Table of Contents
Advertisement
Available languages
Available languages
Quick Links
Advertisement
Table of Contents

Subscribe to Our Youtube Channel
Related Manuals for Qlima D 810 Smart


Summary of Contents for Qlima D 810 Smart
- Page 1 D 810 - D 812 Smart BEDIENUNGSANLEITUNG MANUAL DEL USUARIO MANUEL D’UTILISATION USER MANUAL MANUALE UTENTE > GEBRUIKERSHANDLEIDING MANUAL DE UTILIZAÇÃO PRIROČNIK ZA UPORABO...
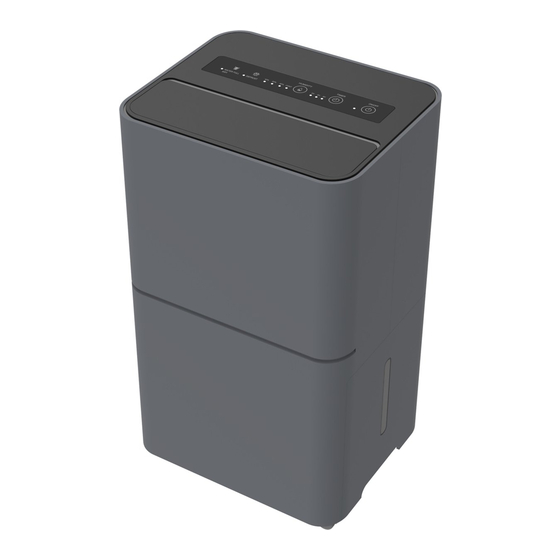
- Page 2 DE: Bedienfeld, ES: Panel de control, FR: Panneau de commande, GB: Control panel, IT: Pannello di controllo, NL: Bedieningspaneel, PT: Painel de controlo, SLO: Nadzorna plošča DE: Lüftungsgitter, ES: Rejilla, FR: Volet d’aération, GB: Louver, IT: Griglia, NL: Ventilatiesleuven, PT: Grelha de ventilação, SLO: Reža DE: Vorderes Gehäuse, ES: Carcasa frontal, FR: Boîtier avant, GB: Front casing, IT: Rivestimento anteri- ore, NL: Voorbehuizing, PT: Revestimento frontal, SLO: Sprednje ohišje...
- Page 3 ≥ 10 cm ≥ 10 cm ≥ 10 cm ≥ 20 cm...
- Page 4 INHALTSVERZEICHNIS Allgemeine Informationen Installation Verwendung Instandhaltung und Garantie Fehlerbehebung...
-
Page 5: Allgemeine Informationen
A. ALLGEMEINE INFORMATIONEN Lesen Sie die Warn- und Sicherheitshinweise zuerst, ehe Sie diese Bedienungsanleitung lesen oder dieses Gerät installieren/verwenden. Die im Text erwähnten Bilder, Zahlen und Illustrationen sind auf Seite 2 dieser Bedienungsanleitung zu finden. B. BEDIENUNGSANLEITUNG Dieses Gerät entfeuchtet einen Wohnraum/-bereich und wird am besten an einem zentralen Standort innerhalb des Raumes platziert. -
Page 6: Automatisches Abtauen
WASSER-VOLL- Wenn der Wassertank voll ist, leuchtet die Anzeige auf und der ANZEIGE Luftentfeuchter stellt den Betrieb ein. Wenn das Gerät im ABTAUEN-Modus arbeitet, leuchtet die ABTAUEN-ANZEIGE Anzeige auf. TIMER-ANZEIGE Wenn Sie die Taste [TIMER] betätigen, um die Zeit einzustellen, 2H 4H 6H leuchtet die Timer-Anzeige auf. - Page 7 Entfernen Sie den Tank nur, wenn das Gerät nicht in Betrieb und ausgesteckt ist. MANUELLES VERFAHREN Entfernen Sie den Tank vom Gerät (siehe Abb. 1.5.). Halten Sie den Tank gut fest und vermeiden Sie es, dass Wasser aus dem Tank tropft. Leeren Sie den Tank sorgfältig in einem Waschbecken oder an einem anderen Ort, der für Abwasser vorgesehen ist.
- Page 8 HINWEIS: • Das Gerät unterstützt ausschließlich 2,4 GHz WiFi-Netzwerke. Prüfen Sie Ihre Netzwerkfrequenz, kontaktieren Sie Ihren Internetanbieter oder lesen Sie in der Bedienungsanleitung Ihres Drahtlosrouters nach. • Falls das Gerät mit dem WiFi-Netzwerk keine Verbindung herstellen kann, steht es möglicherweise zu weit vom Router entfernt. •...
-
Page 9: Fehlerbehebungstabelle
• Die Garantie erlischt, wenn jegliche Veränderungen vorgenommen wurden, keine Original- Bauteile eingesetzt wurden oder der Luftentfeuchter von einem Dritten repariert wurde. • Komponenten, die der üblichen Abnutzung unterliegen, wie der Luftfilter, sind nicht von der Garantie abgedeckt. • Die Garantie gilt nur bei Vorlage der unveränderten und mit dem Datum abgestempelten Original-Kaufquittung. - Page 10 ÍNDICE DE CONTENIDO Información general Instalación Mantenimiento y garantía Solución de problemas...
-
Page 11: Información General
A. INFORMACIÓN GENERAL Lea las advertencias y el manual de seguridad antes de leer este manual o instalar/usar este aparato. Las imágenes, figuras e ilustraciones mencionadas en el texto se encuentran en la página 2 de este manual. B. INSTRUCCIONES Este aparato deshumidifica la zona destinada a la vivienda o sala de estar y su mejor ubicación es en un punto central de la habitación. - Page 12 INDICADOR DE DE- Cuando el aparato está funcionando en el modo DESCONGELA- SCONGELACIÓN CIÓN, el indicador se encenderá. INDICADOR DEL Cuando toque el botón del [TEMPORIZADOR] para fijar el TEMPORIZADOR DE tiempo, el indicador del temporizador se iluminará. Muestra 2H 4H 6H 2h~4h~6h.
- Page 13 PROCESO MANUAL Extraiga el depósito (véase imagen 1.5) del aparato. Coja el depósito con firmeza y evite que caiga agua del depósito. Vacíe el depósito con cuidado en un fregadero u otro lugar específico para agua de desagüe. Limpie el depósito si fuera necesario con un paño seco. Coloque el depósito en el aparato.
-
Page 14: Mantenimiento
NOTA: • El aparato solo acepta redes wifi de 2,4 GHz. Verifique la frecuencia de su red, contacte con su proveedor de internet o consulte el manual de su rúter inalámbrico. • Si el aparato tiene dificultades para conectarse a la red wifi, quizá se deba a que está demasiado lejos del rúter. -
Page 15: Solución De Problemas
• La garantía solo es válida si se presenta el comprobante de compra original sin alteraciones y con el sello de la fecha. • La garantía no cubre daños causados por acciones que no se ajusten a las descritas en el manual del usuario o por negligencia. - Page 16 TABLE DES MATIÈRES Informations générales Installation Utilisation Entretien et garantie Dépannage...
-
Page 17: Informations Générales
A. INFORMATIONS GÉNÉRALES Lisez le manuel d’avertissement et de sécurité avant de lire ce manuel ou d’installer/utiliser cette unité. Les images, schémas et illustrations mentionnés et auxquels il est fait référence dans le texte sont situés en page 2 de ce manuel. B. -
Page 18: Dégivrage Automatique
TÉMOIN DE lorsque la machine fonctionne en mode DEFROST, ce témoin DÉGIVRAGE s’allume. TÉMOIN DE MINUTE- appuyez sur le bouton [TIMER] pour régler la minuterie, le té- RIE 2 H 4 H 6 H moin de minuterie s’allume. Il affiche 2h~4h~6h. TÉMOIN DE lorsque la machine fonctionne en mode CO, le témoin CONT CONTRÔLE ... - Page 19 PROCESSUS MANUEL Retirez le réservoir de l’unité (voir image 1.5). Tenez fermement le réservoir pour éviter que l’eau ne coule du réservoir. Videz le réservoir soigneusement dans un évier ou un autre lieu approprié pour le drainage de l’eau. Si nécessaire, nettoyez le réservoir à l’aide d’un chiffon sec. Placez le réservoir dans l’appareil.
-
Page 20: Entretien
NOTE : • L’unité fonctionne uniquement avec les réseaux WiFi 2.4 GHz. Vérifiez la fréquence de votre réseau, contactez votre fournisseur internet ou consultez le manuel de votre routeur sans fil. • Si l’unité a des difficultés à se connecter au réseau WiFi, il se peut qu’elle soit trop loin du routeur. -
Page 21: Dépannage
• La garantie expire si des modifications ont été effectuées, si des pièces non authentiques ont été installées ou si le déshumidificateur a été réparé par un tiers. • Les composants sujets à une usure normale, comme le filtre à air, ne sont pas couverts par la garantie. - Page 22 TABLE OF CONTENTS General Information Installation Maintenance & warranty Troubleshooting...
-
Page 23: General Information
A. GENERAL INFORMATION Read the warning and safety manual first before you read this manual or instal/use this unit. The images, figures and illustrations mentioned refered to in the text are located on page 2 of this manual. B. INSTRUCTIONS This appliance dehumidifies living room/area and is best placed in a central spot within the room. -
Page 24: Humidity Indicator
TIMER INDICATOR 2H Touch [TIMER] button to set time , the timer indicator lights on. 4H 6H It shows 2h~4h~6h. When the machine is running in CO mode, The CONT indicator CONT INDICATOR lights up. When selecting the humidity setting, the green indicator will 40% 50% 60% light on and the dehumidifier will start dehumidifying according HUMIDITY INDICATOR... - Page 25 DRAIN HOSE Always make sure the tank is empty before connecting the drain hose Use the pre-packed hose Remove the drain stop. Thread the drain hose onto the nozzle and always make sure it is locked securely. Make sure the hose goes through the drain hole and is places downward. Connect the hose to a drain, preventing it from being bent or obstructed.
-
Page 26: Maintenance
D. MAINTENANCE Make sure the appliance has been turned off and if applicable detached from any energy source. CLEANING Only use a soft, dry cloth to wipe the appliance clean. If the appliance is especially dirty, you can use a cloth soaked in handwarm water to wipe it clean. The appliance must be periodically cleaned. -
Page 27: Troubleshooting Table
To prevent unnecessary expenses, we recommend that you always carefully read the user’s manual first. If this does not provide a solution, take the dehumidifier to your distributor for repair. E. TROUBLESHOOTING Troubleshooting table PROBLEM CAUSE SOLUTIONS The unit does not work. The power is not connected. - Page 28 INDICE Informazioni generali Installazione Utilizzo Manutenzione e garanzia Risoluzione dei problemi >...
-
Page 29: Informazioni Generali
A. INFORMAZIONI GENERALI Prima di leggere il presente manuale o di installare/utilizzare l’unità, leggere le avvertenze e il manuale di sicurezza. Le immagini, le figure e le illustrazioni citate nel testo si trovano a pagina 2 del presente manuale. B. ISTRUZIONI Questo apparecchio deumidifica il soggiorno e va collocato in un punto centrale della stanza. -
Page 30: Sbrinamento Automatico
l’indicatore si illumina quando l’apparecchio è in funzione DE- INDICATORE DEFROST FROST (sbrinamento). INDICATORE TIMER quando si tocca il pulsante [TIMER] per programmare il timer, 2H 4H 6H l’indicatore si illumina Mostra 2h~4h~6h. quando l’apparecchio funziona in modalità CO, l’indicatore INDICATORE CONT CONT si illumina. - Page 31 Rimuovere la tanica solo quando l’apparecchio non è in funzione e non è collegato alla rete elettrica. PROCESSO MANUALE Rimuovere la tanica, vedere figura 1.5., dall’unità. Aggrapparsi saldamente alla tanica per evitare che l’acqua esca dalla tanica. Svuotare con cautela la tanica in un lavandino o in un altro luogo adatto allo scarico dell’acqua.
-
Page 32: Manutenzione
NOTA: • L’unità supporta solo reti Wi-Fi a 2,4 GHz. Controllare la frequenza di rete, contattare il provider Internet o consultare il manuale del router wireless. • Se l’unità ha problemi di connessione alla rete Wi-Fi, è possibile che sia troppo lontana dal router. -
Page 33: Risoluzione Dei Problemi
• La garanzia decade se sono state apportate modifiche, se sono stati montati componenti non originali o se il deumidificatore è stato riparato da terzi. • I componenti soggetti a normale usura, come il filtro dell’aria, non sono coperti dalla garanzia. •... - Page 34 INHOUDSOPGAVE Algemene informatie Installatie Gebruik Onderhoud en garantie Probleemoplossing...
-
Page 35: Algemene Informatie
A. ALGEMENE INFORMATIE Lees voordat u deze handleiding leest eerst de handleiding met waarschuwingen en veiligheidsinformatie, en installeer/gebruik dit apparaat pas als u alles heeft gelezen. De afbeeldingen, figuren en illustraties waarnaar in de tekst verwezen wordt, vindt u op pagina 2 van deze handleiding. - Page 36 Als het apparaat in de DEFROST-stand (ontdooien) staat, licht het LAMPJE DEFROST lampje op. LAMPJE TIMER Druk op de knop [TIMER] om de bedrijfsduur in te stellen; het 2U 4U 6U lampje van de timer licht op. Deze geeft 2u~4u~6u aan. LAMPJE CONT Als het apparaat in de CO-modus staat, licht het lampje CONT op.
- Page 37 Leeg het reservoir voorzichtig in de gootsteen of een andere voorziening voor waterafvoer. Reinig het reservoir zo nodig met een droge doek. Plaats het reservoir in het apparaat. AFVOERSLANG Zorg er altijd voor dat het reservoir leeg is als u de afvoerslang bevestigt. Gebruik de bijgeleverde slang Verwijder de afvoerdop.
- Page 38 N.B.: • Het apparaat ondersteunt uitsluitend 2,4 GHz Wi-Fi-netwerken. Controleer de frequentie van uw netwerk, neem contact op met uw internetprovider of raadpleeg de handleiding van uw draadloze router. • Als het apparaat er niet in slaagt om verbinding te maken met het Wi-Fi-netwerk, kan het zijn dat het te ver van de router staat.
- Page 39 in verlenging van de garantieperiode. • De garantie vervalt als er wijzigingen zijn aangebracht, er geen originele onderdelen zijn gemonteerd of als de luchtontvochtiger door een derde is gerepareerd. • Onderdelen onderhevig aan normale slijtage, zoals de luchtfilters, vallen niet onder de garantie.
- Page 40 ÍNDICE Informações gerais Instalação Utilização Manutenção e garantia Resolução de problemas...
-
Page 41: Informações Gerais
A. INFORMAÇÕES GERAIS Ler primeiro o manual de avisos e segurança antes de ler este manual ou instalar/utilizar esta unidade. As imagens, figuras e ilustrações mencionadas referidas no texto estão localizadas na página 2 deste manual. B. INSTRUÇÕES Este aparelho desumidifica a sala/área e funciona melhor se colocado num local central na divisão. Nunca utilizar em ambientes com água ou no exterior. - Page 42 INDICADOR DE Quando o depósito de água estiver cheio, o indicador irá acen- DEPÓSITO CHEIO der-se e o desumidificador deixará de trabalhar. INDICADOR DE Quando o aparelho estiver a trabalhar na função DESCONGELA- DESCONGELAMENTO MENTO, o indicador acender-se-á. INDICADOR DO TEM- Tocar no botão [TIMER] para definir a hora.
- Page 43 ESVAZIAR O RESERVATÓRIO DE ÁGUA Existem duas formas de esvaziar o reservatório de água. A primeira é fazendo-o manualmente. A segunda é através de uma mangueira de escoamento. Remover o reservatório apenas quando o aparelho não estiver em funcionamento e desliga- do da corrente elétrica.
- Page 44 NOTA: • A unidade suporta apenas redes de Wi-Fi de 2,4 GHz. Verificar a frequência da rede, contactar o fornecedor de Internet ou consultar o manual do router sem fios. • Se a unidade tiver problemas em estabelecer a ligação à rede de Wi-Fi, poderá estar muito longe do router.
-
Page 45: Resolução De Problemas
• A garantia vencer-se-á se forem efetuadas alterações, não forem montados componentes genuínos ou se o desumidificador for reparado por terceiros. • Componentes sujeitos a desgaste normal, tais como o filtro de ar, não estão cobertos pela garantia. • A garantia só é válida mediante a apresentação do recibo de compra original, inalterado e carimbado com a data em que foi adquirido. - Page 46 KAZALO VSEBINE Splošne informacije Namestitev Uporaba Vzdrževanje in garancija Odpravljanje težav...
-
Page 47: Splošne Informacije
A. SPLOŠNE INFORMACIJE Pred branjem tega priročnika ali namestitvijo/uporabo enote preberite varnostni priročnik. Slike, številke in ilustracije, navedene v besedilu, so na 2. strani tega priročnika. B. NAVODILA Ta aparat razvlažuje bivalni prostor/območje in ga je najbolje postaviti na sredino prostora. Nikoli ga ne uporabljajte v mokrih okoljih ali na prostem. - Page 48 INDIKATOR ČASOVNI- dotaknite se gumba [ČASOVNIK], da nastavite čas; zasveti indika- KA 2H 4H 6H tor časovnika. Prikazuje 2 h ~ 4 h ~ 6 h. INDIKATOR CONT ko stroj deluje v načinu CO, sveti indikator CONT. 40 % 50 % 60 % po nastavitvi vlažnosti zasveti zeleni indikator in razvlažilec zač- INDIKATOR ne razvlaževati glede na nastavljeno vlažnost.
- Page 49 ODTOČNA CEV Pred priključitvijo odtočne cevi se prepričajte, da je rezervoar prazen. Uporabite vnaprej pakirano cev. Odstranite odtočni čep. Privijte odtočno cev na šobo in se prepričajte, da je varno zaskočena. Prepričajte se, da je odtočna cev napeljana skozi luknjo odtoka in nagnjena navzdol. Cev priključite na odtok, pri čemer poskrbite, da ni ukrivljena ali ovirana.
- Page 50 D. VZDRŽEVANJE Poskrbite, da je aparat izklopljen in, če je primerno, iztaknjen iz električnega napajanja. ČIŠČENJE Aparat očistite izključno z mehko, suho krpo. Če je aparat zelo umazan, ga lahko očistite s krpo, namočeno v mlačno vodo. Aparat je treba redno čistiti. Pred in po uporabi vedno preverite, ali se je na njem nabral prah. Prah odstranite s suho, čisto krpo ali krtačo.
-
Page 51: Odpravljanje Težav
Za preprečitev nepotrebnih stroškov priporočamo, da najprej vedno pozorno preberete uporabniški priročnik. Če rešitve v priročniku ne najdete, razvlažilec odpeljite k distributerju na popravilo. E. ODPRAVLJANJE TEŽAV Preglednica odpravljanja težav TEŽAVA VZROK REŠITVE Enota ne deluje. Napajanje ni priključeno. Vtaknite vtič v stensko vtičnico. - Page 52 Jos haluat huoltoapua, lisätietoja tai laitteen kanssa tulee ongelmia, tutustu verkkosivustoon osoitteessa www.qlima.com tai kysy neuvoa PVG kuluttajapalvelukeskuksesta (T: +45 77 34 33 30). If you need information or if you have a problem, please visit the our website (www.qlima.com) or contact our sales support (T: +31 412 694 694).
Need help?
Do you have a question about the D 810 Smart and is the answer not in the manual?
Questions and answers