Table of Contents
Advertisement
Available languages
Available languages
Quick Links
Washer Dryer
OWNER'S MANUAL
MF200D80B/E
Read This Manual
Read all instructions and explanations for the
installation before use. Follow the instructions
carefully. Keep the operation instructions handy
for later use. If the appliance is sold or passed
on, ensure that the new owner always receives
this operation instructions.
CAUTION: HOT SURFACE !
CAUTION: RISK OF FIRE !
Advertisement
Chapters
Table of Contents

Related Manuals for Midea MF200D80B/W


Summary of Contents for Midea MF200D80B/W
- Page 1 Washer Dryer OWNER’S MANUAL MF200D80B/E Read This Manual Read all instructions and explanations for the installation before use. Follow the instructions carefully. Keep the operation instructions handy for later use. If the appliance is sold or passed on, ensure that the new owner always receives this operation instructions.
-
Page 2: Table Of Contents
CONTENTS SAFETY INSTRUCTIONS Safety Instructions ..........INSTALLATION Product Description ..........Installation ............OPERATION Quick Start ............. Before Each Washing ..........Detergent Dispenser ..........Control Panel ............Programmes............Option..............MAINTENANCE Cleaning and Care ..........Trouble Shooting ............ Technical Specifications ......... Product Fiche ............ -
Page 3: Safety Instructions
SAFETY INSTRUCTIONS Safety Instructions Please read the following safety information thoroughly and follow it strictly to minimize the risk of fire or explosion, electric shock and to prevent property damage, personal injury or loss of life. Failing to follow these instructions shall void any warranty. Warning! This combination of symbol and signal word indicates a potentially dangerous situation which may result in... - Page 4 SAFETY INSTRUCTIONS •The appliance can be used by children aged from 8 years and above and persons with reduced physical, sensory or mental capabilities or lack of experience and knowledge if they have been given supervision or instruction concerning use of the appliance in a safe way and understand the hazards involved.
-
Page 5: Installation
SAFETY INSTRUCTIONS •Do not operate the machine in rooms with a temperature of below 5°C. This can cause damages to parts of it. If it is unavoidable, make sure to drain the water completely from the appliance after every use (see “Maintenance - Cleaning of drain pump filter“) to avoid damages caused by frost. - Page 6 SAFETY INSTRUCTIONS •Water and electrical connections must be carried out by a qualified technician in accordance with the manufacturer‘s instructions and local safety regulations. Warning! •Don´t use multiple plugs or extension cords. •The appliance must not have an external switching device such as a timer or connected to a circuit that is regularly switched on and off.
- Page 7 SAFETY INSTRUCTIONS OPERATION AND MAINTENANCE Warning! ! •Never stop the washer dryer before the end of the drying cycle unless all items are quickly removed and spread out so that the heat can dissipate. •The washer dryer is not to be used if industrial chemicals have been used for cleaning.
- Page 8 SAFETY INSTRUCTIONS •Always unplug the appliance and close the water tap before cleaning and maintenance and after each use. •Never pour water over the appliance for cleaning purpose. Risk of electric shock! •Repairs shall only be carried out by the manufacturer, its service agent or similarly qualified persons in order to avoid a hazard.
- Page 9 SAFETY INSTRUCTIONS Packaging/Old appliance This marking indicates that this product should not be disposed with other household wastes throughout the EU.To prevent possible harm to the environment or human health from uncontrolled waste disposal,recycle it responsibly to promote the sustainable reuse of material resources.To return your used device, please use the collection systems or contact the retailer where the product was purchased.
-
Page 10: Product Description
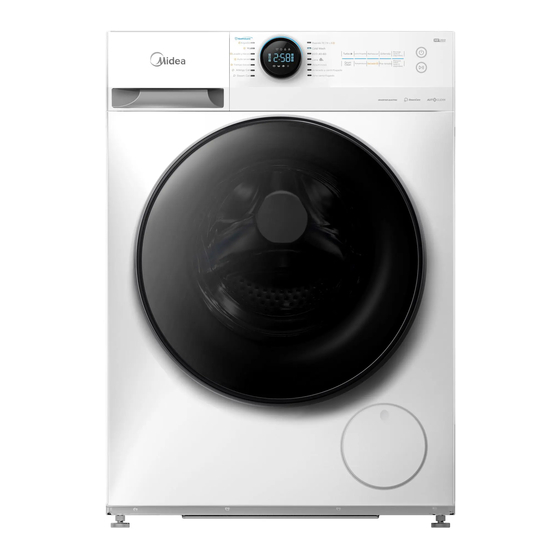
INSTALLATION Product Description Top cover Water supply hose Control panel Power supply cord Detergent dispenser Drum Door Service flap Drain hose Note! • The product picture is for illustration only, please refer to real product as reference. Accessories 4 x Cover caps 1 x Owner’s manual 1 x Supply hose cold water... - Page 11 INSTALLATION Installation Installation area Warning! ! • Stability is important to prevent the product from wandering! Make sure the machine is standing leveled and stable. • Make sure that the product does not stand onto the power cord. W> 20mm •...
- Page 12 INSTALLATION Remove transport bolts Warning! ! • You must remove the transport bolts from the backside before using the product. Loosen the 4 transport Remove the bolts Close the holes using the bolts with a spanner. including the rubber parts cover caps.
- Page 13 INSTALLATION Drain Hose Warning! Warning! ! ! • Do not kink or protract the drain hose. • Position drain hose properly ,otherwise damage might result of water leakage. There are two ways to place the end of drain hose: 1.Put it into the water trough. 2.Connect it to the branch drain pipe of the trough.
-
Page 14: Operation
OPERATION Quick Start Caution! • Before washing, please make sure the washer dryer is installed properly. • Your appliance was thoroughly checked before it left the factory. To remove any residual water and to neutralize potential odors, it’s recommended to clean your appliance before first use. - Page 15 OPERATION 1. Before Washing earth terminal Main wash Softener Prewash Close door Plug in Open tap Load Add detergent Note! • Detergent need to be added in compartment I if the pre-wash function is selected. 2. Washing Power on Select programme Select function or Press remain default Start/Pause to...
-
Page 16: Before Each Washing
OPERATION Before Each Washing • The ambient temperature of the washer dryer should be 5-40°C. If used under 0°C, the inlet valve and draining system may be damaged. If the machine is installed under freezing conditions, it should be transferred to normal ambient temperature to ensure the water supply hose and drain hose can unfreeze before use. -
Page 17: Detergent Dispenser
OPERATION Detergent Dispenser Pre wash Main wash Softener Release button to pull out the dispenser Caution! • Detergent only need to be added in "compartment I “after selecting pre-wash function. Programme Programme Cotton Quick 15’ Cold Wash ECO 40-60 Wash and Dry Wool Auto Dry Time Dry... - Page 18 OPERATION Detergent Recommendation Recommended washing Washing Wash cycles Type of laundry and textile detergent temp. Heavy-duty detergent with White laundry made from bleaching agents and 20/30 Cotton,ECO 40-60,Mix,Bulky boil-proof cotton or linen optical brighteners 40/60 Coloured laundry made Colour detergent without Cotton,ECO40-60,Mix,Bulky, Cold/20/ from cotton or linen...
-
Page 19: Control Panel
OPERATION Control Panel On/Off Start/Pause Turn the appliance on and off. Start or pause your programme. Programmes Option Available according to the laundry type. This allows you to select additional functions and will light when selected. Display The display shows settings, estimated remaining time, options and status messages. Display Wash Time Delay Time... -
Page 20: Programmes
OPERATION Programmes Programme Display Time Washing Load/Dry load(kg) Cotton 8.0/6.0 3:49 8.0/6.0 1:30 Wash and Dry 6.0/6.0 5:04 Auto Dry --/6.0 4:14 Time Dry --/0.5 0:40 Allergy Care 2:38 Steam Care 1:57 Quick 15’ 0:15 Cold Wash 0:58 ECO 40-60 3:35 Wool 1:07... - Page 21 OPERATION Programmes • The above data is for reference only, and the data may change due to different actual use conditions. • The valves given for programmes other than the ECO 40-60 programme and the Wash and Dry cycle are indicative only. •...
- Page 22 OPERATION The highest temperature reached by the laundry in the wash cycle for at least 5 minutes. 2) Residual moisture after the wash cycle in water content percent and the spin speed at which this was achieved. 3) The ECO 40-60 programme is able to clean normally soiled cotton laundry declared to be washable at 40°C or 60°C, together in the same cycle.
- Page 23 OPERATION Programmes Programmes are available according to the laundry type. Programmes Hard-wearing textiles, heat-resistant textiles made of cotton or Cotton linen. Mixed load consisting of textiles made of cotton and synthetics. Auto Dry This program is designed for drying clothes automatically to achieve the best dry performance.
- Page 24 OPERATION Option Default spin speed in rpm 1400 Quick 15’ Cold 1h WD – Cold Wash Cold ECO 40-60 1400 Wool Bulky 1000 Rinse & Spin 1000 Spin Only 1000 Steam Care Allergy Care Time Dry 1400 Auto Dry 1400 Wash and Dry 1400 Cotton...
- Page 25 OPERATION Spin Speed Speed When needed, the spinning speed can be adjusted pressing the Speed button in the following steps: 1400: 0-400-600-800-1000-1200-1400 Delay 1. Select a programme 2.Press the Delay button to choose the delaying time 0-24h 3.Press [Start/Pause] to start the delay operation Delay Setting time Start...
- Page 26 OPERATION Press the Dry button continuously to choose the dry level: Gentle Dry(Soft) Normal Dry(Normal)/ Extra Dry,and Time Dry. Gentle Dry(Soft): Clothes are dried to damp state for ironing. Normal Dry(Normal): Clothes are ready for storing in the wardrobe. Extra Dry: Clothes are dried complete to be worn directly. Timed Dry:Drying your laundry and finish within given time.
- Page 27 OPERATION Reload This operation can be executed during the washing progress. When the drum is still rolling and there is large amount of water with high temperature in the drum. The state is unsafe and the door cannot be opened forcefully. To Press [3s for Reload]3sec.
-
Page 28: Maintenance
MAINTENANCE Cleaning and Care Warning! • Always unplug the appliance and close the water tap before cleaning and maintenance. Cleaning the Cabinet Proper maintenance on the washing machine can extend its working life. The surface can be cleaned with diluted non-abrasive neutral detergents when necessary. - Page 29 MAINTENANCE Cleaning the Inlet Filter Note! • Diminishing water flow is a sign that the filter need to be cleaned. 1. Close the tap and remove the water supply hose from it. 2. Clean the filter with a brush. 3. Unscrew the water supply hose from the backside of the machine.
- Page 30 MAINTENANCE Cleaning the Drain Pump Filter Warning! • Make sure that the machine has finished the washing cycle and is empty. Switch it off and unplug it before cleaning the drain pump filter. • Be careful of hot water. Allow the water to cool down. Risk of scalding! •...
- Page 31 MAINTENANCE Emergency Door Release In case of power failure or other circumstances and door cannot be opened. If it is necessary to open the door under this circumstances, please pull down the pull cord inside emergency door and restore the pull cord after opening the door. Emergency door pull cord pen filter door 2.Useing a straght screwdriver...
-
Page 32: Trouble Shooting
MAINTENANCE Trouble Shooting Whenever there is a problem with the appliance, check if you can solve it following the tables below. If the problem persists, please contact the customer service. Description Possible cause Solution Appliance does Door is not closed properly. Close the door properly and not start Clothes are stuck. -
Page 33: Technical Specifications
MAINTENANCE Customer service Spare part for your appliance are available for a minimum of 10 years. In case of questions please contact our customer service at: Risk of electric shock • Never try repair an appliance which is defective of presumed to be defective. You may put your own and future users' lives in danger.Only authorised specialists are allowed to carry out this repair work. - Page 34 MAINTENANCE MF200D80B/E...
- Page 35 MAINTENANCE...
- Page 36 MAINTENANCE 1) The actual energy consumption will depend on how the appliance is used. 2) The actual water consumption will depend on how the appliance is used and on the hardness of the water. 3) Delivery of the spare parts within 15 working days after having received the order. Product Data Sheet concerning (EU) 2019/2014, (EU) 2019/2023, (EU) 2021/340, (EU) 2021/341.
- Page 37 CONTENIDO INSTRUCCIONES DE SEGURIDAD „ Instrucciones de Seguridad........2 INSTALACIÓN „ Descripción del Producto ........9 „ Instalación ............10 OPERACIÓN „ Inicio Rápido ............13 „ Antes de Cada Lavado........15 „ Dispensador de Detergente ........16 „ Panel de Control ..........18 „ Programas............19 „...
-
Page 38: Instrucciones De Seguridad
INSTRUCCIONES DE SEGURIDAD „ Instrucciones de Seguridad Lea detenidamente la siguiente información de seguridad y sígala estrictamente para minimizar el riesgo de incendio o explosión, descarga eléctrica y evitar daños a la propiedad, lesiones personales o la muerte. Anulará cualquier garantía debido a no seguir estas instrucciones. ¡Advertencia! Esta combinación de símbolo y palabra de advertencia indica una situación peligrosa potencialmente que... - Page 39 INSTRUCCIONES DE SEGURIDAD • El aparato puede ser utilizado por niños mayor de 8 años y personas con capacidades físicas, sensoriales o mentales reducidas o con falta de experiencia y conocimiento si han sido supervisados o indicados sobre el uso del aparato de forma segura y comprenden las peligros involucrados. Los niños no deben jugar con el aparato.
- Page 40 INSTRUCCIONES DE SEGURIDAD • No utilice la máquina en habitaciones con una temperatura inferior a 5°C. Esto puede causar daños en algunas partes. Si es inevitable, asegúrese de vaciar completamente el agua del aparato después del uso (Ver "Mantenimiento - Limpieza del filtro de la bomba de drenaje" ) para evitar daños causados por las heladas.
- Page 41 INSTRUCCIONES DE SEGURIDAD • Las conexiones eléctricas y de agua deben ser realizadas por un técnico calificado en conformidad con las instrucciones del fabricante y las normas de seguridad locales. ¡Advertencia! • No use múltiples enchufes o cables de extensión. •...
- Page 42 INSTRUCCIONES DE SEGURIDAD OPERACIÓN Y MANTENIMIENTO ¡Advertencia! • Nunca detenga la lavadora secadora antes del final del ciclo de secado a menos que todos los artículos se retiren rápidamente y se extiendan para que el calor se pueda disipar. • La lavadora secadora no debe usarse si se han usado productos químicos industriales para la limpieza.
- Page 43 INSTRUCCIONES DE SEGURIDAD • Desenchufe siempre el aparato y cierre el grifo del agua antes de la limpieza y el mantenimiento y posterior a cada uso. • No vierta agua por encima del aparado para la limpieza. ¡Riesgo de descarga eléctrica! •...
- Page 44 INSTRUCCIONES DE SEGURIDAD Embalaje / Aparato antiguo Esta marca indica que este producto no debe desecharse con otros desechos domésticos en toda la UE. Para evitar posibles daños al medio ambiente o la salud humana debido a la eliminación incontrolada de desechos, recíclelo con plena responsabilidad para promover la reutilización sostenible de los recursos materiales.
-
Page 45: Instalación
INSTALACIÓN „ Descripción del producto Cubierta superior Manguera de suministro de agua Panel de control Cable de alimentación Dispensador de eléctrica detergente Tambor Puerta Trampilla de servicio Manguera de drenaje ¡Nota! • La imagen del producto es solo para ilustración, consulte el producto real como referencia. -
Page 46: X84; Instalación
INSTALACIÓN „ Instalación Área de instalación ¡Advertencia! • ¡La estabilidad es importante para evitar que el producto se mueva! Asegúrese de que la máquina esté nivelada y estable. • Asegúrese de que el producto no se apoye sobre el cable de alimentación. W≥... - Page 47 INSTALACIÓN Retire los pernos de transporte ¡Advertencia! • Debe quitar los pernos de transporte de la parte trasera antes de usar el producto. Afloje los 4 tornillos Retire los pernos, incluidas las Cierre los orificios de transporte con piezas de goma, y guárdelos con las tapas de una llave.
- Page 48 INSTALACIÓN Manguera de drenaje ¡Advertencia! • No retuerza ni alargue la manguera de drenaje. • Coloque la manguera de drenaje correctamente; de lo contrario, podrían producirse daños debido a una fuga de agua. Hay dos formas de colocar el extremo de la manguera de drenaje: 1.
-
Page 49: Operación
OPERACIÓN „ Inicio Rápido ¡Precaución! • Antes de lavar, asegúrese de que la lavadora secadora esté instalada correctamente. • Su electrodoméstico fue revisado minuciosamente antes de salir de fábrica. Para eliminar el agua residual y neutralizar los posibles olores, se recomienda limpiar su electrodoméstico antes del primer uso. Por este motivo, inicie el programa Algodón a 90°C sin ropa ni detergente. - Page 50 OPERACIÓN 1. Antes de lavado terminal de Lavado tierra principal Suavizante Prelavado Enchufar Grifo abierto Carga Cerrar puerta Agregar detergente ¡Nota! • Es necesario agregar detergente en el compartimiento I si se selecciona la función de Prelavado. 2. Lavado Encendido Seleccione Seleccione Presione...
-
Page 51: X84; Antes De Cada Lavado
OPERACIÓN „ Antes de cada lavado • La temperatura ambiente de la lavadora secadora debe ser de 5-40°C. Si se usa por debajo de 0°C, la válvula de entrada y el sistema de drenaje pueden dañarse. Si la máquina se instala bajo la condición de congelación, se debe ser trasladada a un lugar con temperatura ambiente normal para garantizar que la manguera de suministro de agua y la manguera de drenaje se puedan descongelar antes de su uso. -
Page 52: X84; Dispensador De Detergente
OPERACIÓN „ Dispensador de detergente Prelavado Lavado principal Suavizante Suelte el botón para sacar el dispensador ¡Precaución! • Solo es necesario añadir detergente en "compartimento I" después de seleccionar la función de Prelavado. Programa Programa Rápido de 15’ Algodón Lavado en Frío Mezcla ECO 40-60 Lavado y Secado... - Page 53 OPERACIÓN Recomendación de detergente Detergente de lavado Ciclos de Temperatura del Tipo de ropa y textil recomendado lavado lavado Detergente de uso Ropa blanca Algodón, ECO intensivo con agentes hecha de algodón 40-60, Mezcla, 20/30/40/60 blanqueadores y o lino a prueba de Voluminoso abrillantadores ópticos ebullición...
- Page 55 OPERACIÓN Programas Carga de Lavado/Carga de Programa Tiempo de visualización secado (kg) Algodón 8,0/6,0 3:49 Mezcla 8,0/6,0 1:30 Lavado y 6,0/6,0 5:04 Secado Secado --/6,0 4:14 Automático Secado por --/0,5 0:40 Tiempo Cuidado de 2:38 Alergias Cuidado de 1:57 Vapor Rápido de 15’...
- Page 56 OPERACIÓN Programas Ciclo Voluminoso 1:48 0,803 65%/1000 Lavado en frío Frío 0:58 0,102 Frío 70%/800 Algodón 20,0 3:49 0,524 53%/1400 (20°C) Algodón 60,0 3:54 1,515 53%/1400 (60°C) Mezcla 40,0 1:30 0,772 70%/800 Rápido de 15' Frío 0:15 0,030 frío 75%/800 3:38 0,871 64,0...
- Page 57 OPERACIÓN 1) La temperatura más alta alcanzada por la ropa en el ciclo de lavado durante al menos 5 minutos. 2) Humedad residual después del ciclo de lavado en porcentaje de contenido de agua y la velocidad de centrifugado a la que se logró. 3) El programa ECO 40-60 puede limpiar prendas de algodón con suciedad normal declaradas lavables a 40°C o 60°C, juntas en el mismo ciclo.
-
Page 58: X84; Programas
OPERACIÓN „ Programas Los programas están disponibles según el tipo de ropa sucia. Programa Algodón Textiles resistentes, textiles resistentes al calor de algodón o lino. Mezcla Carga mixta compuesta por textiles de algodón y sintéticos. Secado Este programa está diseñado para secar la ropa Automático automáticamente a fin de lograr el mejor rendimiento de secado. -
Page 59: X84; Opción
OPERACIÓN „ Opción Temperatura Velocidad de centrifugado Funciones Ciclo predeterminada predeterminada en rpm adicionales (°C) 1400 Rápido de 15’ Frío 1h WD – Lavado en Frío Frío ECO 40-60 1400 Lana Voluminoso 1000 Enjuague & 1000 Centrifugado Centrifugado 1000 único Cuidado de Vapor Cuidado de... - Page 60 OPERACIÓN Velocidad de centrifugado Cuando sea necesario, la velocidad de centrifugado se puede ajustar presionando el botón Speed (Velocidad) en los siguientes pasos: 1400: 0-400-600-800-1000-1200-1400 Retraso 1. Seleccionar un programa 2. Presione el botón Delay (Retraso) para elegir el tiempo de retraso 0-24h 3.
- Page 61 OPERACIÓN Secado Presione el botón Dry (Secado) continuamente para elegir el nivel de secado: Secado Suave (Blando) / Secado Normal (Normal) / Extra Secado y Secado por Tiempo. Seco Suave (Blando): La ropa se seca a estado húmedo para planchar. Secado Normal (Normal): La ropa está...
- Page 62 OPERACIÓN Recarga Esta operación se puede ejecutar durante el proceso de lavado. Cuando el tambor todavía está rodando y hay una gran cantidad de agua con alta temperatura en el tambor. El estado es inseguro y la puerta no se puede abrir a la fuerza. Para presionar [3s for Reload (3s para Recarga)] durante 3 segundos para recargar y comenzar a agregar ropa en la función intermedia.
-
Page 63: Mantenimiento
MANTENIMIENTO „ Limpieza y Cuidado ¡Advertencia! • Desenchufe siempre el aparato y cierre el grifo del agua antes de la limpieza y el mantenimiento. Limpieza del gabinete El mantenimiento adecuado de la lavadora puede prolongar su vida útil. La superficie se puede limpiar con detergentes neutros no abrasivos diluidos cuando sea necesario. - Page 64 MANTENIMIENTO Limpieza del filtro de entrada ¡Nota! • La disminución del flujo de agua es una señal de que es necesario limpiar el filtro. 1. Cierre el grifo y retire la manguera de suministro de agua. 2. Limpiar el filtro con un cepillo. 3.
- Page 65 MANTENIMIENTO Limpieza del filtro de la bomba de drenaje ¡Advertencia! • Asegúrese de que la máquina haya terminado el ciclo de lavado y esté vacía. Apáguelo y desenchúfelo antes de limpiar el filtro de la bomba de drenaje. • Tenga cuidado con el agua caliente. Deje que el agua se enfríe. ¡Riesgo de quemaduras! Manguera drenaje de...
- Page 66 MANTENIMIENTO Desbloqueo de Puerta de Emergencia En caso de corte de energía u otras circunstancias, la puerta no se puede abrir. Si es necesario abrir la puerta en estas circunstancias, tire hacia abajo del cordón de tiro dentro de la puerta de emergencia y restaure el cordón de tiro después de abrir la puerta.
-
Page 67: X84; Resolución De Problemas
MANTENIMIENTO „ Resolución de Problemas Siempre que haya un problema con el aparato, compruebe si puede solucionarlo siguiendo las tablas siguientes. Si el problema persiste, póngase en contacto con el servicio de atención al cliente. Descripción Causa posible Solución El aparato no se La puerta no está... -
Page 68: X84; Especificaciones Técnicas
MANTENIMIENTO Servicio al Cliente Las piezas de repuesto para su aparato están disponibles por un mínimo de 10 años. En caso de dudas, comuníquese con nuestro servicio de atención al cliente en: ¡Advertencia! Riesgo de shock eléctrico • No intente reparar un electrodoméstico que esté defectuoso o que se presume defectuoso. - Page 69 MF200D80B/E...
- Page 70 MANTENIMIENTO Emisiones de ruido acústico Clase de emisión de ruido en el aire durante la fase de acústico aéreo para la fase de centrifugado del ciclo de lavado centrifugado del programa eco eco 40-60 a la capacidad de 40-60 con lavado nominal lavado nominal [empotrado / soporte Tipo...
Need help?
Do you have a question about the MF200D80B/W and is the answer not in the manual?
Questions and answers