Table of Contents
Advertisement
Quick Links
Dear SHARP Customer
Welcome to the SHARP Family. We are pleased that you are now the owner of a SHARP Color
LCD Projector built for outstanding quality, reliability and performance.
Every SHARP Color LCD Projector is adjusted for a proper picture and has passed through the
most stringent quality control tests at the factory. We have prepared this OPERATION MANUAL
so that you have the ability to adjust the picture and color to your personal viewing preference.
We sincerely hope that you will be satisfied with the quality and performance of your Color LCD
Projector for many years to come.
Please read the instructions carefully, and keep them handy for future reference.
IMPORTANT
For your assistance in reporting the loss or
theft of your Color LCD Projector, please
record the Serial Number located on the rear
of the projector and retain this information.
Important Information
There are two important reasons for prompt warranty registration of your new SHARP LCD
Projector, using the REGISTRATION CARD packed with the projector.
1) WARRANTY
This is to assure that you immediately receive the full benefit of the parts, service and labor
warranty applicable to your purchase.
2) CONSUMER PRODUCT SAFETY ACT
To ensure that you will promptly receive any safety notification of inspection, modification, or
recall that SHARP may be required to give under the 1972 Consumer Product Safety Act,
PLEASE READ CAREFULLY THE IMPORTANT "LIMITED WARRANTY" CLAUSE.
WARNING:
High brightness light source, do not stare into the beam of light, or view
directly. Be especially careful that children do not stare directly into the
beam of light.
WARNING:
TO REDUCE THE RISK OF FIRE OR ELECTRIC SHOCK, DO NOT EXPOSE
THIS PRODUCT TO RAIN OR MOISTURE.
CAUTION
RISK OF ELECTRIC SHOCK.
DO NOT REMOVE SCREWS
EXCEPT SPECIFIED USER
SERVICE SCREW.
CAUTION: TO REDUCE THE RISK OF ELECTRIC SHOCK,
DO NOT REMOVE COVER.
NO USER-SERVICEABLE PARTS EXCEPT LAMP UNIT.
REFER SERVICING TO QUALIFIED SERVICE
PERSONNEL.
E-1
Model No.: XG-E690UB
Serial No.:
The lightning flash with arrowhead symbol,
within an equilateral triangle, is intended to
alert the user to the presence of uninsulated
"dangerous voltage" within the product's
enclosure that may be of sufficient
magnitude to constitute a risk of electric
shock to persons.
The exclamation point within a triangle is
intended to alert the user to the presence of
important operating and maintenance
(servicing) instructions in the literature
accompanying the product.
U.S.A. ONLY
Advertisement
Table of Contents

Related Manuals for Sharp XG-E690UB


Summary of Contents for Sharp XG-E690UB
- Page 1 Dear SHARP Customer Welcome to the SHARP Family. We are pleased that you are now the owner of a SHARP Color LCD Projector built for outstanding quality, reliability and performance. Every SHARP Color LCD Projector is adjusted for a proper picture and has passed through the most stringent quality control tests at the factory.
-
Page 2: Important Safeguards
WARNING: FCC Regulations state that any unauthorized changes or modifications to this equipment not expressly approved by the manufacturer could void the user’s authority to operate this equipment. INFORMATION This equipment has been tested and found to comply with the limits for a Class A digital device, pursuant to Part 15 of the FCC Rules. -
Page 3: Outstanding Features
15) Overloading — Do not overload wall outlets, extension cords, or integral convenience receptacles as this can result in a risk of fire or electric shock. 16) Object and Liquid Entry — Never push objects of any kind into this product through openings as they may touch dangerous voltage points or short-out parts that could result in a fire or electric shock. -
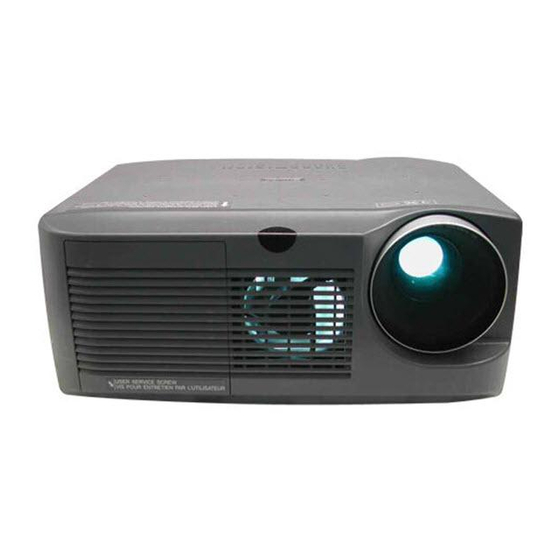
Page 4: Location Of Controls
Location of Controls FRONT VIEW Cooling fan (exhaust vent) OPERATION PANEL ON SIDE OF PROJECTOR POWER ON/OFF button POWER indicator LAMP REPLACEMENT indicator TEMPERATURE WARNING indicator VOLUME UP-DOWN buttons REAR VIEW KEYSTONE/SIZE CORRECTION knob INPUT OUTPUT FILTER COMPUTER FILTER ON/OFF switch COMPUTER RGB INPUT connector (HD-15) COMPUTER RGB OUTPUT... -
Page 5: Remote Control Operation
Remote Control Operation REMOTE CONTROL VOLUME UP-DOWN buttons ADJUSTMENT ( ƒ / ∂ ) buttons (Can be used as ADJUSTMENT ( ƒ / ∂ ) buttons when the MENU button is pressed.) ADJUSTMENT ( ß / © ) buttons E-ZOOM/PANNING button MENU button LIGHT button Using the remote control in... -
Page 6: Setting Up The Projector
Caution: When setting up the projector • For minimal servicing and to maintain high image quality, SHARP recommends that this projector be installed in an area free from humidity, dust and cigarette smoke. When the projector is subjected to these environments, the lens and filter must be cleaned more often. -
Page 7: Adjusting The Focus
Example of a standard setup TOP VIEW Lens center Using the reverse function makes the following setups possible. Example of a reversed image setup • By placing a mirror (normal flat type) in front of the lens and using the reverse function, the image reflected from the mirror can be projected onto the screen. -
Page 8: Adjusting The Height Of The Picture
Adjusting the Height of the Picture Adjusters Transporting the Projector Use the carrying handle when moving the projector. When transporting the projector, carry it by the handle located on the side of the unit. Note: When transporting the projector, always put on the lens cap to prevent damage to the lens. -
Page 9: Connecting The Projector
Connecting the Projector Rear terminals Used when the AV equipment to be connected has an S-VIDEO output terminal. COMPUTER S-VIDEO VIDEO AUDIO To video To video Playback input output terminal terminal S-video output To audio terminal output terminals To watch video playback with the projector connected to audio/video output equipment, such as a VCR or Laser Disc Player, or to view on a separate monitor:... - Page 10 Connecting the Projector (RGB: Computer) Rear view of the projector INPUT OUTPUT COMPUTER IBM-PC (VGA, ANALOG RGB OUT SVGA) Series (computer) RGB Signal Output Socket Mac/VGA Adaptor (Supplied) Macintosh RGB Signal Output Socket Rear view of the projector RGB Signal Input Socket Macintosh RGB Signal Output Socket...
-
Page 11: External Monitor Connection
INPUT OUTPUT COMPUTER Direct connection External IBM-PC monitor Computer Input Analog 1. Video input (red) 8. Earth (blue) 2. Video input 9. GND (green) 10. GND 3. Video input 11. GND (blue) 12. Reserve input 2 4. Reserve input 1 13. -
Page 12: Input Signals (Recommended Timing)
Input Signals (Recommended Timing) For IBM and Compatibles Input signals: The video output signal timing of different types of video signals are shown below for reference. VIDEO SIGNAL HORIZONTAL SYNC SIGNAL VIDEO SIGNAL VERTICAL SYNC SIGNAL MODE TEXT 720 dot 350 line 400 line LEVEL VIDEO... -
Page 13: Rgb Adjustment Controls
RGB Adjustment Controls R G B I N P U T A D J . R E S E T M O D E ( - - - ) P H A S E H - P O S V - P O S C L O C K : S E L . -
Page 14: Basic Operation Of The Projector
Basic Operation of the Projector AC cord POWER LAMP TEMP. Projector Remote control ON/OFF When the power is on, the LAMP POWER REPLACEMENT indicator flashes to show the operating condition of the lamp. LAMP Green: Flashing green: Warming up TEMP. Red: E-ZOOM (ON) On-Screen Display... - Page 15 On-Screen Display S Y S T E M A U T O • P A L • S E C A M • N 4 . 4 3 • N 3 . 5 8 : S E L . M E N U : E N D SECAM VIDEO PA L...
-
Page 16: Adjusting The Picture
Adjusting the Picture On-Screen Display V I D E O A D J . V I D E O A D J . A U D I O A D J . B A C K G R O U N D L E V E L I M A G E A D J . -
Page 17: Computer Mode Memory Adjustments
When RGB is selected. R G B A D J . R G B A D J . R G B I N P U T A D J . A U D I O A D J . I M A G E A D J . L A N G U A G E : S E L . -
Page 18: Adjusting The Audio
Adjusting the Audio On-Screen Display A U D I O B A L A N C E T R E B L E B A S S R E S E T : S E L . : A D J . M E N U : E N D •... -
Page 19: The Remote Control
E-ZOOM Functions On-Screen Display I M A G E A D J . B L U E S C R E E N ( O F F) R E V E R S E ( O F F ) I N P U T D I S P L A Y ( O N ) E - Z O O M / P A N ( O F F ) : S E L . -
Page 20: Functions On The Projector
Functions on the Projector On-Screen Display B A C K G R . L V L R E D B L U E R E S E T : S E L . : A D J . M E N U : E N D Background level •... -
Page 21: Image Adj
On-Screen Display I M A G E A D J . B L U E S C R E E N ( O F F ) R E V E R S E ( O F F ) I N P U T D I S P L A Y ( O N ) E - Z O O M / P A N ( O F F ) : S E L . - Page 22 On-Screen Display I M A G E A D J . B L U E S C R E E N ( O N ) R E V E R S E ( O F F ) I N P U T D I S P L A Y ( O N ) E - Z O O M / P A N ( O F F ) : S E L .
-
Page 23: Air Filter Maintenance
The air filter should be cleaned every 100 hours of use. Clean the filter more often when the projector is used in a dusty or smoky location. • Have your nearest Authorized Sharp Industrial LCD Products Dealer replace the filter (PFILD0048CEZZ) when it is no longer possible to clean it. AIR FILTER unit... -
Page 24: Lamp/Maintenance Indicators
1. When the lamp is nearly burned out, the picture and color quality deteriorate. At this point, replace the lamp. (See E-25.) 2. If the new lamp does not light after replacement, take your projector to the nearest Authorized Sharp Industrial LCD Products Dealer for repair. -
Page 25: Lamp Replacement
Authorized Sharp Industrial LCD Products Dealer. Then change the lamp by carefully following the instructions below. If you wish, you may bring the projector to your nearest Authorized Sharp Industrial LCD Products Dealer. IMPORTANT NOTE TO U.S. CUSTOMERS: The lamp included with this projector is backed by a 90-day parts and labor limited warranty. -
Page 26: Specifications
TVs, video systems and/or video cameras, there are certain acceptable tolerances that the equipment must conform to. Sharp’s acceptable tolerances permit a total of 35 inactive 1, RGB optical shutter method 130.0 [W] mm) -
Page 27: Top View
Dimensions (313) Side View E-27 Top View (386) (384) (121) Front View (166) (166) Bottom View [Units: inches (mm)]...
Need help?
Do you have a question about the XG-E690UB and is the answer not in the manual?
Questions and answers