Table of Contents
Advertisement
Quick Links
Printed Matter No. 9839 1487 01
Publication Date 2019-01-10
Valid from Serial No. A0800001
LMB27 S014
(25000 r/min)
(25000 rpm)
Read all safety warnings and instructions
Failure to follow the safety warnings and instructions may result in
electric shock, fire and/or serious injury.
Save all warnings and instructions for future reference
LMB27 S014
8423030510
WARNING
Product Instructions
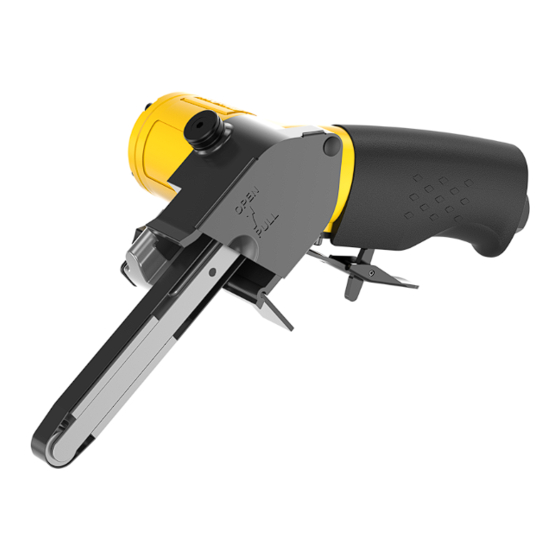
Belt Sander
Advertisement
Table of Contents

Related Manuals for Atlas Copco LMB27 S014


Summary of Contents for Atlas Copco LMB27 S014
- Page 1 LMB27 S014 Printed Matter No. 9839 1487 01 Belt Sander Publication Date 2019-01-10 Valid from Serial No. A0800001 Product Instructions LMB27 S014 8423030510 (25000 r/min) (25000 rpm) WARNING Read all safety warnings and instructions Failure to follow the safety warnings and instructions may result in electric shock, fire and/or serious injury.
-
Page 2: Table Of Contents
Rust protection and cleaning ............... 11 Lubricating guide ................. 11 Dismantling/Assembling instructions .............. 12 Required tools .................. 12 Consumables.................. 12 Disassembling the belt sander ............ 12 Instructions for vane motor .............. 14 Assembling the motor................ 16 Assembling the motor housing ............ 17 © Atlas Copco Industrial Technique AB - 9839 1487 01... - Page 3 Assembling the tension arm .............. 18 Assembling the wheel cover.............. 19 Assembling the belt sander .............. 20 Function test .................... 22 Recycling ....................... 23 Recycling instruction.................. 23 © Atlas Copco Industrial Technique AB - 9839 1487 01...
-
Page 4: Product Information
■ Damage to parts that occurs as a result of inadequate maintenance or performed by parties other than Atlas Copco or their Certified Service Partners during the warranty period is not covered by the warranty. ■ To avoid damage or destruction of tool parts, service the tool according to the recommended mainte- nance schedules and follow the correct instructions. -
Page 5: Website
You can find information concerning our products, accessories, spare parts and published matters on our website. Safety Data Sheets MSDS/SDS The safety data sheets describes chemical products sold by Atlas Copco. For more information, consult the website: www.atlascopco.com/sds Country of origin Please refer to the information on the product label. -
Page 6: Service Recommendations
If the product is not working properly, take it out of service and inspect it. If no detailed information about preventive maintenance is included, follow these general guidelines: ■ Clean appropriate parts accurately ■ Replace any defective or worn parts © Atlas Copco Industrial Technique AB - 9839 1487 01... -
Page 7: Installation
Air quality ■ For optimum performance and maximum product life we recommend the use of compressed air with a maximum dew point of +10°C (50°F). We also recommend to install an Atlas Copco refrigeration type air dryer. ■ Use a separate air filter which removes solid particles larger than 30 microns and more than 90% of liquid water. -
Page 8: Visual Inspection - Air Installation
Look for any damage that can compromise the safety of the tool. Installation of vibrating tools We recommend using a minimum length of 300 mm (12") of flexible hose for compressed air between a vi- brating tool and the quick-action coupling. © Atlas Copco Industrial Technique AB - 9839 1487 01... -
Page 9: Operation
Make sure that the idle pulley runs smoothly and that the tension arm is undamaged and correctly at- tached. Put the new sanding belt in position. Make sure that the rotation direction marked inside the sanding belt is the same as the rotation direction of the tool. © Atlas Copco Industrial Technique AB - 9839 1487 01... - Page 10 Operate the tool in free speed for approximately 30 seconds to make sure that the sanding belt is moving correctly. 10. If necessary, adjust the sanding belt by repeating step 2 to 7. © Atlas Copco Industrial Technique AB - 9839 1487 01...
-
Page 11: Service
The air inlet is equipped with a strainer. If this is punctured, foreign objects may harm the valves, resulting in overspeed. Lubricating guide Use lubricants of good quality. The oils and greases listed in the lubrication table are examples of lubri- cants that can be recommended. © Atlas Copco Industrial Technique AB - 9839 1487 01... -
Page 12: Dismantling/Assembling Instructions
Make sure not to damage the gasket (19). Remove the complete motor assembly (20-27) and the felt (28). 10. Remove the circlip at the shaft end of the motor assembly. © Atlas Copco Industrial Technique AB - 9839 1487 01... - Page 13 Instructions for vane motor, Dismantling. 12. Remove the rotor blades (23) from the rotor (24). 13. Remove the ball bearing (20) and the end plate (21), see Instructions for vane motor, Dismantling. © Atlas Copco Industrial Technique AB - 9839 1487 01...
-
Page 14: Instructions For Vane Motor
PTFE-particles must not come in contact with open fire, glow or heat ► Motor components must be washed with cleaning fluid and not blown clear with an air line ► Wash your hands before starting any other activity ► © Atlas Copco Industrial Technique AB - 9839 1487 01... - Page 15 4080 0182 09 17.5 4080 0182 10 20.5 4080 0182 11 25.5 4080 0182 12 30.5 4080 0182 13 35.5 4080 0182 14 40.5 Dismantling tool Mandrel A Inspection of motor parts © Atlas Copco Industrial Technique AB - 9839 1487 01...
-
Page 16: Assembling The Motor
Attach the ball bearing (20) and the end plate (21) on the rotor, see Instructions for vane motor, As- sembling - According to Bäckström method. Make sure that there is no axial clearance. © Atlas Copco Industrial Technique AB - 9839 1487 01... -
Page 17: Assembling The Motor Housing
Apply a few drops of threadlocker on the adapter (3), attach it to the motor housing (1) and tighten it to 29.4 Nm. Attach the safety lever (14) to the motor housing with the pin (13). Do an air blow and air leaking test. © Atlas Copco Industrial Technique AB - 9839 1487 01... -
Page 18: Assembling The Tension Arm
Attach the assembled idle pulley (30) to the tension arm by with the pulley pin (28). Make sure that the idle pulley rotates smoothly. Attach the shoes (31) on both sides of the tension arm (32) by using a quick dry bonding agent. © Atlas Copco Industrial Technique AB - 9839 1487 01... -
Page 19: Assembling The Wheel Cover
Attach the wheel cover lid (24) to the wheel cover (15) with the pin (23), the spring (22), the washer (21) and the e-ring (20). Attach the apron (25) to the wheel cover (15) and the wheel cover lid (24) by using one drop of glue. © Atlas Copco Industrial Technique AB - 9839 1487 01... -
Page 20: Assembling The Belt Sander
Put the drive pulley (31) and washer (32) in position on the rotor and tighten it with lock nut (33). Attach the wheel cover assembly to the motor housing and fasten it with the nut (17) and the screw (18). © Atlas Copco Industrial Technique AB - 9839 1487 01... - Page 21 LMB27 S014 Service © Atlas Copco Industrial Technique AB - 9839 1487 01...
-
Page 22: Function Test
Service LMB27 S014 Function test Do a speed check. The speed shall be 18000 rpm at 0.62 Mpa. Do an air leakage test. Do a stopper function test. © Atlas Copco Industrial Technique AB - 9839 1487 01... -
Page 23: Recycling
When a product has served its purpose it has to be recycled properly. Dismantle the product and recycle the components in accordance with local legislation. Batteries shall be taken care of by your national battery recovery organization. © Atlas Copco Industrial Technique AB - 9839 1487 01... - Page 24 Original instructions Atlas Copco Industrial © Copyright 2019, Atlas Copco Industrial Technique AB. All rights reserved. Any Technique AB unauthorized use or copying of the contents or part thereof is prohibited. This SE-10523 STOCKHOLM applies in particular to trademarks, model denominations, part numbers and drawings.
Need help?
Do you have a question about the LMB27 S014 and is the answer not in the manual?
Questions and answers