
Subscribe to Our Youtube Channel
Related Manuals for Tintometer Lovibond PM630


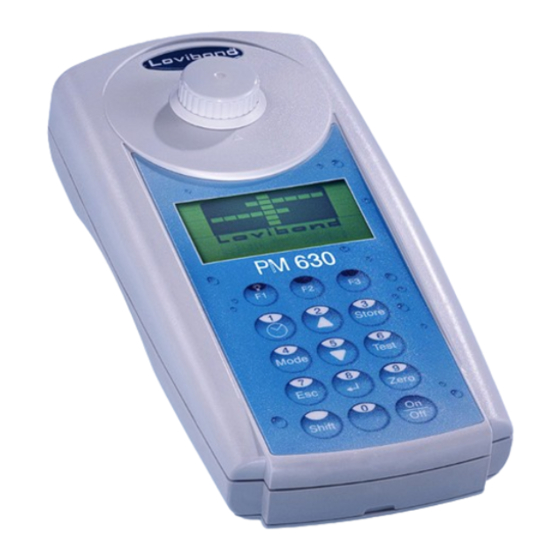
Summary of Contents for Tintometer Lovibond PM630
- Page 1 Lovibond Water Testing ® Tintometer Group ® Photometer P 630 Instruction manual...
- Page 3 Important steps before using the photometer Please carry out the following steps as described in the Instruction manual. Become familiar with your new pho- tometer before starting with the first tests: • Unpacking and inspection of delivery contents, see page 166. •...
- Page 5 Ce service n’est valable que pour des instruments électriques achetés après le 13 août 2005. Nous vous prions d’envoyer vos instruments électriques Tintometer usés à vos frais à votre fournisseur. Belangrijke informatie...
- Page 6 Devido à Directiva Europeia 2012/19/UE, o seu equipamento eléctrico naõ deve ser removido com o lixo doméstico habitual! A Tintometer GmbH tratará da remoção do seu equipamento eléctrico de forma profissional e responsável em termos ambientais. Este serviço, não incluindo os custos de transporte, é...
- Page 7 Wichtiger Entsorgungshinweis zu Batterien und Akkus Jeder Verbraucher ist aufgrund der Batterieverordnung (Richtlinie 2006/66/ EG) gesetzlich zur Rückgabe aller ge- und verbrauchten Batterien bzw. Akkus verpflichtet. Die Entsorgung über den Hausmüll ist verboten. Da auch bei Produkten aus unserem Sortiment Batterien und Akkus im Lieferumgang enthalten sind, weisen wir Sie auf folgendes hin: Verbrauchte Batterien und Akkus gehören nicht in den Hausmüll, sondern können unentgeltlich bei den öffentlichen Sammelstellen Ihrer Gemeinde und überall...
- Page 8 Indicación importante acerca de la eliminación de pilas y acumuladores Basado en la norma relativa a pilas/ baterías (directiva 2006/66/CE), cada consumidor, está obligado por ley, a la devolución de todas las pilas/ baterías y acumuladores usados y consumidos. Está prohibida la eliminación en la basura doméstica. Ya que en productos de nuestra gama, también se incluyen en el suministro pilas y acumuladores, le sugerimos lo siguiente: Las pilas y acumuladores usados no pertenecen a la basura doméstica, sino que pueden...
- Page 9 Safety precautions CAUTION Reagents are formulated exclusively for chemical analysis and must not be used for any other purpose. Reagents must not get into the hands of children. Some of the reagents contain substances which are not entirely harmless environmentally. Be aware of the ingredients and take proper care when disposing of the test solution.
-
Page 10: Table Of Contents
Table of contents Part 1 Methods ....................7 1.1 Table of Methods ......................8 Acid demand to pH 4.3 ....................12 Alkalinity-total (Alkalinity-m, m-Value) ................14 Alkalinity-total HR (Alkalinity-m HR, m-Value HR) ............16 Aluminium with tablets ....................18 Aluminium (powder pack) ....................20 Ammonia with tablet ...................... - Page 11 total Copper ....................... 61 Copper (powder pack) ....................62 CyA-TEST (Cyanuric acid) ....................64 HR with liquid reagent (16 mm Ø) ................66 Hardness, Calcium with Calcio tablet ................68 Hardness, total ........................ 70 Hardness, total HR ......................72 Iodine ..........................74 Iron with tablet .......................
- Page 12 2.2.2 Displaying time and date ................116 2.2.3 User countdown ................... 116 2.2.4 Display backlight ..................116 Operation mode ................... 117 2.3.1 Automatic switch off ..................117 2.3.2 Selecting a method ..................117 2.3.2.1 Method Information (F1) ................117 2.3.2.2 Chemical Species Information ...............
- Page 13 Selection of temperature unit ............... 162 2.6.8 Photometer-Information ................163 Part 3 Enclosure ....................165 Unpacking ....................166 Delivery contents ..................166 Technical data ....................167 Abbreviations ....................168 Troubleshooting ................... 169 3.5.1 Operating messages in the display / error display .......... 169 3.5.2 General ......................
- Page 14 PM630_3 03/2018...
-
Page 15: Part 1 Methods
Part 1 Methods PM630_3 03/2018... -
Page 16: Table Of Methods
Table of Methods No. Analysis Reagent Range Displayed Method OTZ Page [nm] 20 Acid demand to tablet 0.1-4 mmol/l Acid/Indicator 1,2,5 pH 4.3 T 30 Alkalinity, total T tablet 5-200 mg/l CaCO Acid/Indicator 1,2,5 31 Alkalinity HR, tablet 5-500 mg/l CaCO Acid/Indicator 1,2,5 total T... - Page 17 No. Analysis Reagent Range Displayed Method OTZ Page [nm] 290 Oxygen, active T tablet 0.1-10 mg/l O 300 Ozone (DPD) T tablet 0.02-2 mg/l O DPD/Glycine 70 PHMB T tablet 2-60 mg/l PHMB Buffer/Indicator 319 Phosphate, T tablet 0.05-4 mg/l PO Ammonium- ortho LR molybdate...
- Page 18 Methods The precision of Lovibond® Reagent Systems (tablets, powder packs and tube tests) is identical to the precision specified in standards literature such as American Standards (AWWA), ISO etc. Most of the data referred to in these standard methods relates to Standard Solutions. Therefore they are not readily applicable to drinking-, boiler- or waste-water, since various interferences can have a major influence on the accuracy of the method.
- Page 19 PM630_3 03/2018...
- Page 20 Acid demand to pH 4.3 with Tablet 0.1 – 4 mmol/l 1. Fill a clean vial (24 mm Ø) with 10 ml of the water sample, close tightly with the cap. 2. Place the vial in the sample chamber making sure that marks are aligned.
- Page 21 Notes: 1. The terms total Alkalinity, Alkalinity-m, m-Value and Acid demand to pH 4.3 are identical. 2. For accurate results exactly 10 ml of water sample must be taken for the test. Reagent Form of reagent/Quantity Order-No. ALKA-M-PHOTOMETER Tablet / 100 513210BT PM630_3 03/2018...
-
Page 22: Alkalinity-Total (Alkalinity-M, M-Value)
Alkalinity, total = Alkalinity-m = m-Value with Tablet 5 – 200 mg/l CaCO 1. Fill a clean vial (24 mm Ø) with 10 ml of the water sample, close tightly with the cap. 2. Place the vial in the sample chamber making sure that marks are aligned. -
Page 23: Acid Demand To Ph 4.3
Notes: 1. The terms total Alkalinity, Alkalinity-m, m-Value and Alkalinity to pH 4.3 are identical. 2. For accurate results exactly 10 ml of water sample must be taken for the test. 3. Conversion table: Acid demand to pH 4.3 German English French DIN 38 409 (K... -
Page 24: Alkalinity-Total Hr (Alkalinity-M Hr, M-Value Hr)
Alkalinity HR, total = Alkalinity-m HR = m-Value HR with Tablet 5 – 500 mg/l CaCO 1. Fill a clean vial (24 mm Ø) with 10 ml of the water sample, close tightly with the cap. 2. Place the vial in the sample chamber making sure that marks are aligned. - Page 25 Notes: 1. For verification of the result look carefully at the bottom of the vial. If a thin yellow layer forms, then mix the vial again. This ensures that reaction is complete. Reread the result. 2. Conversion table: Acid demand to pH 4.3 German English French...
-
Page 26: Aluminium With Tablets
Aluminium with Tablet 0.01 – 0.3 mg/l Al 1. Fill a clean vial (24 mm Ø) with 10 ml of the water sample, close tightly with the cap. 2. Place the vial in the sample chamber making sure that marks are aligned. prepare Zero 3. - Page 27 Notes: 1. Before use, clean the vials and the accessories with Hydrochloric acid (approx. 20%). Rinse them thoroughly with deionised water. 2. To get accurate results the sample temperature must be between 20°C and 25°C. 3. A low test result may be given in the presence of Fluorides and Polyphosphates. The effect of this is generally insignificant unless the water has fluoride added artificially.
-
Page 28: Aluminium (Powder Pack)
Aluminium with Vario Powder Pack 0.01 – 0.25 mg/l Al Use two clean vials (24 mm Ø) and mark one as blank for zeroing. 1. Fill 20 ml of the water sample in a 100 ml beaker. 2. Add the contents of one Vario Aluminum ECR F20 Powder Pack straight from the foil to the water sample. - Page 29 prepare Zero 13. Press ZERO key. press ZERO 14. Remove the vial from the sample chamber. 15. Place the vial (the sample) in the sample chamber making sure that the marks are aligned. Zero accepted prepare Test 16. Press TEST key. press TEST The result is shown in the display in mg/l Aluminium.
-
Page 30: Ammonia With Tablet
Ammonia with Tablet 0.02 – 1 mg/l N 1. Fill a clean vial (24 mm Ø) with 10 ml of the water sample, close tightly with the cap. 2. Place the vial in the sample chamber making sure that marks are aligned. prepare Zero 3. - Page 31 Notes: 1. The tablets must be added in the correct sequence. 2. The AMMONIA No. 1 tablet will only dissolve completely after the AMMONIA No. 2 tablet has been added. 3. The temperature of the sample is important for full colour development. At a temperature below 20°C the reaction period is 15 minutes.
-
Page 32: Bromine
Bromine with Tablet 0.05 – 13 mg/l Br 1. Fill a clean vial (24 mm Ø) with 10 ml of the water sample, close tightly with the cap. 2. Place the vial in the sample chamber making sure that marks are aligned. prepare Zero 3. - Page 33 Notes: 1. Vial cleaning: As many household cleaners (e.g. dishwasher detergent) contain reducing substances,the subsequent determination of Bromine may show lower results. To avoid any measurement errors, only use glassware free of Chlorine demand. Preparation: Put all applicable glassware into Sodium hypochlorite solution (0.1 g/l) forone hour, then rinse all glassware thoroughly with deionised water.
-
Page 34: Chlorine
Chlorine with Tablet 0.01 – 6 mg/l Cl Chlorine HR with Tablet 0.1 – 10 mg/l Cl Chlorine with Liquid Reagent 0.02 - 4 mg/l Cl Chlorine with Powder Pack 0.02 - 2 mg/l Cl Chlorine HR with Powder Pack 0.1 - 8 mg/l Cl Chlorine The following selection is shown in the display:... - Page 35 Notes: 1. Vial cleaning: As many household cleaners (e.g. dishwasher detergent) contain reducing substances, the subsequent determination of Chlorine may show lower results. To avoid any measurement errors, only use glassware free of Chlorine demand. Preparation: Put all applicable glassware into Sodium hypochlorite solution (0.1 g/l) for one hour, then rinse all glassware thoroughly with deionised water.
-
Page 36: Chlorine With Tablet
Chlorine, free with Tablet 0.01 – 6 mg/l Cl 1. Fill a clean vial (24 mm Ø) with 10 ml of the water sample, close tightly with the cap. 2. Place the vial in the sample chamber making sure that marks are aligned. -
Page 37: Total Chlorine
Chlorine, total with Tablet 0.01 – 6 mg/l Cl 1. Fill a clean vial (24 mm Ø) with 10 ml of the water sample, close tightly with the cap. 2. Place the vial in the sample chamber making sure that marks are aligned. -
Page 38: Differentiated Determination (Free, Combined, Total)
Chlorine, differentiated determination with Tablet 0.01 – 6 mg/l Cl 1. Fill a clean vial (24 mm Ø) with 10 ml of the water sample, close tightly with the cap. 2. Place the vial in the sample chamber making sure that marks are aligned. - Page 39 13. Place the vial in the sample chamber making sure that marks are aligned. T1 accepted 14. Press TEST key. prepare T2 Wait for a reaction period of 2 minutes. press TEST Countdown 2:00 After the reaction period is finished the measurement starts automatically.
-
Page 40: Chlorine Hr With Tablet
Chlorine HR, free with Tablet 0.1 – 10 mg/l Cl 1. Fill a clean vial (24 mm Ø) with 10 ml of the water sample, close tightly with the cap. 2. Place the vial in the sample chamber making sure that marks are aligned. -
Page 41: Total Chlorine
Chlorine HR, total with Tablet 0.1 – 10 mg/l Cl 1. Fill a clean vial (24 mm Ø) with 10 ml of the water sample, close tightly with the cap. 2. Place the vial in the sample chamber making sure that marks are aligned. -
Page 42: Differentiated Determination (Free, Combined, Total)
Chlorine HR, differentiated determination with Tablet 0.1 – 10 mg/l Cl 1. Fill a clean vial (24 mm Ø) with 10 ml of the water sample, close tightly with the cap. 2. Place the vial in the sample chamber making sure that marks are aligned. - Page 43 13. Place the vial in the sample chamber making sure that marks are aligned. T1 accepted prepare T2 14. Press TEST key. press TEST Wait for a reaction period of 2 minutes. Countdown 2:00 After the reaction period is finished the measurement starts automatically.
-
Page 44: Chlorine With Liquid Reagent
Chlorine, free with Liquid Reagent 0.02 – 4 mg/l Cl 1. Fill a clean vial (24 mm Ø) with 10 ml of the water sample, close tightly with the cap. 2. Place the vial in the sample chamber making sure that marks are aligned. -
Page 45: Total Chlorine
Chlorine, total with Liquid Reagent 0.02 – 4 mg/l Cl 1. Fill a clean vial (24 mm Ø) with 10 ml of the water sample, close tightly with the cap. 2. Place the vial in the sample chamber making sure that marks are aligned. -
Page 46: Differentiated Determination (Free, Combined, Total)
Chlorine, differentiated determination with Liquid Reagent 0.02 – 4 mg/l Cl 1. Fill a clean vial (24 mm Ø) with 10 ml of the water sample, close tightly with the cap. 2. Place the vial in the sample chamber making sure that marks are aligned. - Page 47 13. Place the vial in the sample chamber making sure that marks are aligned. T1 accepted prepare T2 14. Press TEST key. press TEST Wait for a reaction period of 2 minutes. Countdown 2:00 After the reaction period is finished the measurement starts automatically.
-
Page 48: Chlorine (Powder Pack)
Chlorine, free with Powder Pack 0.02 – 2 mg/l Cl 1. Fill a clean vial (24 mm Ø) with 10 ml of the water sample, close tightly with the cap. 2. Place the vial in the sample chamber making sure that marks are aligned. -
Page 49: Total Chlorine
Chlorine, total with Powder Pack 0.02 – 2 mg/l Cl 1. Fill a clean vial (24 mm Ø) with 10 ml of the water sample, close tightly with the cap. 2. Place the vial in the sample chamber making sure that marks are aligned. -
Page 50: Differentiated Determination (Free, Combined, Total)
Chlorine, differentiated determination with Powder Pack 0.02 – 2 mg/l Cl 1. Fill a clean vial (24 mm Ø) with 10 ml of the water sample, close tightly with the cap. 2. Place the vial in the sample chamber making sure that marks are aligned. - Page 51 12. Place the vial in the sample chamber making sure that marks are aligned. T1 accepted prepare T2 13. Press TEST key. press TEST Wait for a reaction period of 3 minutes. Countdown 3:00 After the reaction period is finished the measurement starts automatically.
-
Page 52: Chlorine Hr (Powder Pack)
Chlorine HR, free with Powder Pack plastic vial (type 10 mm 0.1 – 8 mg/l Cl 1. Fill a clean vial (10 mm Ø) with 5 ml of the water 10 ml sample, close tightly with the cap. 5 ml 2. -
Page 53: Total Chlorine
Chlorine HR, total with Powder Pack plastic vial (type 10 mm 0.1 – 8 mg/l Cl 10 ml 1. Fill a clean vial (10 mm Ø) with 5 ml of the water sample, close tightly with the cap. 5 ml 2. -
Page 54: Differentiated Determination (Free, Combined, Total)
Chlorine HR, differentiated determination with Powder Pack plastic vial (type 10 mm 0.1 – 8 mg/l Cl 10 ml 1. Fill a clean vial (10 mm Ø) with 5 ml of the water 5 ml sample, close tightly with the cap. 2. - Page 55 12. Place the vial in the sample chamber making sure that marks are aligned. 13. Press TEST key. T1 accepted prepare T2 Wait for a reaction period of 3 minutes. press TEST Countdown After the reaction period is finished the measurement 3:00 starts automatically.
-
Page 56: Chlorine Dioxide
Chlorine dioxide with Tablet 0.02 – 11 mg/l ClO Chlorine dioxide >> with Cl The following selection is shown in the display: without Cl for the determination of Chlorine dioxide in the presence >> with Cl of Chlorine. for the determination of Chlorine dioxide in the absence >>... - Page 57 Notes: 1. Vial cleaning: As many household cleaners (e.g. dishwasher detergent) contain reducing substances, the subsequent determination of Chlorine dioxide may show lower results. To avoid any measurement errors, only use glassware free of Chlorine demand. Preparation: Put all applicable glassware into Sodium hypochlorite solution (0.1 g/l) for one hour, then rinse all glassware thoroughly with deionised water.
-
Page 58: In Presence Of Chlorine
Chlorine dioxide in the presence of Chlorine with Tablet 0.02 – 11 mg/l ClO 1. Fill a clean vial (24 mm Ø) with 10 ml of the water sample. 2. Add one GLYCINE tablet straight from the foil and crush the tablet using a clean stirring rod. 3. - Page 59 13. Remove the vial from the sample chamber, empty the vial, rinse vial and cap several times. Fill with a few drops of water sample. 14. Add one DPD No. 1 tablet straight from the foil and crush the tablet using a clean stirring rod. 15.
- Page 60 Notes: (Chlorine dioxide in the presence of Chlorine) 1. The conversion factor to convert Chlorine dioxide (display) to Chlorine dioxide as Chlorine units is 2.6315. mg/l ClO [Cl] = mg/l ClO · 2.6315 Chlorine dioxide displayed as Chlorine units ClO [Cl] has its origin in swimming poolwater treatment according to DIN 19643.
-
Page 61: In Absence Of Chlorine
Chlorine dioxide in absence of Chlorine with Tablet 0.02 – 11 mg/l ClO 1. Fill a clean vial (24 mm Ø) with 10 ml of the water sample, close tightly with the cap. 2. Place the vial in the sample chamber making sure that marks are aligned. -
Page 62: Chlorite In Presence Of Chlorine And Chlorine Dioxide
Chlorite in presence of Chlorine and Chlorine dioxide 0,01 – 6 mg/l Cl Firstly, the glycine method is used to measure the concen- tration of Chlorine Dioxide. This is then followed by the determination of the free and total chlorine, from which the Combined Chlorine can be calculated. - Page 63 9. Transfer the contents of the first vial (Glycine solu- tion) into the prepared vial (point 8). 10. Close the vial tightly with the cap and swirl several times until the tablets are dissolved. 11. Place the vial in the sample chamber making sure that marks are aligned.
- Page 64 22. Place the vial in the sample chamber making sure that marks are aligned. 23. Wait for a reaction period of 2 minutes. Zero accepted prepare Test 24. Press TEST key. press TEST Record the displayed test result (C). 25. Remove the vial from the sample chamber. 26.
- Page 65 Calculations: mg/l Chlorine dioxide = result G x 1,9 mg/l free Chlorine = result A – result G mg/l combined Chlorine = result C – result A mg/l Chlorite = result D – ( result C + 4 x result G ) Tolerances: 1.
-
Page 66: Copper With Tablet
Copper with Tablet 0.05 – 5 mg/l Cu Copper The following selection is shown in the display: >> diff free total for the differentiated determination of free, combined and >> diff total Copper. >> free for the determination of free Copper. >>... -
Page 67: Differentiated Determination (Free, Combined, Total)
Copper, differentiated determination with Tablet 0.05 – 5 mg/l Cu 1. Fill a clean vial (24 mm Ø) with 10 ml of the water sample, close tightly with the cap. 2. Place the vial in the sample chamber making sure that marks are aligned. -
Page 68: Free Copper
Copper, free with Tablet 0.05 – 5 mg/l Cu 1. Fill a clean vial (24 mm Ø) with 10 ml of the water sample, close tightly with the cap. 2. Place the vial in the sample chamber making sure that marks are aligned. -
Page 69: Total Copper
Copper, total with Tablet 0.05 – 5 mg/l Cu 1. Fill a clean vial (24 mm Ø) with 10 ml of the water sample, close tightly with the cap. 2. Place the vial in the sample chamber making sure that marks are aligned. -
Page 70: Copper (Powder Pack)
Copper, free (Note 1) with Vario Powder Pack 0.05 – 5 mg/l Cu 1. Fill a clean vial (24 mm Ø) with 10 ml of the water sample, close tightly with the cap. 2. Place the vial in the sample chamber making sure that marks are aligned. - Page 71 Notes: 1. For determination of total Copper digestion is required. 2. Extremely acid water samples (pH 2 or less) must be adjusted between pH 4 and pH 6 before the reagent is added (with 8 mol/l Potassium hydroxide solution KOH). Caution: pH values above 6 can lead to Copper precipitation.
-
Page 72: Cya-Test (Cyanuric Acid)
CyA-TEST (Cyanuric acid) with Tablet 0 – 160 mg/l CyA 1. Fill a clean vial (24 mm Ø) with 5 ml of the water sample and 5 ml deionised water (Note 1), close tightly with the cap. 2. Place the vial in the sample chamber making sure that marks are aligned. - Page 73 Notes: 1. Use deionised water or tap water free of Cyanuric acid. 2. If Cyanuric acid is present a cloudy solution will occur. Small single particles are not necessarily caused by Cyanuric acid. 3. Dissolve the tablet completely (therefore swirl the vial approx. 1 minute). Un-dissolved particles of the tablet can cause results that are too high.
-
Page 74: With Liquid Reagent (16 Mm Ø)
(Hydrogen peroxide) HR with Liquid Reagent 40 – 500 mg/l H Insert the adapter for 16 mm Ø vials. 1. Fill a clean vial (16 mm Ø) with 10 ml of the water sample, close tightly with the cap. (Note 1, 2) Ø... - Page 75 Notes: 1. The hydrogen peroxide is determined in the form of yellow/orange coloured peroxotitanic acids in strongly acidic media. In connection with neutral to weakly alkaline (~pH 10) samples, the acid in the reagent is sufficient in order to produce a medium suitable for measurement.
-
Page 76: Hardness, Calcium With Calcio Tablet
Hardness, Calcium 2T with Tablet 0 – 500 mg/l CaCO 1. Fill a clean vial (24 mm Ø) with 10 ml of water sample, close tightly with the cap. 2. Place the vial in the sample chamber making sure that marks are aligned. - Page 77 Notes: 1. To optimise the readings an optional batch related calibration can be performed using Mode 40, see page 143. 2. Strong alkaline or acidic water samples must be adjusted to a pH-value between pH 4 and 10 before the tablets are added (use 1 mol/l Hydrochloride acid resp. 1 mol/l Sodium hydroxide).
-
Page 78: Hardness, Total
Hardness, total with Tablet 2 – 50 mg/l CaCO 1. Fill a clean vial (24 mm Ø) with 10 ml of the water sample, close tightly with the cap. 2. Place the vial in the sample chamber making sure that marks are aligned. - Page 79 Notes: 1. Strong alkaline or acidic water samples must be adjusted between pH 4 and pH 10 before the tablet is added (use 1 mol/l Hydrochloric acid resp. 1mol/l Sodium hydroxide). 2. Conversion table: mg/l CaCO °dH °fH °eH 1 mg/l CaCO ---- 0.056 0.10...
-
Page 80: Hardness, Total Hr
Hardness, total HR with Tablet 20 – 500 mg/l CaCO 1. Fill a clean vial (24 mm Ø) with 1 ml of the water sample and 9 ml of deionised water, close tightly with the cap. 2. Place the vial in the sample chamber making sure that marks are aligned. - Page 81 Notes: 1. Strong alkaline or acidic water samples must be adjusted between pH 4 and pH 10 before the tablet is added (use 1 mol/l Hydrochloric acid resp. 1mol/l Sodium hydroxide). 2. Conversion table: mg/l CaCO °dH °fH °eH 1 mg/l CaCO ---- 0.056 0.10...
-
Page 82: Iodine
Iodine with Tablet 0.05 – 3.6 mg/l I 1. Fill a clean vial (24 mm Ø) with 10 ml of the water sample, close tightly with the cap. 2. Place the vial in the sample chamber making sure that marks are aligned. prepare Zero 3. - Page 83 Notes: 1. Oxidizing reagents, such as Chlorine, Bromine, etc. interfere as they react in the same way as Iodine. Reagent Form of reagent/Quantity Order-No. DPD No. 1 Tablet / 100 511050BT PM630_3 03/2018...
-
Page 84: Iron With Tablet
Iron (Note 1) with Tablet 0.02 – 1 mg/l Fe Determination of total dissolved Iron Fe and Fe *This information refers to analysis of the water sample without digestion. 1. Fill a clean vial (24 mm Ø) with 10 ml of the water sample, close tightly with the cap. - Page 85 Notes: Iron Determination dissolved and dissolved Iron undissolved Iron Filtration Digestion + Fe + Fe IRON LR IRON (II) LR IRON LR tablet tablet tablet result A minus result B = Fe Digestion procedure for the determination of total dissolved and undissolved iron. 1.
-
Page 86: Oxygen, Active
Oxygen, active* with Tablet 0.1 – 10 mg/l O 1. Fill a clean vial (24 mm Ø) with 10 ml of the water sample, close tightly with the cap. 2. Place the vial in the sample chamber making sure that marks are aligned. - Page 87 Notes: * Active Oxygen is a synonym for a common disinfectant (based on “Oxygen“) in Swimming Pool Treatment. 1. When preparing the sample, the lost of Oxygen, e.g. by pipetting or shaking, must be avoided. 2. The analysis must take place immediately after taking the sample. Reagent Form of reagent/Quantity Order-No.
-
Page 88: Ozone
Ozone with Tablet 0.02 – 2 mg/l O Ozon >> with Cl The following selection is shown in the display: without Cl >> with Cl for the determination of Ozone in the presence of Chlorine. >> without Cl for the determination of Ozone in the absence of Chlorine. Select the desired method with the arrow keys [ ] and [ ]. - Page 89 Notes: 1. Vial cleaning: As many household cleaners (e.g. dishwasher detergent) contain reducing substances, the subsequent determination of Ozone may show lower results. To avoid any measurement errors, only use glassware free of Chlorine demand. Preparation: Put all applicable glassware into Sodium hypochlorite solution (0.1 g/l) for one hour, then rinse all glassware thoroughly with deionised water.
-
Page 90: In Presence Of Chlorine
Ozone, in the presence of Chlorine with Tablet 0.02 – 2 mg/l O 1. Fill a clean vial (24 mm Ø) with 10 ml of the water sample, close tightly with the cap. 2. Place the vial in the sample chamber making sure that marks are aligned. - Page 91 13. Close the vial tightly with the cap and swirl several times until the tablet is dissolved. 14. Add one DPD No. 1 tablet and one DPD No. 3 tablet straight from the foil into the first cleaned vial and crush the tablets using a clean stirring rod.
-
Page 92: In Absence Of Chlorine
Ozone, in absence of Chlorine with Tablet 0.02 – 2 mg/l O 1. Fill a clean vial (24 mm Ø) with 10 ml of the water sample, close tightly with the cap. 2. Place the vial in the sample chamber making sure that marks are aligned. - Page 93 PM630_3 03/2018...
-
Page 94: Phmb (Biguanide)
PHMB (Biguanide) with Tablet 2 – 60 mg/l PHMB 1. Fill a clean vial (24 mm Ø) with 10 ml of the water sample, close tightly with the cap. 2. Place the vial in the sample chamber making sure that marks are aligned. - Page 95 Notes: 1. Clean vials with the brush immediately after analysis. 2. Vials and stirring rods may turn blue after prolonged use. In this case clean vials and stirring rods with a laboratory detergent (see chapter 1.2.2 Cleaning of vials and accessories for analysis).
-
Page 96: Phosphate, Ortho Lr With Tablet
Phosphate, ortho LR with Tablet 0.05 – 4 mg/l PO 1. Fill a clean vial (24 mm ø) with 10 ml of the water sample, close tightly with the cap. 2. Place the vial in the sample chamber making sure that the marks aligned. - Page 97 Notes 1. Only ortho-Phosphate ions PO react. 2. The tablets must be added in the correct sequence. 3. The test sample should have a pH-value between 6 and 7. 4. Interferences: Higher concentrations of Cu, Ni, Cr (III), V (V) and W (VI) interfere due to their colour. Silicates do not interfere (masked by Citric acid in the tablets).
-
Page 98: Ph Value Lr With Tablet
pH value LR 5.2 – 6.8 with Tablet 1. Fill a clean vial (24 mm Ø) with 10 ml of the water sample, close tightly with the cap. 2. Place the vial in the sample chamber making sure that marks are aligned. prepare Zero 3. - Page 99 Notes: 1. For photometric determination of pH values only use BROMOCRESOLPURPLE tablets in black printed foil pack and marked with PHOTOMETER. 2. pH values below 5.2 and above 6.8 can produce results inside the measuring range. A plausibility test (pH-meter) is recommended. 3.
-
Page 100: Ph Value With Tablet
pH value 6.5 – 8.4 with Tablet 1. Fill a clean vial (24 mm Ø) with 10 ml of the water sample, close tightly with the cap. 2. Place the vial in the sample chamber making sure that marks are aligned. prepare Zero 3. - Page 101 Notes: 1. For photometric determination of pH-values only use PHENOL RED tablets in black printed foil pack and marked with PHOTOMETER. 2. Water samples with low values of Alkalinity-m (below 35 mg/l CaCO ) may give wrong pH readings. 3. pH-values below 6.5 and above 8.4 can produce results inside the measuring range. A plausibility test (pH-meter) is recommended.
-
Page 102: Ph Value With Liquid Reagent
pH value 6.5 – 8.4 with Liquid Reagent 1. Fill a clean vial (24 mm Ø) with 10 ml of the water sample, close tightly with the cap. 2. Place the vial in the sample chamber making sure that marks are aligned. prepare Zero 3. - Page 103 Notes: 1. When testing chlorinated water the residual chlorine contents can influence the colour reaction of the liquid reagent. This can be avoided (without interfering with the pH measurement) by adding a small crystal of Sodiumthiosulfate (Na · 5 H O) to the sample before adding the PHENOL RED solution.
-
Page 104: Ph Value Hr With Tablet
pH value HR 8.0 – 9.6 with Tablet 1. Fill a clean vial (24 mm Ø) with 10 ml of the water sample, close tightly with the cap. 2. Place the vial in the sample chamber making sure that marks are aligned. prepare Zero 3. - Page 105 Notes: 1. For photometric determination of pH values only use THYMOLBLUE tablets in black printed foil pack and marked with PHOTOMETER. 2. pH values below 8.0 and above 9.6 can produce results inside the measuring range. A plausibility test (pH-meter) is recommended. 3.
-
Page 106: Sodium Hypochlorite
Sodium hypochlorite (Soda bleaching lye) with Tablet 0.2 – 16 % w/w NaOCl Preparation: 1. Fill a 5 ml plastic syringe with the test solution, ensuring that all air bubbles are expelled. Transfer the 5 ml test solution slowly into a 100 ml beaker and dilute to the 100 ml mark with chlorine-free water. - Page 107 8. Place the vial in the sample chamber making sure that marks are aligned. Zero accepted prepare Test 9. Press TEST key. press TEST The result is shown in the display in % w/w as avail- able chlorine present in the original sample of Sodium hypochlorite.
-
Page 108: Sulfate With Tablet
Sulfate with Tablet 5 – 100 mg/l SO 1. Fill a clean vial (24 mm Ø) with 10 ml of the water sample, close tightly with the cap. 2. Place the vial in the sample chamber making sure that marks are aligned. prepare Zero 3. - Page 109 Notes: 1. If Sulfate is present a cloudy solution will appear. Reagent Form of reagent/Quantity Order-No. SULFATE T Tablet / 100 515450BT PM630_3 03/2018...
-
Page 110: Sulfate (Powder Pack)
Sulfate with Vario Powder Pack 5 – 100 mg/l SO 1. Fill a clean vial (24 mm Ø) with 10 ml of the water sample, close tightly with the cap. 2. Place the vial in the sample chamber making sure that marks are aligned. - Page 111 Note: 1. If Sulfate ions are present a cloudy solution will appear. Reagent Form of reagent/Quantity Order-No. VARIO Sulpha 4 / F10 Powder Pack / 100 532160 PM630_3 03/2018...
-
Page 112: Urea
Urea with Tablet and Liquid Reagent 0.1 – 2.5 mg/l (NH CO / mg/l Urea 1. Fill a clean vial (24 mm Ø) with 10 ml of the water sample, close tightly with the cap. 2. Place the vial in the sample chamber making sure that marks are aligned. - Page 113 15. Place the vial in the sample chamber making sure that marks are aligned. Zero accepted 16. Press TEST key. prepare Test Wait for a reaction period of 10 minutes. press TEST Countdown 10:00 After the reaction period is finished the measurement starts automatically.
-
Page 114: Important Notes
Important notes 1.2.1 Correct use of reagents The reagents must be added in the correct sequence. Tablet reagents: The tablet reagents should be added to the water sample straight from the foil without touching them with the fingers. Liquid reagents: Add drops of the same size to the water sample by holding the bottle vertically and squeezing slowly. -
Page 115: Cleaning Of Vials And Accessories For Analysis
1.2.2 Cleaning of vials and accessories for analysis Vials, caps and stirring rods should be cleaned thoroughly after each analysis to prevent interferences. Procedure: Clean vials and accessories after each analysis as soon as possible. a. Clean vials and accessories with laboratory detergent (e.g. - Page 116 5. Always perform zeroing and test with closed vial cap. Only use cap with sealing ring. 6. Bubbles on the inside wall of the vial lead to incorrect measurements. To prevent this, remove the bubbles by swirling the vial before performing the test. 7.
-
Page 117: Sample Dilution Techniques
1.2.4 Sample dilution techniques Proceed as follows for accurate dilutions: Pipette the water sample (see table) into a 100 ml volumetric flask and fill up to 100 ml mark with deionised water. Swirl to mix the contents. Water sample Multiplication [ml] factor Pipette the required volume of the diluted sample into the vial and proceed as described in... - Page 118 PM630_3 03/2018...
-
Page 119: Part 2 Instrument Manual
Part 2 Instrument Manual PM630_3 03/2018... -
Page 120: Operation
Operation 2.1.1 Set up Before working with the photometer insert the batteries (delivery contents). See chapter 2.1.2 Saving data – Important Notes, 2.1.3 Replacement of batteries. Before using the photometer perform the following settings in the Mode-Menu: • MODE 10: select language •... -
Page 121: Instrument (Explosion Drawing)
2.1.4 Instrument (explosion drawing): (A) screws (B) battery compartment cover (C) notch (D) batteries: 4 batteries (AA/LR6) (E) seal ring (F) instrument back (B) battery compartment cover (E) seal ring (F) instrument back (A) screws (C) notch (D) batteries CAUTION: To ensure that the instrument is water proof: seal ring (E) must be in position •... - Page 122 PM630_3 03/2018...
-
Page 123: Overview Of Function Keys
Overview of function keys 2.2.1 Overview Switching the photometer on or off Press shift key to achieve figures key 0-9. Keep the shift key depressed and press desired figures key. Shift e.g.: [Shift] + [1][1] Returning to selection of methods or previous menu Function key: description in the text if key available Function key: description in the text if key available Function key: description in the text if key available... -
Page 124: Displaying Time And Date
2.2.2 Displaying time and date: Press [“clock”] key. 19:30:22 2013-06-15 The display shows: After 15 seconds the photometer reverts to the previous display automatically or press [ ] key or [ESC]. 2.2.3 User countdown With this function the operator is able to define his own countdown. Press [“clock”] key. -
Page 125: Operation Mode
Operation mode Switch the photometer on by pressing the [ON/OFF] key. selftest ... The photometer performs an electronic self-test. Bluetooth ® The display shows the status of the Bluetooth connection. ® switched on 2.3.1 Automatic switch off The instrument switches off automatically after 20 minutes. This is indicated 30 seconds before by a beeper. -
Page 126: Chemical Species Information
2.3.2.2 Chemical Species Information Pressing the [F2] key the display shows a list with available chemical species and corresponding ranges. Changing chemical species see chapter 2.3.7 page 120. 319 Phosphate LR T Line 1: Method number, Method name 0.05-4 mg/l PO Line 2: Range with chemical species 1 0.02-1.3 mg/l P Line 3: Range with chemical species 2... -
Page 127: Performing Tests
2.3.5 Performing Tests When zero calibration is complete, remove the vial from the sample chamber and perform the tests as described under “Method“. When the results have been displayed: - with some methods you can change between different chemical species - you can store and/or print out the results - perform further analysis with the same zero - select a new method... -
Page 128: Changing Chemical Species
2.3.7 Changing chemical species For some methods there is a possibility to change the chemical species of the test result. If the test result is displayed press arrow key [ ] or [ ]. Example: 319 Phosphate LR T -----[ ]----> 319 Phosphate LR T <---- [ ] ----- 319 Phosphate LR T 0.05-4 mg/l PO 0.02-1.3 mg/l P... -
Page 129: Printing Results (Infra-Red Interface Module) (Optional)
Note: The display shows the number of free data sets. Storage: 900 free records left If there are less than 30 data sets free the display shows: Storage: only 29 free records left Clear the memory as soon as possible (see “Deleting stored results”). -
Page 130: Measure Absorbance
2.3.11 Measure absorbance Range: –2600 mAbs to +2600 mAbs Method-No. Title mAbs 530 nm mAbs 560 nm mAbs 610 nm Select the desired wavelength from the method list or by entering the corresponding method number directly. The display shows e.g.: 910 mAbs 530 nm -2600 mAbs - + 2600 mAbs... -
Page 131: Bluetooth
(Low Energy). Data is transmitted from the photometer as a .csv file. Details on how information is transmitted from the photometer can be found on www.lovibond.com. To receive the data, there are several options on offer from the Tintometer Group. -
Page 132: Internet Updates
Internet Updates To connect the instrument to the serial interface of a computer the optional connection cable with integrated electronic system is required. It is possible to update new software applications and additional languages via the internet. Please find detailed information at our homepage in the download-area (as soon as available). -
Page 133: Mode Functions
Mode Functions Schema MODE-Function No. Description Page Auto transfer Automatic data transfer after measurement Bluetooth Switching the Bluetooth Modul on/off ® ® Calibration Special method calibration Clear calibration Deleting user calibration Clock Setting date and time Countdown Switching the countdown on/off to ensure reaction times Delete data Deleting all stored results... -
Page 134: Instrument Basic Settings
MODE-Function No. Description Page System info Information about the instrument e.g. current software version Temperature Selection of °C or °F for Langelier Mode 70 User calibration Storage of user calibration User concentration Entering the data necessary to run a user concentration method User polynoms Entering the data necessary to run a user polynomial User methods clear... - Page 135 Key beep Press [MODE], [Shift] + [1][1] keys. Mode Confirm with [ ] key. <Key-Beep> The display shows: Shift + 1 OFF: Shift +0 • Press [Shift] + [0] keys to switch the key beep off. Shift • Press [Shift] + [1] keys to switch the key beep on. Shift Confirm with [ ] key.
- Page 136 Countdown (Ensuring reaction periods) Some methods require a reaction period. This reaction period is incorporated in the method as standard with the countdown function. It is possible to switch the countdown off for all methods: Press [MODE], [Shift] + [1][3] keys. Mode Confirm with [ ] key.
- Page 137 Signal beep Performing a zero or a measurement takes 8 seconds. The photometer indicates the end of zeroing or measuring by a short beep. Press [MODE], [Shift] + [1][4] keys. Mode Confirm with [ ] key. <Signal-Beep> The display shows: Shift + 1 OFF: Shift +0...
- Page 138 Adjusting display contrast Press [MODE], [Shift] + [8][0] keys. Mode Confirm with [ ] key. <LCD contrast> The display shows: • Press arrow key [ ] to increase contrast of the LCD display about one unit. • Press arrow key [ ] to decrease contrast of the LCD display about one unit.
- Page 139 Adjusting display brightness Press [MODE] [8] [1] keys. Mode Confirm with [ ] key. <LCD brightness> The display shows: Press [ ] key to increase brightness of the display about one unit. Press [ ] key to decrease brightness of the display about one unit.
- Page 140 Bluetooth ® Press [MODE], [Shift] + [1][8] keys. Mode Confirm with [ ] key. <Bluetooth > ® The display shows: switched on Shift + 1 OFF: Shift + 0 connected The current status of the Bluetooth connection (connected / ® disconnected) is displayed.
- Page 141 Autotransfer The auto transfer enables the user to transfer measured results automatically to the App or PC without storing. A connection to the receiving program is necessary. If this is not given a message will be displayed on the instruments screen. If necessary an update of the list of recognized devices in the software on the peripheral devices may be required.
-
Page 142: Data Transfer Of Stored Results
2.6.2 Data transfer of stored results Data transfer of all results Press [MODE], [Shift] + [2][0] keys. Mode Confirm with [ ] key. <Data Transfer> The display shows: all Data Start: cancel: Press [ ] key to transfer all stored test results. The display shows e.g.: Data Transfer Test No.:... - Page 143 Data transfer of results of a selected time period Press [MODE], [Shift] + [2][1] keys. Mode Confirm with [ ] key. The display shows: <Data Transfer> sorted: date from yy-mm-dd Enter year, month and day for the first day of the required __-__-__ period, e.g.: 14 May 2009 = [Shift] + [0][9][0][5][1][4] Confirm with [ ] key.
- Page 144 Data transfer of results of a selected Code No. range Press [MODE], [Shift] + [2][2] keys. Mode Confirm with [ ] key. <Data Transfer> The display shows: sorted: Code-No. Enter numeric code number (up to 6 places) for the first from _ _ _ _ _ _ required Code No., e.g.: [Shift] + [1].
- Page 145 Data transfer of results of one selected method Press [MODE], [Shift] + [2][3] keys. Mode Confirm with [ ] key. The display shows: <Data Transfer> >>20 Acid demand T 35 Alkalinity-p T Select the required method from the displayed list or enter 30 Alkalinity-tot T the method-number directly.
-
Page 146: Recall / Delete Stored Results
2.6.3 Recall / delete stored results Recall all stored results Press [MODE], [Shift] + [3][0] keys. Mode Confirm with [ ] key. The display shows: <Storage> display all data The stored data sets are displayed in chronological order, Start: cancel: ESC starting with the latest stored test result. - Page 147 Recall results of a selected time period Press [MODE], [Shift] + [3][1] keys. Mode Confirm with [ ] key. The display shows: <Storage> sorted: date from yy-mm-dd Enter year, month and day for the first day of the required __-__-__ period, e.g.: 14 May 2015 = [Shift] + [1][5][0][5][1][4] Confirm with [ ] key.
- Page 148 Recall results of a selected Code No. range Press [MODE], [Shift] + [3][2] keys. Mode Confirm with [ ] key. <Storage> The display shows: sorted: Code-No. from _ _ _ _ _ _ Enter numeric code number (up to 6 places) for the first required Code No., e.g.: [Shift] + [1].
- Page 149 Recall results of one selected method Press [MODE], [Shift] + [3][3] keys. Mode Confirm with [ ] key. <Storage> The display shows: >>20 Acid demand T 30 Alkalinity-tot T Select the required method from the displayed list or enter 40 Aluminium T the method number directly.
- Page 150 Delete stored results Press [MODE], [Shift] + [3][4] keys. Mode Confirm with [ ] key. <Delete data> The display shows: Delete all data? YES : Shift + 1 NO : Shift + 0 • Press [Shift] + [0] keys to retain the data sets in memory. Shift •...
-
Page 151: Calibration
2.6.4 Calibration Calcium Hardness Method 191 – Calibration of a method blank Press [MODE], [Shift] + [4] [0] keys. Mode Confirm with [ ] key. <Calibration> 1: M 191 Ca-Hardness 2 The display shows: 2: M 191 0 Jus. Reset 3: M 170 Fluoride L Press [Shift] + [1] keys. - Page 152 After the reaction period is finished proceed as follows: 9. Rinse the vial (24 mm Ø) with the coloured sample from the beaker and fill with 10 ml of the sample. prepare TEST 10. Press TEST key. press TEST stored The batch related method blank is saved.
-
Page 153: User Calibration
User Calibration If a test method is user calibrated the method name is displayed inverse. Procedure: • Prepare a standard of known concentration and use this standard instead of the sample according to the test procedure. • It is recommend to use well known standards which are formulated according to DIN EN, ASTM or other international norms or to use certified standards which are commercially available. - Page 154 Method Recommended range for user calibration Hardness, total HR T Calibration with basic test 200 Hardness, total Iodine Calibration with basic test 100 Chlorine free Iron T 0.3 – 0.7 mg/l Fe Ozone (DPD) Calibration with basic test 100 Chlorine free Oxygen, active Calibration with basic test 100 Chlorine free pH-Value LR...
-
Page 155: Store User Calibration
Store user calibration 100 Chlorine T Perform the required method as described in the manual 0.02-6 mg/l Cl2 using a standard of known concentration instead of the 0.90 mg/l free Cl2 water sample. If the test result is displayed press [MODE], [Shift] + [4] [5] Mode keys and confirm with [ ] key. -
Page 156: Delete User Calibration
Delete user calibration This chapter only applies for methods which can be user calibrated. Select the required method. Chlorine T 0.02-6 mg/l Cl2 prepare ZERO Instead of zeroing the instrument press [MODE], [Shift] + press ZERO [4][6] keys and confirm with [ ] key. Mode <user calibration>... -
Page 157: Lab Function
2.6.5 Lab function Reduced operator guidance => “Profi-Mode“ This function may be used for routine analyses with many samples of one method. The following information is always stored in the methods: a) Method b) Range c) Date and time d) Differentiation of results e) Detailed operator instruction Compliance with reaction periods If the Profi-Mode is active, the photometer provides only a minimum of operator instructions. -
Page 158: Onetimezero
One Time Zero (OTZ) OneTimeZero is available for all methods where Zero is performed in a 24 mm Ø round vial with sample water (see chapter 1.1 Table of Methods). OneTimeZero can be used for different tests providing the tests are performed with the same sample water and under the same test conditions. -
Page 159: User Operations
2.6.6 User operations User method list After switching on the instrument a scroll list of all available methods is automatically shown in the display. To shorten this list according to the requirements of the user it is possible to create a user defined scroll list. The program structure requires that this list must have at least one active (switched on) method. - Page 160 User method list, switch all methods on This mode function activates all methods. After switching on the instrument a scroll list of all available methods is automatically shown in the display. Press [MODE], [Shift] + [6][1] keys. Mode Confirm with [ ] key. <Mlist all on>...
-
Page 161: User Concentration Methods
User Concentration Methods It is possible to enter and store up to 10 User Concentration Methods. Therefor you need 2 to 14 standards of known concentration and one blank (deionised water or reagent blank value). The Standards should be measured with increasing concentrations and from the brightest to the darkest colouration. - Page 162 Press the appropriate numerical key to select the required choose resolution resolution, e.g.: [Shift] + [3] for 0.01. 1: 1 2: 0.1 Note: 3: 0.01 Please enter the required resolution according to the instru- 4: 0.001 ment pre-sets: range max. resolutions 0.000 ...9.999 0.001 10.00 ...99.99...
-
Page 163: User Polynomials
Prepare the second standard and press [Test] key. S2: 0.10 mg/l prepare The display shows the input value and the measured absorp- press TEST tion value. Confirm with [ ] key. S2: 0.10 mg/l Note: mAbs: • Perform as described above to measure further stan- dards. - Page 164 Confirm with [ ] key. Note: Overwrite polynom? if the entered number has already been used to save a YES: 1, NO: 0 polynomial the display shows the query: • Press [Shift] + [0] or [ESC] keys to go back to method no. query.
- Page 165 Press [ ] or [ ] keys to select the required unit. choose unit: >> mg/l mmol/l mAbs µg/l Confirm with [ ] key. choose resolution Press the appropriate numerical key to select the required 1: 1 resolution, e.g.: [Shift] + [3] for 0.01. 2: 0.1 3: 0.01 Note:...
-
Page 166: Delete User Methods
Delete User Methods (Polynomial or Concentration) In principle a valid user method can be overwritten. An existing user method (Polynomial or Concentration) can be totally deleted as well and is removed out of the method selection list: Press [MODE], [Shift] + [6][6] keys. Mode Confirm with [ ] key. -
Page 167: Print Data Of User Methods
Print Data of User Methods (Polynomials & Concentration) With this Mode function all data (e.g. wavelength, unit ...) of stored user polynomials and concentration methods can be transferred to a PC. To receive the data, it is recommended that the computer software provided by Lovibond should be used. The software can be downloaded from www.lovibond.com/support. -
Page 168: Initialise User Method System
Initialise User Method System (Polynomials & Concentration) Power loss will cause incoherent data. The user method system must be initialised with this mode function to set it to a predefined state. ATTENTION: All stored user methods (polynomial & concentration) are deleted with initialisation. Press [MODE], [Shift] + [6][9] keys. -
Page 169: Langelier Saturation Index
2.6.7 Langelier Saturation Index (Water Balance) For calculation the following tests are required: • pH-value • Temperature • Calcium hardness • Total Alkalinity • TDS (Total Dissolved Solids) Run each test separately and note the results. Calculate the Langelier Saturation Index as described: Calculation of Langelier Saturation Index With Mode 71 (see below) it is possible to select between degree Celsius or degree Fahrenheit. -
Page 170: Selection Of Temperature Unit
pH value The display shows: 0<=pH<=12 +_ _ _ _ Enter the pH-value in the range between 0 and 12 and confirm with [ ] key. <Langelier> Langelier The display shows the Langelier Saturation Index. saturation index 0.00 Press [ ] key to start new calculation. Return to mode menu by pressing [ESC] key. -
Page 171: Photometer-Information
2.6.8 Photometer-Information Press [MODE], [Shift] + [9][1] keys. Mode Confirm with [ ] key. <System-Info> This method informs you about the current software version, Software: serial number, about the number of performed tests and V201.001.1.001.002 free memory capacity. Serial number: 151234 more: , cancel: Esc Press arrow key [ ] to display the number of performed... - Page 172 PM630_3 03/2018...
-
Page 173: Part 3 Enclosure
Part 3 Enclosure PM630_3 03/2018... -
Page 174: Unpacking
Unpacking Carefully inspect all items to ensure that every part of the list below is present and no visible damage has occurred during shipment. If there is any damage or something is missing, please contact your local distributor immediately. Delivery contents Standard contents for PM 630: 1 Photometer in plastic case 1 Instruction manual... -
Page 175: Technical Data
Technical data Display Graphic Display Serial Interface Bluetooth 4.0 for data transfer ® RJ45 connector for internet updates (see chapter 2.5) Light source light-emitting diode – photosensor – pair arrangement in a transparent measurement chamber Wavelength ranges: 1 = 530 nm IF = 5 nm 2 = 560 nm IF = 5 nm... -
Page 176: Abbreviations
Abbreviations Abbreviation Definition °C degree Celsius (Centigrade) °F degree Fahrenheit °F = (°C x 1.8) + 32 °dH degree German Hardness °fH degree French hardness °eH degree English Hardness °aH degree American Hardness Absorption unit ( = Extinction E) 1000 mAbs = 1 Abs = 1 A = μg/l (= ppb) Microgram per litre... -
Page 177: Troubleshooting
Troubleshooting 3.5.1 Operating messages in the display / error display Display Possible Causes Elimination Overrange reading is exceeding the range if possible dilute sample or use other measuring range water sample is too cloudy filtrate water sample too much light on the photo cell seal on the cap? Repeat measurement with seal on the cap of the vial. - Page 178 Display Possible Causes Elimination The calculation of a value Test procedure correct? (e.g. combined Chlorine) is If not – repeat test not possible Example 1: Example 1 The readings for free and total 0,60 mg/l free Cl Chlorine are different, but comb Cl considering the tolerances of 0,59 mg/l total Cl...
-
Page 179: General
3.5.2 General Finding Possible Causes Elimination Test result deviates from Chemical species not as Press arrow keys to select the the expected. required. required chemical species. No differentiation: Profi-Mode is switched on. Switch Profi-Mode off with e.g. for the Chlorine test Mode 50. -
Page 180: Declaration Of Ce-Conformity
Bevollmächtigte Person im Sinne des Anhangs II Nr. 1. A. Nr. 2, 2006/42/EG für die Zusammenstellung der technischen Unterlagen / Authorized person for compilation of technical documents on behalf of Annex II No. 1. A. No. 2, 2006/42/EC: Corinna Meier Name: c/o Tintometer GmbH, Schleefstr. 8-12, 44287 Dortmund Anschrift / Address: Dortmund 15.09.2015 Ort, Datum / Place and date of issue Rechtsgültige Unterschrift / Authorized signature... -
Page 181: Copyright And Trademark Notice
Copyright and Trademark Notice The Bluetooth word mark is a registered trademark owned by Bluetooth SIG, Inc. and any ® use by The Tintometer Group is under license. ® is a registered trademark of Cisco, Inc. and licensed to Apple, Inc. - Page 182 PM630_3 03/2018...
- Page 183 PM630_3 03/2018...
- Page 184 Fax: +44 (0)1980 625412 Switzerland sales@tintometer.com Germany www.lovibond.com Tintometer China Tintometer South East Asia Tintometer Brasilien Tintometer Indien Pvt. Ltd. Room 1001, China Life Tower Caixa Postal: 271 B-91, A.P.I.E. Sanath Nagar, Unit B-3-12, BBT One Boulevard, 16 Chaoyangmenwai Avenue,...
Need help?
Do you have a question about the Lovibond PM630 and is the answer not in the manual?
Questions and answers