Table of Contents
Advertisement
Quick Links
Advertisement
Table of Contents

Related Manuals for Strong SRT 43UD6593


Summary of Contents for Strong SRT 43UD6593
- Page 1 SMART ANDROID TV WITH DVB-T2/C/S2 SRT 43UD6593 Bedienungsanleitung Brugervejledning Manuel d’utilisation Brukerveiledning Manuale utente Gebruiksaanwijzing Manual del usuario Användarhandbok Manual do utilizador Korisnički priručnik Használati útmutató Uživatelský manuál www.strong-eu.com...
- Page 2 Supplied by STRONG Austria Represented by STRONG Ges.m.b.H. Teinfaltstraße 8/4. Stock 1010 Vienna, Austria Email: support_at@strong-eu.com www.strong-eu.com...
- Page 3 Hereby, STRONG declares that the device SRT 43UD6593 is in compliance with Directive 2014/53/EU. The full text of the EU declaration of conformity is available at the following internet address: https://eu.strong-eu.com/downloads/ Subject to alterations. In consequence of continuous research and development technical speci cations, design and appearance of products may change.
-
Page 4: Table Of Contents
TABLE OF CONTENT 1. INSTRUCTION 1.1 Safety Instructions 1.2 Storage 1.3 Accessories 1.4 Equipment set-up 2. INSTALLATION 2.1 Password setting: 2.2 Front panel 2.3 Rear panel 2.4 Remote control 2.5 Installing the batteries 2.6 Using the IR remote controls 3. FIRST TIME INSTALLATION 3.1 Channel installations for cable 3.2 Channel installations for Antenna 3.3 Channel installations for Satellite... -
Page 5: Instruction
1. INSTRUCTION 1.1 Safety Instructions Read all of the instructions before operating the set. Keep these instructions well for later use. Only use attachments/accessories speci ed or provided by the manufacturer (such as the exclusive supply adapter, battery etc.). ... -
Page 6: Accessories
the carton during the warranty period, to keep your device perfectly protected in the event of repair or warranty. 1.3 Accessories 1x installation instructions 1x Safety Instructions/Warranty Cards 2x Remote controls 2x AAA batteries 1.4 Equipment set-up Fig. 1 Install the display on a solid horizontal surface such as a table or desk. For ventilation, leave a space of at least 10 cm free all around the set. -
Page 7: Rear Panel
NOTE: The graphics are for representation only. 1. Power indicator /remote sensor 2. Speakers 2.3 Rear panel Fig. 3a NOTE: The graphics are for representation only. 43UD6953 1. HDMI 1 (ARC) Connect HDMI input signal from a signal source such as DVD, Blu-ray player or game console or directly to a Digital Ampli er that supports the ARC function. -
Page 8: Remote Control
11. HDMI 2 Connect HDMI input signal from a signal source such as DVD, Blu-ray player or game console. 12. USB 2.0 USB 2.0 port. NOTE: If the TV turns o when you plug a cable to any connector, just turn it on again. 2.4 Remote control This TV model supplies with 2 Remote control units (RCU). -
Page 9: Installing The Batteries
5. SUBT Enable/disable subtitles in DTV mode 6. EXIT Exit the current menu. Press to display EPG info in TV mode. Press to access the TV settings. 9. Navigate the menu. 10. OK Con rm the selection 11. Press to go back to previously viewed channel. -
Page 10: Using The Ir Remote Controls
• Do not place the remote control under direct sunlight which will cause deformation of the unit by heat. • When the remote sensor is under direct sunlight or strong lighting, the remote control will not work. If so, please change the lighting or TV's position, or operate the remote control closer to the remote sensor. - Page 11 Step 2 Press and key simultaneously, while poin ng to the TV bo om within the distance of 1 meter at least 3 seconds. Release your finger when the indicator light (red) of the remote flashes. Press and - key simultaneously, while pointing to the TV bottom within the distance of 1 meter at least 3 seconds, Release your nger when the indicator light (red) of the remote ashes.
- Page 12 Step 5 Make the most of your TV Sign in Skip If you have one on this page you can use your Google account to access additional services. By selecting Skip it is possible to skip this procedure. However, it will be possible to add an account later at the end of the installation by accessing the Settings >...
-
Page 13: Channel Installations For Cable
3.1 Channel installations for cable Tuner Mode Please select Antenna your tuner mode: Cable Satellite Select the tuner mode Cable and press OK to continue. Select the operator You can select only Ziggo one operator from the following list : Others Select one operator from the following list, or select Other if you don't have a prede ned operator or it is di erent from those listed. -
Page 14: Channel Installations For Antenna
Scan mode Cable Scan Configure Advance Please configure the cable info. Channel Scan Type Use “ENTER” key to se ng value Only digital channels and “RIGHT” key to next page. Please tune to your country home Frequency (KHz) max transponder frequency. 474000 Network ID 5555... - Page 15 Scan direc on Select the channel ordering method. Automa c Automa c Channel Ordering channel ordering is the default method. Pay TV ordering enable user presenta on of channel Pay TV Ordering numbers in a convenient form dedicated to Pay TV customers.
-
Page 16: Channel Installations For Satellite
3.3 Channel installations for Satellite Tuner Mode Please select Antenna your tuner mode: Cable Satellite Select the tuner mode Satellite and press OK to continue. Satellite installa on Do you want Start to start satellite channel installa on? Press OK to start with the satellite channel installation. Antenna type Next More... - Page 17 Single Satellite Tone Burst antenna type DiSEqC 1.0 DiSEqC 1.1 DiSEqC 1.2 Unicable I If you are looking for the LNB list you have to go to General and press OK. Select the operator General vùsat LNB list Next Astra4A/SES5 5E Eutelsat 7E Off...
- Page 18 Channel scan First, please connect the cable. Digital and analog channels Star the channel scan now? If you skip this step, Only analogue channels the channel scan could be performed in Menu. Only digital channels Skip scan First step is to connect the satellite. Then you must start the channel scan. If you skip this step, the channel scan can be done later by accessing the TV menu.
-
Page 19: Home Screen
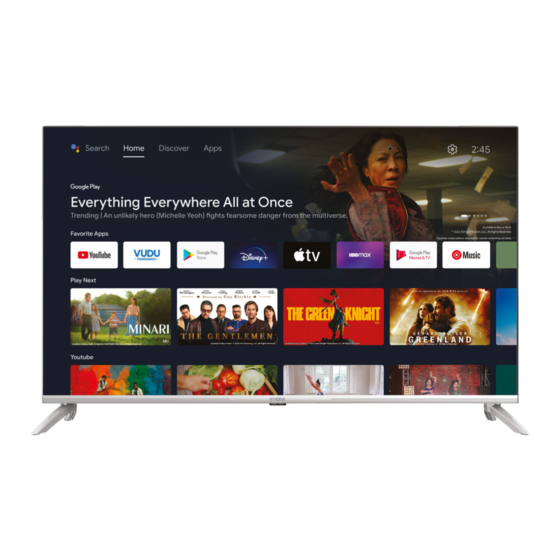
4. HOME SCREEN The Home screen is the main screen of this model of TV. It divided on few zones and lines and contains - Search line with possibility to enter text to search information or content, related with this text. - Noti cation corner, which provide information about system noti cations and messages. -
Page 20: Network & Internet
4.2 Network & Internet Connection to internet allows to install and use internet applications (i.e. You Tube, Net ix, etc.) and to enjoy of other advantages of Smart TV. Network & Internet Search Home Discover Apps Network privacy policy Wi-Fi Available networks XXXX Connected... - Page 21 Connecting to a wired network Fig. 6a Note: The graphics are for representation only. To connect to a wired network 1. Ensure you have: - An Ethernet cable long enough to reach your TV - A router or modem with an available Ethernet port - A highspeed Internet connection 2.
-
Page 22: Live Tv Usage
NOTE: The graphics are for representation only. To connect to a wireless network: 1. Ensure you have: - A router broadcasting a 2.4GHz wireless signal - A highspeed Internet connection 2. Select your Wi-Fi network from the Available networks list and enter password for connection. 3. -
Page 23: Watching Tv Channels
then button to get to Channels chapter. Select Channel and follow Once set the correct source press the instructions for the channels installation. Channels Channel Program Guide TV op ons 5.2 Watching TV channels When the installation is completed, you can use TV set for watching of installed TV programs. Some helpful features for comfortable watching. - Page 24 It contains such items: Program Guide, Channel. Program Guide gives access to EPG. Please refer to Chapter 5.3 for more information how to use it. Channel tool allows you to search for channels (please refer to Chapter 5.1) and modify the Parental Control settings.
-
Page 25: Smart Tv Possibilities
Power allows you to change all settings related to device management such as the Sleep Timer or automatic Power-o in case of no signal. CI Card: if an CAM device is used, this option allows access to the main menu of the CAM or the Card connected to it. -
Page 26: Device Preferences Menu
1. Some USB storage devices may not be compatible to operate smoothly with this TV. 2. Back up all the data in the USB storage device in case data is lost due to an unexpected accident. STRONG does not assume any liability for the losses by misuse or malfunction. Data backup is consumer's responsibility. -
Page 27: Multimedia Player
7. When using a USB Hard Disk Drive, which is not powered independently, ensure its power does not exceed 500 mA. Otherwise, the TV system will change into standby mode, and you must pull out the USB Hard Disk and restart the TV system. 8. -
Page 28: Play Videos
Press to open menu Device Video Picture Music 007-Skyfall Batman Begins Focus (2015) Your TV will collect all supported les of selected media type and will show them in one list. Use and to select le. Press OK for playback. During playback you could use Multimedia buttons on your RCU or use on-screen commands, available from menu by ... -
Page 29: Browse Photos
Menu Picture > Sound > Aspect Ra o > Auto Play Mode > Normal Sub tle > Audio Track > Audio Track1 Available Menu options: Picture gives access to all settings relating to the screen. Sound gives access to all settings relating to audio. Aspect Ratio this option allows you to adapt the video format to the screen. -
Page 30: Play Music
Press Device Video Picture Music STRONG HDD SD Card NOTE: • This menu shows only supported by Smart Player les. • Files with other le extensions may not be displayed, even if they are saved on the same USB storage device. -
Page 31: Troubleshooting
Before calling a service technician, review following information for possible causes and solutions for the problem you are experiencing. If the TV does not work properly after checking it, please contact your local service line or STRONG dealer. Alternatively, you can send a support mail via our website www.strong-eu.com. -
Page 32: Specifications
Satellite dish is too small, trees or buildings in path. Change to a larger dish or change position of dish. d) Signal is too strong, dish is oversized. Connect a signal attenuator to the LNB input. Ask a local satellite specialist for advice. - Page 33 7.3 kg Data Protection: Please be aware that STRONG, its manufacturing partners, the application providers and the providers of the services may collect and use technical data and related information, including but not limited to technical information about this device, system and application software and peripherals. STRONG, its manufacturing...
Need help?
Do you have a question about the SRT 43UD6593 and is the answer not in the manual?
Questions and answers