Table of Contents
Advertisement
Quick Links
Advertisement
Table of Contents

Related Manuals for Heatrae Sadia Advance Plus


Summary of Contents for Heatrae Sadia Advance Plus
- Page 1 Advance Plus Installation Manual...
- Page 2 Translation of the original document.
- Page 3 Do not forget to register the product via the Heatrae Sadia website www.heatraesadia.com. Although this manual has been drawn up with the utmost care, no rights may be derived from this document.
-
Page 4: Table Of Contents
Contents 1. Safety and other regulations 1.1. Safety 2. Product information 2.1. Accessories 2.2. Technical Specifications 2.3. Capacity 2.4. Product fiche information 2.5. Dimension drawings 2.6. Parts 2.7. Controls 2.8. Recycling 3. Installation 3.1. Installation requirements 3.2. Installing the ventilation unit 3.3. -
Page 5: Safety And Other Regulations
Inspect the product regularly for faults. In ● hazards. the event of faults, immediately contact Cleaning and maintenance by the user your installer or Heatrae Sadia. ● may not be done by children or people Switch the product off if: ●... - Page 6 Ensure that the device drains into a sewer ● system which leads outside, and is suitable and installed for this purpose. Ensure that air valves and grilles are not ● obstructed, and that they are clean. 1) A qualified installer is one who is employed by a central heating or civil engineering installation company registered with the Chamber of Commerce and who is registered in the SEI qualification register, or holds a Sterkin certificate.
-
Page 7: Product Information
2. Product information The Advance Plus consists of a central balanced ventilation unit with heat recovery and a duct connection set. The ventilation unit has an automatic bypass valve. The operation of the bypass valve is described under Bypass control. -
Page 8: Technical Specifications
2.2. Technical Specifications Description Symbol Unit Advance Plus DIMENSIONS AND WEIGHT Dimensions [HxWxD] — 760 x 597 x 290 Weight — CONNECTIONS HRU duct adapters connection — 2x Ø125 external (2x) Condensate drain — 2x Ø14 external GENERAL IP classification —... -
Page 9: Product Fiche Information
2.4. Product fiche information Heatrae Sadia Description Symbol Unit Advance Plus Specific energy consumption class — — Specific energy consumption under average climate kWh/(m conditions Specific energy consumption under warm climate kWh/(m conditions Specific energy consumption under cold climate kWh/(m... -
Page 10: Dimension Drawings
2.5. Dimension drawings 230V >50 (1) >50 (1) >360 (1) 1) Minimum clearance around the ventilation unit. Legend Exhaust air to outside Exhaust air from dwelling Supply air from outside Supply air to dwelling Condensate drain (2x) -
Page 11: Parts
2.6. Parts Legend Ventilation unit Motor module Duct adapter EPP side Mounting bracket Duct adapter duct side Wire bracket Filter Filter cap Ceiling mounting bracket Bypass valve... -
Page 12: Controls
2.7. Controls This sensor measures the relative humidity in the room. The sensor translates the measured value into a ventilation demand and The ventilation unit is normally equipped with a three-level control communicates this wirelessly to the ventilation unit, with which the which allows the flow rates at low and high speed to be adjusted as sensor is paired, or to a DF/QF controller for the room where it is desired with potentiometers on the unit. -
Page 13: Recycling
2.7.2. Bypass control 2.7.4. Dirty filter control The ventilation unit is equipped as standard with a bypass valve in The controller of the ventilation unit uses a smart counter to keep the exhaust air line. This makes it possible to control what happens track of when the filters need to be cleaned or replaced. -
Page 14: Installation
Check that a ceiling mounting bracket and a condensate hose are included with the ventilation unit. In order to avoid noise complaints, Heatrae Sadia advises fitting e) Place the ventilation unit upright on the floor, with the duct silencers on the ducts from and to the dwelling rooms. - Page 15 Remove the two wire brackets from the unit and set them aside. h) Then remove both duct adapters from the mounting bracket and put everything to one side. g) Unlock both duct adapters on the front of the unit using a flat- head screwdriver.
- Page 16 3.2.2. Mounting positions The ventilation unit can be mounted on the wall, floor or ceiling. ä Caution! Depending on the configuration of the ducts, the ventilation unit can be wall mounted with the standard duct adapter Mount the ventilation unit on a concrete surface, not on a arrangement (as delivered) or the inverse arrangement (see wooden or plaster surface or a surface with insufficient load- Converting before mounting on page 18).
- Page 17 Mounting positions Wall mounting, standard Wall mounting, inverse Floor mounting, standard Ceiling mounting, inverse See Converting before mounting on page 18. Supply air from outside Supply air to dwelling Exhaust air to outside Exhaust air from dwelling...
- Page 18 3.2.3. Converting before mounting c) Rotate both ventilation unit adapters by 180°. The ventilation unit is delivered as standard with the air supply ducts on the wall side (mounting bracket side). This is the correct position for wall and floor mounting. For ceiling mounting, or if this is more convenient with wall mounting, the ventilation unit can easily be inverted.
- Page 19 3.2.4. Wall mounting c) Hook the two wire brackets onto the outside of the duct adapters using the holes intended for this purpose. a) Attach the mounting bracket to the wall using anchor plugs and 6 mm screws (not provided). (575) >125 (1) 425 (2)
- Page 20 3.2.5. Ceiling mounting b) Slip the duct adapters back over the mounting bracket and push the two adapters to the left and to the right as far as they will go. ä Caution! With this mounting option, the ventilation unit needs to be mounted with a tilt of at least 5°...
- Page 21 3.2.6. Floor mounting e) Now secure both wire brackets. First hook each bracket onto ä the outside of the duct adapter using the holes intended for Caution! this purpose, and then clip the underside of the bracket into the With this mounting option, the ventilation unit needs to be underside of the housing of the ventilation unit.
-
Page 22: Connecting The Condensate Drain
3.3. Connecting the condensate drain d) Hook the two wire brackets onto the outside of the duct adapters using the holes intended for this purpose. ä Caution! If the ventilation unit is situated outside the thermal shell of the dwelling (for example in a non-insulated attic), the condensate drain must be thermally insulated up to the ventilation unit. -
Page 23: Connecting The Ducts
The Advance Plus has two duct adapters at the top. Each duct adapter has two nozzles for connection to ducts with a diameter of 125 mm. -
Page 24: Electrical Connection
3.4.4. Exhaust air from dwelling The ventilation unit draws exhaust air out of the dwelling through this port. This duct does not normally need to be thermally insulated. Thermally insulated and vapour-tight ductwork is only necessary if the ventilation unit is located outside the thermal shell of the dwelling (for example in a non-insulated attic). -
Page 25: Operation
4. Operation 4.1. Control options 4.2. Pairing and unpairing RF remote controls The ventilation unit has several pre-programmed modes. A number 4.2.1. Pairing RF control switches of control switches are available for active adjustment to the right mode and ventilation capacity: It is best to pair wireless switches with a ventilation unit in the Wireless RF control switch, 230 V supply, with two levels, auto ●... -
Page 26: Pairing And Unpairing The Rf Status Indicator
4.3. Pairing and unpairing the RF status indicator control For information about pairing and unpairing the RF status indicator control, see the documentation included with that product. 4.4. Pairing and unpairing RF sensors 4.4.1. Pairing RF sensors Pair wireless sensors with the ventilation unit as follows: a) Disconnect power to the ventilation unit. -
Page 27: Use
5. Use 5.1. Preparation 5.2. Putting into service Before commissioning Follow the steps below to correctly put the ventilation unit into service: The ventilation unit and accessories must be assembled. ● a) Disconnect power to the ventilation unit. The duct system must be assembled. ●... -
Page 28: Adjusting The Capacity
5.3. Adjusting the capacity 5.3.1. High speed setting If necessary, adjust the high speed setting with the ä Caution! right-hand potentiometer. This potentiometer is set to 125 m /h by default. The adjustment range goes from The capacities (high and low) of the ventilation unit must be set 75 to 150 m /h (at 150 Pa). -
Page 29: Inspection And Maintenance
If the ventilation system is being used under harsh operating regulations are based on normal operating conditions. conditions or in a very dirty environment, extra maintenance may be required. 6.1. Inspection and maintenance schedule Advance Plus inspection schedule User Installer Check for unusual noises coming from Noise... -
Page 30: Check For Unusual Noises
6.3. Inspecting and cleaning the fan Note It is not possible to remove the heat exchanger from the ä Caution! ventilation unit. Cleaning the heat exchanger is not necessary under normal conditions if the correct filters are used and If the unit is ceiling mounted, be careful to avoid being hit by replaced on schedule. -
Page 31: Inspecting And Cleaning The Bypass Valve
6.4. Inspecting and cleaning the bypass valve e) Take the whole motor module including fans out of the ventilation unit. To do so, use the handle on the motor module. a) Disconnect power to the ventilation unit. b) Unlock the duct adapters using a screwdriver. Inspect the blades of both impellers and clean them if necessary (see next step). - Page 32 e) Take the whole motor module including fans out of the g) Now, carefully pull the bypass valve out of the EPP housing. ventilation unit. To do so, use the handle on the motor module. There are two finger-holes in the valve for this purpose. Remove the yellow cable bracket from the EPP housing, and h) First clean the bypass valve using a vacuum cleaner to remove carefully remove the cable from the cable channel.
-
Page 33: Inspecting, Cleaning And Replacing Filters
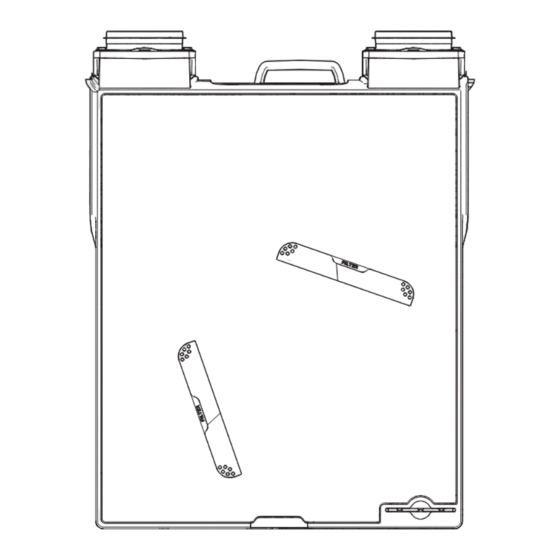
6.5. Inspecting, cleaning and replacing filters c) Remove the filters from the ventilation unit. There are tabs at the front of the filters for this purpose. Note The ventilation unit comes with G3 filters as standard. These filters are very suitable for use as "construction dust filters" after initial completion of the dwelling. -
Page 34: Rf Status Indicator Control Maintenance
6.6. RF status indicator control maintenance g) Put both filter covers back in the front panel. The RF status indicator control is mains powered, so it does not have any batteries that need to be replaced. The only maintenance to be done consists of cleaning the outside of the device with a damp cloth if necessary. -
Page 35: Faults
7. Faults The fan has stopped Cause Solution a) Frost control is active. When the outside temperature rises ● above -1°C, the fan will start running again. Install a pre-heater in the supply duct for ● outside air. b) The power is switched off. Switch the power back on. - Page 36 The ventilation unit is not responding to the RF sensors (PIR sensor, 230 V CO sensor, RV sensor) Cause Solution a) The system is not in Auto mode. If desired, place the system in Auto ● mode. b) Frost control is active. When the outside temperature rises ●...
- Page 37 The fan suddenly starts running much faster or slower (for no apparent reason) Cause Solution a) After using the timer function, the ventilation If desired, change the system setting. ● unit switches back to the last selected speed before the timer was started. b) The RF remote control from a neighbouring Disconnect power to the ventilation unit ●...
- Page 38 The air quality in the dwelling is not good / air supply and extraction in the dwelling are not working properly Cause Solution a) One or both filters are dirty or blocked. Clean or replace dirty/blocked filters. ● b) The valves are dirty or blocked. Clean the valves.
-
Page 39: Service Parts
8. Service parts Item number Description 7035035 Entire motor module 95615089 Motor module printed circuit board 95607725 Cable harness for motor module with outside temperature sensor 95607827 Power cable 95970205 Bypass valve assembly 95970009 G4 filter set 95970010 F7 filter set 95607728 Filter caps, set of 4 95607822... -
Page 41: Warranty
Faults that have been caused by repairs by third parties without ● authorisation from Heatrae Sadia. If the appliance does not function correctly or develops a fault please contact Heatrae Sadia immediately. Ensure that only genuine spares are used for repairs. -
Page 42: Declarations
10. Declarations EG-Verklaring van overeenstemming | Déclaration de conformité CE | EG-Konformitätserklärung | EC Declaration of Conformity Voldoet aan de geharmoniseerde Europese normen | Heatrae Sadia Répond aux normes Européennes harmonisées | Hurricane Way Entspricht den harmonisierten europäischen Normen |... - Page 44 HEATRAE SADIA HEATING Hurricane Way, Norwich NR6 6EA www.heatraesadia.com SERVICE +44 (0)344 871 1535 EMAIL customer.support@heatraesadia.com HS | 36006180 issue 04 01-01085-002 | ID 2016-11-10-1453...
Need help?
Do you have a question about the Advance Plus and is the answer not in the manual?
Questions and answers