
Related Manuals for Rockwell Automation Allen-Bradley 1746-HSCE


Summary of Contents for Rockwell Automation Allen-Bradley 1746-HSCE
- Page 1 (217) 352-9330 | Click HERE Find the Rockwell / Allen-Bradley 1746-HSCE at our website:...
- Page 2 SLC™ 500 4-Channel Analog I/O Modules (Catalog Numbers 1746-NI4, 1746-NIO4I, 1746-NIO4V, 1746-NO4I, and 1746-NO4V) User Manual Artisan Technology Group - Quality Instrumentation ... Guaranteed | (888) 88-SOURCE | www.artisantg.com...
- Page 3 In no event will Rockwell Automation, Inc. be responsible or liable for indirect or consequential damages resulting from the use or application of this equipment.
- Page 4 Summary of Changes The information below summarizes the changes to this manual since the last printing. To help you find new and updated information in this release of the manual, we have included change bars as shown to the right of this paragraph.
- Page 5 Summary of Changes Publication 1746-UM005B-EN-P - June 2004 Artisan Technology Group - Quality Instrumentation ... Guaranteed | (888) 88-SOURCE | www.artisantg.com...
-
Page 6: Table Of Contents
Table of Contents Preface Who Should Use this Manual..... . . P-1 Purpose of this Manual ......P-1 Related Documentation . - Page 7 Table of Contents Chapter 4 Module Operation and System Interface between the Module and the Processor ..4-1 Entering Module ID Codes ..... . 4-1 Considerations Addressing Analog Modules .
- Page 8 Table of Contents Calculating the Shifted Linear Relationship ..6-15 Using Standard Math ......6-16 Using the Scale with Parameters (SCP) Instruction .
- Page 9 Table of Contents Publication 1746-UM005B-EN-P - June 2004 Artisan Technology Group - Quality Instrumentation ... Guaranteed | (888) 88-SOURCE | www.artisantg.com...
-
Page 10: Preface
• the purpose of this manual • related documentation • conventions used in this manual • Rockwell Automation support Who Should Use this Use this manual if you are responsible for designing, installing, programming, or troubleshooting control systems that use SLC 500 Manual 4-Channel Analog I/O Modules. -
Page 11: Related Documentation
Preface Related Documentation The following documents contain additional information concerning Rockwell Automation products. To obtain a copy, contact your local Rockwell Automation office or distributor. Read this Document Document Number In-depth information on the SLC Instruction Set. SLC 500 Instruction Set Reference Manual... -
Page 12: Common Techniques Used In This Manual
If you would like a manual, you can: • download an electronic version from the internet at: – www.theautomationbookstore.com – http://ab.com/manuals • order a printed manual by: – contacting your local distributor or Rockwell Automation representative – visiting www.theautomationbookstore.com – calling 1.800.963.9548 (USA/Canada) or 001.330.725.1574 (Outside USA/Canada) - Page 13 Preface Publication 1746-UM005B-EN-P - June 2004 Artisan Technology Group - Quality Instrumentation ... Guaranteed | (888) 88-SOURCE | www.artisantg.com...
-
Page 14: Overview
Chapter Overview This chapter describes how analog is used and provides two application examples of analog. The types of available analog modules and their related specifications are also described. How to Use Analog Analog refers to the representation of numerical quantities by the measurement of continuous physical variables. -
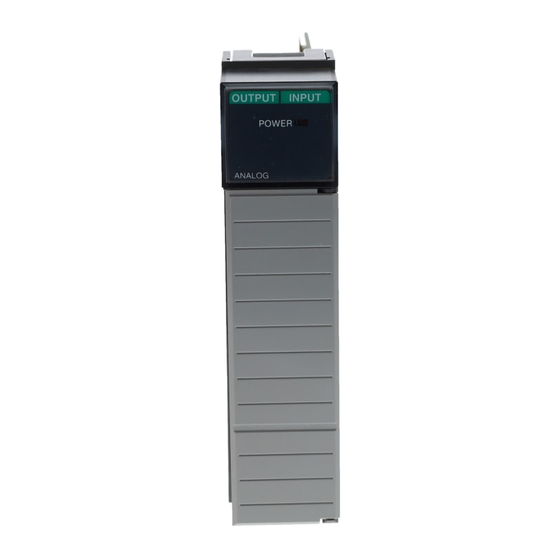
Page 15: 1746-Ni4 Analog Input Module
Overview 1746-NI4 Analog Input Module The 1746-NI4 Analog Input module contains 4 analog input channels that are user selectable per channel for voltage or current to support a variety of monitoring and controlling applications 1746-NIO4I and NIO4V Analog Combination Modules The NIO4I and NIO4V Analog Combination I/O modules provide two input and two output channels in a single slot module. -
Page 16: Quick Start For Experienced Users
Chapter Quick Start for Experienced Users This chapter can help you to get started using analog. The procedures are based on the assumption that you have an understanding of SLC 500 products. You should understand electronic process control and be able to interpret the ladder logic instructions required to generate the electronic signals that control your application. -
Page 17: Procedures
Quick Start for Experienced Users Procedures Check the contents of shipping box. Reference Unpack the shipping box making sure that the contents include: • Analog I/O module (Catalog Number 1746-Series) • installation instructions (publication 1746-IN008) If the contents are incomplete, call your local Allen–Bradley representative for assistance. Determine your power requirements for the modular controller. - Page 18 Quick Start for Experienced Users Configure the module using the DIP switches (analog inputs only). Reference Each analog input channel can be configured for either voltage or current. Locate the DIP Chapter 3 switches on your module and set them for your application. (Installing and Wiring Your Analog Module)
- Page 19 Quick Start for Experienced Users Make sure system power is off; then insert the analog module into your 1746 chassis. In this example procedure, local slot 1 is selected. Top and Bottom Module Release(s) Card Guide Wire the module. Reference Important: Follow these guidelines when wiring the module.
- Page 20 Quick Start for Experienced Users analog IN 0 + source IN 0 earth ANL COM ground IN 1 + analog IN 1 source ANL COM earth IN 2 + ground IN 2 ANL COM Jumper unused IN 3 + inputs. IN 3 ANL COM NIO4I &...
- Page 21 Quick Start for Experienced Users Configure system I/O configuration. Reference Configure your system I/O configuration for the particular slot the analog module is in. When Chapter 4 assigning an I/O module to a slot location, select the module from the displayed list. If not listed, (Module select OTHER at the bottom of the list and enter the module’s ID code at the prompt.
- Page 22 Quick Start for Experienced Users Understanding analog inputs. Reference Analog inputs convert current and voltage signals into 16–bit (max.) integer values and place Chapter 4 them in the input image for the slot that the analog module resides in. (Module Operation and System Considerations)
- Page 23 Quick Start for Experienced Users Understanding analog outputs. Reference Analog outputs convert 16-bit integer values placed in the output image to voltage or current Chapter 4 signals for the slot that the analog card is in. (Module Operation and System Considerations) Address 1746-NO4 1746-NI04I, -NI04V...
-
Page 24: Installing And Wiring Your Analog Module
Chapter Installing and Wiring Your Analog Module To obtain the maximum performance from an analog module, proper module installation is imperative. This chapter describes the procedures that you must follow to install the analog module in an SLC 500 system. The following items are described: •... -
Page 25: Determining Your Power Requirements For A Modular Controller
Installing and Wiring Your Analog Module Determining Your Power Analog modules require both 5V dc and 24V dc power from the backplane of the SLC 500 system. However, the NO4I and NO4V Requirements for a analog modules can use an external 24V dc power supply. This Modular Controller eliminates the 24V dc backplane power requirement, providing configuration flexibility if SLC power supply loading is critical. - Page 26 Installing and Wiring Your Analog Module NIO4I NIO4V NO4I NO4V • • • • ∇ • • • • ∇ • • • • IA16 ∇ • • • • ∇ • • • • ∇ • • • • IM16 ∇...
- Page 27 Installing and Wiring Your Analog Module NIO4I NIO4V NO4I NO4V ∇ • • • • IV32 ∇ • • • • IB32 ∇ ∇ • ∇ ∇ ∇ ∇ ∇ NO4I ∇ ∇ ∇ ∇ ∇ NO4V ∇ • • •...
-
Page 28: Configuring Your Module
Installing and Wiring Your Analog Module Configuring Your Module The NI4, NIO4I and NIO4V analog modules have user selectable DIP switch settings which allow you to configure the input channels as either current or voltage inputs. The switches are located on the analog module board. -
Page 29: External Power Switch For The 1746-No4I And -No4V
Installing and Wiring Your Analog Module External Power Switch for the 1746-NO4I and -NO4V The NO4I and NO4V analog output modules have an external 24V dc power switch, SW1, which gives you the option of using an external power supply. In the UP position, power is drawn from an external power source. -
Page 30: Removing The Analog Module Terminal Block
Installing and Wiring Your Analog Module Never install, remove, or wire modules with power ATTENTION applied to the chassis. Also, do not expose analog modules to surfaces or other areas that may typically hold an electrostatic charge. Electrostatic charges can destroy the analog circuitry. -
Page 31: Wiring Considerations
Installing and Wiring Your Analog Module 2. Align the circuit board of the analog module with the card guide of the chassis. 3. Slide the module in until both top and bottom retaining clips are secured. Top and Bottom Module Release(s) Card Guide 4. -
Page 32: System Wiring Guidelines
Installing and Wiring Your Analog Module System Wiring Guidelines Use the following guidelines in planning the system wiring for the analog modules: • all analog common terminals (ANL COM) are electrically connected inside the module. ANL COM is not connected to earth ground inside the module. -
Page 33: Determining The Cable Length
3-10 Installing and Wiring Your Analog Module F oil Shield Insulation Black Wire Drain Wire Clear Wire Determining the Cable Length Determine the length of cable you will need to connect a channel to its input or output device. Remember to leave additional length to route the drain wire and foil shield for earth grounding. - Page 34 Installing and Wiring Your Analog Module 3-11 5. At End 2, cut the drain wire and foil shield back to the cable and apply shrink wrap. 6. Connect the signal wires (black and clear) to the terminal block and the input and output devices. The recommended maximum torque is 5 lb.-in (0.565 NM) for all terminals.
-
Page 35: Labeling And Installing The Terminal Block
3-12 Installing and Wiring Your Analog Module Labeling and Installing the The terminal block has a write-on label. Labeling the terminal block will help ensure that it is installed on the correct module. Terminal Block SLOT ____ RACK ____ MODULE _____ Note: The black dot on the terminal block label indicates the position of terminal 0. - Page 36 Installing and Wiring Your Analog Module 3-13 analog IN 0 + source – IN 0 – earth ANL COM ground IN 1 + analog IN 1 – source ANL COM – earth IN 2 + ground IN 2 – Jumper unused ANL COM inputs.
-
Page 37: Wiring Schematics For 2, 3, And 4-Wire Analog Input Devices
3-14 Installing and Wiring Your Analog Module Wiring Schematics for 2, 3, and 4-Wire Analog Input Devices Important: The module does not provide loop power for analog inputs. Use a power supply that matches the transmitter specifications. 2-Wire Transmitter Transmitter –... -
Page 38: Wiring Schematic For Single-Ended Analog Input Connections
Installing and Wiring Your Analog Module 3-15 Wiring Schematic for Single-ended Analog Input Connections When wiring single-ended analog input devices to the analog input card, the number of total wires necessary can be limited by using the ANALOG COMMON terminal. Note that dif ferential inputs are more immune to noise than single-ended inputs. - Page 39 3-16 Installing and Wiring Your Analog Module • group analog and low voltage dc modules away from ac I/O or high voltage dc modules. A system may malfunction due to a change in the operating environment after a period of time. We recommend periodically checking system operation, particularly when new machinery or other noise sources are installed near the SLC 500 system.
-
Page 40: Interface Between The Module And The Processor
Chapter Module Operation and System Considerations This chapter describes: • Interface between the Module and Processor • System Considerations Interface between the This section describes how to set up an analog module in a SLC 500 system. Module and the Processor Entering Module ID Codes When configuring an analog module for an SLC 500 system using your programming software, a list of the different I/O modules, including... -
Page 41: Addressing Analog Modules
Module Operation and System Considerations Addressing Analog Modules NI4 - Each input channel of the NI4 is addressed as a single word in the input image table. The NI4 uses a total of 4 words in the input image table. The converted values from channels 0 through 3 are addressed as input words 0 through 3 respectively for the slot where the module resides. - Page 42 Module Operation and System Considerations The following illustration shows I/O addressing for the analog modules. SLC 500 SLC 5/01 or 5/02 Data Files Output Image 1746-NI4 Address Analog Input Module Input Input Channel 0 Word 0 I:e.0 Image Input Input Input Channel 1 Word 1 I:e.1...
-
Page 43: Bit Level Addressing
Module Operation and System Considerations Bit Level Addressing The following bit maps show bit level addressing for the analog inputs and outputs. The input channel converter resolution is 16 bits, or 1 word. The output channel converter resolution is 14 bits and is loaded from the most significant 14 bits of the associated output word. -
Page 44: Processor Update Of Analog Data
Module Operation and System Considerations Processor Update of Analog Data The analog input and output data is updated by the processor once during each scan of the user program. The table below shows typical analog update scan times and the number of input and output bits for the specified modules. -
Page 45: Converting Analog Input Data
Module Operation and System Considerations If you are using the Hand-Held Terminal (HHT) or the Data Table Access Module (DTAM) to monitor input and output data, the binary ™ radix is the only available option. To view the analog input and output data in decimal radix, the data must be moved to an integer data file. -
Page 46: Converting Analog Output Data
Module Operation and System Considerations To determine an approximate current that an input value represents, you can use the following equation: 20 mA × input value = input current (mA) 16,384 The Input Value is the decimal value of the word in the input image for the corresponding analog input. - Page 47 Module Operation and System Considerations Voltage Range Decimal Number of Resolution per Representation for Significant Output Word Bits -10 to +10V dc -32,768 to +32,764 14 bits - 1LSB 1.22070 mV 0 to +10V dc 0 to +32,764 13 bits - 1LSB 0 to 5V dc 0 to +16,384...
-
Page 48: System Considerations
Module Operation and System Considerations System Considerations This section describes the system considerations for an analog module. These include: • safe state for outputs • retentive programming • input out-of-range detection • response to slot disable • input channel filtering Safe State for Outputs Whenever an SLC 500 system is NOT in the RUN mode, the outputs on the analog module are automatically forced to 0 Volts or 0 mA by... -
Page 49: Retentive Analog Output Example
4-10 Module Operation and System Considerations fault. Once the fault condition is corrected and the major fault bit in the processor is cleared, the retained data is sent to the analog output channels. If you choose not to use the retentive programming option, retained data is not sent to the output channels. -
Page 50: Non-Retentive Analog Output Example
Module Operation and System Considerations 4-11 Non-Retentive Analog Output Example The following example shows a non-retentive program during a program execution and for a mode change or power cycle. I1:1.0/0 MOVE Source 32767 Dest O0:2.0 I1:1.0/0 MOVE Source Dest O0:2.0 In the above example, as long as discrete input 0 is ON, the value 32767 is transferred to analog output channel 0. - Page 51 4-12 Module Operation and System Considerations which exceed low and high limits respectively. For this example, the analog input value is in word 1 of slot 1 (I1:1.1). Whenever the input value exceeds a limit, this program latches a binary variable in memory that could serve as an alarm indication at some other point in the program.
-
Page 52: Response To Slot Disable
Module Operation and System Considerations 4-13 Response to Slot Disable You have the ability to disable any slot in the chassis using the processor. Before disabling any slot containing an analog module, it is important to consider how the analog module will respond when the slot is disabled. -
Page 53: Input Channel Filtering
4-14 Module Operation and System Considerations Input Channel Filtering The input channels for all of the analog modules incorporate extensive on board signal conditioning. The purpose of this conditioning is to reject the high frequency noise that can couple into an analog input signal while passing the normal variations of the input signal. - Page 54 Module Operation and System Considerations 4-15 If power line noise is coupling into the input signal through the input cable, the proper use of differential inputs reduces the effect of noise. With differential inputs, noise couples into both the plus (+) and minus (-) inputs where it is attenuated by over 105 dB (60 Hz common mode rejection).
- Page 55 4-16 Module Operation and System Considerations Publication 1746-UM005B-EN-P - June 2004 Artisan Technology Group - Quality Instrumentation ... Guaranteed | (888) 88-SOURCE | www.artisantg.com...
-
Page 56: Testing The Slc 500 System
Chapter Testing Your Module The purpose of this chapter is to help you isolate problems in a systematic and controlled manner before beginning normal system operation. If your analog module is installed in the expansion chassis of a fixed system, test your system using the procedures described in the SLC 500 Fixed Hardware Style Installation &... -
Page 57: Inspect The Analog Module
Testing Your Module Inspect the Analog Module Problems can be prevented by inspecting the analog module before installing it in the SLC 500 system. Inspection should include the following steps: 1. Make sure that all voltage/current mode selection DIP switches are set properly (inputs only). -
Page 58: Power Up The Slc 500 System
Testing Your Module In some instances, you may not be able to disconnect a device the preferred way. In these cases, open the output circuit at a point as close as possible to the motion-causing device. For example, your output might be a relay coil which in turn energizes a motor starter. If you cannot disconnect the motor wires, open the circuit at a point between the motor starter and the relay contact. -
Page 59: Testing Analog Inputs
Testing Your Module Testing Analog Inputs Before testing the analog module input channels, the SLC 500 system must be installed and tested according to the SLC 500 Fixed Hardware Style Installation & Operation Manual (publication 1747-6.21) or the SLC 500 Modular Hardware Style User Manual (publication 1747-UM011). - Page 60 Testing Your Module To test the analog inputs follow these steps: 1. Determine the boundary conditions for the analog module input channel. For example, if the input channel is connected to a sensor that has an output range of 1 mA to 5 mA, the boundary conditions would be 1 mA (lower) and 5 mA (upper).
-
Page 61: Testing Analog Outputs
Testing Your Module 10. Repeat steps 1 through 8 for the remaining analog inputs. 11. If any of the analog input channels do not pass the start–up procedure, check for the following potential causes: • The processor is not in the TEST/CONTINUOUS scan mode. •... - Page 62 Testing Your Module device, properly configured, and must have no rungs in its ladder program. The analog module LED must be illuminated. The procedure described in this section for testing ATTENTION analog module output channels assumes that all I/O module outputs that normally activate prime movers or other potentially dangerous devices have been disconnected from these devices.
- Page 63 Testing Your Module 3. Create and save the test rung shown below. MOVE Source N7:0 Dest O:e.x "e" is the slot number of the analog module "x" is the number of the analog module output channel being tested 4. Download the program to the processor and enter the RUN mode.
-
Page 64: Addressing, Out-Of-Range Detection, And Scaling Of Analog
Chapter Programming Examples This chapter shows several programming examples that provide additional capabilities such as: • Addressing, Out-of-Range Detection, and Scaling of Analog Inputs • Addressing and Scaling of Analog Outputs • Scaling Offsets when > 32,767 or < -32,768 •... -
Page 65: Calculating The Linear Relationship
Programming Examples The scaling operation is displayed in the following graph. It displays the linear relationship between the input and the resulting scaled values. 500°C (Scaled max.) Scaled Value 300°C Process operating range 275°C 100°C (Scaled min.) 0=0V dc High 32767 = 10V dc –... -
Page 66: Calculating The Out-Of-Range Flag Using The Scale Instruction
Programming Examples Calculating the Out-of-Range Flag Using the Scale Instruction Use the following equation to calculate the low and high limit input values which determine the out-of-range flag. Input value = (scaled value - offset) / slope low limit (275 - 100) / (400/32,767) = 14,344 high limit (300 - 100) / (400/32,767) = 16,393 Once you have calculated the linear relationship and the out-of-range flag value, this example allows you to:... -
Page 67: Using Standard Math
Programming Examples Using Standard Math Rung 2:0 Check for below allowable range Below range flag | | +LES–––––––––––––––+ |–+LESS THAN +–––––––––––––––––––––––––––––––––––––––––––––––––( )–––––| | |Source A I:1.1| | |Source B 14344| | +––––––––––––––––––+ Rung 2:1 Check for above allowable range Above range flag | | +GRT–––––––––––––––+ |–+GREATER THAN... - Page 68 Programming Examples Rung 2:4 Scale the analog input value and process the result only when it is within the acceptible range | Below |Above Multiply | range flag|range flag by the scaled range +MUL–––––––––––––––+ |––––]/[––––––––]/[–––––––––––––––––––––––––––––––––––+–+MULTIPLY +–+–| | |Source A I:1.1| | | | | | | |Source B 400| | |...
-
Page 69: Using The Scale (Scl) Instruction
Programming Examples Using the Scale (SCL) Instruction Rung 2:0 Check for below allowable range. Below range flag | | +LES–––––––––––––––+ |–+LESS THAN +–––––––––––––––––––––––––––––––––––––––––––––––––( )–––––| | |Source A I:1.1| | |Source B 14344| | +––––––––––––––––––+ Rung 2:1 Check for above allowable range. Above range flag | +GRT–––––––––––––––+... -
Page 70: Using Scale With Parameters (Scp) Instruction
Programming Examples Using Scale with Parameters (SCP) Instruction Rung 2:0 Check for below allowable range. Below range flag | +LES–––––––––––––––+ |–+LESS THAN +–––––––––––––––––––––––––––––––––––––––––––––––––( )–––––| | |Source A I:1.1| | |Source B 14344| | +––––––––––––––––––+ Rung 2:1 Check for above allowable range. Above range flag | +GRT–––––––––––––––+... -
Page 71: Addressing And Scaling Outputs
Programming Examples Addressing and Scaling We are making the following assumptions: Outputs • The NIO4I is located in slot 2 of a SLC 500 system. • An actuator from a flow control valve is wired to output channel • The actuator accepts a 4 mA to 20 mA signal proportional to 0 to 100% of the valve’s opening. - Page 72 Programming Examples The out-of-range limits are predetermined because any value less than 0% is 6,242 and any value greater than 100% is 31,208. The ladder logic checks for the out-of-range flag to verify that not less than 4 mA and not more than 20 mA is provided out of the analog output channel.
-
Page 73: Using Standard Math
6-10 Programming Examples Using Standard Math Rung 2:0 N7:0 contains percentage of valve open. If this value is less than 0, move the minimum value to the analog output (6242 decimal = 4 mA at the analog output). Check for Below below range flag... - Page 74 Programming Examples 6-11 Rung 2:2 Scale values in the 0 to 100% range to the decimal range for the 4–20 mA analog output. | Below |Above Mulitply | range flag|range flag by scaled range +MUL–––––––––––––––+ |––––]/[––––––––]/[–––––––––––––––––––––––––––––––––––+–+MULTIPLY +–+–| | |Source A N7:0| | | 0| | | | |Source B...
-
Page 75: Using The Scale With Parameters (Scp) Instruction
6-12 Programming Examples Using the Scale with Parameters (SCP) Instruction Rung 2:0 N7:0 contains percentage of valve open. If this value is less than 0, move the minimum value to the analog output (6242 decimal = 4 mA at the analog output). Check for Below below... - Page 76 Programming Examples 6-13 Rung 2:2 Scale values in the 0 to 100% range to the decimal range for the 4–20 mA analog output. | Below |Above | range flag|range flag +SCP––––––––––––––––––––+ | |––––]/[––––––––]/[––––––––––––––––––––––––––––––––––+SCALE W/PARAMETERS +–| |Input N7:0| | 0| | |Input Min.
-
Page 77: Scaling Offset When > 32,767 Or < -32,768
6-14 Programming Examples Scaling Offset when There may be applications when the offset value put into standard math instructions is greater than 32,767 or less than -32,768. In these > 32,767 or < -32,768 cases, it is easier to shift the linear relationship along the input value axis and reduce the values. -
Page 78: Calculating The Shifted Linear Relationship
Programming Examples 6-15 The following graph shows the shifted linear relationship. Notice that the resulting offset value is reduced. 20 mA = 31208 (scaled max.) Scaled Value 4 mA = 6242 (scaled min.) 100% (input min.) (input max.) Input Value Calculating the Shifted Linear Relationship Use the following equations to recalculate the linear relationship: Scaled value = ((input value - input min.) x slope)) + offset... -
Page 79: Using Standard Math
6-16 Programming Examples Using Standard Math Rung 2:0 N7:0 contains the percentage of the valve open. Check for below range | +LES–––––––––––––––+ |–+LESS THAN +––––––––––––––––––––––––––––––––+––( )–––––––––––––––––+–| | |Source A N7:0| | |Source B | +––––––––––––––––––+ | +MOV–––––––––––––––+ | | +–+MOVE +–+ | |Source 6242|... - Page 80 Programming Examples 6-17 Rung 2:2 Scale values in the 90–100% range to the decimal range for the 4–20 mA analog output. Subtract the input min. +SUB–––––––––––––––+ |––––]/[––––––––]/[–––––––––––––––––––––––––––––––––––+–+SUBTRACT +–+–| | |Source A N7:0| | | 0| | | | |Source B 90| | | | | | | |Dest...
-
Page 81: Using The Scale With Parameters (Scp) Instruction
6-18 Programming Examples Using the Scale with Parameters (SCP) Instruction Rung 2:0 N7:0 contains percentage of valve open. If this value is less than 90, move the minimum value to the analog output (6242 decimal = 4 mA at the analog output). Check for Below below... - Page 82 Programming Examples 6-19 Rung 2:2 Scale values in the 90 to 100% range to the decimal range for the 4–20 mA analog output. | Below |Above Scale for the analog output | range flag|range flag +SCP––––––––––––––––––––+ | |––––]/[––––––––]/[––––––––––––––––––––––––––––––––––+SCALE W/PARAMETERS +–| |Input N7:0| | 0| |...
-
Page 83: Scaling And Range Checking And Analog Inputs And Outputs
6-20 Programming Examples Scaling and Range This example demonstrates the addressing of analog I/O and the scaling and range checking of analog input and output values. An Checking and Analog NIO4V is placed in slot 1 of an SLC 500 system. A 0 to 200 psi Inputs and Outputs pressure sensor is input as a 4 mA to 20 mA signal to input channel 0. -
Page 84: Calculating The Linear Relationship
Programming Examples 6-21 Calculating the Linear Relationship Use the following equations to express the linear relationship between the input value and the resulting scaled value: Scaled value = (input value x slope) + offset Slope = (scaled max. - scaled min.) / (input max. - input min.) (8192 - 0) / (16384 - 3277) = 8192/13107 Offset = scaled min. -
Page 85: Using Standard Math Instructions
6-22 Programming Examples Using Standard Math Instructions Rung 2:0 Check for below range. | +LES–––––––––––––––+ |–+LESS THAN +––––––––––––––––––––––––––––––––+––( )–––––––––––––––––+–| | |Source A I:1.0| | |Source B 3277| | +––––––––––––––––––+ | +MOV–––––––––––––––+ | | +–+MOVE +–+ | |Source |Dest O:1.0| +––––––––––––––––––+ Ladder logic continued on the next page. - Page 86 Programming Examples 6-23 Rung 2:1 Check for above range. | +GRT–––––––––––––––+ |–+GREATER THAN +––––––––––––––––––––––––––––––––+––( )–––––––––––––––––+–| | |Source A I:1.0| | |Source B 16384| | +––––––––––––––––––+ | +MOV–––––––––––––––+ | | +–+MOVE +–+ | |Source 8192| |Dest O:1.0| +––––––––––––––––––+ Rung 2:2 Scale the analog input for the analog output. Multiply by the scaled range...
-
Page 87: Scaling And Range Checking Of Analog Inputs And Outputs
6-24 Programming Examples Scaling and Range The scaling instruction available in the SLC 5/02 processor is used to realize a more efficient program. The scaling instruction uses the same Checking of Analog Inputs multiply, divide and add algorithm but it does so with a single rate and Outputs instead of the scaled range and input range values. -
Page 88: Using Scl Instruction
Programming Examples 6-25 Using SCL Instruction Rung 2:0 Check for below range. | +LES–––––––––––––––+ |–+LESS THAN +––––––––––––––––––––––––––––––––+––( )–––––––––––––––––+–| | |Source A I:1.0| | |Source B 3277| | +––––––––––––––––––+ | +MOV–––––––––––––––+ | | +–+MOVE +–+ | |Source |Dest O:1.0| +––––––––––––––––––+ Rung 2:1 Check for above range. -
Page 89: Using The Scale With Parameters (Scp) Instruction
6-26 Programming Examples Using the Scale with Parameters (SCP) Instruction Rung 2:0 Check for below range. | +LES–––––––––––––––+ |–+LESS THAN +––––––––––––––––––––––––––––––––+––( )–––––––––––––––––+–| | |Source A I:1.0| | |Source B 3277| | +––––––––––––––––––+ | +MOV–––––––––––––––+ | | +–+MOVE +–+ | |Source |Dest O:1.0| +––––––––––––––––––+... -
Page 90: Preventative Maintenance
Chapter Maintenance and Safety Preventative Maintenance This chapter provides preventive maintenance information and safety considerations when troubleshooting your SLC 500 system. The printed circuit boards of the analog modules must be protected from dirt, oil, moisture and other airborne contaminants. To protect these boards, the SLC 500 system must be installed in an enclosure suitable for the environment. -
Page 91: Safety Considerations When Troubleshooting
Maintenance and Safety Safety Considerations The following section describes several safety areas you should be aware of when troubleshooting your SLC 500 system. When Troubleshooting Indicator Lights - When the red LED on the analog module is illuminated it indicates that 24V dc power is applied to the module. Activating Devices When Troubleshooting - When troubleshooting, never reach into the machine to actuate a device. -
Page 92: Analog Modules Specification
Appendix Specifications Analog Modules This section lists the specifications for the 1746-NI4, NIO4I, NIO4V, NO4I and NO4V analog modules. They include: Specification • General specifications • Current and Voltage input specifications • Current and Voltage output specifications General Specifications for NI4, NIO4I, NIO4V, NO4I, Specification Value... -
Page 93: Nio4V
Specifications General Analog Input Catalog 1746- Input Channels per Output Channels per Backplane Current Draw External 24V dc Power Module Module Supply Tolerance 5V (max.) 24V (max.) 4 differential, voltage or 35 mA 85 mA current selectable per channel, not individually isolated NIO4I 2 differential, voltage or... -
Page 94: Current-Loop Input Specifications For Ni4, Nio4I, And Nio4V
Specifications Current-Loop Input Specifications for NI4, Specification 1746-NI4, -NI04I, -NIO4V NIO4I, and NIO4V Input Range (Normal Operation) -20 to +20 mA Absolute Maximum Input Current -30 to +30 mA Absolute Maximum Input Voltage ±7.5V dc or 7.5V ac RMS Current Input Coding -20 to +20 mA -16,384 to +16,384 Input Impedance 250 Ohms... -
Page 95: Voltage Input Specifications For Ni4, Nio4I, And Nio4V
Specifications Voltage Input Specifications for NI4, NIO4I, and NIO4V Specification 1746-NI4 1746-NI04I, -NI04V Input Range -10 to +10V dc - 1 LSB Voltage Input Coding (-10 to +10V dc - 1 LSB) -32,768 to +32,767 Input Impedance 1M ohms 760K ohms Resolution 305.176 µV per LSB Full Scale... -
Page 96: Current Output Specifications For Nio4I And No4I
Specifications Current Output Specifications for NIO4I Specification 1746-NI04I, -N04I and NO4I Converter Resolution 14 bit Location of LSB in I/O image word 0000 0000 0000 01XX Non–linearity 0.05% Conversion Method R-2R Ladder Step Response 2.5 ms (at 95%) Load Range 0 to 500 Ohms Maximum Load Reactance 100 µH... -
Page 97: Voltage Output Specifications For Nio4V And No4V
Specifications Voltage Output Specifications for NIO4V Specification 1746--NIO4V, -N04V and NO4V Converter Resolution 14 bit Location of LSB in I/O image word 0000 0000 0000 01XX Non–linearity 0.05% Conversion Method R-2R Ladder Step Response 2.5 ms (at 95%) 1K to ∞ Ohms Load Range Maximum Load Current 10 mA... -
Page 98: Positive Decimal Values
Appendix Two’s Complement Binary Numbers The SLC 500 processor memory stores 16-bit binary numbers. Two’s complement binary is used when performing mathematical calculations internal to the processor. Analog input values from the analog modules are returned to the processor in 16-bit two’s complement binary format. -
Page 99: Negative Decimal Values
Two’s Complement Binary Numbers 14 = 16384 16384 13 = 8192 8192 12 = 4096 4096 11 = 2048 2048 10 = 1024 1024 32767 15 = This position is always zero for positive numbers Negative Decimal Values In two’s complement notation, the far left position is always 1 for negative values. - Page 100 Two’s Complement Binary Numbers 14 = 16384 16384 13 = 8192 8192 12 = 4096 4096 11 = 2048 2048 10 = 1024 1024 32767 15 = This position is always 1 for negative numbers Publication 1746-UM005B-EN-P - June 2004 Artisan Technology Group - Quality Instrumentation ...
- Page 101 Two’s Complement Binary Numbers Publication 1746-UM005B-EN-P - June 2004 Artisan Technology Group - Quality Instrumentation ... Guaranteed | (888) 88-SOURCE | www.artisantg.com...
-
Page 102: Calibrating An Analog Input Channel
Appendix Optional Analog Input Software Calibration This appendix helps you calibrate an analog input channel using software offsets to increase the expected accuracy of an analog input circuit. Examples of equations and a ladder diagram are provided for your reference. A software calibration reduces the offset error and gain error at a given temperature by scaling the values read at calibration time. -
Page 103: Calculating The Software Calibration
Optional Analog Input Software Calibration 20 mA = 16384 (scale Hi) Scaled Value 4 mA = 3277 (scale low) 3267 16396 Low Value from card Hi Value from card Input Value Scaled Value vs. Input Value Calculating the Software Calibration Use the following equation to perform the software calibration: Scaled Value = (input value x slope) + offset Slope = (scaled max. - Page 104 Optional Analog Input Software Calibration 4. Using an analog input calibration source or your system’s input device placed at the 20 mA position, capture the high value by energizing the calibrate high input. Ensure that your high value lies within the conversion range of your analog input. 5.
- Page 105 Optional Analog Input Software Calibration Example Ladder Diagram The following ladder diagram requires 3 external inputs that are used to perform the calibration procedure. Lo causes the ladder to capture the 4 mA calibration value and Hi causes the ladder to capture the 20 mA calibration value.
- Page 106 Optional Analog Input Software Calibration Rung 2:0 | Cal_Lo N10:0 +MOV---------------+ | |----] [------[OSR]---------------------------------------+MOVE |Source ANALOG_IN| | 8000| | |Dest LO_VALUE| | 3267| | +------------------+ | Rung 2:1 | Cal_Hi N10:0 +MOV---------------+ | |----] [------[OSR]---------------------------------------+MOVE |Source ANALOG_IN| | 8000| | |Dest HI_VALUE| | 16396| |...
- Page 107 Optional Analog Input Software Calibration | +MUL--------------------+ | | +-+MULTIPLY +-+ | | |Source A LO_VALUE| | | 3267| | | | |Source B SLOPE_X10K| | | 9983| | | | |Dest N10:5| | | 32767| | | | +-----------------------+ | | | +DDV---------------+ +-+DOUBLE DIVIDE +------+ |...
- Page 108 Appendix Module Input and Output Circuits 380K (NI4 Series B module) 500K (NI4 Series A module) Input Circuit for 1746-NI4, -NIO4I, and -NIO4V Modules 380K (NI4 Series B module) 500K (NI4 Series A module) .001 µ F IN – > S1, S2 –...
- Page 109 Module Input and Output Circuits Isolation Rating 500V dc Circuit for Current Input 500KΩ 500KΩ – 250Ω Transfomer Isolation 500KΩ ANL COM DC-DC Rectifier Converter Filter and Primary Regulation Circuit for Voltage Input 500KΩ 500KΩ Optical – Isolation A to D Converter 500KΩ...
- Page 110 Index Numerics Converting Analog Input Data Converting Analog Output Data 1746-N04I and N04V Analog Output Current Output Circuit for 1746NIO4I Modules Modules 1746-NI04I and NI04V Analog Combination Modules 1746-NI4 Analog Input Module Disconnect Prime Movers Addressing Analog Modules Addressing and Scaling Outputs equipment needed Calculating the Linear Relationship 6-10...
- Page 111 Index 6-14 Positive Decimal Values Calculating the Linear Relationship Calculating the Linear Shifted power requirements for a fixed 6-15 Relationship controller 6-16 Using Standard Math power requirements for a modular Using the Scale with Parameters (SCP) controller 6-18 Instruction PowerUp the SLC 500 System startup instructions Processor Update of Analog Data system start-up procedures...
- Page 112 Index Publication 1746-UM005B-EN-P - June 2004 Artisan Technology Group - Quality Instrumentation ... Guaranteed | (888) 88-SOURCE | www.artisantg.com...
- Page 113 Artisan Technology Group - Quality Instrumentation ... Guaranteed | (888) 88-SOURCE | www.artisantg.com...
- Page 114 States technical support issues. New Product Satisfaction Return Rockwell Automation tests all of our products to ensure that they are fully operational when shipped from the manufacturing facility. However, if your product is not functioning and needs to be returned: United States Contact your distributor.
Need help?
Do you have a question about the Allen-Bradley 1746-HSCE and is the answer not in the manual?
Questions and answers