
Related Manuals for Regada DMS 3


Summary of Contents for Regada DMS 3
- Page 1 INSTALLATION, SERVICE AND MAINTENANCE INSTRUCTIONS Electric linear actuators Rematic with the DMS 3 electronic control STR 0.1PA ® 74 1040 02 74 1040 02...
- Page 2 TEST CERTIFICATE ELECTRIC LINEAR THRUST ACTUATOR STR 0.1PA Type number 438........ Power supply ......V ..Hz Serial number ........Max. load thrust ..........N Production year ........Switch-off thrust ..........N Wiring diagram ........Operating speed .........mm/min ............Set stroke ..........mm ............
-
Page 3: Table Of Contents
Please read these instructions carefully before mounting and operating the actuator! Preventive and safety-measures applied on the actuator can not offer required safety level till the actuator and its safety systems are not applied by required and described way and if installation and maintenance is not applied according to applicable instructions and rules! Contents 1. -
Page 4: General Data
1.1 Purpose and applications Electric linear actuators Rematic (hereinafter referred as EA only) with the DMS 3 electronic control of the STR 0.1PA type are set up by the program to be controlled on the 24 V DC voltage level, or are set up by the program to be controlled by analogue input signal. -
Page 5: Warning For Safety Use
STR 0.1PA Warning for safety use Product protection: There must be included suitable protective device into the power supply (circuit breaker or fuse) which serves at the same time as main switch. EA STR 0.1PA is provided with its own short-circuit protection of 1-phase motor power supply circuits and space heater. -
Page 6: Operation Conditions
STR 0.1PA It is recommended to have after-guarantee service performed by the service department of the production plant, or by a contracted service centre. Serviceman makes the record about service mission after warranty actions and sends it to the production company. 1.7 Operation conditions 1.7.1 Product location and operation position •... - Page 7 STR 0.1PA • with strong danger of presence of animals (insects, birds, small animals) ......AL 2* • with harmful effects of radiation: • of escaping stray current ....................AM 2-2* with intensity of magnetic field (direct and alternating of power supply frequency) to 400 A.m •...
-
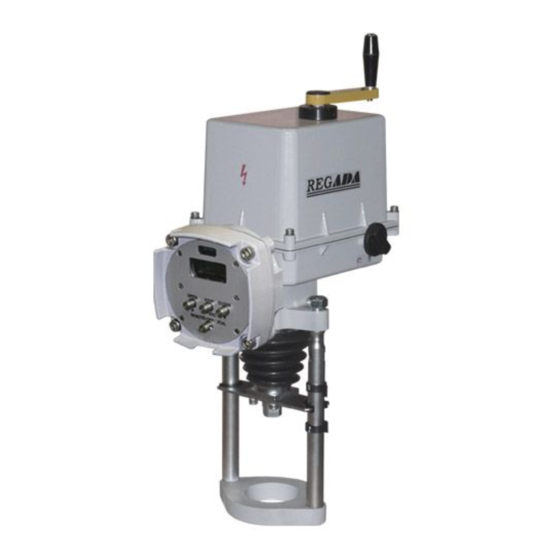
Page 8: Description
The electric actuator is driven by an electric motor (1) supplied and controlled from the source board (3) and control unit (2) of the DMS 3 electronics. Position of output element of EA is scanned by contactless absolute sensor. Thrust is scanned with thrust switches S1 and S2. - Page 9 STR 0.1PA Fig. 1...
-
Page 10: Basic Specifications
STR 0.1PA 1.9 Basic specifications Basic EA specifications: Max. load thrust [N], operating speed [mm/min], operating stroke [mm], switching-off thrust [N], and electric motor parameters are given in Table 1. Table 1: Basic EA Specifications Electric motor Nominal Supply voltage Capacitor nominal voltage/ current... - Page 11 STR 0.1PA 1) Anomaly of operating speed: - 15% at temperature under - 10°C 2) For automotive regulation the operating speed 63mm/min is not recommended Other specifications: Protection enclosure of EA:..............IP 67 EN 60 529 (IEC 60 529) Mechanical ruggedness: sinusoid vibrations .....................
- Page 12 STR 0.1PA Output relay : - 3x relays (standard) (READY, R1, R2) max. 250 V AC/1 A/cos phi=1; max. 30 V DC/2A - 3x additional relays (options) (RE3, RE4, RE5) max. 250 V AC/1 A/cos phi=1; max. 30 V DC/2A - - 6x additional relays (options) (RE1, RE2, RE3, RE4, RE5, READY) max.
- Page 13 STR 0.1PA Control by binary inputs 24 V DC: by feeding of 24 V DC to terminals CLOSE and OPEN Programming possibilities of binary inputs I1 and I2 (change is possible only through the programme of PC or using buttons local control) - for the input I1 : DISABLED;...
- Page 14 STR 0.1PA 11 terminals (COM1, RE1, RE2, RE3, RE4, COM5, NO5, NC5, COM, NO, NC - for module 6 additional relays with intersection of connection wire 0,05 – 1,5 mm2 for solid wire and for flexible wire. Max. terminal screw tightening torque 0,5 N.m. .Attention: Thermic resistance incoming wires must be minimum +80°C Wire cross-section conversion table (mm –...
- Page 15 STR 0.1PA INTERNAL PROTECTION TERMINAL FUSE SUPPLY (F3) Fig.2 EXTERNAL PROTECTION Fig.2a TERMINAL...
-
Page 16: Conservation, Packing, Transport, Storing And Unpacking
STR 0.1PA 1.10 Conservation, packing, transport, storing and unpacking Surfaces without surface treatment are treated by conservation preparation MOGUL LV 2-3 before packaging . Conservation is not necessary if the following storage conditions are complied with: • Storage temperature: -10 to +50 °C •... -
Page 17: Installation And Dismantling Of Actuator
STR 0.1PA The product and its packing are not a source of any environment pollution or contamination and do not contain any dangerous waste. 2. Installation and dismantling of actuator 2.1 Installation Abide by safety measures! Note: Check again whether the EA is place in accordance with the Chapter “Operation Conditions”. If the installation conditions are different than recommended it is needed to consult the situation with the producer. - Page 18 STR 0.1PA b) Mechanical connection for pillar version - Fig. 4 Connection procedure: • Check the label whether valve and actuator strokes are the same. • Put the valve (B) to the position "closed" and the actuator (A) to a mid-position.
- Page 19 STR 0.1PA d) Mechanical connection for versions with flange (Fig. 6) Connection procedure: • Check the labels whether the actuator and the valve strokes are the same. • Put the valve (B) to the position “closed“ and the actuator (A) to a mid-position. •...
-
Page 20: Dismantling
STR 0.1PA Connecting with the master system: EA can be controlled by: - by analogue signals through the built-in controller - by binary inputs 24 V DC EA is connected according to wiring diagram under the cover of EA. Notes: 1. - Page 21 STR 0.1PA For the specific adjustment procedure or individual parameters reset see individual appendixes 74 1053 02, 74 1076 02 For facilitating the simple setting of required operation parameters, the control unit is equipped with : • four setting buttons: MENU, P, O, C •...
-
Page 22: Ea Control Set-Up Options (Regulating)
STR 0.1PA SETTING BUTTON P SETTING BUTTON O BUTTON MENU SETTING BUTTON C COMMUNICATION CONNECTOR LED ERROR LED OPEN LED MENU LED CLOSE LED PAR LED I1 LED SEL LED I2 LED POWER Fig. 7 3.1 EA control set-up options (regulating) 2P CONTROL Setting-up: 2P control + other functions, in addition to STOP on I1 terminal: The EA moves either to the OPEN or CLOSE direction with 24V DC voltage supplied to terminals... - Page 23 STR 0.1PA The EA moves either to the OPEN or CLOSE direction with 0/4/12 up to 20 mA, 4 up to 12 mA (0/2 up to 10V) input control signal supplied on terminals +IN, -IN. The EA stops once the required position is reached (corresponding with the input control signal supplied) or the set end position is reached.
-
Page 24: Procedure For Setting Individual Parameters And The Register Of Errors And Warnings
STR 0.1PA Procedure for setting individual parameters and the register of errors and warnings - is given in the separate attachment 74 1053 02 resp. 74 1076 02 of these operating instructions. The factory default setting of individual programmes shown in Table 2 and Table 3, as long as otherwise specified by the customer: Table 2 Factory default settings of individual parameters in version without local control;... - Page 25 STR 0.1PA Table 3 Factory default settings of individual parameters in version with local control; possibility to set-up by operating the local control buttons. For the individual parameters set-up see appendix 74 1076 02. MENU NAME FACTORY SETTING-UP JAZ/LANGUAGE English (select language on LCD display) POSITION O work angle range set as per EA specification POSITION C...
-
Page 26: Putting An Ea Into Operation When The Ea Is Set Up And Connected With The Armature Already In The Production Plant (Starting The Calibration)
STR 0.1PA CYCLE POSITION O2 100 % CYCLE POSITION C1 CYCLE POSITION C2 100 % LCD CONTRAST Warning 1: When the input control signal is set to the value 0 ÷ 20 mA (0 to 10 V), or 20 ÷ 0 mA (10 to 0 V) and the input control signal fails, then the EA keeps the position as with a 0 mA (0 V) input signal (EA doesn’t recognise between input signal fail and 0 mA (0 V) input signal). -
Page 27: Putting An Ea Into Operation When It Is Necessary To Do A Change To The Stroke
STR 0.1PA connect the EA with the armature to be controlled (according to chapter 2) and fit this assembly into the specified technology complex connect the EA electrically according to the wiring diagram and chapter Electrical connection and checking of function introduce the EA into an mid- position (see Note 2 presented above) switch on the supply voltage start the EA calibration by pressing the P button on the control unit for 2 seconds as minimum... -
Page 28: Setting Other Parameters
STR 0.1PA 3.6 Setting other parameters If changes to some parameters would be necessary, proceed please according to the instructions given in the separate attachment No 74 1053 02. 3.7 Error messages from the control unit The EA electronics makes possible to identify some failures of EA. The failure is signalled by flickering LED ERROR (red) on the control unit (Fig.7). -
Page 29: Maintenance - Extent And Periodicity
STR 0.1PA In case of manual control the set of end positions and transmitter are not detuned. Electric local control: - additional equipment (Fig.8) If necessary in the case of accession, function check and so on, it is possible to preset EA or change some parameters by local electric control with secured power feeding. -
Page 30: Troubleshooting
STR 0.1PA In case of damage or after 6 years of the actuator´s operation the replacement of cover seals and oil filling seals must be done. The grease in the supplied actuators is designed for the lifetime of the product. It is not necessary to change the grease during the operation of the actuator. - Page 31 STR 0.1PA Spin direction EEPROM Reset Voltage +5V Parameters Set mode Relay Temperature < Temperature > Phase Power frequency Thermal fuse Manual control Position module Position module type Position sensor 1 Position sensor 2 Position sensor 3 Position sensor 4 Torque module Torque module type Torque sensor...
-
Page 32: Accessories And Spare Parts
STR 0.1PA 5. Accessories and spare parts 5.1 Accessories The EA is delivered with the service handle and communication cable DB-9F/RJ45. Table 5 Spare part Order Nr. Position Figure Electric motor; 15W/39 VA; 230/220 V AC; 50 Hz 63 592 314 Electric motor;... -
Page 33: Enclosures
STR 0.1PA 6. Enclosures 6.1 Wiring diagrams... - Page 34 STR 0.1PA...
- Page 35 STR 0.1PA Legend: Z473a ..wiring diagram of electric local control Z500 ... wiring diagram module with 6 additional relays Z500a ..wiring diagram module with 3 additional relays Z514a ..wiring diagram of EA STR 0.1PA for the ON/OFF control or for analogue input 0/4/12 up to 20 mA, 4 up to12 mA and output signal 4 - 20 mA Z515a ..
- Page 36 STR 0.1PA M ........single phase electric motor N........controller POSITION....... position scanning R in........input resistance ........load resistance U N ........voltage for EPV R1........free programmable relay R2........free programmable relay READY......READY relay (free-programmable) R1 to RE5 ....... additional relays S1........
-
Page 37: Dimensional Drawings
STR 0.1PA 6.2 Dimensional drawings... - Page 38 STR 0.1PA...
- Page 39 STR 0.1PA...
- Page 40 STR 0.1PA...
- Page 41 STR 0.1PA...
- Page 42 STR 0.1PA...
- Page 43 STR 0.1PA...
- Page 44 STR 0.1PA...
- Page 45 STR 0.1PA...
-
Page 46: Guarantee Service Check Report
STR 0.1PA 6.3 Guarantee service check report Service center:D Date of repair: Guarantee repair no.: User of actuator: Claim applied by: Actuator type number: Actuator production number: Product claim fault: Detected product fault: Used spare parts: Remarks: Issued on a day: Signature:... -
Page 47: Post Guarantee Service Check Report
STR 0.1PA 6.4 Post guarantee service check report Service center: Date of repair: User of actuator: Actuator operating place : Actuator type number: Actuator production number: Detected product fault: Used spare parts: Remarks: Issued on a day: Signature:... -
Page 48: Commercial Representation
Tel.: +421 (0)51 7480 460, Fax: +421 (0)51 7732 096, E-mail: regada@regada.sk Czech republic: REGADA Česká s.r.o. (Ltd.) – exclusive representation REGADA, s.r.o. (Ltd.) for sale of electric actuators Regada Česká, s.r.o. Kopaninská 109 252 25 Ořech PRAHA – západ Tel.: +420 257 961 302...
Need help?
Do you have a question about the DMS 3 and is the answer not in the manual?
Questions and answers