Table of Contents
Advertisement
Available languages
Available languages
For product questions contact:
Sunbeam Consumer Service
USA: 1.800.334.0759
www.oster.com
© 2020 Sunbeam Products, Inc. All rights reserved. Distributed by Sunbeam Products, Inc.,
Boca Raton, Florida 33431.
Para preguntas sobre los productos llame:
Sunbeam Consumer Service
EE.UU.: 1.800.334.0759
www.oster.com
© 2020 Sunbeam Products, Inc. Todos los derechos reservados. Distribuido por Sunbeam
Products, Inc., Boca Ratón, Florida 33431.
GCDS-OST-SL
Printed in China
2LB. EXPRESSBAKE® BREADMAKER
2LB. MÁQUINA PARA HACER PAN EXPRESSBAKE®
User Guide & Recipes/ Guía del Usuario & Recetas
CKSTBRTW21
ART0000863963 Rev B
www.oster.com
Impreso en China
Safety
Seguridad
How to use
Cómo usar
Cleaning
Cuidado y Limpieza
FAQs
Preguntas frecuentes
Recipes
Rectas
Warranty
Garantía
Advertisement
Table of Contents

Related Manuals for Oster EXPRESSBAKE CKSTBRTW21


Summary of Contents for Oster EXPRESSBAKE CKSTBRTW21
- Page 1 User Guide & Recipes/ Guía del Usuario & Recetas Safety USA: 1.800.334.0759 CKSTBRTW21 Seguridad www.oster.com © 2020 Sunbeam Products, Inc. All rights reserved. Distributed by Sunbeam Products, Inc., Boca Raton, Florida 33431. Para preguntas sobre los productos llame: How to use Sunbeam Consumer Service Cómo usar...
-
Page 2: Important Safeguards
Always use appliance on a dry, stable, level surface. 17. If electric circuit is overloaded with other appliances, your bread maker may not operate properly. The bread maker should be operated on a separate electrical circuit from other operating appliances. HOUSEHOLD USE ONLY SAVE THESE INSTRUCTIONS www.oster.com www.oster.com... -
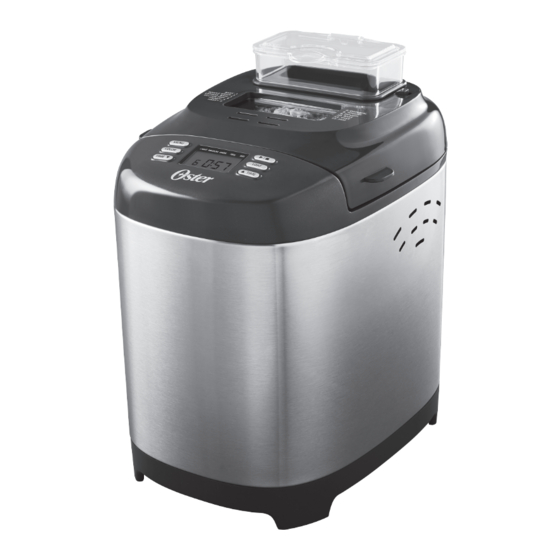
Page 3: General Description (Fig.1)
TIME TIME program program 1. Lid 6. Control Panel 2. Viewing Window 7. Housing 3. Ingredient 8. Fruit & nuts dispenser compartment 9. Measuring cup 4. Bread Basket 10. Hook 5. Kneading blade 11. Measuring Spoon www.oster.com www.oster.com... -
Page 4: Pause Function
After the program starts up, you can press START/STOP button once to interrupt Menu – The Oster ExpressBake® Bread Maker offers 12 different menu cycles. Press at any time, the operation will be paused but the setting will be memorized, the working time will be flashed on the LCD. -
Page 5: Before First Use
Also, make sure ALL ingredients are at room temperature, (between 77°–85° F) unless otherwise noted in the recipe. Note: Temperatures too low or too high can affect the way the bread rises and bakes. It’s a good idea to start with all new, fresh ingredients (especially fresh flour and yeast) www.oster.com www.oster.com... -
Page 6: How To Make Bread
Bake: This setting is for baking dough. Cake: Kneading, rising, and baking occurs, but with the aid of baking soda or baking powder. Jam: This setting is for baking jams and marmalades. www.oster.com www.oster.com... -
Page 7: Using The Delay Timer
3. When the delay timer is set where you want it, make sure to press the “Start/Stop” button. provides you with a higher loaf. Make sure to follow your Oster® Breadmaker recipe The colon “:” will flash and your bread will be ready when you planned. - Page 8 Cup(s) Tablespoon(s) Teaspoon(s) happens, the yeast is old and should be thrown away. Add Ingredients in the Correct Order Read all recipes from top to bottom, and remember: FIRST, liquid ingredients SECOND, dry ingredients LAST, yeast 1 1/2 www.oster.com www.oster.com...
-
Page 9: Care And Cleaning
Clean the breadmaker before using it again. Please see the “Care & Cleaning” section of the manual. What do I do if the dough does not mix? Make sure the baking pan and kneading blade are properly installed in the machine. www.oster.com www.oster.com... -
Page 10: Traditional White Bread
What do I do if the bread is not brown enough? This is usually the result of repeatedly lifting the lid of the bread machine or leaving the lid open while the bread is baking. Be sure the lid is shut while the breadmaker is in operation. www.oster.com www.oster.com... -
Page 11: Honey Grain Bread
7 Press the “Color” button to choose light, medium or dark. At 1:00, the dough begins to bake (60 minutes) 8 Press the “Start/Stop” button. At 0:00, the bread is finished. Fruit and Nut Dispenser will automatically release at 2:45. www.oster.com www.oster.com... -
Page 12: Buttermilk Bread
4 Snap the baking pan into the breadmaker and close the lid. 5 Press the “Menu” button to choose the ExpressBake® setting a. ExpressBake® (1.5 lb) for 1.5 pound loaves b. ExpressBake® (2 lb) for 2.0 pound loaves 6 Press the “Start/Stop” button. www.oster.com www.oster.com... - Page 13 8 Press the “Start/Stop” button 4 Snap the baking pan into the breadmaker and close the lid. 5 Press the “Menu” button to choose the Gluten Free setting. 6 Press the “Start/Stop” button. www.oster.com www.oster.com...
- Page 14 5 Press the “Menu” button to choose the oatmeal setting. 6 Press the “Loaf” button to choose 1.5 lb., or 2 lb. 7 Press the “Color” button to choose light, medium or dark. 8 Press the “Start/Stop” button www.oster.com www.oster.com...
- Page 15 Keeping Your Bread Fresh There are no preservatives in your homemade bread, so store cooled loaf in a lightly sealed plastic bag. If desired, enclose a stalk of celery in the bag to keep bread fresh longer. Do not store in the refrigerator as this causes bread to dry out faster www.oster.com www.oster.com...
- Page 16 2 Put the baking pan onto the breadmaker and close the lid. 3 Press the “Menu” button to choose the Bake setting. 4 Adjust the time of baking using the “Time (arrow down)” and “Time (arrow up)” buttons. 5 Press the “Start/Stop” button” www.oster.com www.oster.com...
- Page 17 4 Press the “Start/Stop” button. The display will begin counting down the time on the Jam setting. When jam is ready, the unit will signal, and the display will read “0:00. ” 5 Using hot pads, remove bread pan. Pour jam into containers; cover. Refrigerate to set. Makes about 3 cups. www.oster.com www.oster.com...
-
Page 18: Year Limited Warranty
Devuelva el aparato al centro de servicio autorizado Sunbeam shall not be liable for any incidental or consequential damages caused by the breach of any de Oster para que lo examinen, reparen o ajusten. express, implied or statutory warranty or condition. -
Page 19: Descripción General (Fig.1)
Panel de control Ventana de visualización Cuerpo de Maquina para hacer Compartimiento de Ingredientes Dispensador de frutas y nueces Cesta de pan Taza medidora Cuchilla para amasar 10. Gancho para desmontar la cuchilla para amasar 11. Cuchara medidora www.oster.com www.oster.com... - Page 20 Pantalla de visualización: indica su menú, ciclo de cocción actual, tamaño del pan, color y tiempo de cocción. Menú: la máquina para hacer pan Oster ExpressBake® ofrece 12 programas diferentes. Presione el botón Menú para desplazarse y seleccionar el programa deseado.
-
Page 21: Antes Del Primer Uso
10 minutos, incluso sin presionar el botón START / STOP. Si el tiempo de pausa excede los 10 minutos, la memoria no puede conservarse y la máquina de hacer pan debe reiniciarse. www.oster.com www.oster.com... -
Page 22: Recomendaciones Importantes
Coloque la canasta boca abajo y sacuda ligeramente hasta que salga el pan. Retire la cuchilla para amasar de la base del pan con la herramienta para retirarla que se provee y ya está listo para comer www.oster.com www.oster.com... - Page 23 Preparación de pan en menos de una hora para mostrarle claramente qué configuración debe usar. Este modelo tiene 12 La Maquina para hacer Pan OSTER® puede hornear fantásticos panes en menos de una hora. configuraciones en total (BASIC, WHOLE GRAIN, ExpressBake®, GLUTEN FREE, FRENCH, SWEET, Se le denomina “...
- Page 24 Es para evitar que la masa se levante demasiado. También puede reducir la cantidad de sal en 1/8 o 1/4 y la cantidad de azúcar en 1/4 de cucharadita al mismo tiempo www.oster.com www.oster.com...
-
Page 25: Cuidado Y Limpieza
Este aparato no tiene piezas que deban ser reparadas por el usuario. Cualquier servicio que se extienda más allá de lo descrito en la sección de limpieza, debe ser realizado solo por un representante de servicio autorizado. Ver la garantía, disponible en línea. 1 1/2 www.oster.com www.oster.com... -
Page 26: Preguntas Frecuentes
Asegúrese de que la tapa se ¿Qué hacer si sale humo o si hay olor a quemado proveniente de la parte trasera de la máquina? encuentre cerrada cuando la panificadora esté en funcionamiento. www.oster.com www.oster.com... - Page 27 Cuando está en 0:60, la masa comienza a hornearse (60 minutos) 8 Presione el botón “START / STOP”. Cuando está en 0:00, el pan está listo. El dispensador de frutas y nueces liberara los ingredientes automáticamente a las 2:45. www.oster.com www.oster.com...
- Page 28 6 Presione el botón “Loaf” para elegir 1 lb., 1.5 lb. o 2 lb. 7 Presione el botón “Color” para elegir su pan Claro, Medio u Oscuro. 8 Presione el botón “START / STOP”. www.oster.com www.oster.com...
- Page 29 4 Coloque la canasta para pan en la Maquina y cierre la tapa. 5 Presione el botón “Menu” para elegir el programa “ExpressBake®”. Presione el botón “Loaf” para elegir 1 lb., 1.5 lb. o 2 lb. 6 Presione el botón “START / STOP”. www.oster.com www.oster.com...
- Page 30 8 Presione el botón “START / STOP”. 5 Presione el botón “Menu” para elegir la configuración “Sweet”. 6 Presione el botón “Loaf” para elegir 1 lb., 1.5 lb. o 2 lb. 7 Presione el botón “START / STOP”. www.oster.com www.oster.com...
- Page 31 5 Presione el botón “Menu” para elegir la configuración “Oatmeal”. 6 Presione el botón “Loaf” para elegir 1 lb., 1.5 lb. o 2 lb. 7 Presione el botón “Color” para elegir su pan Claro, Medio u Oscuro. 8 Presione el botón “START / STOP”. www.oster.com www.oster.com...
- Page 32 Si así lo desea, coloque un tallo de apio en la bolsa para mantener el pan más fresco por más tiempo. No lo guarde en el refrigerador debido a que esto causa que el pan se reseque más rápido www.oster.com www.oster.com...
- Page 33 2 Coloque la canasta para hornear en la máquina para hacer pan y cierre la tapa. 3 Presione el botón “Menú” para elegir la el programa de “Bake”. 4 Ajuste el tiempo de cocción con los botones “Tiempo (flecha hacia abajo)” y “Tiempo (flecha hacia arriba)”. 5 Presione el botón “START / STOP” www.oster.com www.oster.com...
-
Page 34: Garantía Limitada De 1 Año
4 Presione el botón “START/STOP”. La pantalla comenzará a contar en forma regresiva el tiempo en la configuración jalea. Cuando la jalea esté lista, se escuchará una señal y la pantalla mostrará “0:00. ” 5 Utilizando agarraderas, saque el recipiente para pan. Vierte la jalea en contenedores; cubra y refrigere. Rinde aproximadamente 3 tazas. www.oster.com www.oster.com...
Need help?
Do you have a question about the EXPRESSBAKE CKSTBRTW21 and is the answer not in the manual?
Questions and answers