Table of Contents
Advertisement
Advertisement
Table of Contents

Related Manuals for Oster 5836


Summary of Contents for Oster 5836
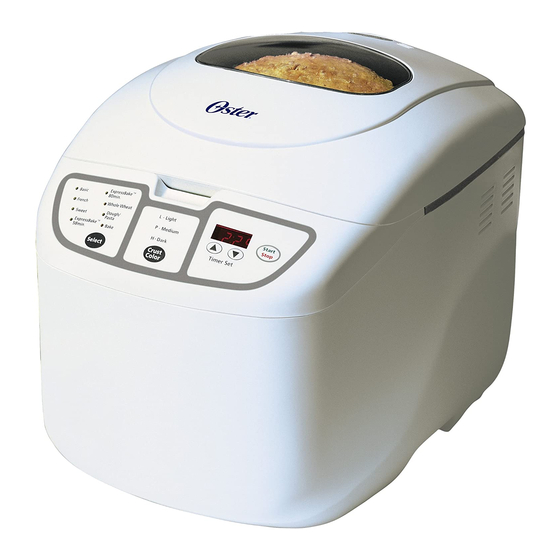
- Page 1 User Manual & Bread Recipes 2 lb. EXPRESSBAKE™ Breadmaker...
-
Page 2: Important Safeguards
Important Safeguards When using electrical appliances, basic safety precautions should always be followed including the following: Read all instructions, product labels and warnings before using the breadmaker. Do not touch hot surfaces. Always use oven mitts when handling hot materials, and allow metal parts to cool before cleaning. Allow the breadmaker to cool thoroughly before putting in or taking off parts. -
Page 3: Table Of Contents
Chapter 1: Getting Started ....Chapter 2: Let’s Chapter 3: Overview of %readmaker features ..12 Chapter 4: Chapter 5: Using the Delay Timer . -
Page 4: Chapter 1: Getting Started
Getting Started Place the breadmaker on a counter where the plug will reach an outlet. DO NOT yet plug the machine into the wall outlet. You will be shown later when to do this. Make sure you can open the breadmaker top without hitting the top of kitchen cabinets. - Page 5 Attach the kneading blade to the baking pan, as shown. You will find the kneading blade in a small plastic wrap attached to the power cord. Set the pan aside. Do not yet place the pan into the breadmaker. You’re ready to start!
-
Page 6: Chapter 2: Let's
Let’s Bake Bread The simplest way to learn how to bake bread is to follow a basic recipe. The following recipe is easy and the bread is delicious. Before you begin • Make sure you have the following measuring equipment: —... -
Page 7: Measuring
Measuring THE most important secret of making bread. Exact measurements. That’s the key to successfully baking bread. Exact measurements. With wet ingredients, use ONLY measuring cups with the cups/ ounces marked clearly on the side. After filling the measuring cup, place it on a flat surface and view it at eye level to make sure the amount of liquid is exact. - Page 8 Temperatures too cool or too high can affect the way the bread rises and bakes. Last, it’s a good idea to start with all new, fresh ingredients (especially fresh flour and yeast). Now, let’s try a simple (but really good) recipe.
-
Page 9: White Bread Baking Process
Traditional White Bread 2 lb. loaf 1 + 1/3 cups water 4 teaspoons softened butter or margarine 4 cups bread flour 2 tablespoons sugar 4 teaspoons dry milk Carefully measure 1 and 1/3 cups water. Remember, use water that is room temperature. - Page 10 This takes care of all of the liquid ingredients for the recipe. Next come the dry ingredients. Measure 4 cups of bread flour. Make sure not to “overpack” the flour into the cup. To avoid over packing, a good trick is to fill the measuring cup to overflowing, then tap the side of the cup with a knife or spatula to remove air pockets.
- Page 11 Carefully snap the baking pan into the breadmaker. Close the lid of the bread machine and plug the power cord into the wall outlet. The following things will happen. The machine will “beep,” and the lights of the display will turn on. The time setting will say “3:00”...
- Page 12 Press the “Start/Stop” button and your machine will start making bread. You will hear the breadmaker begin to mix the ingredients. Important: Do NOT press the “Start/Stop” button while the breadmaker is making bread. If you do, the machine will turn off and you will need to start over again, from scratch.
-
Page 13: After The Bread Is Baked
After the bread is baked Caution: Do not put your face near the lid when you open the breadmaker. Hot steam may escape that could burn you. Important: The breadmaker has an automatic “keep warm” setting that will keep your bread warm for up to one hour. -
Page 14: Overview Of Breadmaker Features
Overview of Breadmaker Features Select Press this button to select the kind bread you want to make. Each time you press the button you hear a beep, and a red light wilt appear next to the setting you chose. The display shows a number for each setting. for example, is 1. - Page 15 Crust Color button The Crust Color button allows you to choose how light or dark to make the crust of the bread. Each time you press the Crust Color button the display will change as follows: L-Light= P-Medium= P H-Dark= In addition, the display will show the cycle number before the crust color setting.
- Page 16 Start/Stop button Press this button to start and stop your breadmaker. Important: Do not press “Stop” when making bread because this will cancel the entire cycle and you will need to start from scratch. Breadmaker Settings Your breadmaker can bake almost any kind of bread. We provide recipes that clearly show you which setting you should use.
- Page 17 Sweet The sweet setting is for baking breads with high amounts of sugar, fats, and proteins, all of which tend to increase browning. EXPRESSBAKE™ (58 minutes) Use this setting to for baking bread in under one hour. (please see page 16). EXPRESSBAKE™...
-
Page 18: Making Brad In Under One Hour
Making Bread In Under 1 Your breadmaker can bake great bread in under 1 hour. This is called the setting loaves are a little different from loaves baked on to see which of them you prefer. There are two One setting can bake bread in 58 minutes. - Page 19 The other setting is for baking loaves in 1 hour 20 minutes. The loaves baked with this setting are a little taller and more airy than the 58 minute breads. There are a few things you should know about the different than the other settings.
- Page 20 20 minutes with the cover open. — YOU CAN use standard bread mixes for EXPRESSBAKE™ setting breads, but the results may not be as good as the results when using your Oster this book. EXPRESSBAKE™ Setting Tips and Hints...
-
Page 21: Express White Bread Process
— You may need a cooking thermometer to measure the temperature of the water you use in these recipes. You should only use hot water (between 115° and 125° F) for EXPRESSBAKE™ setting recipes. Although baking EXPRESSBAKE™ setting breads is a little different, the results and convenience are well worth it. - Page 22 Use a cooking thermometer to make sure the temperature of the water is between 115°–125° F. When the water is at the proper temperature, pour into the baking pan. Carefully measure and add 2 tablespoons oil that is at room temperature. Carefully measure and add the salt, sugar, and dry milk to the baking pan.
- Page 23 Repeatedly press the Select button until the red light appears next to the setting (58 min). Press the “Start/Stop” button and your machine will start making bread. Caution: Do NOT raise the lid when using the of the dough. The breadmaker is very hot, right from the beginning of the cycle.
- Page 24 Use pot holders or oven mitts to carefully lift the pan by its handle from the breadmaker. Turn the pan upside down onto a cooling rack and gently shake it until the bread comes out. If it sticks, take a rubber spatula, (metal can damage the pan’s surface), and carefully go around the sides of the loaf until the bread comes out.
-
Page 25: Chapter 5: Using The Delay Timer 2
Using the Delay Timer You can delay the time your breadmaker starts to have fresh bread ready when you get up in the morning or when you come from work. We recommend that before you use the Delay Timer, you try out a few recipes. - Page 26 To Use the Delay Timer: flgure out how many hours and minutes there are between now and when you want final, baked bread. For example, if it is 8:00 AM and you want bread ready for dinner at Use the “Timer Up” button to advance the time In 10 minute increments.
-
Page 27: Tips And Hints
Tips and Hints Experienced cooks consider breadmaking to be as much of an art as a science. Keep in mind that some recipes may require a little experimentation before they are exactly the way you want them. Just don’t give up. Still, there are special hints to ensuring quality bread almost every time. - Page 28 depending on the area of the country in which you live. We recommend using fresh bread flour. • Yeast. Fresh yeast is probably the most important ingredient in baking bread. If the yeast is not fresh, your bread may not rise. It is better to buy new yeast than to take a chance on yeast that has been stored for a long time.
- Page 29 If the doughball is too wet During the second kneading cycle, check the consistency of the doughball. If the doughball appears sticky or wet, like pancake batter, sprinkle in flour, a tablespoon at a time, until the doughball appears smooth, round, and dry and circles nicely in the pan.
- Page 30 If the bread rises too high • reduce the amount of yeast. For each teaspoon of yeast, try reducing the yeast by 1/8 to 1/4 teaspoon. • reduce the amount of sugar. For each tablespoon of sugar, reduce the amount by 1 to 2 teaspoons.
-
Page 31: Measurement Equivalency Chart
Measurement Equivalency Chart Getting Started The following chart will help you convert measurements used in the recipes. For example: 1/2 tablespoon = 1 + 1/2 teaspoons Fluid Ounce(s) Cup(s) Tablespoon(s) Teaspoon(s) 1 and 1/2... -
Page 32: Taking Care Of Your Bread Machine
Taking Care of Your Bread Machine Caution: Do not put the breadmaker in water or in a dishwasher. Do not use benzene, scrubbing brushes, or chemical cleaners as these will damage the machine. Use only a mild, non-abrasive cleaner to clean the breadmaker. - Page 33 Cleaning the baking pan and kneading blade Wipe the baking pan and kneading blade with a damp cloth and dry completely. DO NOT wash the pan or parts in the dishwasher. This will damage the finish of the pan and the other parts. Caring for your breadmaker Keep your breadmaker clean at all times.
-
Page 34: Troubleshooting
Troubleshooting Getting Started Getting Started If you experience difficulties when operating the breadmaker, review the troubleshooting information in this section to find a solution. If you are unable to find a solution, please call our Consumer Relations Department at 1(800)526-2832. If you have a power outage If the power goes out while you are using your breadmaker, the display will go blank. - Page 35 Understanding Display Information ® Your Oster Breadmaker is designed to give you information on temperature problems that may occur. The following chart shows you how to correct problems that may occur from time to time. Display Problem The display does not light up.
- Page 36 Troubleshooting Breadmaker Problems If the breadmaker does not function as you think it should, review the chart below for some possible solutions. Breadmaker Problem You see smoke or smell a burning odor from the back of the machine. The dough does not mix. Troubleshooting Baking Problems If your bread does not turn out the way you expected or has some characteristic you don’t care for, review the chart below...
- Page 37 Baking Problem, continued The bread has a heavy, thick texture. The bread is not baked completely in the center. The bread has a coarse or holey texture. The bread rose too much. The bread did not rise enough. Solution Try using less flour (a teaspoon at a time), or more yeast (1/4 teaspoon at a time).
- Page 38 Baking Problem, continued The bread has a floured top. The bread is too brown. The bread is not brown enough. Solution This is usually a result of using too much flour or not enough water. Try using less flour (a teaspoon less at a time), or try using more yeast (1/4 teaspoon less at a time).
-
Page 39: Recipes
Basic Setting Basic Bead Machine Stages for the basic cycle you can expect the foliowing things to happen as the timer counts down to zero. At 3:00 The dough is kneaded for the first time. (10 minutes) At 250 The dough begins to rise. (20 minutes) At 2:30 The dough is kneaded for the second time. - Page 40 Traditional White Bread pound loaf cup water 2 tablespoons butter or margarine 1 and 112 teaspoons salt 3 cups bread flour 2 tablespoons dry millc 1 tablespoon sugar 2 teaspoons active dry yeast I) Measure and add liquid ingredients to the bread pan. 2) Measure and add dry ingredients (except yeast) to the bread pan.
-
Page 41: Oatmeal Bread
Potato Bread I and 3/8 cups water 2 tablespoons butter or margarine 1 and 114 teaspoons salt 4 cups bread flour 2 tablespoons sugar l/4 cup instant potato flakes 2 tablespoons dry milk 1 and 314 teaspoons active dry yeast 1) Measure and add liquid ingredients to the bread pan. - Page 42 Raisin Bread (no Delay Timer) 1.5 pound loaf 7/S cups water 1 and 112 tablespoons butter or margarine 1 teaspoon salt 3 cups bread flour 2 tablespoons sugar 1 and l/2 tablespoons dry milk 1 teaspoon cinnamon 1 and 314 teaspoons active dry yeast 3/4 cups raisins (see note below) 1) Measure and add liquid ingredients to the bread pan.
-
Page 43: Sourdough Starter
3) Use your finger to form a well (hole) In the flour where you will pour the yeast. Yeast must NEVER come into contact wlth a liquid when you are adding ingredients. Measure the yeast and carefully pour it into the well. 4) Snap the baking pan into the breadmaker and close the 5) Press ‘Select”... - Page 44 To Replenish Starter After using a portion of starter, replenish with equal amounts of flour and warm water. for example, if l-1/4 cups (10 oz.) of starter were removed to make bread, replenish remaining starter with l-114 cups warm water and l-1/4 cups flour. Stir well to blend. cover and let stand in warm place until bubbly.
-
Page 45: French Bread Machine Settings
french Setting french Bread Machine Settings for the french bread cycle you can expect the following things to happen as the timer counts At 350 The dough is kneaded for the first time. (18 minutes) At 3:32 The dough begins to rise. (40 minutes) At 2:52 The dough is kneaded for the second time. - Page 46 French Countryside %read 1 and 3/S cups water 1 and l/2 tablespoons vegetable or olive oil I and l/2 teaspoons salt 4 cups bread flour 1 tablespoon sugar 2 teaspoons active dry yeast 1) Measure and add liquid ingredients to the bread pan. 2) Measure and add dry ingredients (except yeast) to the bread pan.
-
Page 47: Sweet
Sweet Setting Recipes Sweet Bread Machine Stages for the sweet bread cycle you can expect the following things to happen as the timer counts down to zero: At 250 The dough is kneaded for the first time. (10 minutes) At 2:40 The dough begins to rise. (5 minutes) At 2:35 The dough is kneaded for the second time. - Page 48 Springtime favorite Bread (no Delay Timer) 1 cup water l/4 cup butter or margarine 1 large egg 1 and t/2 teaspoons vanilla extract 1 and 114 teaspoons almond extract 1 teaspoon salt 3 and 314 cups bread flour 112 cup sugar 3 tablespoons dry milk 2 teaspoons active dry yeast 3/4 cup raisins...
- Page 49 Special Winter Bread (no Delay Timer) 718 cups water 2 tablespoons butter or margarine 1 large egg cup molasses l/4 cup corn meat 2 and 314 cups bread flour 213 cup whole wheat flour 2 and II4 teaspoons active dry yeast 1) Measure and add liquid ingredients to the bread pan.
-
Page 50: Apple Walnut Bread
Apple Walnut Bread cup unsweetened apple sauce 3/8 cups apple juice 3 tablespoons butter or margarine 1 large egg 1 teaspoon salt 4 cups bread flour l/4 cup packed brown sugar 1 and l/4 teaspoons cinnamon 112 teaspoon baking soda 2 teaspoons active dry yeast l/2 cup chopped walnuts 1) Measure and add liquid ingredients to the bread pan. - Page 51 Setting Recipes (58 Minutes) Bread Machine Stages (58 minutes) for the 58 minute following things to happen as the timer counts down to zero: The dough is kneaded for the first time. (1 minute) ‘The dough is kneaded for the second time. (12 minutes) The dough rises.
-
Page 52: Setting (58 Minutes) 4
White Bread 1.5 pound Loaf 1 cup and two tablespoons hot water (115”-125”f) 2 tablespoons oil 2 tablespoons sugar 1 teaspoon salt 3 cups bread flour 5 teaspoons Red Star@ Quick RiseTM Yeast Important: Carefully measure the hot water and make sure it is between 115’-125’f by using a cooking thermometer. - Page 53 Important: Carefully measure the hot water and make sure ‘4: it is between 115°-125”F 1) Measure and add Liquid ingredients to the bread pan. 2) Measure and add dry ingredients (except yeast) to the bread pan. 3) use your finger to form a well (hole) in the flour where you w i t I pour the must yeast.
- Page 54 EXPRfSSBAKErM EXPf?ESS%AtETM for the 80 minute EXPRESS%AKETM cycle you can expect the following things to happen as the timer counts down to zero: At 1:20 The dough is kneaded for the first time. (2 minutes) At 1:18 The dough is kneaded for the second time. (18 minutes) At 1:00 The dough rises.
-
Page 55: Rye Bread
i3eer Rye Bread 1 and l/4 cups hot beer (115’-125°F) l/4 cup oil 3 tabtespoons packed brown sugar 1 teaspoon salt 3 cups bread flour 1 cup rye flour 1 and 112 tablespoons caraway seeds teaspoons ground fennel 3/4 teaspoon fresh orange zest (finely ground orange peel) 2 tablespoons Red Star@ Quick RiseTM Yeost Important: Carefully measure the hot water and make sure i<... - Page 56 Oatmeal Date Bread D 1 and l/2 cups hot water (115°-1250f) 2 tablespoons oil l/4 cup packed brown sugar 1 teaspoon salt 3 cups bread flour 1 and 112 cups instant oatmeal l/2 cup finely chopped dates 2 tablespoons Red Star@ Quick RisetM Yeast Important: Carefully measure the hot water and make sure ‘I<...
-
Page 57: Whole Wheat
Whole Wheat Setting Recipes Whole Wheat Bread Machine Stages For the whole wheat bread cycle you can expect the following things to happen as the timer counts down to zero: At 3:40 The dough is kneaded for the first time. (IO minutes) At 3:30 The dough begins to rise. - Page 58 100% Whole Wheat Bread 1 and 518 cups water cup packed brown sugar 2 teaspoons salt 4 and 213 cups whole wheat flour 3 teaspoons active dry yeast 1) Measure and add liquid ingredients to the bread pan. 2) Measure and add dry ingredients (except yeast) to the bread pan. 3) Use your finger to form a well (hole) in the flour where you wit1 pour the yeast.
-
Page 59: Wheat Bread
Wheat Bread 1 and cups water 2 tablespoons butter or margarine 4 tablespoons honey 1 teaspoon salt 3 and cups bread flour 1 cup wheat flake cereal 2 tablespoons wheat bran cereal 2 teaspoons dry yeast 1) Measure and add liquid ingredients to the bread pan. Measure and add dry ingredients (except yeast) to the bread pan. -
Page 60: Buttermilk Bread
Buttermilk Bread 1 and t/4 cups water 1 and 112 tablespoon butter or margarine 1 teospoon white vinegar 2 tablespoons packed brown sugar 2 cups bread flour 1 cup whole wheat flour 1 cup rye flour 2 tabtespoons powdered buttermilk 1 tabtespoon vital gluten 1 and l/2 teaspoons caraway seeds 2 teaspoons active dry yeast... -
Page 61: Doug H/Pasta 5
Dough Setting Recipes Dough Machine Stages For the dough cycle you can expect the following things to happen as the timer counts down to zero: At 1:30: The dough is kneaded for the first time. (20 minutes) At 1:10: The dough continues to rise. (20 minutes) At 0:50: The dough is “punched down.”... - Page 62 Note: The pan does not get hot when using the dough setting. Preparing Dough for Baking Lightly sprinkle all-purpose flour onto a pastry mat or board. Using a rubber spatula or wooden spoon, remove dough from the bread pan and place on lightly floured surface.
- Page 63 Dough swirl. Place rolls 2 to 3 inches apart on prepared baking sheet. Cover, let rise and bake as directed. Makes 10 Butterhorns Lightly grease baking sheet and set aside. On a lightly floured surface, roll dough into a 12-inch circle.
- Page 64 Bread Pretzel All ingredients at room temperature (70˚ F–80˚ F) 2 cups bread flour 1-1/2 tsp. active dry yeast 1/4 tsp. salt 1/2 tsp. sugar 7/8 cup water 1 to 2 Tbsp. coarse (Kosher) salt 1 egg, slightly beaten Measure all ingredients into bread pan, except egg and coarse salt. Press “Start/Stop”...
-
Page 65: Powdered Sugar Glaze
Coffee Cake (no Delay Timer) All ingredients at room temperature (70˚ F–80˚ F), except milk 1/4 cup sugar 1 tsp. salt 2-1/4 cups bread flour 2 tsp. active dry yeast 1 egg yolk 3/4 to 7/8 cup milk 1 Tbsp. butter or margarine Measure all ingredients into bread pan. -
Page 66: Pizza Crust
In a small bowl, combine all ingredients and blend until smooth. Spread or drizzle glaze on slightly warm coffee cake or sweet rolls. Makes enough to cover 1 coffee cake. Pizza Crust 1.5 pound All ingredients at room temperature (70˚–80˚ F) 1/2 tsp. -
Page 67: Pasta Recipes
Pasta Recipes Basic Pasta (no Delay Timer) All ingredients should be at room temperature (70˚–80˚ F) 2 cups all-purpose flour 1 cup semolina flour 1 tsp. salt 1 Tbsp. olive oil or vegetable oil 7/8 cup water Measure all ingredients into bread pan. Select Dough setting. - Page 68 Bake Setting Recipes (Jams and Marmalades) Strawberry Jam (no Delay Timer) 1 cup sugar 1 Tbsp. powdered low-sugar fruit pectin 1-1/2 cups fresh strawberries, sliced 2 tsp. lemon juice Combine all ingredients into bread pan. Select Basic setting. Press “Start/Stop.” Allow to mix 5–6 minutes, scraping sides of the pan with rubber spatula.
- Page 69 Orange Marmalade (no Delay Timer) 1-1/4 cups sugar 2 Tbsp. powdered low-sugar fruit pectin 3 large oranges 1 lemon With a vegetable peeler, shave off the bright layer of peel from one orange and the lemon; chop finely. Remove and discard remaining white peel from orange and lemon. Peel remaining oranges, and discard peels.
- Page 70 Glazes After rolls rise, just before baking, gently apply desired glaze with a pastry brush. Bake as directed in the recipe. • For a shiny golden crust, use Egg Glaze or Egg Yolk Glaze. • For a shiny chewy crust, use Egg White Glaze (crust will be lighter in color).
- Page 71 Ham and Swiss Spread Mix: 1 package (3 oz) cream cheese, softened 2 Tbsp. finely chopped, fully cooked, smoked ham 1 Tbsp. shredded Swiss cheese 1/2 tsp. prepared mustard Herb-Cream Cheese Spread Mix: 1 container (4 oz) whipped cream cheese 1 tsp.
-
Page 72: Index
0:OO (display message) ... . 33 altitude, effect on baking ...27 Bake setting description .., ...15 recipes . - Page 73 Keep Warm setting ....11.21 kneading blade ... .3.11.22,31 L:LL (display message! ... .33 measurement conversions .
-
Page 74: Recipe Index 7
%asic Setting ... . . Country White %read ..38 favorite Potato Bread ..3 9 Light Rye Pread Oatmeal %read . - Page 75 IMITED ARRANTY Sunbeam Products, Inc. warrants to the original purchaser, subject to the limitations and exclusions set forth below, that this product shall be free, in all material respects, of mechanical and electrical defects in material and workmanship from the date of purchase for one year. This warranty does not cover normal wear of parts or damage resulting from any of the following: negligent use or misuse of the product, use on improper voltage or current, use contrary to operating instructions or disassembly, repair or alteration by any person other than an authorized service center.
- Page 76 2 lb. EXPRESSBAKE™ Breadmaker P.N. 102819 ©1999 Sunbeam Corporation or its affiliated companies. All rights reserved. Oster® is a registered trademark of Sunbeam Corporation or its affiliated companies. Distributed by Sunbeam Products, Inc. Boca Raton, FL 33431...
Need help?
Do you have a question about the 5836 and is the answer not in the manual?
Questions and answers