Table of Contents
Advertisement
Quick Links
Advertisement
Table of Contents

Related Manuals for Maxview Target Sky QMXL017/85Q


Summary of Contents for Maxview Target Sky QMXL017/85Q
- Page 1 MXL017/65Q/85Q Target Sky Q™ & Auto Skew Installation & operating instructions UK contact: Helpline: +44 (0)1553 811000 Email: support@maxview.co.uk Web: www.maxview.co.uk Maxview reserve the right to change specifications without prior notice 9111330SKYQ Iss 3...
-
Page 2: Table Of Contents
All instructions and models are subject to change. In accordance with policy of progressive product, the company reserve the right to alter specifications. Copyright© these instructions are the sole property of Maxview Ltd and may not be reproduced. Please keep these instructions safe for future reference. -
Page 3: Safety Precautions
Failure to follow all instructions listed below may result in electric shock, fire and/or serious injury. Maxview declines all responsibility in the event of incident or accident if they are due to a non observation of the installation instructions or the way the product is used. -
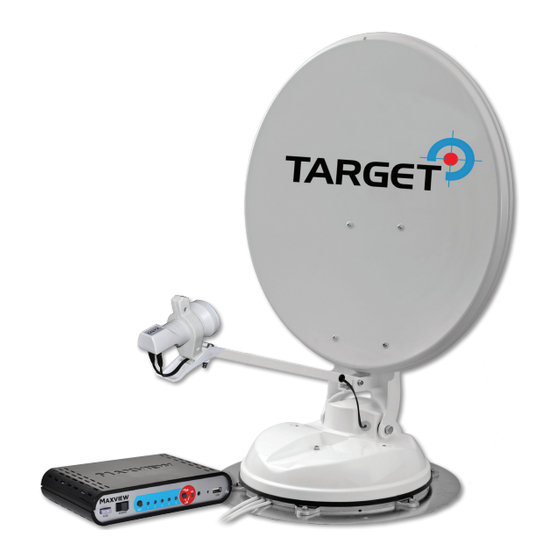
Page 4: Application Example
It can be mounted discretely in a cupboard and can be fixed vertically and horizontally. You need to install the Splitter for SKY Q™ - See page 11 Page 4 Visit: www.maxview.co.uk - Search ‘Target’ for potential software updates... -
Page 5: Connections & Features
> Surface Cleaner > Sikaflex®-512 Caravan > 10mm spanner > Geocel® Geobond HM > Hexagonal socket key 4mm > Sikaflex®-252 > Deburrer/Round File/Emery paper > Conduit (recommend method for securing cables) Visit: www.maxview.co.uk - Search ‘Target’ for potential software updates Page 5... -
Page 6: Selecting An Installation Location
> There is an electrical supply of 12V dc permanent and ignition > There is adequate ventilation > The Control Box is not encased with metal > Material construction and thickness is suitable for fixings Page 6 Visit: www.maxview.co.uk - Search ‘Target’ for potential software updates... -
Page 7: Attaching Antenna Mount Plate
• Take care when working at heights. Always follow ladder manufacturer’s safety advice • Use creeper boards where necessary to ensure roof construction can support your weight • Power tools should be used in accordance with manufacturer’s instructions Page 7 Visit: www.maxview.co.uk - Search ‘Target’ for potential software updates... -
Page 8: Electrical Installation
Positive ignition key on (Fridge) Earth return for contact 6 Black Caution: All electrical work should be carried out by a competent person. If in doubt seek advice from a qualified electrician. Page 8 Visit: www.maxview.co.uk - Search ‘Target’ for potential software updates... -
Page 9: Attaching Antenna Unit To
(front of vehicle) Note: To prevent trip hazards it is recommended that cables are concealed in PVCu conduit (not supplied) where access is required to the roof of the vehicle. Visit: www.maxview.co.uk - Search ‘Target’ for potential software updates Page 9... -
Page 10: Installing Cable Entry Plate
Position the Control Box in one of the 4 ways shown left. Make sure that the front is easily accessible. Fitting the Control Box Brackets: The brackets snap fit to the Control Box casing Visit: www.maxview.co.uk - Search ‘Target’ for potential software updates Page 10 ... -
Page 11: Connection Diagram
If you find the Target locks onto the Satellite and the SKY™ Receiver has no signal we suggest you check connections and ensure the LNB type is on Wideband NOT SCR. Visit: www.maxview.co.uk - Search ‘Target’ for potential software updates Page 11... -
Page 12: Attaching Satellite Dish To Unit
SKY Q™ Receivers only. Therefore LED 2 is the only satellite that is programmed to Astra 2 for SKY Q™ connection. LED 1, 3, 4 & 5 have no function. Page 12 Visit: www.maxview.co.uk - Search ‘Target’ for potential software updates... -
Page 13: Interface Details
*If required. Press SAT to scroll through satellite selection. Eg. New selected SAT LED will flash green. Flashes green Search Flashes green 3. Search SEARCH - Press and release to begin. Both the OK LED and LED selected will flash during search. Visit: www.maxview.co.uk - Search ‘Target’ for potential software updates Page 13... -
Page 14: Ignition Mode
The Ignition Mode will still activate even with the Control Box power switch in the off position. When power is restored to the system the antenna will automatically lower into the park position. Visit: www.maxview.co.uk - Search ‘Target’ for potential software updates Page 14... -
Page 15: Software Update
Software update: To keep your Target up to date with the latest satellites Maxview has incorporated a USB port on the front of the Control Box. The Target has the ability to update its satellite data and its operational software from a simple USB flash memory stick. -
Page 16: Fault Finding
After 5 seconds the dish will then move to park position Flashes green Solid red No SAT found - system parked. Once parked the Search LED stays solid RED and SAT LED searched continues to flash green Page 16 Visit: www.maxview.co.uk - Search ‘Target’ for potential software updates... - Page 17 If rotation motor stops the above LED sequence will occur, please contact Customer Services. Solid orange Flashes red F. Elevation Error. If elevation motor stops the above LED sequence will occur, please contact Customer Services. Visit: www.maxview.co.uk - Search ‘Target’ for potential software updates Page 17...
-
Page 18: Skew Adjustment
For proper treatment, recovery and recycling of old products and used batteries, please take them to applicable collection points, in accordance with your national legislation and the Directives 2002/96/EC and 2006/66/EC. Page 18 Page 18 Visit: www.maxview.co.uk - Search ‘Target’ for potential software updates... -
Page 19: Guarantee
A guarantee authorisation must be obtained from Maxview prior to work commencing. c) Maxview is responsible for the cost of a replacement part if the original part is determined to be defective under the terms of the guarantee. -
Page 20: Specifications
It is the responsibility of the end user to understand the contractual agreement between themselves and SKY Q™ and any limitations of equipment this may have. In no event shall Maxview be liable for any indirect, incidental, or consequential damages pertaining to this document.
Need help?
Do you have a question about the Target Sky QMXL017/85Q and is the answer not in the manual?
Questions and answers