Vortice VORT HR 350 AVEL Instruction Booklet
Hide thumbs
Also See for VORT HR 350 AVEL:
- Instruction booklet (168 pages) ,
- Installation manual (2 pages) ,
- Instruction booklet (25 pages)
Table of Contents
Advertisement
Available languages
Available languages
Quick Links
Libretto istruzioni
Instructions Booklet
Livret d'istructions
Betriebsanleitung
Manual de instrucciones
COD. 5.471.084.178
VORTICE LIMITED
Beeches House - Eastern Avenue
Burton on Trent
DE13 0BB
Tel. (+44) 1283-492949
Fax (+44) 1283-544121
UNITED KINGDOM
VORT HR 350 AVEL
VORTICE FRANCE
15-33, Rue Le Corbusier Europarc
CS 30007
90046 CRETEIL CEDEX
FRANCE
HA
VORTICE ELETTROSOCIALI S.p.A.
Strada Cerca, 2 - frazione di Zoate
20067 TRIBIANO (MI)
Tel. (+39) 02-90.69.91
Fax (+39) 02-90.64.625
ITALIA
09/04/2015
Advertisement
Table of Contents

Subscribe to Our Youtube Channel
Related Manuals for Vortice VORT HR 350 AVEL


Summary of Contents for Vortice VORT HR 350 AVEL
- Page 1 Libretto istruzioni Instructions Booklet Livret d’istructions Betriebsanleitung Manual de instrucciones VORT HR 350 AVEL COD. 5.471.084.178 09/04/2015 VORTICE FRANCE VORTICE LIMITED VORTICE ELETTROSOCIALI S.p.A. 15-33, Rue Le Corbusier Europarc Beeches House - Eastern Avenue Strada Cerca, 2 - frazione di Zoate...
-
Page 2: Table Of Contents
Installation ....... . . 17 Vortice cannot assume any responsibility for damage to property or personal injury resulting from failure to abide Use. -
Page 3: Descrizione Ed Impiego
Centro Assistenza Vortice. • Se il prodotto cade o riceve forti colpi farlo verificare subito presso un Centro di Assistenza Tecnica autorizzato Vortice. • L’apparecchio deve essere montato in modo da garantire che, in condizioni normali di funzionamento, nessuno possa venirsi a trovare in prossimità... -
Page 4: Struttura E Dotazione
ITALIANO sua potenza massima. In caso contrario rivolgersi subito a personale professionalmente qualificato. • Spegnere l’interruttore generale dell’impianto quando: si rileva un’anomalia di funzionamento; si decide di eseguire una manutenzione di pulizia esterna; si decide di non utilizzare per brevi o lunghi periodi l’apparecchio. •... -
Page 5: Installazione
N.B. qualora si optasse per l’installazione a pavimento, predisporre sotto l’apparecchio uno spazio sufficiente per eseguire i sifoni sugli scarichi della condensa (vedi anche paragrafo Scarico Condensa). L’apparecchio può essere appoggiato oppure fissato con i sistemi di fissaggio forniti da Vortice (opzionali) (modalità consigliata da Vortice) (vedi sequenza figure 3, 4, 5) Parete Si suggerisce di utilizzare la staffa fornita da Vortice (opzionale) (fig.6,7,8) - Page 6 ITALIANO 0≤α<2° α Accertarsi che l’apparecchio sia in bolla, al fine di garantirne il perfetto funzionamento. E’ accettata una inclinazione di alcuni gradi verso il retro dell’apparecchio (fig.9) I condotti utilizzati per le canalizzazioni devono essere delle corrette dimensioni. I condotti da e verso l’esterno devono essere isolati termicamente e non soggetti a vibrazioni.
- Page 7 ITALIANO Ingressi scatola elettrica (fig.13) Accessibilità 1: Temperatura L’apparecchio è facilmente accessibile grazie allo 2: Apertura bypass sportello frontale, (fig.12) per eventuali interventi di 3: Alimentazione Supply servizio/manutenzione, compresa rimozione 4: Chiusura Bypass sostituzione dei filtri dell’aria. (Vedi anche paragrafo 5: Segnale Supply “Manutenzione /pulizia”) 6: Preheater...
-
Page 8: Utilizzo
Il controllo dell’apparecchio è realizzato tramite apposito pannello comandi dedicato, di cui nel seguito vengono descritte le funzioni. E’ possibile l’abbinamento di un pre-riscaldatore Vortice, la cui installazione è demandata all’installatore. La distanza minima del pre-riscaldatore dall’apparecchio è di 500 mm. - Page 9 ITALIANO spenta: bypass disattivato accesa fissa: bypass aperto tramite comando manuale lampeggiante: bypass aperto automaticamente via software (in questo caso non è possibile chiudere il bypass manualmente) 19 gradi Celsius temperatura interna 20 visualizzazione temperatura esterna gradi Celsius 21 Boost attivo Accensione/spegnimento (solo mercati NO UK) (fig.18) L’apparecchio si accende/spegne tramite una pressione lunga sul tasto “down”...
- Page 10 ITALIANO Impostazione temperatura ambiente richiesta (fig.21) Prima di eseguire i passi indicati nel seguito premere il tasto FILT ESC per uscire e posizionarsi sul menu iniziale. La temperatura ambiente desiderata può essere selezionata nel seguente modo: - pressione lunga del pulsante SET - pressione breve del pulsante SET (il valore corrente lampeggia) - selezione del valore desiderato tramite pulsanti “up”...
- Page 11 ITALIANO Menu utente (fig.24) Prima di eseguire i passi indicati nel seguito premere il tasto ESC per uscire e posizionarsi sulla schermata iniziale. FILT In generale i parametri relativi alle varie opzioni sono impostabili premendo SET (il valore corrente inizia a lampeggiare), selezionando i diversi valori tramite i pulsanti UP e DOWN e premendo nuovamente SET per acquisire il nuovo valore.
- Page 12 ITALIANO Opzione HA (fig.26) L’opzione è disponibile solo per i modelli dotati di modulo HA Selezionando HA tramite pulsante SET si entra nelle FILT impostazioni della modalità HA. I parametri sono: - En (Enable): i valori possibili sono: PROF: abilita la modalità HA con profili ON: abilita la modalità...
-
Page 13: Manutenzione/Pulizia
ITALIANO Manutenzione e pulizia Prima di iniziare qualsiasi operazione accertarsi che il prodotto sia scollegato dalla rete elettrica. Lo smontaggio e relativo montaggio sono operazioni di manutenzione straordinaria e devono essere eseguite da personale professionalmente qualificato. N.B. Prima di aprire lo sportello svitare la vite di sicurezza frontale. -
Page 14: Informazione Importante Per Lo Smaltimento Ambientalmente Compatibile
ITALIANO Informazione importante per lo smaltimento ambientalmente compatibile IN ALCUNI PAESI DELL'UNIONE EUROPEA QUESTO PRODOTTO NON RICADE NEL CAMPO DI APPLICAZIONE DELLA LEGGE NAZIONALE DI RECEPIMENTO DELLA DIRETTIVA RAEE E QUINDI NON È IN ESSI VIGENTE ALCUN OBBLIGO DI RACCOLTA DIFFERENZIATA A FINE VITA. Questo prodotto è... -
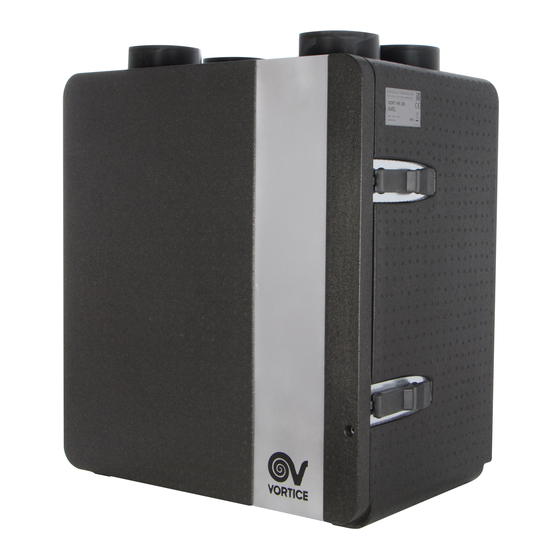
Page 15: Description And Use
ENGLISH Description and use Vort HR 350 Avel (hereafter “the appliance”) is a heat recovery unit for residential use, featuring high heat exchange efficiency, low power consumption and compact size. The appliance is controlled by a hi-tech electronic management system and equipped with fan units that utilize EC brushless motors. A heat exchanger is fitted inside the appliance to guarantee heat exchange efficiency levels >85%. -
Page 16: Items Supplied
ENGLISH • The appliance cannot be used to pilot the operation of water heaters, stoves, etc.; neither must it drain into the hot water ducts of such appliances. • The appliance must expel air directly to the outside through a single dedicated duct. •... -
Page 17: Installation
N.B. if opting for floor-standing installation, leave enough room underneath the appliance to create the siphon traps on the condensate drain outlets (see also Condensate Drain paragraph). The appliance can be placed or secured using the fixing systems supplied by Vortice (optional) (Vortice recommended method) (see figure sequence 3, 4, 5). Wall... - Page 18 ENGLISH 0≤α<2° α Make sure that the appliance is level in order to ensure faultless operation. It is acceptable for the appliance to be tilted no more than a few degrees to the rear (fig.9). The ducts used for conveying air must be of the correct size. The ducts to and from the outdoors must be thermally insulated and not subject to vibration.
- Page 19 ENGLISH Accessibility Junction box inputs (fig.13) The appliance can be accessed easily via the front hatch 1: Temperature (Fig.12) for servicing/maintenance purposes, including 2: Bypass open air filter removal and replacement procedures. (See also 3: Supply power "Maintenance/Cleaning" paragraph) 4: Bypass close 5: Supply signal 6: Preheater 7: Boost...
-
Page 20: Use
The appliance is wired to a special dedicated control panel, the functions of which are described further on. This model can be used in combination with a Vortice preheater, which must be fitted and set up by the installer. The minimum distance of the preheater from the appliance is 500 mm. - Page 21 ENGLISH off: bypass deactivated permanently alight: bypass opened manually blinking: bypass opened automatically via software (in this case the bypass cannot be closed manually) 19. indoor temperature, degrees Celsius 20. view outdoor temperature, degrees Celsius 21. Boost active On/off (NO UK) (fig.18 The appliance is switched on and off by pressing and holding the "down"...
- Page 22 ENGLISH Set required room temperature (fig.21) Before proceeding with the steps indicated below, press the ESC button to exit and return to the initial menu. The FILT preferred room temperature can be selected as follows: - press and hold the SET button - press the SET button briefly (the current value flashes) - select the required value using the UP and DOWN buttons - press the SET button briefly to retain the setting...
- Page 23 ENGLISH User Menu Before proceeding with the steps indicated below, press FILT ESC to exit and return to the opening screen. As a rule, the parameters relative to the various options are selected by pressing SET (this causes the current value to blink), then scrolling through the available values with the UP and DOWN buttons, and pressing SET again to confirm the new value.
- Page 24 ENGLISH Option HA This option is available only on models with HA module FILT Selecting HA by pressing SET, the settings for HA operating mode are accessed. The parameters are: - En (Enable): possible values are: PROF: enables HA mode with profiles ON: enables HA mode continuously OFF: disables HA mode HOL: enables HOLIDAY mode: two hours antibacterial...
-
Page 25: Maintenance/Cleaning
ENGLISH Maintenance and cleaning Before commencing any servicing operation, make sure that the appliance is disconnected from the electrical power supply. Dismantling and assembly are special maintenance operations and must be entrusted to professional technicians. N.B. Before opening the hatch, loosen the front safety screw. (fig.28) Filters Recommended maintenance intervals: Because levels of air... -
Page 26: Important Information Regarding Eco-Compatible Disposal
ENGLISH Important information concerning the environmentally compatible disposal IN CERTAIN EUROPEAN UNION COUNTRIES THIS PRODUCT DOES NOT FALL WITHIN THE REQUIREMENTS OF THE NATIONAL LAWS IMPLEMENTING DIRECTIVE WEEE, AND IN THESE COUNTRIES THE PRODUCT IS NOT SUBJECT TO SEPARATE DISPOSAL OPERATIONS AT THE END OF ITS WORKING LIFE. This product conforms to EU Directive2002/96/EC. -
Page 27: Description Et Mode D'emploi
FRANCAIS Description et mode d’emploi Vort HR 350 Avel (ci-après dénommé « l’appareil ») est un récupérateur de chaleur à usage domestique, à haut rendement thermique, économique et de dimensions réduites. L’appareil est commandé par un système de gestion électronique avancé... -
Page 28: Structure Et Équipement De Série
FRANCAIS à sa puissance maximale. Dans le cas contraire, s'adresser immédiatement à un technicien qualifié. • Couper l'interrupteur général de l'installation dans les cas suivants : dysfonctionnement ; nettoyage extérieur ; non utilisation de l'appareil pendant une courte ou une longue période. -
Page 29: Installation
N.B. pour la pose au sol, laisser un espace suffisant sous l'appareil pour monter les siphons sur les conduits d'évacuation de la condensation (consulter également le paragraphe Évacuation condensation). L'appareil peut être posé au sol ou fixé par le biais des systèmes de fixation fournis par Vortice (en option) (modalité conseillée par Vortice) (voir séquence figures 3, 4, 5) Pose murale Il est vivement conseillé... - Page 30 FRANCAIS 0≤α<2° α S'assurer que l'appareil est parfaitement à niveau, condition nécessaire pour qu'il fonctionne correctement. Une inclinaison de quelques degrés vers l'arrière de l'appareil est tolérée (fig. 9) Les conduites utilisées pour les canalisations doivent être correctement dimensionnées. Les conduites qui communiquent avec l'extérieur doivent être isolées contre les variations thermiques et protégées contre les vibrations.
- Page 31 FRANCAIS Entrées boîtier électrique (fig.13) Accessibilité 1 : Température L’accès à l'appareil est facilité grâce au volet présent à 2 : By-pass ouverte l'avant (fig.12) à utiliser pour les opérations de 3 : Alimentation Supply service/entretien et pour démonter ou remplacer les 4 : By-pass fermée filtres à...
-
Page 32: Mode D'emploi
Le contrôle de l'appareil se fait à partir d'un tableau de commande spécial dont les fonctions sont décrites ci-dessous. Il est possible d'ajouter un préchauffeur Vortice dont la mise en place doit être confiée à l'installateur. La distance minimale entre le pré-chauffage et l'appareil est de 500 mm. - Page 33 FRANCAIS 17 fonction by-pass : l’icône indique : (consulter également le paragraphe Activation fonction By-pass) éteinte : by-pass désactivée allumée en permanence : by-pass ouverte au moyen de la commande manuelle clignotante : by-pass ouverte automatiquement via le logiciel (dans ce cas, il n'est pas possible de fermer la by-pass manuellement) 19 degrés Celsius température intérieure 20 affichage de la température extérieure en degrés Celsius.
- Page 34 FRANCAIS Réglage de la température ambiante requise (fig.21) Avant de suivre les étapes ci-dessous, appuyer sur la FILT touche ESC pour sortir et se positionner dans le menu principal. La température ambiante choisie peut être sélectionnée de la façon suivante : - appui prolongé...
- Page 35 FRANCAIS Menu utilisateur Avant de suivre les étapes ci-dessous, appuyer sur la touche ESC pour sortir et se positionner sur la page initiale. Les FILT paramètres concernant les différentes options peuvent être généralement configurés moyennant l'enfoncement de SET (la valeur actuelle commence à clignoter), la sélection des différentes valeurs au moyen des boutons UP et DOWN et le réenfoncement de SET pour obtenir la nouvelle valeur.
- Page 36 FRANCAIS Option HA Cette option n'est disponible que sur les modèles dotés du FILT module HA Pour entrer dans les configurations de la modalité HA, sélectionner HA au moyen du bouton SET. Les paramètres sont les suivants : - En (Enable) : les valeurs possibles sont les suivantes : PROF : active la modalité...
-
Page 37: Entretien / Nettoyage
FRANCAIS Entretien et nettoyage Avant toute opération, s'assurer que l'appareil est déconnecté du réseau électrique. Le démontage et le remontage sont des opérations d'entretien exceptionnel qui doivent être exécutées par des professionnels qualifiés. N.B. Avant d'ouvrir le volet, desserrer la vis de sécurité à l'avant. -
Page 38: Information Importante Pour Éliminer L'appareil En Respectant L'environnement
FRANCAIS Information importante pour éliminer l'appareil en respectant l'environnement DANS CERTAINS PAYS DE L’UNION EUROPÉENNE, CET APPAREIL N’ENTRE PAS DANS LE CHAMP DE TRANSPOSITION DE LA DIRECTIVE DEEE, IL N’EXISTE DONC AUCUNE OBLIGATION DE COLLECTE DIFFÉRENCIÉE À LA FIN DE SON CYCLE DE VIE. Cet appareil est conforme à... -
Page 39: Beschreibung Und Gebrauch
DEUTSCH Beschreibung und Gebrauch Vort HR 350 Avel (nachfolgend als „Gerät“ bezeichnet) ist ein Wärmerückgewinnungsgerät für den Privatgebrauch, das sich durch hohe Wärmeaustauscheffizienz, geringen Verbrauch und kompakte Abmessungen auszeichnet. Das Gerät besitzt ein hochentwickeltes elektronisches Steuersystem und ist mit modernen Lüftern bestückt, die mit kollektorlosen EC-Motoren ausgestattet sind. -
Page 40: Aufbau Und Ausstattung
DEUTSCH • Das Gerät nur dann an das Stromnetz anschließen, wenn die Stromfestigkeit der Anlage/Steckdose für die maximale Leistung geeignet ist. Wenden Sie sich andernfalls umgehend an einen Elektrofachmann. • Den Hauptschalter der Anlage in folgenden Fällen ausschalten: Auftreten einer Betriebsstörung; vor der Durchführung der Außenreinigung des Gerätes;... -
Page 41: Installation
Hinweis: Falls das Gerät auf dem Boden aufgestellt wird, muss unter dem Gerät ausreichend Platz freigelassen werden, um die Siphons an den Kondensatableitungen ausführen zu können (siehe auch Abschnitt „Kondensatableitung“). Das Gerät kann aufgestellt oder mit den von Vortice gelieferten Befestigungssystemen (optional) verankert werden (von Vortice empfohlene Installationsart) (siehe Abbildungen 3, 4, 5) Wand Es wird empfohlen, den von Vortice gelieferten Montagebügel zu verwenden (optional) (Abb.6,7,8) - Page 42 DEUTSCH 0≤α<2° α Das Gerät muss perfekt nivelliert sein, um einen optimalen Betrieb zu gewährleisten. Eine nach hinten gerichtete Neigung des Geräts von wenigen Graden wird akzeptiert (Abb.9) Die Lüftungskanäle müssen korrekt bemessen werden. Die Zu- und Ableitungen von/nach außen müssen isoliert sein und dürfen nicht vibrieren.
- Page 43 DEUTSCH Zugänglichkeit Schaltkasteneingänge (Abb. 13) Für eventuelle Service-/Wartungseingriffe, einschließlich 1: Temperatur Ausbau und Wechsel der Luftfilter, ist das Gerät über die 2: Bypass open vordere Klappe (Abb.12) problemlos zugänglich. (Siehe 3: Versorgung Supply auch Abschnitt „Wartung/Reinigung“) 4: Bypass close 5: Signal Supply 6: Vorwärmer 7: Boost 8: Versorgung...
-
Page 44: Gebrauch
Die Steuerung des Gerätes erfolgt über die entsprechende Bedienblende, deren Funktionen im Folgenden beschrieben werden. Das Gerät kann mit einem Vortice-Vorwärmer kombiniert werden, der nur vom Installationstechniker eingebaut werden darf. Die minimale Distanz vom Vorwärmer zum Gerät beträgt 500 mm. - Page 45 DEUTSCH 17.Bypass-Funktion: Das Symbol zeigt an: (siehe auch Abschnitt Aktivierung der „Bypass-Funktion“) Aus: Bypass deaktiviert Dauerlicht: Bypass offen mit manueller Steuerung Blinkend: Bypass offen automatisch via Software (in diesem Fall kann das Bypassventil nicht von Hand geschlossen werden) 19.Innentemperatur in Grad Celsius 20.Außentemperatur in Grad Celsius 21.Boost aktiv Ein-/Ausschalten (nur NICHT UK) (Abb.18)
- Page 46 DEUTSCH Einstellung der gewünschten Raumtemperatur (fig.21) Vor der Durchführung der angegebenen Vorgehensweise die ESC Taste drücken, um zum Eingangsmenü zurückzukehren. FILT Die gewünschte Raumtemperatur kann wie folgt ausgewählt werden: - anhaltender Druck der Taste SET - kurzer Druck der Taste SET (der aktuelle Wert blinkt) - Auswahl des gewünschten Werts mit den Tasten “up”...
- Page 47 DEUTSCH Benutzermenü Vor der Durchführung der angegebenen Vorgehensweise die Taste drücken, Anfangsbildschirm FILT zurückzukehren. Generell können die Parameter der verschiedenen Optionen wie folgt eingestellt werden: SET drücken (der aktuelle Wert beginnt zu blinken), die Werte mit den Tasten UP und DOWN auswählen und erneut SET drücken, um den neuen Wert zu übernehmen.
- Page 48 DEUTSCH Option HA Die Option steht nur bei Modellen mit Modul HA zur FILT Verfügung Bei Auswahl von HA mit der Taste SET werden die Einstellungen des Betriebsmodus HA geöffnet. Parameter: - En (Enable): Mögliche Werte: PROF: Aktivierung des Betriebsmodus HA mit Profilen ON: Aktivierung des Dauerbetriebs HA OFF: Deaktivierung des Betriebsmodus HA HOL: Aktivierung des Betriebsmodus HOLIDAY: täglich...
-
Page 49: Wartung / Reinigung
DEUTSCH Wartung und Reiningung Vor jedem Eingriff am Gerät muss sichergestellt werden, dass das Gerät vom Stromnetz getrennt ist. Die Demontage und anschließende Montage gehören zur außerordentlichen Wartung und dürfen nur durch qualifiziertes Fachpersonal durchgeführt werden. Hinweis: Vor Öffnen der Klappe die vordere Sicherheitsschraube aufdrehen. -
Page 50: Wichtige Information Für Eine Umweltgerechte Entsorgung
DEUTSCH Wichtige Information für die umweltgerechte Entsorgung IN EINIGEN EU-LÄNDERN GELTEN FÜR DIESES PRODUKT NICHT DIE VORGABEN DER EUROPÄISCHEN RICHTLINIE ÜBER ELEKTRO-UND ELEKTRONIK-ALTGERÄTE (WEEE-RICHTLINIE) UND DEMNACH BESTEHT IN DIESEN LÄNDERN AUCH KEINE PFLICHT FÜR DIE MÜLLTRENNUNG BEI DER ENTSORGUNG DES GERÄTES. Dieses Gerät entspricht der EG-Richtlinie 2002/96/EG. -
Page 51: Descripción Y Uso
Descripción y uso Vort HR 350 Avel (en adelante “el aparato”) es un recuperador de calor para uso residencial caracterizado por una alta eficiencia de intercambio térmico, bajos consumos y dimensiones reducidas. El aparato es controlado por un sistema de gestión electrónica avanzada y está... -
Page 52: Estructura Y Dotación
ESPAÑOL • La instalación eléctrica a la que se ha de conectar el aparato debe ser conforme a las normas vigentes. • Conectar el producto a la red de alimentación eléctrica o a una toma de corriente sólo si la capacidad de la instalación es adecuada para su potencia máxima. -
Page 53: Instalación
Nota: en caso de instalación en el suelo, debajo del aparato debe haber suficiente espacio para los sifones de descarga del condensado (ver el apartado Descarga de condensado). El aparato se puede apoyar o se puede fijar (recomendado) con los sistemas de fijación suministrados por Vortice (opcionales) (ver secuencia figuras 3, 4, 5). Parede... - Page 54 ESPAÑOL 0≤α<2° α Asegurarse de que el aparato esté bien nivelado para garantizar el funcionamiento perfecto. Se admite una inclinación del aparato de pocos grados hacia atrás (fig.9). Los conductos utilizados para las canalizaciones deben ser de la medida adecuada. Los conductos desde y hacia el exterior deben estar aislados térmicamente y no sujetos a vibraciones.
- Page 55 ESPAÑOL Entradas de la caja eléctrica (fig.13) Accesibilidad El aparato es fácilmente accesible por la puerta frontal 1: Temperatura (fig.12) para trabajos de servicio / mantenimiento, 2: Bypass open incluidos el desmontaje y la sustitución de los filtros de 3: Alimentación Supply aire.
-
Page 56: Uso
El control del aparato se efectúa desde el panel de mandos, cuyas funciones se describen a continuación. Es posible asociar al aparato un precalentador Vortice, cuya instalación debe ser realizada por el instalador. La distancia mínima entre el precalentador y el aparato es de 500 mm. - Page 57 ESPAÑOL 16.el encendido del icono indica la presencia de una alarma; el icono intermitente indica que hay una alarma de restablecimiento manual; (ver “Visualización menú alarmas”) 17.función bypass: el icono indica: (ver también “Activación función Bypass”) apagado: bypass desactivado encendido fijo: bypass abierto con mando manual intermitente: bypass abierto automáticamente vía software (en este caso no es posible cerrar el bypass manualmente) 19.grados Celsius temperatura interior...
- Page 58 ESPAÑOL Programación de la temperatura ambiente requerida (fig.21) Antes de ejecutar los pasos indicados a continuación, pulsar la tecla ESC para salir y ubicarse en el menú inicial. La FILT temperatura ambiente deseada se puede seleccionar de la siguiente manera: - presión larga de la tecla SET - presión breve de la tecla SET (el valor corriente parpadea) - selección del valor deseado con las teclas “up”...
- Page 59 ESPAÑOL Menú usuario Antes de ejecutar los pasos indicados a continuación, pulsar FILT la tecla ESC para salir y ubicarse en la pantalla inicial. En general, los parámetros relativos a las distintas opciones se configuran pulsando SET (el valor se pone intermitente), seleccionando los valores con las teclas UP y DOWN y pulsando nuevamente SET para adquirir el nuevo valor.
- Page 60 ESPAÑOL Opción HA La opción está disponible sólo en los modelos dotados de módulo HA Seleccionando HA con la tecla SET se entra en FILT la configuración del modo HA. Los parámetros son: - En (Enable): los valores posibles son: PROF: habilita el modo HA con perfiles ON: habilita el modo HA continuo OFF: inhabilita el modo HA...
-
Page 61: Mantenimiento / Limpieza
ESPAÑOL Mantenimiento y limpieza Antes de cualquier operación, comprobar que el aparato esté desconectado de la red eléctrica. El desmontaje y el montaje son operaciones de mantenimiento extraordinario y deben ser efectuadas por personal profesional cualificado. NOTA: Antes de abrir la puerta, desenroscar el tornillo de seguridad frontal. -
Page 62: Información Importante Sobre Eliminación Respetuosa Con El Medio Ambiente
Vortice S.p.A. reserves the right to make improvements to products at any time and without prior notice. La société Vortice S.p.A. se réserve le droit d'apporter toutes les variations afin d'améliorer ses produits en cours de commercialisation. Die Firma Vortice S.p.A. behält sich vor, alle eventuellen Verbesserungsänderungen an den Produkten des Verkaufsangebots vorzunehmen. - Page 66 TAGLIANDO INTERVENTO IN GARANZIA CERTIFICATE OF WORK PERFORMED UNDER GUARANTEE COUPON INTERVENTION SOUS GARANTIE DATA INTERVENTO TIMBRO CENTRO ASSISTENZA DATE OF WORK - DATE INTERVENTION STAMP OF TECHNICAL ASSISTANCE CENTRE - CACHET SERVICE APRES-VENTE TAGLIANDO INTERVENTO IN GARANZIA CERTIFICATE OF WORK PERFORMED UNDER GUARANTEE COUPON INTERVENTION SOUS GARANTIE DATA INTERVENTO TIMBRO CENTRO ASSISTENZA...
- Page 67 CONDIZIONI DI GARANZIA CONDITIONS OF WAR- CONDITIONS DE GARANTIE RANTY VORTICE SPA garantisce i suoi prodotti per Votre appareil est couvert par notre garantie à 24 mesi dalla data dell’acquisto che deve condition qu’il ne soit pas utilisé à des ns autres...
- Page 68 Per poter usufruire della garanzia il cliente deve compilare e rispedire alla VORTICE GARANZIA - GUARANTEE - GARANTIE SPA, entro 8 giorni dall’acquisto, la “Parte 2” del tagliando di garanzia, all’indirizzo e con le modalità in tale parte riportate. La “Parte 1” del tagliando di garanzia deve essere conservata e presentata,...
Need help?
Do you have a question about the VORT HR 350 AVEL and is the answer not in the manual?
Questions and answers