Advertisement
Quick Links
Technical Support and E-Warranty Certificate www.vevor.com/support
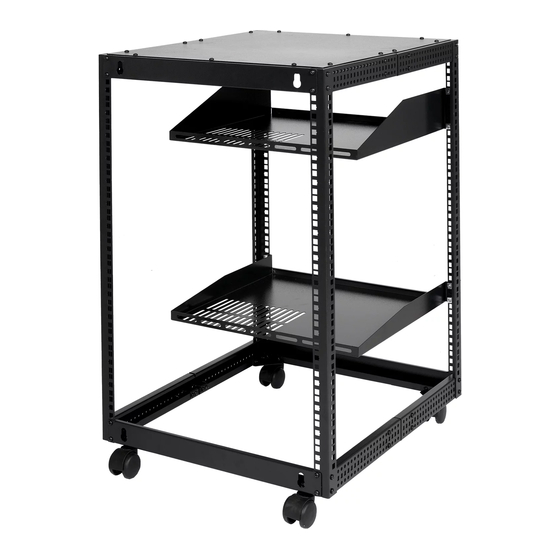
ADJUSTABLE OPEN FRAME
SERVER RACK
USER MANUAL
We continue to be committed to provide you tools with competitive price.
"Save Half", "Half Price" or any other similar expressions used by us only represents an estimate
of savings you might benefit from buying certain tools with us compared to the major top brands
and doses not necessarily mean to cover all categories of tools offered by us. You are kindly
reminded to verify carefully when you are placing an order with us if you are actually saving half
in comparison with the top major brands.
Advertisement

Related Manuals for VEVOR HT-W6412


Summary of Contents for VEVOR HT-W6412
- Page 1 Technical Support and E-Warranty Certificate www.vevor.com/support ADJUSTABLE OPEN FRAME SERVER RACK USER MANUAL We continue to be committed to provide you tools with competitive price. "Save Half", "Half Price" or any other similar expressions used by us only represents an estimate of savings you might benefit from buying certain tools with us compared to the major top brands and doses not necessarily mean to cover all categories of tools offered by us.
- Page 2 CustomerService@vevor.com This is the original instruction, please read all manual instructions carefully before operating. VEVOR reserves a clear interpretation of our user manual. The appearance of the product shall be subject to the product you received. Please forgive us that we won't inform you again...
- Page 3 This manual may make reference to trademarks, registered trade- marks,and other protected names and/or symbols of third-party com- panies not related in any way to vevor. Where they occur these refer- ences are for illustrative purposes only and do not represent an...
- Page 4 enclosure without assistance. Tipping hazard! Extending multiple components from this enclosure increases the chance that the enclosure will tip over. To avoid this risk, do not extend more than one component from the enclosure. Do not place any items on this enclosure and do not stack the enclosure on top of another enclosure.
-
Page 5: Table Of Contents
Righ upper Bracket (x 1) Limit parts (x 8) Righ lower Bracket (x 1) Expansion bolts (x 4) To view manuals, videos, drivers, downloads, technical drawings, and more visit www.vevor PACKAGE CONTENTS Vertical Rails Left Upper Bracket Qty: 4 Qty: 1... -
Page 6: Qty: 1
Right Corner Brackets Right Upper Bracket Qty: 4 Qty: 1 Right Lower Bracket Center Sections Qty: 1 Qty: 4 Corner Piece Top Panel Qty: 8 Qty: 1 Top Pallet Bottom Palle Qty: 1 Qty: 1 Limit Parts M5*10 Cross Head Screw Qty: 8 Qty: 145... -
Page 7: Expansion Bolts (X 4)
M6 Cage Nuts M6*12 Cross Head Screw Qty: 10 Qty: 10 Expansion bolts Qty: 4 REQUIREMENTS • Electric screwdriver (sold separately) • Two People (for assembly) • Earth Ground Connection • Allen key... - Page 8 INSTALLATIO Note: Two people are required for the Rack assembly. Adjust the torque of the electric screwdriver to 10 Set the Mounting Depth 1. Align the Left corner Brackets(#4 )and the Right corner Brackets(#4) with the Center Sections(#8),slide the Corner Brackets overtop of the Center Sections.(Figure 1) Figure 1 2.
- Page 9 5. Tighten the M5*10 Cross head screws on the Centre Section Assembly using Electric screwdriver. 6. Place two Limit parts(#13) on Corner Brackets,Tighten the M5*10 Cross head screws using Electric screwdriver. (Figure 4) 7.Repeat the above steps and assemble other 4 center section Figure 4 Assemble the Rack 1.
- Page 10 3. Insert one Center Section Assembly between the Top of the two Vertical Rails.Ensure the holes in the ends of the Center Section Assembly align with the holes in the Top of the two Vertical Rails. 4. Tighten the M5*10 Cross head screws on the Vertical Rails using Electric screwdriver.
- Page 11 8. Place Left upper Bracket(#2) between the Half-frame Assembly, align the two holes in the Vertical Rail and Left upper Bracket. 9. Tighten the M5*10 Cross head screws on the Left upper Bracket using Electric screwdriver. 10. Place Righ lower Bracket(#7) between the Half-frame Assembly, align the two holes in the Vertical Rail and Right lower Bracket.
- Page 12 14. Place Corner piece(#9) on Center Section Assembly and lower Bracket(or upper Bracket).There are 8 locations that need to be installed 15. Tighten the M5*10 Cross head screws on the Corner piece using Electric screwdriver. (#1) (#2) 16. Place Top Pallet and Bottom Pallet on the Enclosure.
- Page 13 3. Connect the Grounding Wire to an Earth Ground Connection. LIMITATION OF LIABILITY In no event shall the liability of vevor (or their officers,directors,employees or agents)for any damages(whether direct or indirect, special, punitive, incidental, consequential, or otherwise), loss of profits, loss of business,or any pecuniary loss, arising out of or related to the use of the product exceed the actual price paid for the product.
- Page 14 PRODUCT PARAMETER Name Adjustable Open Frame Server Rack Model HT-W6412 HT-W6415 HT-W6420 Adjustable 15”-40” 15”-40” 15”-40” Depth Installation 19'' Width Standard Height Ground-Mounted 200 Ibs Load-Bearing Wall-Mounted 100 Ibs Load-Bearing Product Size 585*510*626mm 585*510*759mm 585*510*982mm Package Size 710*610*170mm 840*610*170mm 1050*610*170mm N.W.: 14.15Kg...
- Page 15 Address:Baoshanqu Shuangchenglu 803long 11hao 1602A-1609shi Shanghai Imported to USA: VEVOR STORE INC, 9448 RINCHMOND PL #E RANCHO CUCAMONGA, California, 91730 United States of America Made In China...
- Page 16 Technical Support and E-Warranty Certificate www.vevor.com/support...
Need help?
Do you have a question about the HT-W6412 and is the answer not in the manual?
Questions and answers