Advertisement
Quick Links
Technical Support and E-Warranty Certificate www.vevor.com/support
KAYAK STORAGE RACK
MODEL: Y08006-D2
We continue to be committed to provide you tools with competitive price.
"Save Half", "Half Price" or any other similar expressions used by us only represents an
estimate of savings you might benefit from buying certain tools with us compared to the major
top brands and does not necessarily mean to cover all categories of tools offered by us. You
are kindly reminded to verify carefully when you are placing an order with us if you are
actually saving half in comparison with the top major brands.
Advertisement

Subscribe to Our Youtube Channel
Related Manuals for VEVOR Y08006-D2


Summary of Contents for VEVOR Y08006-D2
- Page 1 Technical Support and E-Warranty Certificate www.vevor.com/support KAYAK STORAGE RACK MODEL: Y08006-D2 We continue to be committed to provide you tools with competitive price. "Save Half", "Half Price" or any other similar expressions used by us only represents an estimate of savings you might benefit from buying certain tools with us compared to the major top brands and does not necessarily mean to cover all categories of tools offered by us.
- Page 3 This is the original instruction, please read all manual instructions carefully before operating. VEVOR reserves a clear interpretation of our user manual. The appearance of the product shall be subject to the product you received. Please forgive us that we won't inform you again if there are any technology or software updates on our product.
-
Page 4: Safety Instructions
Safety Instructions Thoroughly read the assembly and operating instructions prior to assembly and follow the individual steps as described in the assembly instructions. Risk of injury! • WARNING! Do not exceed the maximum load capacity of 175 Ibs load! Injuries or product damages may result. •... -
Page 5: Parts List
Parts List - 3 -... -
Page 6: Installation Introduction
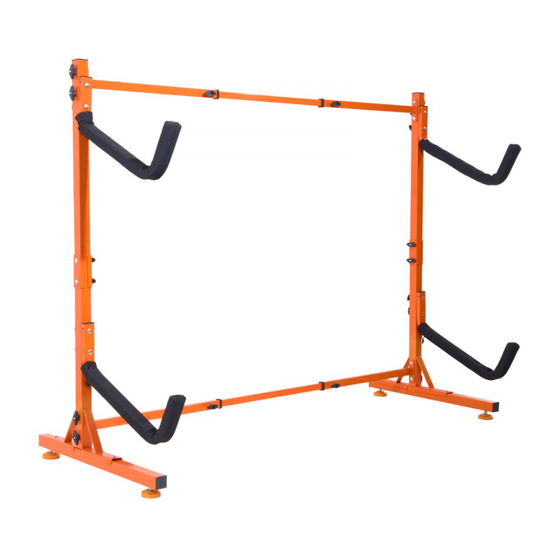
Installation Introduction STEP1: Install the bottom caster bar with a wrench, proper place the lower post vertically on the bottom caster bar, using the hex wrench to tighten the bolts. STEP2: Secure the legs with the knobs as shown. - 4 -... - Page 7 STEP3: Repeat the above steps to install the 2 legs, then the crossbar is attached and secured with knobs . When installing, take care to align the rods at both ends. STEP4: Insert the upper post into the lower post and fix. - 5 -...
- Page 8 STEP5: Connect the arm to the both bracket with the carriage bolt and tighten the bolt with the knob. STEP6: Repeat the above steps to complete the installation. - 6 -...
- Page 9 Use display Address:Baoshanqu Shuangchenglu 803long 11hao 1602A-1609shi Shanghai Imported to USA: Sanven Technology Ltd., Suite 250, 9166 Anaheim Place, Rancho Cucamonga, CA 91730 Pooledas Group Ltd Unit 5 Albert Edward House, The Pavilions Preston, United Kingdom SHUNSHUN GmbH Römeräcker 9 Z2021, 76351 Linkenheim-Hochstetten, Germany Made In China - 7 -...
- Page 12 Technical Support and E-Warranty Certificate www.vevor.com/support...
Need help?
Do you have a question about the Y08006-D2 and is the answer not in the manual?
Questions and answers