Table of Contents
Advertisement
Quick Links
Advertisement
Table of Contents

Related Manuals for Loctite EQ CL42


Summary of Contents for Loctite EQ CL42
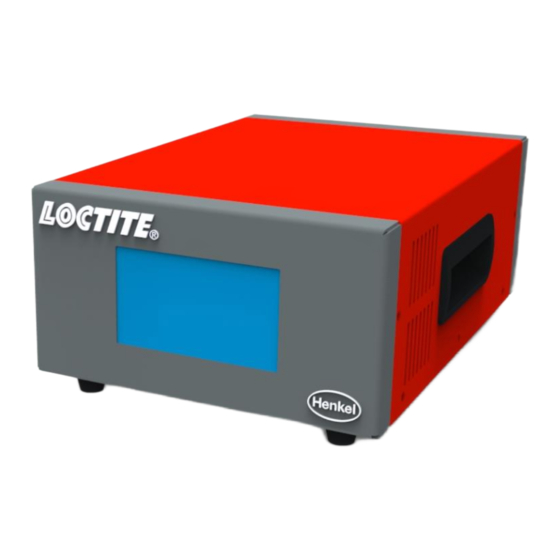
- Page 1 EQ CL42 LED Dual Controller IDH# 2804957 Operating Manual...
-
Page 2: Table Of Contents
Table of Contents Please Observe the Following ....................3 Emphasized Sections ......................3 For Your Safety ........................3 Unpacking and Inspection ....................5 Packing List ........................... 5 Features ..........................5 Usage ............................. 6 Description ........................... 6 2.1 Theory of Operation ........................6 2.2 Display, operating elements and connections .............. -
Page 3: Please Observe The Following
Observe general safety regulations for the handling of chemicals such as ® Loctite adhesives and sealants. Observe the manufacturer’s instructions as stated in the Safety Data Sheet. While under warranty, the unit may be repaired only by an authorized Loctite service representative. - Page 4 WARNING! It is the responsibility of the user to ensure that all devices being driven by the LED Flood Controller are set-up in a safe manner. The manufacturer is in no way responsible for injuries or damage to persons or property resulting from devices being driven by the LED Flood Controller.
-
Page 5: Unpacking And Inspection
® Carefully unpack the Loctite EQ CL42 LED Dual Controller and examine the items contained in the carton. Inspect the unit for any damage that might have occurred in transit. If such damage has occurred, notify the carrier immediately. Claims for damage must be made by the consignee to the carrier and should be reported to the manufacturer. -
Page 6: Usage
Usage The Loctite EQ CL42 LED Dual controller is used with the EQ CL42 365nm and 405nm LED flood heads for use with light cure products that cure when exposed to ultraviolet and/or visible light. The system can be operated manually, operated with the integrated timer, or controlled with an external switch. -
Page 7: Display, Operating Elements And Connections
2.2 Display, operating elements and connections Power Supplier Inlet and Fuse Power Switch ON/OFF Socket XS3: LED Head Socket XS1: Start for CH1(The footswitch is connected here). Socket XS2: Start for CH2(The footswitch is connected here). Socket XS5: RS232 Socket XS9: PLC Interface Cooling Fan Screen. -
Page 8: Technical Data
Technical Data Dimensions (L x H x W): 217x123x307.4 mm Total weight: lbs. (Kg) Operating voltage: 110~240 VAC 50/60Hz Power consumption: 1100 Watts Operating Temperature: +10 °C to +40 °C (+50 °F to +104 °F) Storage Temperature: -10 °C to +60 °C (+14 °F to +140 °F) -
Page 9: Installation
Installation Before using the equipment for the first time check it carefully for signs of external damage. If any shipping damage is found DO NOT USE THE EQUIPMENT – return it to your supplier immediately. 4.1 Environmental and Operating Conditions No direct sunlight. -
Page 10: Turn On The Unit
For automated control, connect external PLC output relay to pins one and nine of XS1. 5.2 Turn on the Unit Observe the operating manual of the LED head used. Turn the power switch 2 to ON 5.3 Main Page Channel Manual Switch Channel LED head running Mode: CONTINUE, TIMER, ADVANCE Intensity percentage... -
Page 11: Parameter Setting Page
To Main page To Parameter Setting page 10. To Warning Message page 5.4 Parameter Setting Page 1. Running Mode selection: Continue, Timer or Advance Continue Mode: The LED head will turn ON when a footswitch is pressed and remain ON until the footswitch is released. - Page 12 5. Intensity & Timer setting. When clicked, can enter below page to set intensity and timer. Continue Mode: Enter required intensity percentage setting (normal operation set 100%). Timer Mode: Enter required intensity percentage setting (normal operation set 100%) and curing time required. Advance Mode: Enter required intensity percentage setting (normal operation set 100%) and curing time required.
-
Page 13: Control Operation Page
For example, if operator have defined as below, when start signal comes, LED head will work step by step. Time and power will follow each step’s setting to run 2 cycles. Step Intensity Time No.1 10% 2.0 s No.2 20% 2.0 s No.3 30% 2.0 s No.4... -
Page 14: Application Hints
5.5 Warning Message Page Connection error Overheat error Emergency stop Clear the warnings Application Hints As with all adhesives, performance depends on conditions of use. Suggestions or recommendations contained herein are for guidance only since actual conditions of use are outside the supplier’s control. Troubleshooting Before proceeding with any repair or maintenance operation disconnect the tool from the main electricity supply. - Page 15 Malfunction Cause/Demonstration Corrective Action Check that the main power Plug in power cable No display appears on the cable is connected to an AC properly. screen when turning on source. power supply Check the fuse in power Replace fuse. inlet. Check if selecting the target Select the target channel channel for the program.
-
Page 16: Care And Maintenance
The unit requires no special care and maintenance. Observe the operating manual of the LED head used. Accessories and Spare Parts Item Description IDH# EQ CL42 LED Flood Head, 365nm 2804955 EQ CL42 LED Flood Head, 405nm 2804956 EQ CL42 LED Dual Controller... -
Page 17: Diagrams
Diagrams XS1: Start XS2: Start... - Page 18 XS9: PLC Interface...
-
Page 19: Warranty
Henkel expressly warrants that all products referred to in this Instruction Manual for Loctite EQ CL42 LED Dual Controller (hereafter called “Products”) shall be free from defects in materials and workmanship. Liability for Henkel shall be limited, as its option, to replacing... - Page 20 THIS SECTION SETS FORTH EXCLUSIVELY ALL OF LIABILITY FOR HENKEL TO THE PURCHASER IN CONTRACT, IN TORT OR OTHERWISE IN THE EVENT OF DEFECTIVE PRODUCTS. WITHOUT LIMITATION OF THE FOREGOING, TO THE FULLEST EXTENT POSSIBLE UNDER APPLICABLE LAWS, HENKEL EXPRESSLY DISCLAIMS ANY LIABILITY WHATSOEVER FOR ANY DAMAGES INCURRED DIRECTLY OR INDIRECTLY IN CONNECTION WITH THE SALE OR USE OF, OR OTHERWISE IN CONNECTION WITH, THE PRODUCTS, INCLUDING, WITHOUT LIMITATION, LOSS OF PROFITS AND SPECIAL, INDIRECT OR CONSEQUENTIAL...
- Page 21 #03-01/02 Haw Par Technocentre Zhangjiang, Hi-Tech Park, Pudong, Loc. Tulpetlac, C.P. 55090 SINGAPORE 149598 Shanghai, China 201203 Ecatepac de Morelos, MEXICO Henkel Loctite Korea Henkel Japan Ltd. Henkel AG & Co. KGaA 8F, Mapo Tower, 418, 27-7 Shin Isogo-cho, Isogo-ku Henkelstraße 67,...
Need help?
Do you have a question about the EQ CL42 and is the answer not in the manual?
Questions and answers