Table of Contents
Advertisement
Quick Links
Advertisement
Table of Contents

Related Manuals for Insportline Flea PRO 183 cm


Summary of Contents for Insportline Flea PRO 183 cm
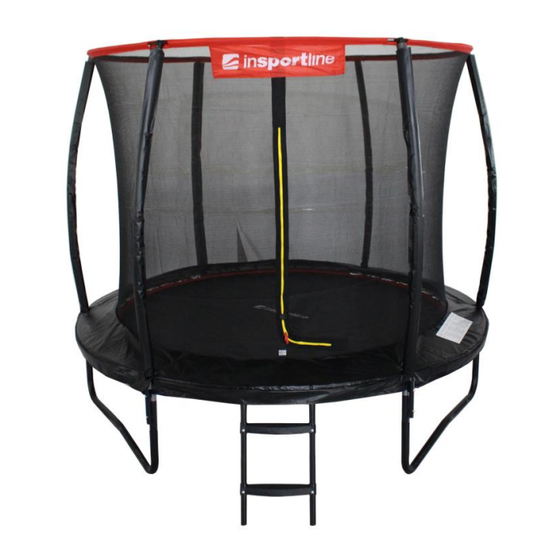
- Page 1 USER MANUAL – EN 23877 Trampoline set inSPORTline Flea PRO 183 cm 23878 Trampoline set inSPORTline Flea PRO 244 cm 23879 Trampoline set inSPORTline Flea PRO 305 cm 23880 Trampoline set inSPORTline Flea PRO 366 cm 23881 Trampoline set inSPORTline Flea PRO 430 cm...
-
Page 2: Table Of Contents
CONTENTS SAFETY PRECAUTIONS ........................3 PARAMETERS ............................5 TRAMPOLINE ASSEMBLY ........................5 PARTS LIST............................5 ASSEMBLY ............................6 SAFETY NET ASSEMBLY ........................9 PARTS LIST............................9 ASSEMBLY ............................10 JUMPING TECHNIQUE ........................12 MAINTENANCE ............................ 14 ENVIRONMENT PROTECTION ......................14 TERMS AND CONDITIONS OF WARRANTY, WARRANTY CLAIMS .......... -
Page 3: Safety Precautions
SAFETY PRECAUTIONS WARNING! Read this manual carefully before each using and keep it for future reference. Fully observe all precautions and recommendations to avoid damage or injury. Ask your physician for advice before starting any exercise. • Only one person may jump at the time to avoid collisions and injuries. •... - Page 4 • Check this product before each using. Never jump on a wet, dirty or damaged trampoline. Always jump max. one foot from the middle mark. • Don’t put any item on the jumping area. • Protect this product from unauthorized using while actually not used. •...
-
Page 5: Parameters
PARAMETERS Model Max. weight limit 50 kg 100 kg 3 legs 10FT 150 kg 12FT 150 kg 4 legs 14FT 150 kg TRAMPOLINE ASSEMBLY PARTS LIST A: Top frame I: Connection bar B: Spring cover pad C: Jumping mat... -
Page 6: Assembly
D: Leg frame E: Leg base F: Springs G: Spring fixing tool H: Bolts ASSEMBLY Two adults are required to carry out an assembly. Pictures may slightly vary. 1. Attach the leg frame to a leg base (U Note: Pay attention for angle shaped) and secure with the bolts. - Page 7 2. Use connection bar to connect the frame. Note: make sure that the connection bars are facing down 3. To connect the frames, one person must Note. The connected frame should look like hold the opposite side and the other person picture above.
- Page 8 5. Attach jumping mat with the springs. 6. Note: The spring connection should look Attach the springs around the connection like picture above. frames. 7. Attach springs equally every 4 or 5 holes Note: After attaching all springs, trampoline to distribute the tension. should look like picture above.
-
Page 9: Safety Net Assembly
SAFETY NET ASSEMBLY PARTS LIST Model 10FT 12FT 14FT TOP POLE BOTTOM POLE SAFETY NET ROPE CONNECTION MATERIAL ASSEMBLE TOOL FIBER ROD PLASTIC CAP POLE COVER LADDER A: Top pole B: Bottom pole C: Safety net D: Rope E: Connection material F: Assemble tool G: Fiber rod H: Plastic cap... -
Page 10: Assembly
ASSEMBLY Two adults are required to carry out an assembly. Pictures may slightly vary. 2. Order of connection – place the spacer 1. Attach the bottom poles to the leg frames. Tighten with wrench. between pole and frame, then thread a bolt to the pole and secure the pole with nut. - Page 11 7. Connect the fiberglass rod, make two 8. With the help of two people, insert the two separate rods. fiberglass rods into the top sleeve of the safety net. 9. Bent the fibre rod into a circle: Pass your 10. Place your safety net on top of your fiberglass poles and form 1 large open loop.
-
Page 12: Jumping Technique
13. Secure the bottom of the net to the rings of mat on the trampoline using the rope. Tie one end of the rope to one jumping mat eyelet, pass the rope through the holes at bottom of the net. You also need to thread it through the eyelets of the trampoline mat to secure it in place to the trampoline. - Page 13 • If you cannot control your jumps, stop using. • Don’t do somersaults or acrobatics. • Keep it away from children and pets. Protect it from unauthorized using. • Maintain it regularly and check all parts. All the loosen bolts and parts must be immediately tightened.
-
Page 14: Maintenance
Turning by 180° 1. Start with prone jumps. 2. Jump off by your right or left hand depending intended turning direction. 3. Push your head and shoulders in the same direction and keep your back parallel to the mat. Head is up. 4. - Page 15 The seller is SEVEN SPORT s.r.o. with its registered office in Strakonická street 1151/2c, Prague 150 00, Company Registration Number: 26847264, registered in the Trade Register at Regional Court in Prague, Section C, Insert No. 116888. According to valid legal regulations it depends whether the Buyer is the End Customer or not. “The Buyer who is the End Customer”...
- Page 16 26847264 VAT ID: CZ26847264 Phone: +420 556 300 970 E-mail: eshop@insportline.cz reklamace@insportline.cz servis@insportline.cz Web: www.inSPORTline.cz inSPORTline s.r.o. Headquaters, warranty & service center: Električná 6471, Trenčín 911 01, SK CRN: 36311723 VAT ID: SK2020177082 Phone: +421(0)326 526 701 E-mail: objednavky@insportline.sk reklamacie@insportline.sk servis@insportline.sk...
Need help?
Do you have a question about the Flea PRO 183 cm and is the answer not in the manual?
Questions and answers