Table of Contents
Advertisement
Quick Links
Advertisement
Table of Contents

Subscribe to Our Youtube Channel
Related Manuals for Insportline Froggy PRO


Summary of Contents for Insportline Froggy PRO
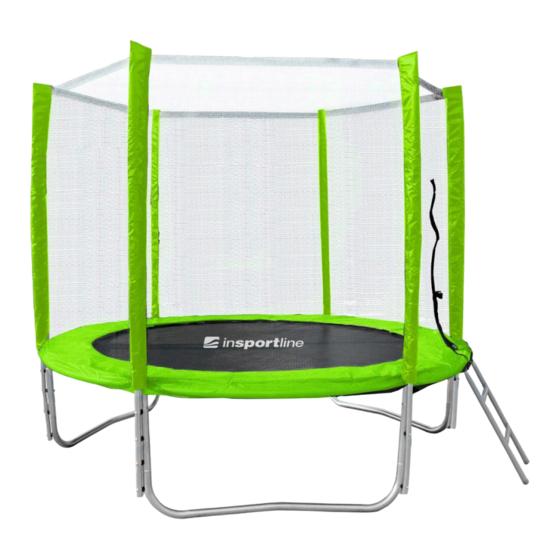
- Page 1 USER MANUAL – EN IN 9772-1 Trampoline Set inSPORTline Froggy PRO 183 cm IN 9773-1 Trampoline Set inSPORTline Froggy PRO 244 cm IN 9774-1 Trampoline Set inSPORTline Froggy PRO 305 cm IN 9775-1 Trampoline Set inSPORTline Froggy PRO 366 cm...
- Page 2 CONTENTS PARAMETERS ............................3 GENERAL SAFETY INSTRUCTIONS ....................3 HOW TO USE THE TRAMPOLINE ......................4 JUMPS AND POSITIONS ........................6 TRAMPOLINE ASSEMBLY ........................7 PARTS LIST............................7 STEP 1: Support Assembly ......................... 9 STEP 2: Trampoline Mat Assembly ....................10 STEP 3: Safety Placard Attachment ....................
-
Page 3: Parameters
PARAMETERS IN 9772 IN 9773 IN 9774 IN 9775 IN 9776 Parameters: 6“(183cm) 8“(244cm) 10“(305cm) 12“(366cm) 14“(430cm) Size 36 pcs 48 pcs 54 pcs 72 pcs 88 pcs Springs 3 pcs 3 pcs 3 pcs 4 pcs 4 pcs Legs 100 kg 100 kg 130 kg... -
Page 4: How To Use The Trampoline
The trampoline shouldn’t be placed on tarmac, concrete or any other hard surface. Nor should it be placed near other conflicting facilities (play grounds, swings, slides). It is recommended to use some sort of cushion mat in the area around the trampoline. Do not jump directly off the trampoline. - Page 5 Initially, you should get accustomed to your trampoline and understand how much spring is in each bounce. The focus at this point should be your body position and technique until you can perform each jump with ease and control. ...
-
Page 6: Jumps And Positions
JUMPS AND POSITIONS BASIC BOUNCE 1. Start from a standing position, with feet shoulder width apart head up and eyes on the trampoline bed. 2. Swing your arms forward and up above your head in a circular motion. 3. Bring your legs together in mid-air and point your toes downwards. -
Page 7: Trampoline Assembly
FRONT DROP 1 1. Start with a low basic bounce in the normal position. 2. Land on your hands and knees at the same time, make sure your back is horizontal and that your hands and legs are shoulder width apart. 3. - Page 8 Ref. Part Description Unit number number TR800 Trampoline Mat, stitched with V-rings TR801 Frame Pad TR802 Top Rail with leg sockets TR803 Leg Base TR804 Vertical Leg Extension TR805 Springs TR806 Safety Instruction Placard TR807 Spring tool Enclosed are the current specifications and product features available at time of printing, however, changes may be made in equipment, availability, specifications and features without notice.
-
Page 9: Step 1: Support Assembly
183 cm, 244 cm, 305 cm Trampoline (3 legs) 366 cm, 430 cm Trampoline (4 legs) Total: 15 pcs Total: 20 pcs STEP 1: Support Assembly A. Slide all the vertical leg extensions (5) into the leg base (4) as depicted. B. -
Page 10: Step 2: Trampoline Mat Assembly
STEP 2: Trampoline Mat Assembly WARNING: Attaching springs, the connecter points can become pinch points since the trampoline is tightening up. With this in mind please be careful attaching springs to the trampoline mat. Please be careful. A. Layout the trampoline mat inside the frame on the floor as depicted below. B. -
Page 11: Step 3: Safety Placard Attachment
C. Hang one side of the spring onto the triangle attached to the trampoline mat and use the spring tool to hook the other side of the spring. Pull the Spring Tool until the spring hook insert the hole on the trampoline frame and disengage the Spring Tool leaving the Spring in place. Repeat process for all springs. -
Page 12: Safety Net
SAFETY NET Parts list Reference Description 183/244/305 cm 366/397/430 cm 458/488 cm Number Upper pole A 6 pcs 8 pcs 12 pcs Upper pole B 6 pcs 8 pcs 12 pcs Bar Spacers 12 pcs 16 pcs 24 pcs Curved Washers 12 pcs 16 pcs 24 pcs... -
Page 13: Safety Net Assembly Instructions
Safety net assembly instructions STEP 1: Mount the upper pole A onto the vertical leg using parts (3), (4), (5) and (6). STEP 2: Spread the safety net (7) on the trampoline’s jumping mat. Make sure the pockets meant to hold the upper pole A face upwards. -
Page 14: General Safety Advice
Carefully and evenly pull down the safety net (7). STEP 4: Fasten the safety net to the reverse side of the trampoline. Hook the elastic fastening ties to the inner straps of the jumping pad. However, take care that no greater openings occur, so that the users won’t jump out of the net. -
Page 15: Using The Safety Net
DO NOT climb, swing or intentionally jump onto the panels or poles of the safety net. If the safety net material becomes damaged, refrain from using it. The safety net is ONLY intended to be used to reduce the risk of an injury from falling off the trampoline. -
Page 16: Care And Maintenance
subzero temperatures. In warmer weather, parts can become hot, and temperatures should be regularly checked during use, especially the temperature of metal parts. CARE AND MAINTENANCE If proper care and maintenance is provided, it will provide all jumpers with years of exercise, fun, and enjoyment as well as reduce the risk of injury. - Page 17 Code, Act No. 513/1991 Coll., Commercial Code, and Act No. 634/1992 Coll., Consumer Protection Act, as amended, also in cases that are not specified by these Warranty rules. The seller is SEVEN SPORT s.r.o. with its registered office in Borivojova Street 35/878, Prague 13000, Company Registration Number: 26847264, registered in the Trade Register at Regional Court in Prague, Section C, Insert No.
- Page 18 VAT ID: CZ26847264 Phone: +420 556 300 970 E-mail: eshop@insportline.cz reklamace@insportline.cz servis@insportline.cz Web: www.insportline.cz INSPORTLINE s.r.o. Headquarters, Warranty & Service centre: Elektricna 6471, 911 01 Trencin, Slovakia CRN: 36311723 VAT ID: SK2020177082 Phone: +421(0)326 526 701 E-mail: objednavky@insportline.sk reklamacie@insportline.sk servis@insportline.sk Web: www.insportline.sk...
Need help?
Do you have a question about the Froggy PRO and is the answer not in the manual?
Questions and answers