Table of Contents
Advertisement
Quick Links
Advertisement
Table of Contents

Related Manuals for Insportline Pinton IN 6849


Summary of Contents for Insportline Pinton IN 6849
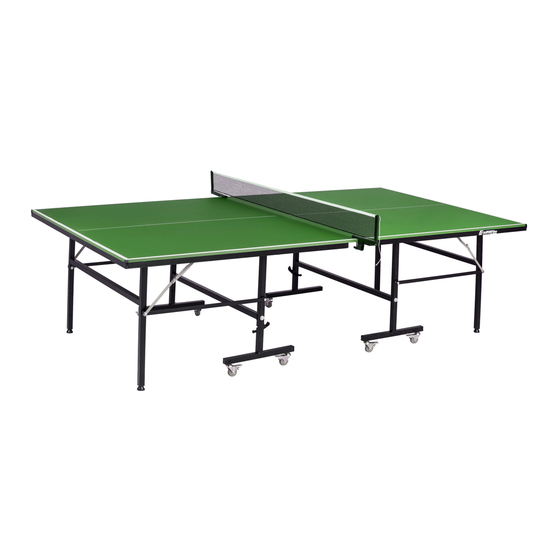
- Page 1 USER MANUAL – EN IN 6849 Table Tennis Table inSPORTline Pinton...
-
Page 2: Table Of Contents
CONTENTS RECOMMENDATION OF USE AND PRECAUTIONS ................3 PARTS LIST ............................4 ASSEMBLY INSTRUCTIONS ......................... 4 STEP 1 ..............................4 STEP 2 ..............................5 STEP 3 ..............................5 STEP 4 ..............................6 SINGLE PLAYER AND LOCKING YOUR TABLE AWAY ............... 6 SAFETY .............................. -
Page 3: Recommendation Of Use And Precautions
! WARNING DO NOT ASSEMBLE OR USE THIS TABLE WITHOUT READING THIS MANUAL. CLASSIFICATION ACCORDING TO STANDARD EN 14468-1 D – for recreational use Class 3 – folding table with two separate boards, each of which has its own attached folding chassis Type (table on wheels with separate folding halves) RECOMMENDATION OF USE AND PRECAUTIONS... -
Page 4: Parts List
PARTS LIST P1 – Tabletop – 2 pcs P2 – “T” leg – 4 pcs P3 – Net + post – 1 pcs P7- Washers for wheels – 8 P4 – Screw set – 8 pcs P5 – Wheels – 8 pcs ASSEMBLY INSTRUCTIONS Open the box and position the two play surfaces face down on the cardboard. -
Page 5: Step 2
STEP 2 Connect the four T legs (P2) to the shorter legs as shown. STEP 3 Secure the T legs (P2) in place using screw set (P4) as shown. Make sure the screws and bolts are fixed tightly, then carefully turn the table tops over into playing position. Adjust leg and wheels levelers to create an even playing surface. -
Page 6: Step 4
STEP 4 Put both tables top together, attach the net and post. The net clamps should be connected along the center line of the tables and clamped in place making the net tight and fairly springy. SINGLE PLAYER AND LOCKING YOUR TABLE AWAY The tennis table can be used in the vertical position as shown here to allow one person practice facility. -
Page 7: Safety
SAFETY • Don’t tighten moving parts too firmly. Check if they fit well. Regularly check their functionality. • WARNING! All damaged or worn parts should be replaced immediately. Use only original spare parts. • Never let children unattended near this product. •... -
Page 8: Terms And Conditions Of Warranty, Warranty Claims
TERMS AND CONDITIONS OF WARRANTY, WARRANTY CLAIMS General Conditions of Warranty and Definition of Terms All Warranty Conditions stated here under determine Warranty Coverage and Warranty Claim Procedure. Conditions of Warranty and Warranty Claims are governed by Act No. 89/2012 Coll. Civil Code, and Act No. - Page 9 26847264 VAT ID: CZ26847264 Phone: +420 556 300 970 E-mail: eshop@insportline.cz reklamace@insportline.cz servis@insportline.cz Web: www.inSPORTline.cz inSPORTline s.r.o. Headquaters, warranty & service center: Električná 6471, Trenčín 911 01, SK CRN: 36311723 VAT ID: SK2020177082 Phone: +421(0)326 526 701 E-mail: objednavky@insportline.sk reklamacie@insportline.sk servis@insportline.sk...
Need help?
Do you have a question about the Pinton IN 6849 and is the answer not in the manual?
Questions and answers