Table of Contents
Advertisement
Quick Links
Advertisement
Table of Contents

Subscribe to Our Youtube Channel
Related Manuals for Insportline 22274


Summary of Contents for Insportline 22274
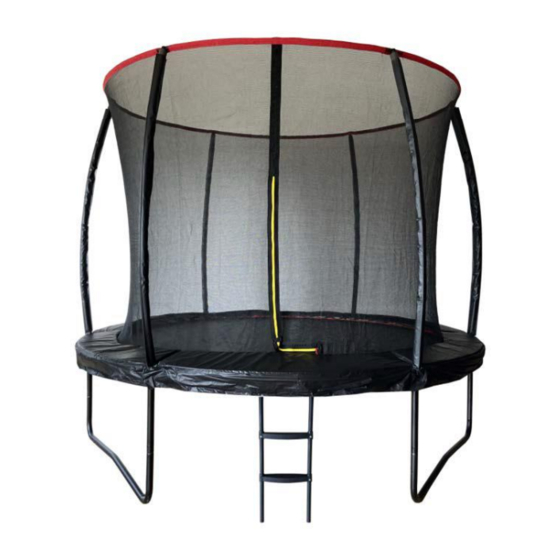
- Page 1 USER MANUAL – EN 22274 Trampoline set inSPORTline Flea, 183 cm 22275 Trampoline set inSPORTline Flea, 244 cm 22276 Trampoline set inSPORTline Flea, 305 cm 22277 Trampoline set inSPORTline Flea, 366 cm 22278 Trampoline set inSPORTline Flea, 430 cm...
-
Page 2: Table Of Contents
CONTENTS SAFETY PRECAUTIONS ........................3 PARAMETERS ............................5 PARTS LIST - TRAMPOLINE ......................... 5 ASSEMBLY – TRAMPOLINE ........................6 PARTS LIST – SAFETY NET ........................ 11 JUMPING TECHNIQUE ........................17 MAINTENANCE ............................ 19 ENVIRONMENT PROTECTION ......................19 TERMS AND CONDITIONS OF WARRANTY, WARRANTY CLAIMS ..........19... -
Page 3: Safety Precautions
SAFETY PRECAUTIONS WARNING! Read this manual carefully before each using and keep it for future reference. Fully observe all precautions and recommendations to avoid damage or injury. Ask your physician for advice before starting any exercise. • Only one person may jump at the time to avoid collisions and injuries. •... - Page 4 • Check this product before each using. Never jump on a wet, dirty or damaged trampoline. Always jump max. one foot from the middle mark. • Don’t put any item on the jumping area. • Protect this product from unauthorized using while actually not used. •...
-
Page 5: Parameters
PARAMETERS Model Frame height Safety net height Diameter Total height Max. weight limit 51 cm 150 cm 183 cm 201 cm 50 kg 55 cm 150 cm 244 cm 205 cm 100 kg 76 cm 180 cm 305 cm 256 cm 150 kg 80 cm 180 cm... -
Page 6: Assembly - Trampoline
F: Springs G: Spring fixing tool H: Screws with nuts and washer ASSEMBLY – TRAMPOLINE 1. Lay out all parts. 2. Attach the leg extensions to a leg base and secure them with screws. Repeat for all leg supports. - Page 7 3. Connect top rails. Ask other person for help if necessary. 4. Attach leg supports to the top rails. 5. Connect the leg supports to the top frame with screws.
- Page 8 6. After steps 2 – 5 the frame should look like picture below. 7. Place the jumping mat so that stitching part is face down. Attach spring to one of the eyelets on the mat. Attach the other end of the spring to the frame. 8.
- Page 9 9. Attach the springs with supplied tool. Be careful when you are attaching the springs. 10. Springs under heavy tension may require adjacent springs to be attached at every four of five holes so that the spring tension is distributed equally. 11.
- Page 10 12. Attach spring cover on the springs. 13. Attach spring cover straps to the springs.
-
Page 11: Parts List - Safety Net
14. Make sure that all parts are connected properly before using the trampoline. PARTS LIST – SAFETY NET A: Upper pole B: Lower pole C: Safety net... - Page 12 D: Rope E: Quick clamp F: Assemble tool G: Fiber rod...
- Page 13 H: Plastic cap...
- Page 14 1. Connect the lower and upper poles. 2. Place the safety net on the trampoline as shown, ready for the next step. 3. Insert black caps into the upper pole and secure them with pin. Repeat for all poles. 4. Insert the fiber poles to the sleeve of safety net. Ask another person for help.
- Page 15 5. Ask another person for help. Attach the poles to the support legs. 6. Attach the poles with clamps. 7. Attach the bottom of the safety net by rope according to the picture.
- Page 16 8. Tie both ends of rope. 9. Zip the entrance and fasten all entrance hooks. 10. Check that all parts are assembled properly.
-
Page 17: Jumping Technique
JUMPING TECHNIQUE • Learn proper jumping technique before first using. • Bend abruptly your knees before falling on the mat to stop jumping. • Have your jumps under control. If it is impossible, stop jumping. • Start with easier jumps before going over to more difficult. Try to fall onto the jump-off point. •... - Page 18 Basic jumps 1. Stand in the middle of the mat and shift your body weight on your tips. Straddle slightly and look on the mat. 2. Move your arms forward and upward in a circle. 3. While jumping, keep legs together and pull tips downward.
-
Page 19: Maintenance
MAINTENANCE • Maintain it regularly to prolong its lifespan. • Neve exceed weight and another limit. • Use suitable sports clothes and shoes. • Regularly check mat tears or its deformations, excessive mat bouncing, seam wears, broken or defected parts, missing springs or screws, frame damage, sharp edges etc. All damages should be immediately removed. - Page 20 Warranty Conditions Warranty Period The Seller provides the Buyer a 24 months Warranty for Goods Quality, unless otherwise specified in the Certificate of Warranty, Invoice, Bill of Delivery or other documents related to the Goods. The legal warranty period provided to the Consumer is not affected. By the Warranty for Goods Quality, the Seller guarantees that the delivered Goods shall be, for a certain period of time, suitable for regular or contracted use, and that the Goods shall maintain its regular or contracted features.
- Page 21 26847264 VAT ID: CZ26847264 Phone: +420 556 300 970 E-mail: eshop@insportline.cz reklamace@insportline.cz servis@insportline.cz Web: www.inSPORTline.cz inSPORTline s.r.o. Headquaters, warranty & service center: Električná 6471, Trenčín 911 01, SK CRN: 36311723 VAT ID: SK2020177082 Phone: +421(0)326 526 701 E-mail: objednavky@insportline.sk reklamacie@insportline.sk servis@insportline.sk...
Need help?
Do you have a question about the 22274 and is the answer not in the manual?
Questions and answers