Table of Contents
Advertisement
evonic f ires
INSETS
INSETS
INSTALLATION MANUAL
INSTALLATION MANUAL
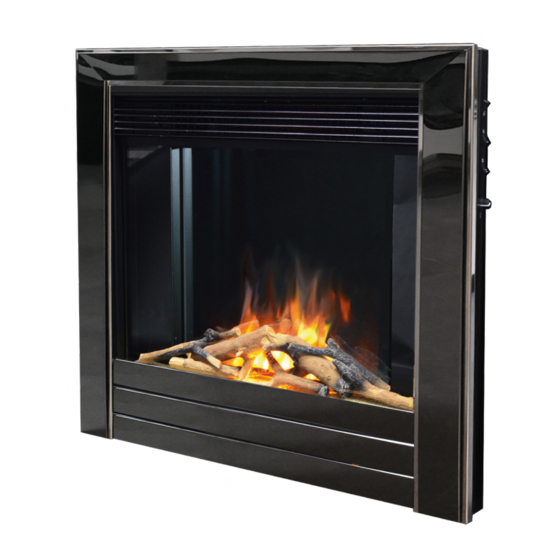
Kepler 22
Kepler
22
Colorado
Colorado
Oberon
Oberon
Strellar
Strellar
EVONIC - 104 INSTRUCTION MANUAL TEMPLATE ISS. 1
EVONIC - 104 INSTRUCTION MANUAL TEMPLATE ISS. 1
Topaz
Topaz
Sphera
Sphera
Argenta 16 16
Argenta
Argenta 22
22
Argenta
e e -lectra
-lectra C1
C1
e e -lectra
-lectra C2
C2
e e -lectra
-lectra C3
C3
INSETS. 1
INSETS. 1
1
Advertisement
Table of Contents

Related Manuals for Evonic Fires Kepler 22


Summary of Contents for Evonic Fires Kepler 22
- Page 1 INSETS INSETS INSTALLATION MANUAL INSTALLATION MANUAL Kepler Kepler 22 Topaz Topaz e e -lectra -lectra C1 e e -lectra -lectra C2 Colorado Colorado Sphera Sphera Argenta 16 16 e e -lectra -lectra C3 Oberon Oberon Argenta Argenta 22...
-
Page 2: Table Of Contents
CONTENTS Health and safety.................................4 Checks before installation – All models........................5 Installation - Tie-back models.............................6 Installation – Slide-in................................7 Spacer Fitting..................................8 Wall Mounting……………………………………………………………………………………………………………...……......…8 Front Glass Removal……………………………………………………………………………………………………......…..9 Sphera front glass removal…………………………………………………………………………………………........10 Fitting the Fascia……………………………………………………………………………………………………………….........11 Control Methods………………………………………………………………………………………………………………......…..13 Inset Remote Operation………………………………………………………………………………………………......…..14 Manual Operation……………………………………………………………………………………………………………......…..15 E-Smart Remote Control……………………………………………………………………………………………….........16 E-Smart App Setup…………………………………………………………………………………………………………......…..17 Using the E-Smart App ………………………………………………………………………………………………........19 Control Overview……………………………………………………………………………………………………………......…..20... - Page 3 Particular requirements for room heaters Particular requirements for room heaters UKCA STANDARDS All Evonic Fires products are in conformity with the relevant UK Statutory Instruments All Evonic Fires products are in conformity with the relevant UK Statutory Instruments (and their amendments).
-
Page 4: Health And Safety
IMPORTANT INFORMATION AND HEALTH & SAFETY When using electrical appliances, basic precautions should always be followed to reduce the risk of fire, electric shock, and injury to persons, including the following: • Read all of the instructions carefully before using the appliance, only use this appliance as described in this manual. -
Page 5: Checks Before Installation - All Models
CHECKS BEFORE INSTALLATION - ALL MODELS INSTALLATION DO’S AND DONT’S Before installing the appliance please read and take into account the following important requirements; • Consult a qualified professional to check the structure of the installation site. • If installing into an existing chimney, make sure to adequately block off the flue. •... -
Page 6: Installation - Tie-Back Models
INSET INSTALLATION - TIE BACK MODELS STRELLAR INFILL PLATE Our Strellar model comes with an infill plate and 2x screws, if you have an Oberon model you can skip to the section below and continue with the installation. To fit the Infill plate, screw in the two screws to either side of the plate as shown. -
Page 7: Installation - Slide-In
INSET INSTALLATION - ALL MODELS All our inset models are designed to be fitted into a standard 16” wide x 22” high opening. Before starting the installation check the dimensions of both the appliance and your opening to ensure that they align well. -
Page 8: Spacer Fitting
INSET INSTALLATION - WITH SPACER - ALL MODELS To convert your appliance to a free-standing unit you can fit an optional spacer. Before securing the spacer, attach the electrical lead to the inlet at the back bottom corner of the appliance. -
Page 9: Front Glass Removal
FRONT GLASS REMOVAL Applicable models - Kepler 22 / Strellar / Colorado / Argenta 16 / Argenta 22 / C1 / C2 / C3 Unscrew the two screws, and remove the bottom glass retainer from the appliance. The glass can now be removed from the appliance. -
Page 10: Sphera Front Glass Removal
FRONT GLASS REMOVAL - SPHERA Unscrew the two screws, and remove the top plate. With the top plate now removed, slide the glass upwards to remove. EVONIC - 104 INSTRUCTION MANUAL TEMPLATE ISS. 1 EVONIC - 104 INSTRUCTION MANUAL TEMPLATE ISS. 1 INSETS. -
Page 11: Fitting The Fascia
• Argenta 16 • Sphera • • Colorado • Argenta 22 • Kepler 22 • • Topaz • Colorado • Argenta C1 • SCREWED The Brooklyn fascia is attached using screws. There are 4 screw holes located in the outside plaster kit which line up with 4 holes in the rear of the Brooklyn fascia. - Page 12 FITTING THE FASCIA SLOTTED The Oberon and Strellar cast fascia is secured to the front of the appliance with two top mounted clips and a mounting bracket. Line up the two clips with the top of the mounting bracket and slot them down into the bracket.
-
Page 13: Control Methods
On each control option page, we have listed which products are applicable with each control method. Please Note: Remote controlled versions of the Oberon, Strellar, Kepler 22, Colorado and Topaz have to be specified at the point of order. If not specified, they will be manufactured as manual appliances. -
Page 14: Inset Remote Operation
INSET REMOTE OPERATION Applicable models - Oberon / Strellar / Kepler 22 / Colorado / Topaz / Argenta 16 / Argenta 22 / Sphera Top Left - Turn your flame effect ON Top Right - Turn your appliance OFF Middle Left - Low heat... -
Page 15: Manual Operation
MANUAL OPERATION Applicable models - Oberon / Strellar / Kepler 22 / Colorado / Topaz Flame effect ON Low heat ON/OFF High heat ON/OFF You can operate your appliance using the manual rocker switches located on the right hand side. -
Page 16: E-Smart Remote Control
E-SMART REMOTE CONTROL Applicable models - C1 / C2 / C3 Top Left - Turn your fire ON and OFF Top Right - Turn your feature lights and overbed illumination ON and OFF Middle Left - Turn your heater ON Middle Right - Turn your heater OFF Bottom Left - Change the flame animation. -
Page 17: E-Smart App Setup
E-SMART APP SETUP Applicable models Applicable models - C1 / C2 / C3 - C1 / C2 / C3 To begin using the app you first need to pair your appliance to the app, we have created a To begin using the app you first need to pair your appliance to the app, we have created a video on our Youtube channel to guide you through the process of pairing your appliance video on our Youtube channel to guide you through the process of pairing your appliance to your smart phone or tablet. - Page 18 CONTINUED... Open the settings panel on the app’s Scroll down to the ‘IoT Registration’ section and fill in your email address and create a Home Screen. password. Press ‘Save’. Then select the grey wi-fi button. The pairing process between your device, the Select your router from the drop down box, and fire, and your router will now take place.
-
Page 19: Using The E-Smart App
USING THE E-SMART APP Press to turn the Control Overview fire ON or OFF Timer settings Press to turn the Shop heater ON or OFF General settings E-SMART APP SETUP On the Home Page of the E-Smart Cloud App you can see the name of your fire, the chosen temperature, and the actual temperature. -
Page 20: Control Overview
CONTROL OVERVIEW Temperature dial Target temperature Animation choice Turn your feature lights ON or OFF Speed settings Lighting settings Fuel bed speed / Flame speed / brightness bar brightness bar To adjust the desired temperature of your fire ensure that the heater is selected on the Home Page in To adjust the desired temperature of your fire ensure that the heater is selected on the Home Page in the previous step. -
Page 21: Programming The Timer
PROGRAMMING THE TIMER Input your desired time in the Time box, Input your desired time in the Time box, select the action (Fire On/Off/, Heater On/Off) select the action (Fire On/Off/, Heater On/Off) Single press the clock icon on the Home Page Single press the clock icon on the Home Page you want. -
Page 22: Connection Problems
PROBLEMS CONNECTING If you are having problems connecting your fire with your device and router please try the following steps to fix the issue. - Switch fire OFF - Switch wi-fi router OFF - Switch fire back ON (Keeping router OFF) - Open the wi-fi settings on your device - find and select your product / fire - Open the e-smart App on your device and select the settings icon - In ‘Device Name’, rename your fire (Be sure not to use numbers or spaces when renaming your fire) -
Page 23: Retro-Fitting The Remote Control
RETRO-FITTING THE REMOTE CONTROL In order to retro-fit your remote on older models, please ensure you follow these steps BEFORE you attempt to use the remote control system. To begin the retro-fit of the remote control, To begin the retro-fit of the remote control, Once the fire has updated, select the Once the fire has updated, select the press the ‘update’... -
Page 24: Connecting To Amazon Alexa
CONNECTING TO AMAZON ALEXA Once your fire is installed, and switched on, Once your fire is installed, and switched on, Single press Skills & Games on the pop up list. Single press Skills & Games on the pop up list. download and open the Amazon Alexa app. - Page 25 CONTINUED... Enter the log in details that you previously Enter the log in details that you previously After a few moments your account will be After a few moments your account will be entered in the app set up process, and single entered in the app set up process, and single linked, once this is done you can single press linked, once this is done you can single press...
-
Page 26: Connecting To Google Home
CONNECTING TO GOOGLE HOME Once your fire is installed, and switched on, Once your fire is installed, and switched on, Single press Set up Device on the pop up list. Single press Set up Device on the pop up list. download and open the Google Home app. - Page 27 CONTINUED... Type in Evonic Fires, single press search and Type in Evonic Fires, single press search and Once in the Evoflame log in page, enter the Once in the Evoflame log in page, enter the then select the Evonic Fires E-Smart icon.
-
Page 28: Commands For Voice Control
COMMANDS FOR AMAZON ALEXA When using Amazon Alexa or to control your appliance settings remember to substitute the words ‘the fire’ for whatever you have named your appliance. TURNING THE APPLIANCE ON AND OFF “Alexa, turn fire on.” / “Alexa, turn the fire off.” TURNING THE HEATER ON AND OFF “Alexa, set fire heater to auto.”... -
Page 29: Notes
NOTES EVONIC - 104 INSTRUCTION MANUAL TEMPLATE ISS. 1 EVONIC - 104 INSTRUCTION MANUAL TEMPLATE ISS. 1 INSETS. 1 INSETS. 1... -
Page 30: Warranty
Failure to supply evidence to support your warranty claim may invalidate or delay the claim. Any visit by an Evonic Fires engineer will incur a service charge after the first year. We will not accept or reimburse the cost(s) of any third party who undertakes any work carried out on the product or fits parts, unless we have approved such work in advance of it being carried out. - Page 31 For product sold outside the UK and Ireland, UK law will prevail. The Evonic Fires Extended Warranty does not affect your statutory rights. REGISTER YOUR EVONIC FIRE By registering your product on our website you ensure 4 years parts only cover on top of your standard one year warranty.
- Page 32 CK Fires Ltd / Evonic Fires 1, Evonic House, Clifford Park, Clifford Lane, Stratford-on-Avon, CV37 8HW Tel: +44 (0)1789 263868 Fax: +44 (0)1789 293080 Email: sales@evonicfires.co.uk www.evonicfires.co.uk Follow us on: Instagram | Facebook | Twitter | LinkedIn @evonicfires EVONIC - 104 INSTRUCTION MANUAL TEMPLATE ISS.
Need help?
Do you have a question about the Kepler 22 and is the answer not in the manual?
Questions and answers