Table of Contents
Advertisement
Quick Links
Advertisement
Table of Contents

Related Manuals for fantastic furniture Bermuda


Summary of Contents for fantastic furniture Bermuda
- Page 1 Version 1.0 Bermuda Lounge 1 Str Acacia Fantasticfurniture.com.au...
- Page 2 Looks like you’ve found your Fantastic! We’re thrilled you’ve chosen Fantastic Furniture to help create a home you’ll love! Care Tips for Timber Products & Textiles Following the general care instructions below will help extend the life of your product and keep them looking their best! Timbers are a natural product and can require a little bit more maintenance to help keep them looking fresh and new.
- Page 3 Assembly checklist Make sure you have all the required tools. Read through the instructions carefully Never use power tools unless instructed before you begin. Identify and lay out all of the components Unless instructed, do not fully tighten screws before you begin assembly. until the item is fully assembled.
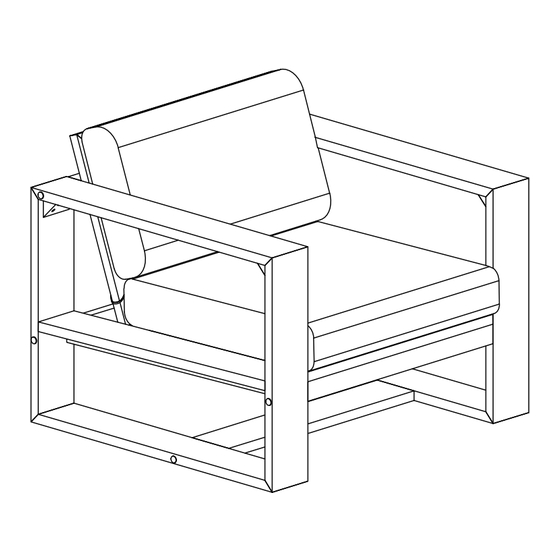
- Page 4 What you need Back Cushion (P8) to assemble the product Right Leg (P4) .\fhlqc 23 assembly instructions\fhlqc 23.3001 assembly instruction artwork v1\mallet icon_001.png Other Tools you need: Rubber Mallet Back (P1) Parts list Back (P1) Seat (P2) Back Stretcher (P5) Left Leg (P3) Right Leg (P4) Back Stretcher (P5)
- Page 5 Step 1 Note: We strongly recommend assembling this product on a soft surface to minimise the risk of any damages. You will need 2 x Long Screws (H1) (P1) (P3) 1 x Allen Key (H4) 1 x Short Screws (H2) (H1) (H2) (P3)
- Page 6 Step 3 (P1) You will need (H3) (H3) 1 x Allen Key (H4) 2 x Bolts (H3) (H4) (P2) Secure the back (P1) to the seat (P2) using 2 x bolts (H3), tightening by turning clockwise using allen key (H4). Ensure the bolts are fully tightened and secure.
- Page 7 Step 5 Secure the seat cushion (P7) to the assembled frame using the ties provided as shown . Step 6 (H5) You will need (P4) (H5) (H5) Rubber Mallet 8 x Wood Buttons (H5) (P3) (H5) (H5) (H5) Wood Button (H5) (H5) Cover all exposed bolts and screws on the left leg (P3) and right...
- Page 8 Step 7 Job Complete! In the interest of our environment please dispose of all pack ag ing thou g htfully .\fhlqc 23 assembly instructions\fhlqc 23.3001 assembly instruction artwork v1\ff-logo_vertical_black.jpg ..\..\..\onedrive\máy tính\bộ bản vẽ kèm ai khách fantastic 2023(24.030.23)\tem icon\logo fantastic 2.png Page 8 fantasticfurniture.com.au...
Need help?
Do you have a question about the Bermuda and is the answer not in the manual?
Questions and answers