fantastic furniture Bridge Manual
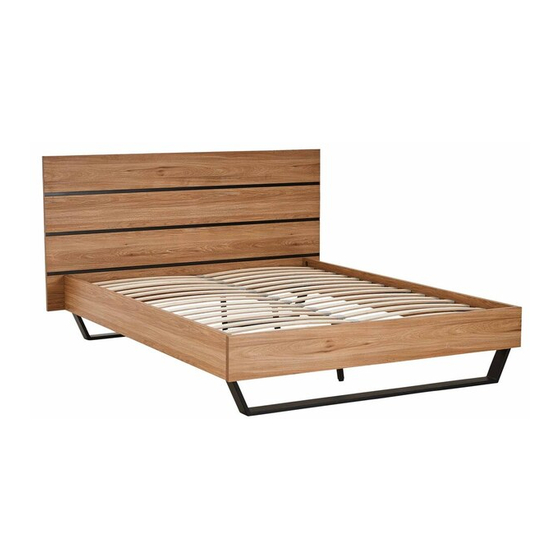
Bed king oak
Hide thumbs
Also See for Bridge:
- Assembly instructions manual (19 pages) ,
- Manual (16 pages) ,
- Manual (9 pages)
Advertisement
Quick Links
Advertisement

Related Manuals for fantastic furniture Bridge


Summary of Contents for fantastic furniture Bridge
- Page 1 Bridge Bed King Oak...
- Page 4 Centre Plastic Slat Caps (P9) Slats (P11) Plastic Slat Caps (P10) 1 x Headboard(P1) Right Side Panel 1 x Right Side Panel (P2) (P2) 1 x Left Side Panel(P3) Cross Bar (P6) 1 x Footboard(P4) Centre Rail (P8) 2 x Side Rails(P5) Side Rails Support Legs (P7)
- Page 5 Step 1 (H1) (H1) (H1) (H1) 8 x Threaded Rods (H1) (H1) (H1) (H1) (H1) Attach 4 x threaded rods (H1) into the bottom of headboard (P1) and 4 x threaded rods (H1) into the footboard (P4) by turning clockwise until secure. Step 2 8 x Large Nuts Half Moon Nuts...
- Page 6 Step 3 (H5) (H10) (H4) 32 x Short Bolts 32 x Washers (H4) (H5) (H13) 2 x Connectors Allen Key (H14) (H13) (H10) (H14) (H13) Connectors (H14) Attach the connectors (H13,H14) to each corner of the bed frame using 32 x short bolts (H4) and 32 x washers (H5), tightening using allen key (H10).
- Page 7 Step 5 16 x Short Bolts 16 x Washers (H4) (H5) Allen Key (H10) (H5) (H4) With assitance, carefully turn the bed over onto one side as pictured. Connect the 2 x legs (P12) to the connectors (H13,H14) using 16 x short bolts and 16 x washers (H5), completely tightening with the allen key (H10). Step 6 (H6) (H5)
- Page 8 Step 7 (H8) (H12) (H5) (H5) (H7) 6 x Bolts 12 x Washers (H7) (H5) (H10) 6 x Nuts 1 x Allen Key (H8) (H10) 1 x Spanner (H12) Attach the 3 x support legs (P7) to the centre rail (P8) using 6 x bolts (H7), 12 x washers (H5) and 6 x nuts (H8), tightening using the allen key (H10) and spanner(H12).
- Page 9 Step 9 (H7) (H5) 6 x Bolts 6 x Washers (H7) (H5) 1 x Alen key (H10) Attach the 2 x cross bars (P6) to the 2 x side rails (P5) and centre rail (P8) using 6 x bolts (H7) and 6 x washers (H5), tightening using the allen key (H10). Step 10 15 x Centre Plastic 30 x Plastic...
- Page 10 Step 11 Lower onto the assembled bed frame, pushing in the plastic slat caps (P10) into the holes on the side rail, and the centre plastic slat caps (P9) into the holes on the centre rail (P8). Apply downward pressure until you feel the caps pop into place.
-
Page 11: Job Complete
Step 12 Job Complete! In the interest of our environment please dispose of all packaging thoughtfully. Page 11...
Need help?
Do you have a question about the Bridge and is the answer not in the manual?
Questions and answers