
Related Manuals for Gazebo penguin FLORENCE 41218MR-GP-12


Summary of Contents for Gazebo penguin FLORENCE 41218MR-GP-12
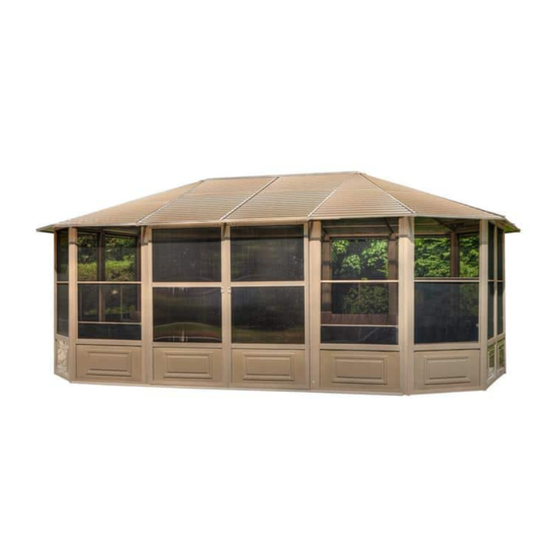
- Page 1 MANUEL D'INSTRUCTIONS INSTRUCTION MANUAL FLORENCE - 12 x 18 TOIT D’ ACIER FLORENCE - 12 x 18 METAL ROOF sku:41218MR-GP-12 sku:41218MR-GP-32...
- Page 2 Certaines juridictions peuvent exiger des permis pour, ou réglementer autrement, l'installation et l'utilisation. Pour l’assistance de l’assemblage, d’installation, des pièces en particulier, ou service à la clientèle, veuillez contacter Gazebo Penguin au numéro de téléphone mentionné mi-bas : (français, anglais, lun. à ven. de 8 du matin à 4 après-midi est) : Montréal: (514) 276-3485...
- Page 3 SCHEMA SCHEMA 08-160-12 08-129-12 CADRE DE CADRE PORTE AVEC REGULIER DE CANAL RÉCEPTEUR 17-054-12 08-133-12 PANNEAU PIECE DE DE TOIT CONNEXION 08-130-12 08-167-12 CADRE ADJACENT M6*63.5 (trous additionnels) 08-162-12 08-158-12 RAIL DE PORTE VIS M6*16 SUPÉRIEUR 81.9’’ 08-221-12 08-159-12 RAIL DE PORTE PORTE SUPÉRIEUR COULISSANTE...
- Page 4 SCHEMA SCHEMA 08-187-12 17-061-12 RONDELLE PANNEAU DE TOIT 17-044-12 08-138-12 CHEVRON BUTOIR 78.9” PORTE 17-057-12 08-189-12 PANNEAU ECROU DE TOIT 08-139-12 08-164-12 PIECE DE CAPUCHON CONNEXION EXTERIEUR 78.9” 08-193-12 17-058-12 PANNEAU BOUCHON DE TOIT EN PLASTIQUE 08-140-12 08-166-12 PIECE DE CAPUCHON CONNEXION INTERIEUR...
- Page 5 SCHEMA SCHEMA 17-068-12 BARRE DE 08-135-12 FINITION 42.6’’ 17-048-12 16-118-12 BARRE DE VIS M6X36 SOLIDIFICATION 20.8’’ 17-051-12 17-069-12 BARRE DE BARRE DE RECOUVREMENT SOLIDIFICATION 39.7’’ 39.4” 18-067-12 17-045-12 SUPPORT BARRE DE DE BARRE FINITION SOLIDIFIANTE 45.2” 17-071-12 17-075-12 BARRE DE PANNEAU FINITION DE TOIT...
- Page 6 SCHEMA SCHEMA 11-599-12 08-156-12 CLÉ DE COIN M5*20 (installé dans 11-598-12 BARRE 12-047-12 HORIZONTALE VIS M5*15 POUR CADRE DE PORTE 17-070-12 15-124-12 CHEVRON ANGLE DE CENTRE EN ACIER DE PORTE 17-060-12 15-125-12 PANNEAU ANGLE DE TOIT EN ACIER 11-597-12 15-125-12 CADRE ANGLE DE PORTE...
- Page 7 Avant d'assembler le Solarium · Ne détruisez pas les boîtes tant qu'elles ne sont pas complètement assemblées. · Pour référence future, prenez des photos des six côtés de chaque boîte dès réception. · Veuillez comparer chaque boîte à la liste des pièces. Outils nécessaires : ·...
- Page 8 Étape 1: Avant de commencer l'assemblage, veuillez décider où vous souhaitez placer les panneaux de porte. 1. Levez deux cadres réguliers (A) et fixez les panneaux ensemble à un angle en faisant glisser deux pièces de connexion (I, J) de haut en bas. Tous les cadres doivent être placés de manière à ce que les vis soient visibles de l'extérieur.
- Page 9 Étape 2: 1. Attachez les Barres de recouvrement (P) en les faisant glisser sur le dessus de la rainure extérieure Step 2: des cadres (A, B, D). 1. Affix gap Cover Bars (P) by sliding them on the top of the exterior groove of the Regular Frames (A, B, D).
- Page 10 Étape 3: Step 3: 1. Faites glisser le rail supérieur de la porte (F) dans les roues de la porte coulissante (C). 2. Faites glisser le rail inférieur de la porte (G) dans le guide en plastique de la porte coulissante (C). Slide Top Door Rail (F) into wheels of Sliding Door (C).
-
Page 11: Vue Intérieure
Étape 4: Étape 4: Veuillez noter que nous suggérons d’assembler les portes de l'intérieur du solarium. Veuillez noter que nous suggérons d’assembler les portes de l'intérieur du solarium. 1. Placez un boulon (Ww) à travers le cadre supérieur de porte (C) et le rail supérieur de porte (F), et placez un boulon femelle (Cc-2) de l'autre côté. - Page 12 Étape 5: Step 5: 1. Attachez les chevrons de toit (L, Xx) au moyeu central (N) à l'aide des boulons (Bb). 2. Utilisez les vis (Z) pour fixer les chevrons (L) sur le dessus des panneaux passant par la pièce de métal Assembled steel angle (Z2) to roof Rafters (L) using Bolts (Bb).Assembled steel angle (Z3) to (Z2) attachée au chevron (L).
- Page 13 Étape 6: Step 6: 1. Suivez la même procédure que celle du chevron (L) pour assembler les chevrons de toit (K) sur les panneaux restants. 1. Follow the same procedure of Rafter (L) to assemble roof Rafters (K) onto the remaining Note: panels.
- Page 14 Étape 7: Step 7: 1. boulons (Bb) et les supports (R/R1). 2. Connectez les barres de fini�on du toit (S, U, Ss et U1) les unes aux autres en alignant les trous. Placez les capuchons d'extrémité (R) sous les trous alignés et fixez-les avec des boulons (Bb). Now secure the sides of the roof with Finishing Bar (S, U, Ss and U1) with Bolts (Bb) and 3.
- Page 15 Étape 8: Step 8: 1. De l'intérieur du solarium, installez tous les supports (Pp/Pp-1) à l'aide des boulons (Bb) sur les chevrons L et K. From the inside of the solarium, install all the Brackets (Pp) using Bolts (Bb) on the Rafters 2.
- Page 16 Étape 9: Step 9: 1. Installez les panneaux de toit inférieurs (Jj, Kk Mm et Rr) en les faisant glisser dans la barre de fini�on (S, U, Ss & U1). Install the bottom Roof Panels (Jj, Kk, Mm and Rr) by sliding them onto Finishing Bars (S, U, Ss and U1).
- Page 17 Étape 10: Step 10: 1. Installez le panneau de toit supérieur (Aa) en le faisant glisser sur les chevrons de toit (K). Install the upper Roof Panel (Aa) by sliding them on top of roof Rafters (K). NOTE: Veuillez-vous référer aux autocollants pour savoir comment placer les panneaux de toit. NOTE: Please refer to the stickers on how to place the roof panels.
- Page 18 Étape 11: Step 11: 1. Une fois l'installation du panneau de toit (Aa) terminée, sécurisez-le sur le chevron d'un côté de votre choix à l'aide du couvercle de chevron (0) et des vis (Oo1), puis placez un autre panneau de toit et Once installation of the Roof Panel (Aa) is complete, affix it using the Cover Roof Bar (0) répétez cette étape.
- Page 19 Étape 12: Step 12: 1.I nstallez les panneaux de toit supérieurs (Aa, Ll, Qq, Y) en les glissant sur le dessus des chevrons de toit (K, L) à l'excep�on d'un panneau de toit (Qq), sécurisez-les à l’aide des couvertures de chevrons (0 Install the Upper Roof Panels (Aa, Ll, Qq, Y) by sliding on top of roof Rafters (K, L) except et 01).
- Page 20 Étape 13: Step 13: 1.Utilisez l'écrou (Hh) et la rondelle (Gg) pour attacher le capuchon supérieur (M) sur le connecteur central (N). 1. Use Nut (Hh) and Washer (Gg) to affix the Top Cap (M) to the Central Hub (N). Remarque: Cette pièce est lourde et doit être manipulée avec précaution.
- Page 21 Étape 14: Step 14: 1. Installez le dernier panneau de toit supérieur (Qq). 1. Install the last upper Roof Panels (Qq). Vue de dessus...
- Page 22 Étape 15: Step 15: 1. Une fois le dernier panneau de toit installé, a�achez la couverture de chevron (O1) à chevron (L) avec le boulon (Oo1). 1. Once the last roof panel is installed, screw last Cover for Rafter (O1) to the Rafters (L) with bolt (Oo1).
- Page 23 Étape 16: Step 16: 1. À l'intérieur de chacun des panneaux du cadre, poussez deux bouchons en plas�que (Ii) dans le sol et sécurisez l'unité en u�lisant deux vis (Ee) pour chaque panneau ou u�lisez tout autre type d'ancrage adapté au sol que vous u�lisez. Inside each of the frames panels, push two Plastic Plugs (Ii) into the ground, and secure the unit by using two Screws (Ee) for each panel or use any other type of anchoring suitable for the floor that you are using.
- Page 24 Suggestions Les éléments mentionnés ci-dessous ne sont que des suggestions afin de permettre ldrainage, elles varieront en fonction de votre revêtement de sol - matériel, platitude epente. Pour sol en Béton Sur la face extérieure, il est suggéré de percer de trous à l’extrémité...
- Page 26 NOTE: LES DIMENSIONS SONT APPROXIMATIVES.
-
Page 27: Garantie
1 AN SUR LES DÉFAUTS MANUFACTURIERS Advenant que le produit soit endommagé ou que la période de garantie soit expirée, veuillez contacter le département d’expérience client de Gazebo Penguin afin d’obtenir une liste complète des pièces de remplacement et des prix. -
Page 28: Manuel D'instructions
MANUEL D'INSTRUCTIONS INSTRUCTION MANUAL FLORENCE - 12 x 18 TOIT D’ ACIER FLORENCE - 12 x 18 METAL ROOF sku:41218MR-GP-12 sku:41218MR-GP-32... - Page 29 Some jurisdictions may require permits for, or otherwise regulate, installation and use. For assistance with assembly, installation, parts, or customer service, contact Gazebo Penguin Customer Service Department at the numbers listed below (English & French, Mon-Fri 8:00 AM to 4:00 PM EST):...
- Page 30 12 x 18 Solarium DRAWING DRAWING 08-160-12 08-129-12 SLIDING REGULAR DOOR WITH FRAME RECEIVER CHANNEL 17-054-12 08-133-12 ROOF CONNECTING PANEL PIECE 78.9’’ 08-130-12 FRAME 08-167-12 NEXT TO SCREW DOORS M6*63.5 (extra holes) 08-162-12 08-158-12 TOP DOOR SCREW RAIL LEFT M6*16 81.9’’...
- Page 31 DRAWING DRAWING 08-187-12 17-061-12 WASHER ROOF PANEL 08-138-12 17-044-12 DOOR RAFTER STOPPER 78.9’’ 08-189-12 17-057-12 ACORN NUT ROOF PANEL 08-139-12 08-164-12 CONNECTING TOP CAP 78.9’’ PIECE 08-193-12 17-058-12 PLASTIC ROOF PANEL PLUG 08-140-12 08-166-12 CENTRAL CONNECTING PIECE 78.9’’ 08-134-12 17-055-12 UPPER ROOF PANEL DOOR RAIL...
- Page 32 DRAWING DRAWING 17-068-12 08-135-12 FINISHING SCREW BAR 42.6’’ 16-118-12 17-048-12 SCREW SOLIDIFYING M6 X 36 BAR 20.8” 17-051-12 17-069-12 GAP COVER SOLIDIFYING BAR 39.7” BAR 39.4” 18-067-12 17-045-12 SOLIDIFYING FINISHING BAR 45.2” BRACKET 17-071-12 17-075-12 FINISHING ROOF PANEL BAR 45.2” 17-047-12 17-053-12 SOLIDIFYING...
- Page 33 DRAWING DRAWING 11-599-12 CORNER 08-156-12 SCREW M5 X 20 (Installed in 11-598-12 12-047-12 HORIZONTAL SCREW BAR FOR M5 X 15 DOOR FRAME 81.1” 15-124-12 23-003 STEEL AP COVER ANGLE BAR 40.3’’ 15-125-12 17-060-12 STEEL ROOF PANEL ANGLE 11-597-12 19-102-12 VERTICAL STEEL BAR DOOR ANGLE...
- Page 34 Before you assemble the Solarium Please don't destroy boxes until completely assembled. For future reference, take pictures of all six sides of each of the boxes upon receipt. Please verify the content of each box against the list of parts. Tools needed: Step Ladder 6’...
- Page 35 Step 1: Before starting to assemble, please decide where you would like to position the door panels. Stand up two Regular Frames (A) and affix the panels together at an angle by sliding two connecting Pieces (I, J) from top to bottom. All Frames should be placed such that screening face out of the unit.
- Page 36 Step 2: 1. Affix gap Cover Bars (P) by sliding them on the top of the exterior groove of the Regular Frames (A, B, D).
- Page 37 Step 3: Slide Top Door Rail (F) into wheels of Sliding Door (C). Slide Lower Door Rail (G) into the plastic guide of the Sliding Door (C). Use Bolts (Bb) to affix the Plastic Stoppers (H) one on each end of Top Door Rail (F). 4.
-
Page 38: Inside View
Step 4: Please note the sliding door is suggested to be installed from the inside of the solarium. 1. Place a Bolt (Ww) through the Top of Sliding Door Frame (C) and Top Door Rail (F), and place a Female Bolt (Cc-2) from the other side. Once all are inserted, tighten them all securely. - Page 39 Step 5: Assembled steel angle (Z2) to roof Rafters (L) using Bolts (Bb).Assembled steel angle (Z3) to roof Rafters (L) using Bolts (Bb). Attach roof rafters (L ) to the Central Hub(N) using bolt (Bb). 3. Use screws (Z) to affix the Rafters (L) onto the top of panels going through the Metal Piece (Z2) attached to the Rafter (L).
- Page 40 Step 6: 1. Follow the same procedure of Rafter (L) to assemble roof Rafters (K) onto the remaining panels. Note: 1. Rafters must be affixed where panels connect to each other. 2. Affix the Rafter (K) such that, the extra hole on the bracket (Z1) are facing each other as shown below.
-
Page 41: Top View
Step 7: Now secure the sides of the roof with Finishing Bar (S, U, Ss and U1) with Bolts (Bb) and Brackets (R/R1). Place roof Finishing Bars (S, U, Ss and U1) on the right of the Roof Finishing Bar (S, U and U1) and align the holes in each bar one on top of the other. - Page 42 Step 8: From the inside of the solarium, install all the Brackets (Pp/Pp-1) using Bolts (Bb) on the Rafters L & K. From the inside of the solarium, install the Solidifying Bar (T, Tt, V, and V1) as illustrated using the Bolts (Bb). NOTE : 1.
- Page 43 Step 9: Install the bottom Roof Panels (Jj, Kk, Mm and Rr) by sliding them onto Finishing Bars (S, U, Ss and U1). NOTE: Please refer to the stickers on how to place the roof panels . Make sure all screws/ bolts are tight. TOP VIEW...
- Page 44 Step 10: Install the upper Roof Panel (Aa) by sliding them on top of roof Rafters (K). NOTE: Please refer to the stickers on how to place the roof panels. Hold panels in position until screwed.
- Page 45 Step 11: Once installation of the Roof Panel (Aa) is complete, affix it using the Cover Roof Bar (0) using the Screws (Oo1) on one side only, then place another roof panel and repeat this step.
- Page 46 Step 12: Install the Upper Roof Panels (Aa, Ll, Qq, Y) by sliding on top of roof Rafters (K, L) except for one Roof Panel (Qq) while installing Cover Roof Bars (0 & 01).
- Page 47 Step 13: 1. Use Nut (Hh) and Washer (Gg) to affix the Top Cap (M) to the Central Hub (N). NOTE: This is a heavy part and needs to be handled carefully.
- Page 48 Step 14: 1. Install the last upper Roof Panels (Qq).
- Page 49 Step 15: 1. Once the last roof panel is installed, screw last Cover for Rafter (O1) to the Rafters (L) with bolt (Oo1).
- Page 50 Step 16: Inside each of the frames panels, push two Plastic Plugs (Ii) into the ground, and secure the unit by using two Screws (Ee) for each panel or use any other type of anchoring suitable for the floor that you are using.
- Page 51 Suggestions The below mentioned are only suggestions in order to permit drainage, these will vary depending on your flooring – material, flatness and slope.
- Page 53 NOTE: The dimensions are approximate.
-
Page 54: Warranty Limitations And Exclusions
7. The product is warranted only if installed in accordance with Gazebo Penguin's written instructions included with the product.
Need help?
Do you have a question about the FLORENCE 41218MR-GP-12 and is the answer not in the manual?
Questions and answers