Table of Contents
Advertisement
Available languages
Available languages
Quick Links
Advertisement
Table of Contents

Related Manuals for urmet domus 2Voice VOG7


Summary of Contents for urmet domus 2Voice VOG7
- Page 1 Mod. 1760 DS1760-013A LBT21106 VIDEO DOOR PHONE 7” USA MONITEUR 7” USA VIDEOINTERFONO 7” USA Sch./Ref. 1760/32 - 1760/32A INSTALLATION HANDBOOK NOTICE D’INSTALLATION MANUAL DE INSTALACIÓN FCC. ID.: REA176032...
-
Page 2: General Description
ENGLISH 1. GENERAL DESCRIPTION The video door phone Ref.1760/32 is a device dedicated to the 2Voice system which can operate • Cutting-edge video door phone • Terminal for displaying the video surveillance cameras • Terminal for displaying the intrusion alarm control unit status •... -
Page 3: Installation
10. Configuration dip-switch (SW1 / SW2): – no.1 of SW1, if set to ON, it enables the “Simultaneous ignition“ parameter which allows the video door phones in the apartment to switch on at the same time as they receive a call from the calling station. -
Page 4: Terminal Description
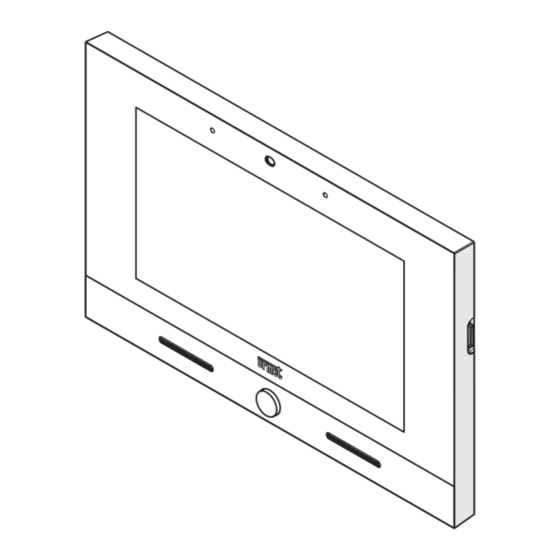
• Use a screwdriver to move the latch for locking the video door phone to the bracket from right to left. • Remove the protective film from the display. 3.1. TERMINAL DESCRIPTION Left terminal board Positive for additional chime Negative for additional chime Floor call Common for panic alarm, alarm 1 input and alarm 2 input PANIC Panic alarm Alarm 1 input (intrusion alarm indication) - Page 5 4. CONTACT INSERTION FOR INTERCOM CALLS In order to make intercom calls, it is necessary to enter contacts in the video door phone directory. Up to 32 contacts can be entered directly from the video door phone as follows. Using the 2Voice Installer Tools app, it is possible to add 32 additional contacts to the video door phone directory managed by the application.
- Page 6 • The request screen for entering a new contact opens. Contact type Select the following icon to modify the contact type. • External contact: call to a video door phone in another apartment but within the same video door phone riser • Internal contact: call to a video door phone in the same apartment Video door phone ID code Select the text box to insert the video door phone ID code.
-
Page 7: Reset To Factory Settings
5. RESET TO FACTORY SETTINGS The reset to factory settings deletes all configurations made on the video door phone. To reset to factory settings, proceed as follows: • Turn on the screen, if off, by tapping it anywhere or by pressing the Home key. • Press the icon to access the Top Page. • Press the icon to access the video door phone parameter configuration page. DS1760-013A... - Page 8 Press on the Maintenance item to display the maintenance functions and parameters of the video door • phone. In the menu, press Reset Factory Settings. • A pop-up window is displayed on the screen to confirm operation. Press the YES button to perform the operation and delete all the configurations in the video door phone • and return it to the factory default configuration. Press the NO button to cancel the operation and close the pop-up window.
-
Page 9: Technical Specifications
6. TECHNICAL SPECIFICATIONS Power voltage (LINE IN): ........................36 ÷ 48 V Consumption (LINE IN): ........................@ 48 V Standby: ............................< 2 mA Full rate: ............................< 15 mA Power voltage (V+, V-): ..........................24 V~ Consumption (V+; V-): ........................@ 24 V~ Standby: ..........................<... -
Page 10: Description Générale
FRANÇAIS 1. DESCRIPTION GÉNÉRALE Le moniteur Réf. 1760/32 est un dispositif dédié au système 2Voice pouvant fonctionner en tant que : • Moniteur évolué • Terminal pour la visualisation des caméras de surveillance • Terminal pour la visualisation de l’état de la centrale anti-intrusion •... - Page 11 10. Commutateur DIP de configuration (SW1 / SW2): – n.1 de SW1, s’il est réglé sur ON, il active le paramètre “Allumage simultané“ qui permet aux moniteurs de l’appartement de s’allumer en même temps qu’ils reçoivent un appel du poste appelant. La fonction est disponible si les moniteurs installés dans l’appartement : –...
-
Page 12: Description Des Bornes
• Utiliser un tournevis pour déplacer de droite à gauche le verrou qui permet de bloquer le moniteur sur l’étrier. • Retirer le film de protection de l’afficheur. 3.1. DESCRIPTION DES BORNES BORNIER GAUCHE Positive pour sonnerie supplémentaire Négative pour sonnerie supplémentaire Appel a l’étage Commune pour alarme panique, entrée alarme 1 et entrée alarme 2 PANIC Alarme de panique Entrée alarme 1 (signalisation alarme intrusion) - Page 13 4. INSERTION DES CONTACTS POUR APPELS INTERCOMMUNICANTS Afin d’effectuer des appels intercommunicants, il faut saisir les contacts dans le répertoire du moniteur. Il est possible de saisir jusqu’à 32 contacts directement depuis le moniteur. Au moyen de l’application 2Voice Installer Tools, il est possible d’ajouter 32 contacts supplémentaires dans le répertoire du moniteur gérés par l’application. Pour toutes les informations concernant la saisie des contacts via l’application, scanner le code QR figurant dans la dernière page du présent manuel et télécharger le Notice d’utilisation de l’App 2Voice Installer Tools.
- Page 14 • La page-écran de demande d’insertion d’un nouveau contact s’ouvre. Typologie de contact Sélectionner l’icône suivante pour modifier la typologie de contact. • Contact externe : appel à un moniteur installé dans un autre appartement mais à l’intérieur de la même colonne de vidéophonie • Contact interne : appel à un moniteur installé dans le même appartement Code ID du moniteur Sélectionner la zone de texte pour insérer le code ID du moniteur.
- Page 15 5. RAZ AUX PARAMÈTRES D’USINE La raz aux paramètres d’usine supprime toutes les configurations effectuées sur le moniteur. Pour effectuer la raz aux paramètres d’usine, suivre la procédure ci-dessous : • Allumer l’écran, s’il est éteint, en le touchant dans un point quelconque ou en appuyant sur la touche Home. • Appuyer sur l’icône pour accéder à la Top Page. • Appuyer sur l’icône pour accéder à la page de configuration des paramètres du moniteur.
- Page 16 Faire défiler les paramètres et appuyer sur l’option Maintenance pour afficher les fonctions et les • paramètres de maintenance du moniteur. Appuyer sur l’option Raz paramètres d’usine du menu. L’écran visualise une fenêtre info-bulle de • confirmation de l’opération. Appuyer sur le bouton OUI pour effectuer l’opération et supprimer tous les réglages du moniteur en •...
-
Page 17: Caractéristiques Techniques
6. CARACTÉRISTIQUES TECHNIQUES Tension d’alimentation (LINE IN): ....................36 ÷ 48 V Consommation Maximum (LINE IN): ....................@ 48 V Au repos: ............................< 2 mA A plein régime: ..........................< 15 mA Tension d’alimentation (V+, V-): ......................24 V~ Consommation Maximum (V+; V-): ....................@ 24 V~ Au repos: ..........................<... -
Page 18: Descripción De Los Componentes
ESPAÑOL 1. DESCRIPCIÓN GÉNÉRALE El videointerfono Sch.1760/32, es un dispositivo dedicado al sistema 2Voice que puede funcionar como: • Videointerfono avanzado • Terminal para ver las cámaras de videovigilancia • Terminal para ver el estado de la central antirrobo • Control de accesos MIFARE •... -
Page 19: Instalación
9. Clavija de bloqueo del videointerfono 10. Interruptor dip de configuración (SW1 / SW2): – n.º 1 de SW1, si está configurado en ON, habilita el parámetro “Encendido simultáneo“ que permite que los videointerfonos de la vivienda se enciendan al mismo tiempo que reciben una llamada del puesto que llama. La prestación está disponible si los videointerfonos presentes en un apartamento: –... - Page 20 • Utilizar un destornillador para desplazar, de la derecha a la izquierda, la clavija que permite el bloqueo del videointerfono en el soporte. • Retirar la película de protección de la pantalla. 3.1. DESCRIPCIÓN DE LOS BORNES Regleta de bornes izquierda Positivo para timbre adicional Negativo para timbre adicional Llamada al piso...
- Page 21 4. AGREGAR CONTACTOS PARA LLAMADAS INTERCOMUNICANTES Para poder realizar llamadas intercomunicantes es necesario agregar los contactos en la guía videointerfono. Se pueden agregar hasta 32 contactos directamente desde el videoportero. Mediante la aplicación 2Voice Installer Tools se pueden introducir 32 contactos adicionales en la agenda de videoportero gestionados por la aplicación.
- Page 22 • Se abre la pantalla para la introducción de un nuevo contacto. Tipo de contacto Seleccionar el icono para modificar el tipo de contacto. • Contacto externo: l lamada a un videointerfono presente en otro apartamento pero en la misma columna de videointerfonos • Contacto interno: llamada a un videoportero presente en el mismo apartamento Código ID del videointerfono Seleccionar el cuadro de texto para escribir el código ID del videointerfono.
- Page 23 5. RESTABLECIMIENTO DE LOS PARÁMETROS DE FÁBRICA El restablecimiento de la configuración de fábrica elimina todos los ajustes hechos en el videointerfono. Para efectuar el restablecimiento, seguir este procedimiento: • Encender la pantalla, si está apagada, tocándola en un punto cualquiera o pulsando el botón de inicio. • Pulsar el icono para abrir la Top Page. •...
- Page 24 Desplazarse por los parámetros y pulsar Mantenimiento para ver las funciones y los parámetros de • mantenimiento del videointerfono. En el menú, pulsar la opción Restablecimiento configuración de fábrica. La pantalla muestra una • ventana emergente para confirmar la operación. Pulsar el pulsador SÍ para realizar la operación, eliminar todas las configuraciones del videointerfono • y restablecer la configuración de fábrica. Pulsar el pulsador NO para cancelar la operación y cerrar la ventana emergente.
-
Page 25: Características Técnicas
6. CARACTERÍSTICAS TÉCNICAS Tensión de alimentación (LINE IN): ....................36 ÷ 48 V Consumo máximo (LINE IN): ......................@ 48 V En reposo: ............................< 2 mA A régimen: ............................< 15 mA Tensión de alimentación (V+, V-): ......................24 V~ Consumo máximo (V+; V-): ........................ @ 24 V~ En reposo: ..........................<... - Page 26 This device complies with Part 15 of the FCC rules. Operation is subject to the following two conditions: 1) This device may not cause harmful interference. 2) This device must accept all interference received, including interference that may cause undesired operation.
- Page 27 Este dispositivo cumple con el Apartado 15 de las normas de FCC relacionadas con las siguientes dos condiciones: 1) Este dispositivo no puede causar interferencia dañina. 2) Este dispositivo debe aceptar toda interferencia recibida, incluyendo la interferencia que pueda causar un funcionamiento no deseado. 15.105 Información a las declaraciones de usuario : Este equipo ha sido sometido a las pruebas pertinentes y cumple con los límites establecidos para un dispositivo digital de Clase B, conforme al apartado 15 de las reglas de la FCC.
- Page 28 ENGLISH DIRECTIVE 2012/19/EU OF THE EUROPEAN PARLIAMENT AND OF THE COUNCIL of 4 July 2012 on waste electrical and electronic equipment (WEEE) The symbol of the crossed-out wheeled bin on the product or on its packaging indicates that this product must not be disposed of with your other household waste. Instead, it is your responsibility to dispose of your waste equipment by handing it over to a designated collection point for the recycling of waste electrical and electronic equipment.
- Page 29 DS1760-013A...
- Page 30 DS1760-013A...
- Page 31 DS1760-013A...
- Page 32 For all information on configuration of the video door phone, download the “Parameter configuration booklet” by scanning the following QR Code with the camera of your smartphone or tablet. Pour toutes les informations sur la configuration du moniteur, télécharger le « Livret de configuration des paramètres » en scannant le code QR suivant avec la caméra de son smartphone ou de sa tablette. Para obtener toda la información sobre la configuración del videointerfono, descargar el “Manual de configuración parámetros”...
Need help?
Do you have a question about the 2Voice VOG7 and is the answer not in the manual?
Questions and answers