Advertisement
Quick Links
Advertisement

Related Manuals for Whitewood Furniture CU-125


Summary of Contents for Whitewood Furniture CU-125
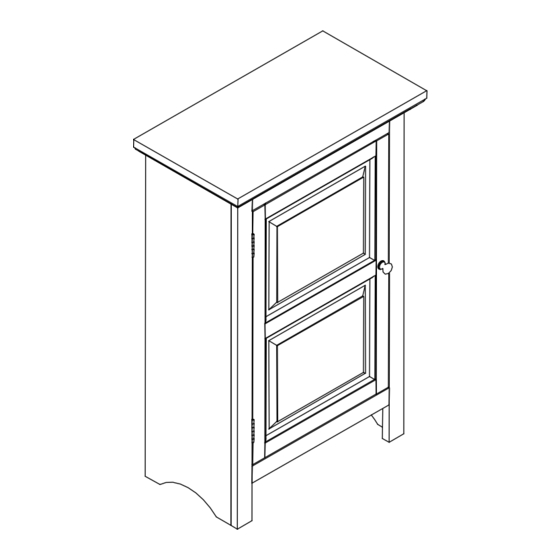
- Page 1 Serious or fatal injuries can occur from furniture tip over. Use tip over restraint (provided) to secure this product to the wall. Description : SMALL JELLY CUPBOARD Item No. : CU-125 ITEM NO.: CU-125 Printed in Vietnam REVISED APR 08, 2020...
-
Page 2: Before Assembly
Long exposure to rubber or soft plastic may cause a chemical reaction and damage the finish of your product. Protect the surface of the product with cloth if you are using any product with rubber feet or base. ASSEMBLY TOOLS REQUIRED NOT INCLUDED ITEM NO.: CU-125 Printed in Vietnam REVISED APR 08, 2020... -
Page 3: Part List
Description Sketch Description Sketch Crown Door Side panel Side panel (Right) (Left) Adjustable Bottom shelf Shelf Rail Back panel NOTE: WARNING LABEL (INCLUDED) ITEM NO.: CU-125 Printed in Vietnam REVISED APR 08, 2020... -
Page 4: Hardware List
Allen key screw (M4 x 30mm x 110mm) (M4 x 25mm) Short Pan head screw Long Pan head screw (M4 x 15mm) (M4 x 50mm) Steel Tip Bracket Flat Nylon Tie ITEM NO.: CU-125 Printed in Vietnam REVISED APR 08, 2020... - Page 5 Insert rail (G) into side panels (C) and (D) as shown below. Then attach bottom shelf (E) to right side panel (C) with bolts (1), and washers (2) and (3) as shown below. Tighten with Allen key (10). ITEM NO.: CU-125 Printed in Vietnam...
- Page 6 Slide back panel (H) into grooves of crown (A), and side panels (C) and (D). Then attach back panel (H) to the unit with pan head screws (5) as shown below. Tighten with a screwdriver. ITEM NO.: CU-125 Printed in Vietnam...
- Page 7 Attach knob (8) to door (B) with pan head screw (9) as shown below. Tighten with a screwdriver. Attach brackets (4) to side panels (C) and (D) as shown below. Then place adjustable shelf (F) on the brackets and attach with screws (6). Tighten with a screwdriver. ITEM NO.: CU-125 Printed in Vietnam REVISED APR 08, 2020...
- Page 8 Lace the end of flat nylon ties (14) through the larger holes in each mounting bracket. Bring both ends together and slide the flat ends through the locking ends and draw it through until all slack is removed. Confirm that the strap is securely laced and locked. ITEM NO.: CU-125 Printed in Vietnam REVISED APR 08, 2020...
Need help?
Do you have a question about the CU-125 and is the answer not in the manual?
Questions and answers