
Subscribe to Our Youtube Channel
Related Manuals for protech PPC-7615


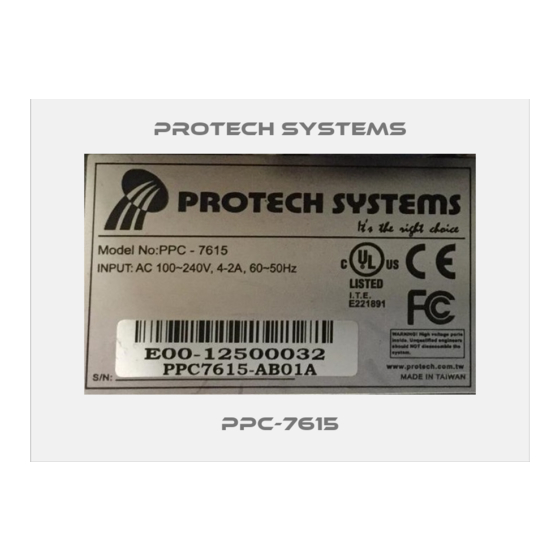
Summary of Contents for protech PPC-7615
- Page 1 USER’S MANUAL PPC-7615/ PPC-7617/ PPC-7619 Intel® Core 2 Duo/ Core Solo 15” /17” /19” Panel PC System PPC-7615/PPC-7617/ PPC-7619...
- Page 2 Copyright Notice PPC-7615/PPC-7617/ PPC-7619 Intel® Core Duo/Solo Panel PC System With LCD / Touch screen OPERATION MANUAL COPYRIGHT NOTICE This operation manual is meant to assist both Embedded Computer manufacturers and end users in installing and setting up the system. The information contained in this document is subject to change without any notice.
- Page 3 Copyright Notice FCC NOTICE This equipment has been tested and found to comply with the limits for a Class A digital device, pursuant to part 15 of the FCC Rules. These limits are designed to provide reasonable protection against harmful interference when the equipment is operated in a commercial environment.
-
Page 4: Table Of Contents
Contents TABLE OF CONTENTS CHAPTER 1 INTRODUCTION About This Manual ............Case Illustration ……………………………………… System Specification ............Safety & Notification ............1-10 CHAPTER 2 HARDWARE CONFIGURATION Jumper & Connector Quick Reference Table ....Component Locations ............ How to Set the Jumpers ..........COM Port Connector ……..…………………………... - Page 5 Contents 2-31 CF Card Master/ Slave Selection …………………….. 2-28 2-32 TV Out Connector …………………………………….. 2-29 2-33 Memory Installation …………………………………… 2-29 2-34 PCI-Express Card Selection …………………………. 2-30 CHAPTER 3 SOFTWARE UTILITIES Introduction …………..........…..VGA Driver Utility ……………………………….…… Flash BIOS Update ..........…..LAN Driver Utility …...........…..
- Page 6 Contents APPENDIX A SYSTEM ASSEMBLY Exploded Diagram of PPC-7615 Whole System ....... Exploded Diagram of PPC-7617 LCD Panel …………….…... Exploded Diagram of PPC-7619 LCD Panel ………………… Exploded Diagram of PPC-7615/PPC-7617/PPC-7619 Packing .. APPENDIX B TECHNICAL SUMMARY Block Diagram ................Interrupt Map ................
-
Page 7: Chapter 1 Introduction
CHAPTER INTRODUCTION This chapter gives you the information for PPC-7615/PPC-7617/PPC- 7619. It also outlines the System specifications. Section includes: About This Manual Case Illustration System Specifications Safety precautions Experienced users can skip to chapter 2 on page 2-1 for a Quick Start. -
Page 8: About This Manual
This chapter indicates on how to set up the BIOS configurations. Appendix A System Assembly This section gives you the exploded diagram for the whole system unit. Appendix B Technical Summary This section gives you the information about the Technical maps. ′ Page: 1-2 PPC-7615/PPC-7617/PPC-7619 USER S MANUAL... -
Page 9: Case Illustration
1-2. CASE ILLUSTRATION Note: When insert this computer into any machine or wall, user should left at lease 5cm space for thermal issue. PPC-7615 Front View Rear View Top View Side View Bottom View ′ Page: 1-3 PPC-7615/PPC-7617/PPC-7619 USER S MANUAL... - Page 10 Chapter 1 Introduction PPC-7617 Front View Rear View Top View Side View Bottom View ′ Page: 1-4 PPC-7615/PPC-7617/PPC-7619 USER S MANUAL...
- Page 11 Chapter 1 Introduction PPC-7619 Front View Rear View Top View Side View Bottom View ′ Page: 1-5 PPC-7615/PPC-7617/PPC-7619 USER S MANUAL...
-
Page 12: System Specification
Mini DIN connector. Supports for AT/PS2 keyboard. MOUSE CONNECTOR : Mini DIN connector. Supports PS/2 Mouse. BUS SUPPORT : 1 PCI-E (x16) Slot (SDVO), Mini-PCI, CF (only available if on IDE device attached) ′ Page: 1-6 PPC-7615/PPC-7617/PPC-7619 USER S MANUAL... - Page 13 Interface: Line_IN, Line_OUT, MIC_IN HARDWARE MONITORING FUNCTION : Monitor Voltage, CPU temperature & cooling fan speed. If CPU temperature is over setting the buzzer will send out a warming (only under DOS system) ′ Page: 1-7 PPC-7615/PPC-7617/PPC-7619 USER S MANUAL...
- Page 14 COLOR : According to the supplier’s LCD specification. LCD MTBF : According to the supplier’s LCD specification. BACKLIGHT MTBF : According to the supplier’s LCD specification. DIMENSION : According to the supplier’s LCD specification. ′ Page: 1-8 PPC-7615/PPC-7617/PPC-7619 USER S MANUAL...
- Page 15 Chapter 1 Introduction TOUCH SCREEN : Type Resistive PPC-7615 : 4096 x 4096 Resolution PPC-7617 : 4096 x 4096 PPC-7619 : 4096 x 4096 PPC-7615 : 3H Hardness PPC-7617 : 3H PPC-7619 : 3H Controller USB interface Knock Life 35,000,000 Times...
-
Page 16: Safety & Notification
100V~240V, otherwise the system may be damaged. 2. Environmental Conditions a. Place your PPC-7615/PPC-7617/PPC-7619 on a sturdy, level surface. Be sure to allow enough room on each side to have easy access. b. Avoid extremely hot or cold places to install your PPC. - Page 17 If heavy stains are present, moisten a cloth with diluted neutral washing agent or with alcohol and then wipe thoroughly with a dry cloth. d. If dust has been accumulated on the outside, remove it by using a special made vacuum cleaner for computers. ′ Page: 1-11 PPC-7615/PPC-7617/PPC-7619 USER S MANUAL...
-
Page 18: Chapter 2 Hardware Configuration
CHAPTER HARDWARE CONFIGURATION ** QUICK START ** Helpful information describes the jumper & connector settings, and component locations. Section includes: Jumper & Connector Quick Reference Table Component Locations Configuration and Jumper settings Connector’s Pin Assignments Page 2-1... -
Page 19: Jumper & Connector Quick Reference Table
JP5,JP6,JP7 Power State Selection …………………..……. JP22, JP10, JP21 Reset/NMI Watchdog Selection ……………… JP21 CF Card Master/ Slave Selecction ……………. JP14 TV Out Connector ……………………………. Memory Installation ………………………….. DIM1, DIM2 PCI-Express Card Selection ………………….. ′ Page: 2-2 PPC-7615/PPC-7617/PPC-7619 USER S MANUAL... -
Page 20: Component Locations
Chapter 2 Hardware Configuration 2-2. COMPONENT LOCATIONS PPC-7615/PPC-7617/PPC-7619 Connector, Jumper and Component locations ′ Page: 2-3 PPC-7615/PPC-7617/PPC-7619 USER S MANUAL... -
Page 21: How To Set The Jumpers
You can connect PIN1 & PIN2 to create one setting by shorting. You can either connect PIN2 & PIN3 to create another setting. The same jumper diagrams are applied all through this manual. The figure below shows what the manual diagrams look and what they represent. ′ Page: 2-4 PPC-7615/PPC-7617/PPC-7619 USER S MANUAL... - Page 22 Jumper Block looks like this JUMPER SETTINGS 2 pin Jumper close(enabled) Looks like this 3 pin Jumper 2-3 pin close(enabled) Looks like this Jumper Block 1-2 pin close(enabled) Looks like this ′ Page: 2-5 PPC-7615/PPC-7617/PPC-7619 USER S MANUAL...
-
Page 23: Com Port Connector
DSR1 RTS1 CTS1 COM2 : COM2 Connector The COM2 is selectable as RS-232/422/485. The pin assignment is as follows : ASSIGNMENT RS-232 RS-422 RS-485 DCD2 DTR2 DSR2 RTS- RTS2 RTS+ CTS2 CTS+ CTS- ′ Page: 2-6 PPC-7615/PPC-7617/PPC-7619 USER S MANUAL... - Page 24 The pin assignment is as follows : ASSIGNMENT DCD4 DTR4 DSR4 RTS4 CTS4 COM4’s pin 9 is selectable for RI, +5V or +12V. For more information, please refer to our “2-5 COM RI and Voltage Selection”. ′ Page: 2-7 PPC-7615/PPC-7617/PPC-7619 USER S MANUAL...
-
Page 25: Com3/4 Ri& Voltage Selection
Chapter 2 Hardware Configuration 2-5. COM3/4 RI & VOLTAGE SELECTION JP16 : COM3 RI & Voltage Selection The selections are as follows: JUMPER JUMPER SELECTION SETTINGS ILLUSTRATION COM3 ***Manufacturing Default -- RI. ′ Page: 2-8 PPC-7615/PPC-7617/PPC-7619 USER S MANUAL... - Page 26 Chapter 2 Hardware Configuration JP17 : COM4 RI & Voltage Selection The selections are as follows: JUMPER JUMPER SELECTION SETTINGS ILLUSTRATION COM4 ***Manufacturing Default -- RI. ′ Page: 2-9 PPC-7615/PPC-7617/PPC-7619 USER S MANUAL...
-
Page 27: Rs232/422/485(Com2) Selection
This connector is used to set the COM2 function. The jumper settings are as follows : COM 2 Jumper Settings Jumper Function (pin closed) Illustrations RS-232 All Open RS-422 1-2, 3-4, 9-10 RS-485 1-2, 5-6, 7-8 *** Manufacturing default -- RS-232. ′ Page: 2-10 PPC-7615/PPC-7617/PPC-7619 USER S MANUAL... -
Page 28: Reset Connector
JKBMS1 : PS/2 Keyboard and Mouse Connector The pin assignments are as follows : ASSIGNMENT KBDATA 5VSB KBCLK MSDATA 5VSB MSCLK 2-8. RESET CONNECTOR JPANEL1 (13, 15) : Reset Connector. The pin assignment is as follows : ASSIGNMENT RST_BTN ′ Page: 2-11 PPC-7615/PPC-7617/PPC-7619 USER S MANUAL... -
Page 29: Hard Disk Drive Led Connector
JPANEL1 (14, 16) : ATX Power Button The pin assignment is as follows : ASSIGNMENT PW_BN1 PW_BN2 2-11. EXTERNAL SPEAKER CONNECTOR JPANEL1 (1, 3, 5, 7) : External Speaker Connector The pin assignment is as follows : ASSIGNMENT P_SPK ′ Page: 2-12 PPC-7615/PPC-7617/PPC-7619 USER S MANUAL... -
Page 30: Clear Cmos Data Selection
Note: To clear CMOS data, user must power-off the computer and set the jumper to “Clear CMOS” as illustrated above. After five to six seconds, set the jumper back to “Normal” and power-on the computer. ′ Page: 2-13 PPC-7615/PPC-7617/PPC-7619 USER S MANUAL... -
Page 31: Cpu Fan Connector
The pin assignment is as follows: ASSIGNMENT LPC1_FANPWM1 +12V LPC1_FANIO1 2-15. SYSTEM FAN CONNECTOR FAN2:System Fan connector The pin assignment is as follows: ASSIGNMENT LPC1_FANPWM2 +12V LPC1_FANIO2 JCFAN1:System Fan connector The pin assignment is as follows: ASSIGNMENT +12V ′ Page: 2-14 PPC-7615/PPC-7617/PPC-7619 USER S MANUAL... -
Page 32: Hard Disk Drive Connector
ASSIGNMENT IDERST PDD7 PDD8 PDD6 PDD9 PDD5 PDD10 PDD4 PDD11 PDD3 PDD12 PDD2 PDD13 PDD1 PDD14 PDD0 PDD15 PDREQ PDIOW# PDIOR# PIORDY PD_CSEL PDDACK# IRQ14 PDA1 P66 DETECT PDA0 PDA2 PDCS1# PDCS3# IDEACTN ′ Page: 2-15 PPC-7615/PPC-7617/PPC-7619 USER S MANUAL... -
Page 33: Vga Connector
Chapter 2 Hardware Configuration 2-17. VGA CONNECTOR VGA1: VGA Connector The pin assignments are as follows: ASSIGNMENT GREEN BLUE VGA IIC DATA HSYNC VSYNC VGA IIC CLK ′ Page: 2-16 PPC-7615/PPC-7617/PPC-7619 USER S MANUAL... -
Page 34: Serial Ata Connector
Chapter 2 Hardware Configuration 2-18. SERIAL ATA CONNECTOR SATA1~SATA4: The PPC-7615/ PPC-7617/ PPC-7619 possesses four Serial ATA Connector, SATA1~SATA4. The pin assignments are as follows: SATA1:SATA Connector The pin assignments are as follows: ASSIGNMENT SATA_TXP0 SATA_TXN0 SATA_RXN0 SATA_RXP0 SATA2:SATA Connector The pin assignments are as follows:... - Page 35 Chapter 2 Hardware Configuration SATA3:SATA Connector The pin assignments are as follows: ASSIGNMENT SATA_TXP2 SATA_TXN2 SATA_RXN2 SATA_RXP2 SATA4:SATA Connector The pin assignments are as follows: ASSIGNMENT SATA_TXP3 SATA_TXN3 SATA_RXN3 SATA_RXP3 ′ Page: 2-18 PPC-7615/PPC-7617/PPC-7619 USER S MANUAL...
-
Page 36: Universal Serial Bus Connector
USB1:Universal Serial Bus Connector The pin assignments are as follows: ASSIGNMENT VCCUSB2 VCCUSB2 USB4N USB5N USB4P USB5P JUSB2:Universal Serial Bus Connector The pin assignments are as follows: ASSIGNMENT VCCUSB1 USB0N USB0P VCCUSB1 USB1N USB1P ′ Page: 2-19 PPC-7615/PPC-7617/PPC-7619 USER S MANUAL... -
Page 37: Usb&Lan Connector
Orange Color on Giga LAN Speed Indicator No LAN switch/hub connected Right side LED: Yellow Color Blinking LAN Message Active No LAN Message Active USB Signal: ASSIGNMENT VCCUSB0 USB2N USB2P VCCUSB0 USB3N USB3P ′ Page: 2-20 PPC-7615/PPC-7617/PPC-7619 USER S MANUAL... -
Page 38: Irda Connector
2-21. IRDA CONNECTOR IRDA1: IrDA (Infrared) Connector The pin assignments are as follows: ASSIGNMENT IRRX IRTX 2-22. ATX POWER CONNECTOR PW1:ATX 12V Connector The pin assignments are as follows: ASSIGNMENT +12V 5VSB PS-ON ′ Page: 2-21 PPC-7615/PPC-7617/PPC-7619 USER S MANUAL... -
Page 39: Sound Connector
The pin assignments are as follows: SPDIF (inside the Line-In hole) ASSIGNMENT AC_SPDIF0 Line-In: light blue color ASSIGNMENT LINE_L LINE_R SPK-Out: light green color ASSIGNMENT SPK_L SPK_R Mic-In: pink color ASSIGNMENT MIC_IN1 MIC_IN2 ′ Page: 2-22 PPC-7615/PPC-7617/PPC-7619 USER S MANUAL... -
Page 40: Lvds Connector
CD R 2-25. LVDS CONNECTOR J1:LVDS CONNECTOR The pin assignments are as follows: ASSIGNMENT ASSIGNMENT LVDS_VCC CLKBM CLKBP YBM2 YBP2 YBM1 YBP1 YBP0 YBM0 CLKAP CLKAM YAP2 YAM2 YAP1 YAM1 YAP0 YAM0 LVDS_VCC LVDS_VCC ′ Page: 2-23 PPC-7615/PPC-7617/PPC-7619 USER S MANUAL... -
Page 41: Inverter Connector
ENABKL (Inverter backlight ON/OFF control signal) 2-27. LVDS PANEL VOLTAGE SELECTION JP4:LVDS Panel Voltage Selection. The pin assignments are as follows: JUMPER JUMPER SETTING SELECTION (pin closed) ILLUSTRATION +3.3V *** Manufacturing Default – +3.3V. ′ Page: 2-24 PPC-7615/PPC-7617/PPC-7619 USER S MANUAL... -
Page 42: Fsb Frequency Selection
2-28. FSB FREQUENCY SELECTION JP5, JP6, JP7:FSB Frequency Selections. The pin assignments are as follows: SELECTION JUMPER SETTING JUMPER (pin closed) ILLUSTRATION 533 MHz 667 MHz open *** Manufacturing Default – 667 MHz. ′ Page: 2-25 PPC-7615/PPC-7617/PPC-7619 USER S MANUAL... -
Page 43: Power State Selection
Jumper Setting Jumper Illustrations JP22 JP10 JP21 open Open close *** Manufacturing Default – ATX. *** JP21 Pin1 ~ Pin 2: Power State Selection JP21 Pin 3 ~ Pin 8: Reset/ NMI Selection ′ Page: 2-26 PPC-7615/PPC-7617/PPC-7619 USER S MANUAL... - Page 44 2-30. RESET/ NMI SELECTIONS JP21:Reset/ NMI Selections. The pin assignments are as follows: Selections Jumper Setting Jumper Illustration RESET 3-4 CLOSE 5-6 CLOSE CLEAR WDG 7-8 CLOSE GPIO For Customer 9-10 Application *** Manufacturing Default –RESET. ′ Page: 2-27 PPC-7615/PPC-7617/PPC-7619 USER S MANUAL...
- Page 45 Chapter 2 Hardware Configuration 2-31. CF CARD MASTER/SLAVE SELECTIONS JP14:CF Card Master/ Slave Selection. The pin assignments are as follows: Selections Jumper Setting Jumper Illustration Master Close Slave Open *** Manufacturing Default – Slave. ′ Page: 2-28 PPC-7615/PPC-7617/PPC-7619 USER S MANUAL...
- Page 46 JP1:TV OUT CONNECTOR The pin assignments are as follows: PIN ASSIGNMENT Luminance(Y) CVBS Chrominance(UV) 2-33. MEMORY INSTALLATION PPC-7615/ PPC-7617/ PPC-7619 CPU Card can support up to 2GB in two SODIMM sockets. DRAM BANK CONFIGURATION DIMM1 DIMM2 Total memory size 256 MB...
- Page 47 2-34. PCI-EXPRESS CARD SELECTIONS JP9:PCI-Express Card Selection. The pin assignments are as follows: Selections Jumper Setting Jumper Illustration PCI-E x 1 Close PCI-E x 4 PCI-E x 16 Open *** Manufacturing Default – PCI-E x 16. ′ Page: 2-30 PPC-7615/PPC-7617/PPC-7619 USER S MANUAL...
- Page 48 CHAPTER SOFTWARE UTILITIES This chapter comprises the detailed information of VGA driver, LAN driver, and sound driver, Intel® Chipset Software Installation Utility, touch screen driver, and Flash BIOS update. It also describes how to install the watchdog timer configuration. Section includes: Introduction VGA Driver Utility Flash BIOS Update...
- Page 49 Chapter 3 Software Configuration 3-1. INTRODUCTION Enclosed with our PPC-7615/ PPC-7617/ PPC-7619 package is our driver utility, which may comes in a form of a CD ROM disc or floppy diskettes. For CD ROM disc user, you will only need some of the files contained in the...
- Page 50 Chapter 3 Software Configuration 3-2. VGA DRIVER UTILITY The VGA interface embedded with our PPC-7615/ PPC-7617/ PPC-7619 can support a wide range of display. You can display CRT, LVDS simultaneously with the same mode. 3-3-1. Installation of VGA Driver: To install the VGA Driver, simply follow the following steps: (1).
- Page 51 Chapter 3 Software Configuration 3-3. FLASH BIOS UPDATE 3-3-1. Introduction Users of PPC-7615/ PPC-7617/ PPC-7619 can use the program “Awdflash.exe” contained in the Utility Disk for system BIOS update. 3-3-2. Installation of system BIOS 1. Copy “Awdflash.exe” from Driver Disk to Drive C.
- Page 52 File Name to Program: 7615xxxx.bin Verifying Flash Memory – 7FFFF OK Write OK No Update Write Fail F1: Reset F10: Exit Please reset or power off the system, then the Flash BIOS is fully implemented. ′ Page:3-5 PPC-7615/ PPC-7617/ PPC-7619 USER S MANUAL L...
- Page 53 Chapter 3 Software Configuration 3-4. LAN DRIVER UTILITY 3-4-1. Introduction The PPC-7615/ PPC-7617/ PPC-7619 Panel PC is enhanced with LAN function that can support various network adapters. Installation programs for LAN drivers are listed as follows: For more details on Installation procedure, please refer to Readme.txt file found on LAN DRIVER UTILITY.
- Page 54 3. Click on the OK button or press the ENTER key. 4. Click on the “Next” and OK prompts as they appear. 5. Reboot the system to complete the driver installation. ′ Page:3-7 PPC-7615/ PPC-7617/ PPC-7619 USER S MANUAL L...
- Page 55 3. Click Setup.exe file for utility installation. 4. Follow the instructions on the screen to complete the installation. 5. Once installation is completed, shut down the system and restart in order for the changes to take effect. ′ Page:3-8 PPC-7615/ PPC-7617/ PPC-7619 USER S MANUAL...
- Page 56 3. Click Setup.exe file for utility installation. 4. Follow the instructions on the screen to complete the installation. 5. Once installation is completed, shut down the system and restart it in order to complete the changes. ′ Page:3-9 PPC-7615/ PPC-7617/ PPC-7619 USER S MANUAL L...
- Page 57 ;-------------------------------------------------------------------------------------------------- ; Disable Watch-Dog Timer ;-------------------------------------------------------------------------------------------------- dx, (800h+66h) ; Disabled Watch Dog al, 00h dx, al dx, (800h+67h) al, 00h dx, al dx, (800h+68h) ; Clear Status Bit al, 00h dx, al ′ Page:3-10 PPC-7615/ PPC-7617/ PPC-7619 USER S MANUAL...
- Page 58 CHAPTER AWARD BIOS SETUP This chapter shows how to set up the Award BIOS. Section includes: Introduction Entering Setup The Standard CMOS Features The Advanced BIOS Features The Advanced Chipset Features Integrated Peripherals Power Management Setup PNP/PCI Configuration PC Health Status Load Fail-Safe Defaults Load Optimized Defaults Password Setting...
- Page 59 4-1. INTRODUCTION This chapter will show you the function of the BIOS in managing the features of your system. The PPC-7615/ PPC-7617/ PPC-7619 are equipped with the BIOS for system chipset from Phoenix -Award Software Inc. This page briefly explains the function of the BIOS in managing the special features of your system.
- Page 60 You may use the cursor the up/down keys to highlight the individual menu items. As you highlight each item, a brief description of the highlighted selection will appear at the bottom of the screen. ′ PPC-7615/ PPC-7617/ PPC-7619 USER Page: 4-3 S MANUAL...
- Page 61 <PgUp> or <PgDn> keys to select the value you want in each item. Date: < Month >, < Date > and <Year >. Ranges for each value are in the CMOS Setup Screen, and the week-day will skip automatically. ′ PPC-7615/ PPC-7617/ PPC-7619 USER Page: 4-4 S MANUAL...
- Page 62 Head: number of heads. • Precomp: write precompensation cylinders. • Landz: landing zone. • Sector: number of sectors. • Mode: Auto, Normal, Large or LBA. Auto: The BIOS automatically determines the optimal mode. ′ PPC-7615/ PPC-7617/ PPC-7619 USER Page: 4-5 S MANUAL...
- Page 63 Displays the amount of conventional memory detected during boot up. EXTENDED MEMORY: Displays the amount of extended memory detected during boot up. TOTAL MEMORY: Displays the total memory available in the system. ′ PPC-7615/ PPC-7617/ PPC-7619 USER Page: 4-6 S MANUAL...
- Page 64 1023 1024 65535 1023 1024 65535 1023 1024 65535 1023 1024 65535 1023 65535 1023 65535 1024 65535 1023 1024 65535 1023 65535 65535 65335 AUTO Award Hard Disk Type Table ′ PPC-7615/ PPC-7617/ PPC-7619 USER Page: 4-7 S MANUAL...
- Page 65 The “BIOS FEATURES SETUP” allow you to configure your system for basic operation. The user can select the system’s boot-up sequence and security. A brief introduction of each setting is given below. ′ PPC-7615/ PPC-7617/ PPC-7619 USER Page: 4-8 S MANUAL...
- Page 66 Do not type anything and just press <Enter>, it will disable security. Once the security is disabled, the system will boot and you can enter Setup freely. ′ PPC-7615/ PPC-7617/ PPC-7619 USER Page: 4-9 S MANUAL...
- Page 67 DRAM and the external cache. It also coordinates communications between conventional ISA bus and the PCI bus. It must be stated that these items should never need to be altered. ′ PPC-7615/ PPC-7617/ PPC-7619 USER Page: 4-10 S MANUAL...
- Page 68 DRAM precharge SYSTEM MEMORY FREQUENCY: Allow to choose different frequency of memory module. DVMT MODE: Intel Dynamic Video Memory Technology Mode. DVMT/FIXED MEMORY SIZE: DVMT Memory Size Select. ′ PPC-7615/ PPC-7617/ PPC-7619 USER Page: 4-11 S MANUAL...
- Page 69 If bios setup menu item supports USB device boot, it will cause Win9x detects the same storages twice when the system is rebooted, and USB HDD will fail. Note: this cause just happen under Win9x, the phenomenon is a limitation. ′ PPC-7615/ PPC-7617/ PPC-7619 USER Page: 4-12 S MANUAL...
- Page 70 To Enable/Disable the IDE DMA transfer access 3. OnChip Primary PCI IDE The integrated peripheral controller contains an IDE interface with support for two IDE channels. Select Enabled to activate each channel separately. 4. Primary Master/Slave PIO ′ PPC-7615/ PPC-7617/ PPC-7619 USER Page: 4-13 S MANUAL...
- Page 71 [SATA Only]: SATA is operating in legacy mode. 8. PATA IDE Mode To select PATA IDE Mode sequence 9. SATA Port According PATA IDE Mode to determine SATA sequence ′ PPC-7615/ PPC-7617/ PPC-7619 USER Page: 4-14 S MANUAL...
- Page 72 2. USB 2.0 Controller Enable the USB 2.0 controller 3. USB Keyboard Support Select Enabled if your system contains a Universal Serial Bus (USB) controller and you have a USB keyboard. ′ PPC-7615/ PPC-7617/ PPC-7619 USER Page: 4-15 S MANUAL...
- Page 73 Select a logical COM port name and matching address for the third and forth serial ports. Select an address and corresponding interrupt for third and forth serial port. WATCHDOG SUPPORT: To select watch-dog times. ′ PPC-7615/ PPC-7617/ PPC-7619 USER Page: 4-16 S MANUAL...
- Page 74 Soft-Off state when the system has “hung”. The choices are Delay 4 Sec and Instant-Off. PWRON AFTER PWR-FAIL: This item allows you to select if you want to power on the system after power failure. The choice: Off and On ′ PPC-7615/ PPC-7617/ PPC-7619 USER Page: 4-17 S MANUAL...
- Page 75 Plug and Play-compatible devices. However, this capability means absolutely nothing unless you are using a Plug and Play operating system such as Windows 95. By choosing “manual”, you are allowed to configure the IRQ Resources and DMA Resources. ′ PPC-7615/ PPC-7617/ PPC-7619 USER Page: 4-18 S MANUAL...
- Page 76 F7:Optimized Defaults Descriptions on each item above are as follows: 1. IRQ-n Assigned to: You may assign each system interrupt a type, depending on the type of device using the interrupt. ′ PPC-7615/ PPC-7617/ PPC-7619 USER Page: 4-19 S MANUAL...
- Page 77 This item shows you the current CPU temperature. VCORE: This item shows you the current system voltage. 5V / 12V : Show you the voltage of5V/12V. FAN1/FAN2 SPEED: This item shows you the current CPU/ SYSTEM FAN speed. ′ PPC-7615/ PPC-7617/ PPC-7619 USER Page: 4-20 S MANUAL...
- Page 78 Load Optimized Defaults ( Y/N ) ? N Pressing "Y" loads the default values that are factory setting for optimal performance system operations. ′ PPC-7615/ PPC-7617/ PPC-7619 USER Page: 4-21 S MANUAL...
- Page 79 PASSWORD DISABLED!!! Press any key to continue... Press the < Enter > key again and the password will be disabled. Once the password is disabled, you can enter Setup freely. ′ PPC-7615/ PPC-7617/ PPC-7619 USER Page: 4-22 S MANUAL...
- Page 80 You may always call up the setup program at any time to adjust any of the individual items by pressing the <Del> key during boot up. ′ PPC-7615/ PPC-7617/ PPC-7619 USER Page: 4-23 S MANUAL...
- Page 81 Quit Without Saving (Y/N)? N ►Power Management etup ►PnP/PCI Configura Saving ►PC Health Status Esc : Quit ↑↓→← : Select Item F10 : Save & Exit Setup Abandon all Datas ′ PPC-7615/ PPC-7617/ PPC-7619 USER Page: 4-24 S MANUAL...
-
Page 82: Appendix A System Assembly
APPENDIX SYSTEM ASSEMBLY This appendix contain exploded diagram of the system. Section includes: Exploded Diagram for PPC-7615 Whole System Exploded Diagram for PPC-7617 LCD Panel Exploded Diagram for PPC-7619 LCD Panel Exploded Diagram for PPC-7615/ PPC-7617/ PPC-7619 Packing Page: A-1... - Page 83 Appendix A System Assembly EXPLODED DIAGRAM FOR PPC-7615 WHOLE SYSTEM LVDS INVERTER HDD SATA CABLE RESET SWITCH INVERTER EXTENDED CABLE ATX 12PIN TO 10PIN CABLE ′ Page: A-2 PPC-7615/ PPC-7617/ PPC-7619USER S MANUAL...
- Page 84 Appendix A System Assembly ′ Page: A-3 PPC-7615/ PPC-7617/ PPC-7619USER S MANUAL...
- Page 85 Appendix A System Assembly EXPLODED DIAGRAM FOR PPC-7617 LCD PANEL ′ Page: A-4 PPC-7615/ PPC-7617/ PPC-7619USER S MANUAL...
- Page 86 Appendix A System Assembly ′ Page: A-5 PPC-7615/ PPC-7617/ PPC-7619USER S MANUAL...
- Page 87 Appendix A System Assembly EXPLODED DIAGRAM FOR PPC-7619 LCD PANEL ′ Page: A-6 PPC-7615/ PPC-7617/ PPC-7619USER S MANUAL...
- Page 88 Appendix A System Assembly ′ Page: A-7 PPC-7615/ PPC-7617/ PPC-7619USER S MANUAL...
- Page 89 Appendix A System Assembly EXPLODED DIAGRAM FOR PPC-7615/ PPC-7617/ PPC-7619 PACKING ′ Page: A-8 PPC-7615/ PPC-7617/ PPC-7619USER S MANUAL...
- Page 90 Appendix A System Assembly ′ Page: A-9 PPC-7615/ PPC-7617/ PPC-7619USER S MANUAL...
- Page 91 APPENDIX TECHNICAL SUMMARY This section introduce you the maps concisely. Section includes: Block Diagram Interrupt Map RTC & CMOS RAM Map Timer & DMA Channels Map I / O & Memory Map Page: B-1...
-
Page 92: Appendix B Technical Summary
Appendix B Technical Summary BLOCK DIAGRAM ′ Page: B-2 PPC-7615/ PPC-7617/ PPC-7619 USER S MANUAL... -
Page 93: Interrupt Map
Appendix B Technical Summary INTERRUPT MAP ASSIGNMENT System TIMER Keyboard Cascade Serial port 2 Serial port 1 Available Floppy Parallel port 1 RTC clock Available Available Available PS/2 Mouse Math coprocessor IDE1 IDE2 ′ Page: B-3 PPC-7615/ PPC-7617/ PPC-7619 USER S MANUAL... -
Page 94: Rtc & Cmos Ram Map
Extension memory low byte Extension memory high byte Reserved for extension memory low byte Reserved for extension memory high byte Date Century byte Information Flag 34-3F Reserve 40-7f Reserved for Chipset Setting Data ′ Page: B-4 PPC-7615/ PPC-7617/ PPC-7619 USER S MANUAL... -
Page 95: Timer & Dma Channels Map
Timer Channel Map : Timer Channel Assignment System timer interrupt DRAM Refresh request Speaker tone generator DMA Channel Map : DMA Channel Assignment Available Available Floppy Available Cascade Available Available Available ′ Page: B-5 PPC-7615/ PPC-7617/ PPC-7619 USER S MANUAL... -
Page 96: I/O & Memory Map
Graphics adapter controller 2F8-2FF Serial port-2 360-36F Net work ports 378-37F Parallel port-1 3B0-3BF Monochrome & Printer adapter 3C0-3CF EGA adapter 3D0-3DF CGA adapter 3F0-3F7 Floppy disk controller 3F8-3FF Serial port-1 ′ Page: B-6 PPC-7615/ PPC-7617/ PPC-7619 USER S MANUAL...
Need help?
Do you have a question about the PPC-7615 and is the answer not in the manual?
Questions and answers