Table of Contents
Advertisement
Quick Links
EMV400 FHD-N / EMV800 FHD-N Lite
4CH/4CH 1080p Full HD Mobile DVR
Quick Installation Guide
Copyright © EverFocus Electronics Corp.
Release Date: October 2021
All the images including product pictures or screen shots in this document are for example only. The images may
vary depending on the product and software version. Information contained in this document is subject to
change without notice.
EverFocus Taiwan:
2F., No.12, Ln. 270, Sec. 3, Beishen Rd., Shenkeng Dist., New Taipei City 222, Taiwan
TEL: +886 2 26622338 FAX: +886 2 26623632
www.everfocus.com.tw marketing@everfocus.com.tw
Advertisement
Table of Contents

Subscribe to Our Youtube Channel
Related Manuals for EverFocus EMV400 FHD-N


Summary of Contents for EverFocus EMV400 FHD-N
- Page 1 EMV400 FHD-N / EMV800 FHD-N Lite 4CH/4CH 1080p Full HD Mobile DVR Quick Installation Guide Copyright © EverFocus Electronics Corp. Release Date: October 2021 All the images including product pictures or screen shots in this document are for example only. The images may vary depending on the product and software version.
-
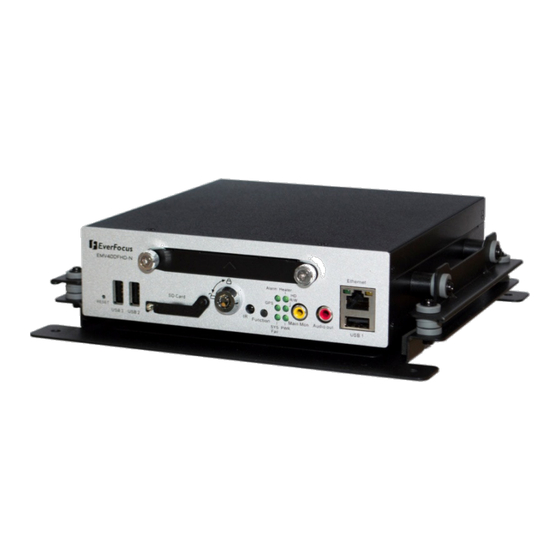
Page 2: Front Panel
1. Overview 1.1 Front Panel 5 6 7 8 9 10 No. Name Description Reset Press to reset the system. USB2.0 Port Three USB2.0 ports for connecting to the USB storage device or mouse. Insert a SD / SDHC card (up to 32GB) for alarm event backup recording (see SD Card Slot 2.3 SD Card Installation). -
Page 3: Rear Panel
By default, this port is set to a Call monitor output. Connects to a Call Call monitor using a RCA cable. Monitor Note: You can optionally switch this port from Call monitor to Main monitor. (RCA) Please refer to 2.6 Monitor Connection in the User’s Manual. RCA audio output for connecting to the speakers. -
Page 4: Packing List
• IR Remote Control (with two AAA batteries. See Note 3) x 1 • Power Harness Cable x 1 • Video Cable x 1 (EMV400 FHD-N); x2 (EMV800 FHD-N Lite) (see 2.4 Audio Cable / Video Cable / Power-Out Cable) •... -
Page 5: Optional Accessories
1.4 Optional Accessories The mobile DVRs feature Wi-Fi/3G/4G function. You can optionally connect Wi-Fi/3G/4G module and antenna to the mobile DVR for networking, or connect a GPS receiver for GPS function. • 3G Antenna: For using 3G network function • 4G Antenna: For using 4G LTE network (LTE frequency bands differ among regions) •... -
Page 6: Sd Card Installation
2. Unscrew the HDD tray screws and then pull out the HDD tray. 3. Insert a HDD to the HDD tray and then screw the HDD using the supplied HDD screws. HDD Screws 4. Put back the HDD tray to the system and then tightly screw the HDD tray screws. 5. -
Page 7: Power Harness Cable
2.4 Audio Cable / Video Cable / Power-Out Cable You can use the supplied Video Cables to connect the cameras to the MDVR. You can also use the supplied Power-Out Cable to power on the connected cameras. Rear View DC12V Out Cable DC12V Out Video Cable Red: + (12V) -
Page 8: Basic Connection
3. Basic Connection Front View Rear View Speaker DC12V Out Mouse Video Cable Audio Cable Power 2.5" HDD Supply Main Monitor Notebook / PC Camera Audio Input Xfleet (Client PC) 1. To record videos, insert a 2.5” HDD to the HDD tray. Remember to lock the HDD Key Lock after inserting the HDD or the recording will not start (see 2.2 Hard Disk Installation).
Need help?
Do you have a question about the EMV400 FHD-N and is the answer not in the manual?
Questions and answers