Table of Contents
Advertisement
Quick Links
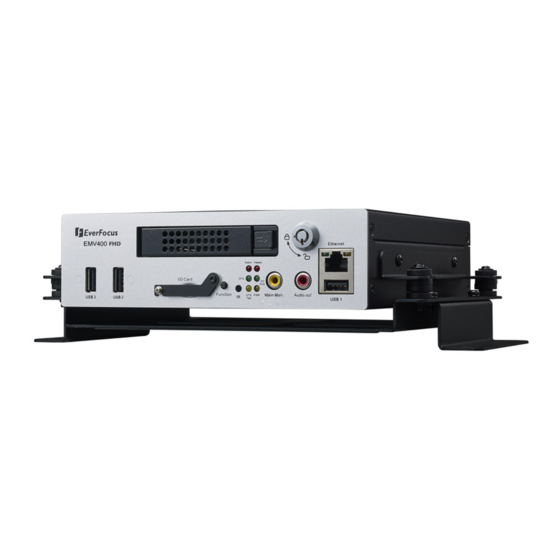
EMV400 FHD
4 Channels 1080p Full HD Mobile DVR
Quick Installation Guide
Copyright © EverFocus Electronics Corp.
Release Date: May, 2018
All the images including product pictures or screen shots in this document are for example only.
The images may vary depending on the product and software version. Information contained in
this document is subject to change without notice.
Advertisement
Table of Contents

Related Manuals for EverFocus EMV400 FHD


Summary of Contents for EverFocus EMV400 FHD
- Page 1 EMV400 FHD 4 Channels 1080p Full HD Mobile DVR Quick Installation Guide Copyright © EverFocus Electronics Corp. Release Date: May, 2018 All the images including product pictures or screen shots in this document are for example only. The images may vary depending on the product and software version. Information contained in...
- Page 2 The 1080p full HD mobile DVR EMV400 FHD can support 4 channels analog SD/HD cameras, delivering and recording up to 1080p full HD resolution.
-
Page 3: Packing List
Note: 1. Equipment configurations and supplied accessories vary by country. Please consult your local EverFocus office or agents for more information. Please also keep the shipping carton for possible future use. 2. Contact the shipper if any items appear to have been damaged in the shipping process. -
Page 4: Front Panel
EMV400 FHD Mobile DVR Front Panel No. Name Description Three USB2.0 ports for connecting to the USB storage device or USB2.0 Port mouse. HDD Drive Tray Install a 2.5” HDD for recording. Insert a SD / SDHC card (up to 32GB) for alarm event backup recording (see 2.3 SD Card Installation). -
Page 5: Rear Panel
EMV400 FHD Mobile DVR Rear Panel No. Name Description Antenna 1 (3G/4G) Connects to the 3G or 4G Antenna for using 3G/4G function. Connects to the 4G Antenna for using 4G LTE function. Note Antenna 2 (4G) that the 4G function is required to use both Antenna 1 and 2. - Page 6 EMV400 FHD Mobile DVR Getting Started Installation Before installation, choose a location in the vehicle where it can: • Provide convenient access for installing or removing the hard disk • Allow air to flow around the fan vents. Inadequate or improper air flow can impede proper...
- Page 7 EMV400 FHD Mobile DVR 2.1.1 Mounting You can use the provided mounting bracket in the package to mount the mobile DVR inside the vehicle. Two mounting types are available, Support-Mount and Suspend-Mount. Interface EMV400 HD Interface Support-Mount Suspend-Mount If the mounting bracket you ordered is a Z-Type Bracket, both of the above two mounting types are supported.
- Page 8 EMV400 FHD Mobile DVR 1. Attach the supplied two Z-Type Brackets to the Fixing Bracket on the mobile DVR. Use the supplied four Short Screws with washers to screw the Z-Type Brackets to the Fixing Bracket. Z-Type Bracket Fixing Bracket 2.
-
Page 9: Hard Disk Installation
EMV400 FHD Mobile DVR 2.2 Hard Disk Installation The mobile DVRs supply with a 2.5” HDD tray for inserting a Hard Disk for video recordings. Please follow the steps below to install the Hard Disk. Note: The mobile DVR does not support hot swap for the hard disk. Ensure to power off the mobile DVR before removing the hard disk. - Page 10 EMV400 FHD Mobile DVR 4. Take out the supplied HDD screw pack inside the HDD Tray, insert a HDD in the HDD Tray and then screw the HDD to the tray with the supplied 8 screws. 5. Insert the HDD Tray into the drive bay and close the Locking Arm until you hear a click.
-
Page 11: Sd Card Installation
Tested SD Cards: The mobile DVRs support SD / SDHC card up to 32 GB. The following brands of the SD cards have been tested by EverFocus and are recommended to work with EverFocus mobile DVRs. Brand SanDisk... - Page 12 EMV400 FHD Mobile DVR After installing the SD Card, it’s recommended to enable the Record Overwrite function. The Record Overwrite function enables the mobile DVR to overwrite the recordings when the card space is full. If Record Overwrite is not enabled, the alarm event backup recording to the SD card will stop when card space is full.
-
Page 13: Basic Connection
EMV400 FHD Mobile DVR 3. Basic Connection After installing the mobile DVR in the vehicle, you can start connecting the mobile DVR to the external devices. The instructions below describe the basic connection to the mobile DVRs. For details on cable connections, please refer to the following sections. -
Page 14: Power Harness Cable
EMV400 FHD Mobile DVR 3.1 Power Harness Cable You can connect the mobile DVR to a power source between 9 VDC ~ 36 VDC. Power Input IGN (Yellow) Power Harness Cable DC Power In (Red) 9 VDC ~ 36 VDC... -
Page 15: Video Cable / Power-Out Cable
EMV400 FHD Mobile DVR 3.2 Video Cable / Power-Out Cable The mobile DVRs have 1 Video In port for connecting 4 analog cameras using the supplied Video Cable. (Note HD-TVI/HD-CVI/HD-SDI cameras are not supported.) The Video Cable is labeled with VIN 1~ VIN 4. Connect the cameras 1 ~ 4 to the video inputs 1 ~ 4. -
Page 16: Audio Cable
EMV400 FHD Mobile DVR 3.3 Audio Cable The mobile DVRs have 1 Audio In port for connecting 4 microphones using the supplied Audio Cable. The Audio Cable is labeled with AIN 1~ AIN 4. Microphones with a (built-in) amplifier and external power supply are required. -
Page 17: Monitor Connection
EMV400 FHD Mobile DVR 3.5 Monitor Connection The mobile DVRs have 3 Main Monitor ports and 1 Call Monitor port. You can connect the monitors to the BNC, VGA or RCA Main Monitor and BNC Call Monitor ports of the mobile DVR. -
Page 18: Vehicle Connection
EMV400 FHD Mobile DVR 4. Vehicle Connection The mobile DVR supports input power voltage between 9 VDC ~ 36 VDC. You can install the mobile DVR in all kinds of vehicles support the above power voltage. The diagrams below are examples to illustrate the connection inside car / truck with 12 VDC / 24 VDC. -
Page 19: Connecting To A Car With 12 Vdc
EMV400 FHD Mobile DVR 4.2 Connecting to a Car with 12 VDC Glove box (inside or underneath) Trunk Passenger seat (underneath) Driver seat (between the seat and side panel) IGN (Yellow) Power Harness Cable Vehicle Battery Relay (12V) 12V+ (Red) -
Page 20: Accessing The Mobile Dvr
EMV400 FHD Mobile DVR 5. Accessing the Mobile DVR You can look up the IP address and access the Web interface of the DVR using the IP Utility (IPU) program, which is included in the software CD. The IP Utility can also be downloaded from EverFocus’... - Page 21 EMV400 FHD Mobile DVR b. Type the Username and Password. Click the OK button, the status of the selected camera will display Login. Note: 1. The default user ID is admin and the default password is 11111111. 2. If you select more than one mobile DVRs that have the same user ID / password, you will be able to log in several mobile DVRs at once.
- Page 22 EMV400 FHD Mobile DVR The “Download ePlayer Instruction” page will only be prompted for the first time login in order to update the system to the latest plugin version. When the Plug-in blocked appears on the browser, select Always allow plug-ins on xxx, click Done and then reload the webpage.
- Page 23 EMV400 FHD Mobile DVR If your PC or laptop is running with Windows, it’s required to run the browser as administrator when first entering the remote web page of the device. Go to C:\Program Files (x86)\Internet Explorer, right-click the browser and then click Run as administrator.
- Page 24 FAX: +81 3 5625 8189 sales@everfocus.com www.everfocus.co.jp info@everfocus.co.jp Ihr EverFocus Produkt wurde entwickelt Your EverFocus product is designed and und hergestellt mit qualitativ manufactured with high quality materials hochwertigen Materialien und and components which can be recycled Komponenten, die recycelt und wieder and reused.
Need help?
Do you have a question about the EMV400 FHD and is the answer not in the manual?
Questions and answers