
Related Manuals for Midea MDDP50


Summary of Contents for Midea MDDP50
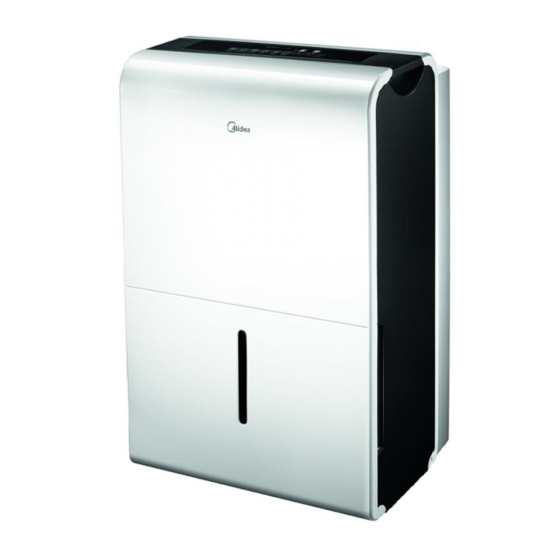
- Page 1 DEHUMIDIFIER Owner’s Manual & Installation Manual MODEL: MDDP50 IMPORTANT NOTE: Read this manual carefully before installing or operating your new machine. Make sure to save this manual for future reference.
-
Page 2: Table Of Contents
Table of Contents Safety Precautions Safety Precautions ........................03 Preparation Identification of parts.........................11 Design Notice..........................11 Positioning the unit........................12 When using the unit........................12 Accessories..........................12 Operating Instructions Control Panel Features.......................13 Other features........................... 14 Removing the collected water.....................15 Care and Maintenance Clean the grille and case......................17 Clean the bucket ........................17... -
Page 3: Safety Precautions
Safety Precautions Read Safety Precautions Before Operation and Installation To prevent death or injury to the user or other people and property damage, the following instructions must be followed. Incorrect operation due to ignoring of instructions may cause death, harm or damage. WARNING CAUTION This symbol indicates the possibility of... - Page 4 CAUTION This appliance can be used by children aged from 8 years and above and person with reduced • physical, sensory or mental capabilities or lack of experience and knowledge if they have been given supervision or instruction concerning use of the appliance in a safe way and understand the hazards involved.
- Page 5 Note about Fluorinated Gasses(Not applicable to the unit using R290 Refrigerant) 1. Fluorinated greenhouse gases are contained in hermetically sealed equipment. For specific information on the type, the amount and the CO equivalent in tonnes of the fluorinated greenhouse gas(on some models), please refer to the relevant label on the unit itself. 2.
- Page 6 WARNING for Using R32/R290 Refrigerant Do not use means to accelerate the defrosting process or to clean, other than those recommended by the manufacturer. The appliance shall be stored in a room without continuously operating ignition sources (for example: open flames, an operating gas appliance or an operating electric heater). Do not pierce or burn.
- Page 7 1.Transport of equipment containing flammable refrigerants See transport regulations 2.Marking of equipment using signs See local regulations 3.Disposal of equipment using flammable refrigerants See national regulations. 4.Storage of equipment/appliances The storage of equipment should be in accordance with the manufacturer's instructions. 5.Storage of packed (unsold) equipment Storage package protection should be constructed such that mechanical damage to the equipment inside the package will not cause a leak of the refrigerant charge.
- Page 8 8)Checks to the refrigeration equipment Where electrical components are being changed, they shall be fit for the purpose and to the correct specification. At all times the manufacturer's maintenance and service guidelines shall be followed. If in doubt consult the manufacturer's technical department for assistance. The following checks shall be applied to installations using flammable refrigerants: The charge size is in accordance with the room size within which the refrigerant containing parts are installed;...
- Page 9 9.Cabling Check that cabling will not be subject to wear, corrosion, excessive pressure, vibration, sharp edges or any other adverse environmental effects. The check shall also take into account the effects of aging or continual vibration from sources such as compressors or fans. 10.Detection of flammable refrigerants Under no circumstances shall potential sources of ignition be used in the searching for or detection of refrigerant leaks.
- Page 10 14.Decommissioning Before carrying out this procedure, it is essential that the technician is completely familiar with the equipment and all its detail. It is recommended good practice that all refrigerants are recovered safely. Prior to the task being carried out, an oil and refrigerant sample shall be taken in case analysis is required prior to re-use of reclaimed refrigerant.
-
Page 11: Preparation
Preparation Identification of parts NOTE: All the illustrations in the manual are for explanation purpose only. Your machine may be slightly different. The actual shape shall prevail. The unit can be controlled by the unit control panel alone or with the remote controller. -
Page 12: Positioning The Unit
Positioning the unit applications only. This dehumidifer should not be used 40cm or more for commercial or industrial applications. Place the dehumidifier on a smooth, level floor strong • enough to support the unit with a full bucket of water. Allow at least 20cm of air space on all sides of the unit •... -
Page 13: Operating Instructions
Operating Instructions Control Panel Features Note: The following control panels are for explanation purpose only. The control panel of the unit you purchased may be slightly different according to the models. Your machine may not contain some indicators or buttons. The actual shape shall prevail. Auto defrost Full Defrost... -
Page 14: Other Features
UP/DOWN buttons DRYER button(on some models) Press to activate the dryer operation. Press it again to · Humidity Set Control buttons stop the function. The humidity level can be set within a range of 35% RH(Relative Humidity) to 85%RH(Relative Humidity) Display in 5% increments. -
Page 15: Removing The Collected Water
Check filter feature Timer On indicator light illuminates. It indicates the The system starts to count the time once the fan motor Auto Start program is initiated. Press it again the operates. The check filter feature can be only activated Timer Off indicator light illuminates. - Page 16 Notes: 3. Pump draining (on some models) · When you remove the bucket, do not touch any parts · Water can be automatically emptied into a floor drain inside of the unit. Doing so may damage the product. or a suitable drainage facility by attaching the pump ·...
-
Page 17: Care And Maintenance
otherwise water is become ice that will cause the water hose blocked up and the unit failure. Make sure to empty the bucket once a week when using the pump draining feature. When the pump draining feature is not being used, remove the pump drain hose from the outlet. -
Page 18: Troubleshooting Tips
Troubleshooting Tips Before calling for service, review the chart below first yourself. Problem What to check · Make sure the dehumidifier s plug is pushed completely into the outlet. · Check the house fuse/circuit breaker box. Unit does not start ·... - Page 20 The design and specifications are subject to change without prior notice for product improvement. Consult with the sales agency or manufacturer for details. Any updates to the manual will be uploaded to the service website, please check for the latest version. CD001UI-DP/DL...
- Page 21 USER MANUAL OF SMART KIT IMPORTANT NOTE: Read the manual carefully before connecting your Smart kit(Wireless module). Make sure to save this manual for future reference.Illustrations in this manual are for explanatory purposes.The actual shape shall prevail.
- Page 23 CONTENTS SPECIFICATION....................DOWNLOAD AND INSTALL APP................. PREPARATION ....................NETWORK CONFIGURATION................HOW TO USE APP....................SPECIAL FUNCTIONS..................APP DECLARATION....................
-
Page 24: Specification
1 SPECIFICATION Unit model: MDDP50 Wireless Module Model: EU-SK105, US-SK105 Antenna Type: Printed PCB Antenna Frequency Band: 2400-2483.5MHz Operation Temperature:0 C~45 C/32 F~113 F Operation Humidity: 10%~85% Power Input: DC 5V/300mA Maximum TX Power: <20dBm 2 DOWNLOAD AND MSmartHome APP On an app market (Google Play Store, Apple App Store), search for "MSmartHome"... -
Page 25: Network Configuration
4 NETWORK CONFIGURATION Cautions It is necessary to forget any other around network and make sure the Android or iOS device just connect to the Wireless network you want to configure. Make sure the Android or iOS device Wireless function works well and can be connected back to your original Wireless network automatically. - Page 26 Register and log in Open the MSmartHome app, and create a new account to start ( you can also register through a third-party account). If you already had an existing account, use the account to log in. Login Enter email XXXXXXXXX Login Enter password...
- Page 27 5. If no message appears, select "+" on the page and select your device in the list of nearby devices available. If your device is not listed, please add your device manually by the device category and device model. 6. Connect your device to Wireless network according to the instructions on app. If the connection fails, please follow the instructions provided by the app to continue with the operation.
- Page 28 NOTE: Make sure your devices are powered on. ・ Keep your mobile phone close enough to your device when you are connecting ・ network to your device. Connect your mobile phone to the wireless network at home, and make sure you ・...
-
Page 29: How To Use App
5 HOW TO USE APP Please ensure both your mobile device and Dehumidifier are connected to the Internet before using app to control the Dehumidifier via internet, please follow the next steps: Login Enter email XXXXXXXXX MSmartHome Login Enter password Login 1. - Page 30 The Dehumidifier supports the following function: Power, Fan, Continuous, Auto Dehumidification, Dryer, Anti-mould and Pure. 1. Power Click on/off icon to turn on/off humidifier. 2. Fan mode Click Fan icon to activate high ,med(on some models),low fan speed. 3. Continuous mode Click Continuous icon to activate.
-
Page 31: Special Functions
6 SPECIAL FUNCTIONS Schedule Weekly,user can make an appointment to turn on or off dehumidifier on specific time.User also can choose circulation to keep the dehumidifier under schedule control every week. -
Page 32: App Declaration
7 APP DECLARATION Applicable system:IOS,Android. APP can not support the latest software version of Android and IOS system. Due to special situation may be occurred,we explicitly claims below:Not all of the Android and IOS system are compatible with APP.We will not be responsible for any issue as a result of the incompatibility. - Page 33 Declaration of conformity FCC ID:2ADQOMDNA21 IC:12575A-MDNA21 This device complies with Part 15 of the FCC Rules and it contains licence- exempt transmitter(s)/receiver(s) that comply with Innovation, Science and Economic Development Canada’s licence-exempt RSS(s). Operation is subject to the following two conditions: (1) This device may not cause interference.
- Page 36 Manufacturer: Midea Appliances Australia 7 Ordish Road Dandenong South VIC 3175 Australia E-mail: info@midea.net.au CD005IU-MSMARTAPWIFI(OBM)
Need help?
Do you have a question about the MDDP50 and is the answer not in the manual?
Questions and answers