Table of Contents
Advertisement
DEHUMIDIFIER
USER MANUAL
MODEL NUMBER
MDDF2-16DEN7-UK
MDDF2-20DEN7-UK
Warning notices: Before using this product, please read this manual carefully and keep it for future reference.
The design and specifications are subject to change without prior notice for product improvement.
Consult with your dealer or manufacturer for details.
The diagram above is just for reference. Please take the appearance of the actual product as the standard.
Advertisement
Table of Contents

Related Manuals for Midea MDDF2-16DEN7-UK


Summary of Contents for Midea MDDF2-16DEN7-UK
- Page 1 DEHUMIDIFIER USER MANUAL MODEL NUMBER MDDF2-16DEN7-UK MDDF2-20DEN7-UK Warning notices: Before using this product, please read this manual carefully and keep it for future reference. The design and specifications are subject to change without prior notice for product improvement. Consult with your dealer or manufacturer for details.
-
Page 2: Table Of Contents
THANK YOU LETTER Thank you for choosing Midea! Before using your new Midea product, please read this manual thoroughly to ensure that you know how to operate the features and functions that your new appliance o ers in a safe way. -
Page 3: Safety Precautions
SAFETY PRECAUTIONS It’s really important you read Safety Precautions Before Operation and Installation Incorrect installation due to ignoring instructions can cause serious damage or injury. The seriousness of potential damage or injuries is classified as either a WARNING or CAUTION. Explanation of Symbols WARNING The signal word indicates a hazard with a medium level of risk... - Page 4 WARNING Do not use in areas where chemicals are handled. • • Never insert your finger or other foreign objects into grills or openings. Take special care to warn children of these dangers. • Do not place heavy object on the power cord and take care so that the cord is not compressed.
- Page 5 CAUTION The manufactures nameplate is located on the rear panel of the unit and contains • electrical and other technical data specific to this unit. Be sure the unit is properly grounded. To minimize shock and fire hazards, proper • grounding is important.
- Page 6 WARNING for Using R32/R290 Refrigerant Do not use means to accelerate the defrosting process or to clean, other than those • recommended by the manufacturer. The appliance shall be stored in a room without continuously operating ignition • sources (for example: open flames, an operating gas appliance or an operating electric heater).
- Page 7 6.Information on servicing 1)Checks to the area Prior to beginning work on systems containing flammable refrigerants, safety checks are necessary to ensure that the risk of ignition is minimised. For repair to the refrigerating system, the following precautions shall be complied with prior to conducting work on the system.
- Page 8 9)Checks to electrical devices Repair and maintenance to electrical components shall include initial safety checks and component inspection procedures. If a fault exists that could compromise safety, then no electrical supply shall be connected to the circuit until it is satisfactorily dealt with.
- Page 9 Leak detection fluids are suitable for use with most refrigerants but the use of detergents containing chlorine shall be avoided as the chlorine may react with the refrigerant and corrode the copper pipe-work. If a leak is suspected, all naked flames shall be removed/extinguished.
- Page 10 g) Start the recovery machine and operate in accordance with manufacturer's instructions. h)Do not overfill cylinders. (No more than 80 % volume liquid charge). i)Do not exceed the maximum working pressure of thecylinder, even temporarily. j)When the cylinders have been filled correctly and the process completed, make sure that the cylinders and the equipment are removed from site promptly and all isolation valves on the equipment are closed o .
-
Page 11: Specifications
SPECIFICATIONS Product Model MDDN2-12DEN7-QA3 MDDF2-16DEN7-UK MDDF2-20DEN7-UK 220-240V~ 50Hz, 1Ph 220-240V~ 50Hz, 1Ph Power source 16 L/DAY 20 L/DAY Capacity (DB=30 RH=80%) 2.6 2 6 6 A 2.3A Rated current 430W 440W Rated power input Resistance class IPX0 IPX0... -
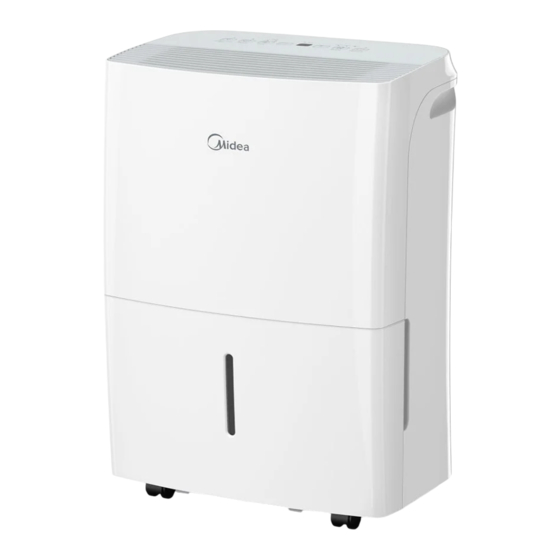
Page 12: Product Overview
PRODUCT OVERVIEW NOTE ON ILLUSTRATIONS: All the illustrations in the manual are for explanation purpose only. Your machine may be slightly di erent. The actual shape shall prevail. The unit can be controlled by the unit control panel alone. Type A HEPA filter Air intake grill... -
Page 13: Confirm It Before You Get Start
CONFIRM IT BEFORE YOU GET START 40cm or more 40cm or more 20cm 20cm or more or more 40cm or more Front view Top view Casters(At four points on the bottom of unit) Casters can move freely. Do not force casters to move over carpet, nor move the unit with water in the bucket. (The unit may tip over and spill water.) A dehumidifier operating in a basement will have little or no e ect in drying an adjacent enclosed storage area, such as a closet, unless there is adequate circulation of air in and out of the area. -
Page 14: Removing The Collected Water
REMOVING THE COLLECTED WATER There are two ways to remove collected water. Type 1: Type 2: Bucket drainage water hose drainage (continuous) Type 1: Use the bucket · When the unit is o ,if the bucket is full, the unit will beep 8 times(on some models) and the Full Water indicator light will flash. - Page 15 NOTE When you remove the bucket, do not touch any parts inside of the unit. Doing so may damage the product. Be sure to push the bucket gently all the way into the unit. Banging the bucket against anything or failing to push it in securely may cause the unit not to operate.
-
Page 16: Operation Instructions
OPERATION INSTRUCTIONS Control Panel Control panel A1(DF7) Control panel B1(DF/DF3/DF5) Control panel A2(DF7) Control panel B2(DF/DF3/DF5) Control panel A3(DF7) Control panel B3(DF/DF3/DF5) Control panel C(DG) Control panel B4(DF2) Control panel B5(DF2) (3 seconds) NOTE: The following control panels are for explanation purpose only. The control panel of the unit you purchased may be slightly di erent according to the models. - Page 17 Description Press to turn the dehumidifier on and o . POWER ON/OFF NOTE: When the compressor startups or stops running, the unit may make a loud voice, it is normal. Press to initiate the Auto start and Auto stop feature, in conjuction TIMER - Function with the UP and DOWN buttons.
- Page 18 Description Press this button for 3 seconds to initiate the Wireless connection mode. The LED DISPLAY shows’AP’ (at this time the unit shuts o all other functions) to indicate you can set Wireless connection. If connection (router) is successful (3 seconds) within 8 minutes, the unit will exit Wireless connection mode automatically WIRELESS - Function and the Wireless indicator illuminates and the unit enters the previous...
- Page 19 Setting the Timer(With 2 indicator lights) Anti-mould function (on some models) · When the unit is on, first press the Timer button, Press the Pure pad for 3 seconds to enable the Timer O indicator light illuminates. It indi- this function. This maximises occupant comfort cates the Auto Stop program is initiated.
-
Page 20: Cleaning And Maintenance
CLEANING AND MAINTENANCE Care and cleaning of the dehumidifier Turn the dehumidifier o and remove the plug from the wall outlet before cleaning. Clean the Grille and Case Use water and a mild detergent. Do not use bleach or abrasives. Do not splash water directly onto the main unit. -
Page 21: Troubleshooting 2
TROUBLESHOOTING Before calling for service, review the chart below first yourself. Problem What to check Make sure the dehumidifier s plug is pushed completely into the outlet. Check the house fuse/circuit breaker box. Unit does not start Dehumidifier has reached its preset level or bucket is full. Water bucket is not in the proper position. -
Page 22: Trademarks, Copyrights And Legal Statement
Midea Group and/or its a liates (“Midea”), to which Midea owns trade- marks, copyrights and other intellectual property rights, and all goodwill derived from using any part of an Midea trademark. -
Page 23: Data Protection Notice
European Economic Area. Further information are provided on request. You can contact our Data Protection O cer via MideaDPO@midea.com. To exercise your rights such as right to object your personal date being processed for direct marketing purposes, please contact us via MideaDPO@midea.com. - Page 24 CD003UI-DF/DG(B)
Need help?
Do you have a question about the MDDF2-16DEN7-UK and is the answer not in the manual?
Questions and answers