Table of Contents
Advertisement
Available languages
Available languages
395136-00,03,BT1500
6/22/04
B B
T T
1 1
5 5
0 0
0 0
1 1
0 0
" "
C C
o o
B B
T T
1 1
5 5
0 0
0 0
1 1
0 0
" "
C C
o o
INSTRUCTION MANUAL
BEFORE RETURNING THIS PRODUCT
FOR ANY REASON PLEASE CALL
1-800-54-HOW-TO
IF YOU SHOULD EXPERIENCE A PROBLEM
WITH YOUR BLACK & DECKER PURCHASE,
CALL 1-800-54-HOW-TO (1-800-544-6986).
IN MOST CASES, A BLACK & DECKER REPRESENTATIVE
CAN RESOLVE YOUR PROBLEM OVER THE PHONE.
IF YOU HAVE A SUGGESTION OR COMMENT,
GIVE US A CALL. YOUR FEEDBACK IS VITAL
TO THE SUCCESS OF BLACK & DECKER'S QUALITY
IMPROVEMENT PROGRAM.
SAVE THIS MANUAL FOR FUTURE REFERENCE.
VEA EL ESPAÑOL EN LA CONTRAPORTADA.
POUR LE FRANÇAIS, VOIR LA COUVERTURE ARRIÈRE.
INSTRUCTIVO DE OPERACIÓN, CENTROS DE SERVICIO Y PÓLIZA DE
GARANTÍA. ADVERTENCIA: LÉASE ESTE INSTRUCTIVO ANTES DE
USAR EL PRODUCTO.
All manuals and user guides at all-guides.com
9:04 AM
Page 1
R
m m
p p
o o
u u
n n
d d
M M
i i
t t
e e
r r
S S
a a
w w
m m
p p
o o
u u
n n
d d
M M
i i
t t
e e
r r
S S
a a
w w
(544-6986)
1
Advertisement
Table of Contents

Related Manuals for Black & Decker BT1500


Summary of Contents for Black & Decker BT1500
- Page 1 All manuals and user guides at all-guides.com 395136-00,03,BT1500 6/22/04 9:04 AM Page 1 ” ” ” ” INSTRUCTION MANUAL BEFORE RETURNING THIS PRODUCT FOR ANY REASON PLEASE CALL 1-800-54-HOW-TO (544-6986) IF YOU SHOULD EXPERIENCE A PROBLEM WITH YOUR BLACK & DECKER PURCHASE, CALL 1-800-54-HOW-TO (1-800-544-6986).
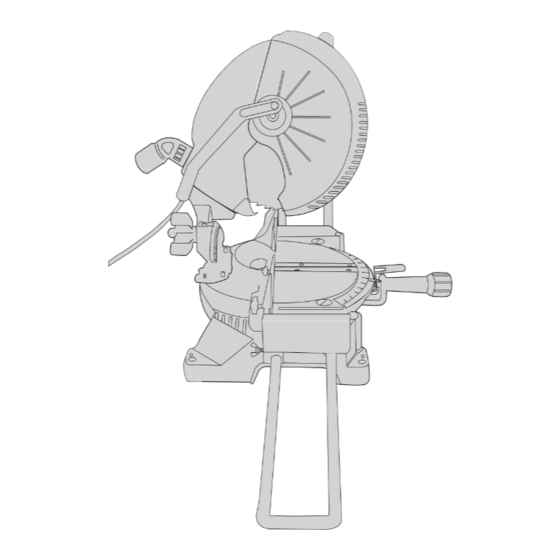
- Page 2 All manuals and user guides at all-guides.com 395136-00,03,BT1500 6/22/04 9:04 AM Page 2 FIG. 1 FIG. 2 Parts Description (Figures 1,2 ) FIG. 1 Operating Handle Guard Saw Blade Miter Clamp Handle Miter Latch Miter Scale Left Side Fence and...
- Page 3 All manuals and user guides at all-guides.com 395136-00,03,BT1500 6/22/04 9:04 AM Page 3 FIG. 3 FIG. 4 FIG. 5 FIG. 8 FIG. 7 FIG. 6...
- Page 4 All manuals and user guides at all-guides.com 395136-00,03,BT1500 6/22/04 9:04 AM Page 4 Fig. 9 Fig. 11 Fig. 10...
- Page 5 All manuals and user guides at all-guides.com 395136-00,03,BT1500 6/22/04 9:04 AM Page 5 Fig. 12 Fig. 13 Fig. 14 Fig. 15 Fig. 16 Fig. 17...
- Page 6 All manuals and user guides at all-guides.com 395136-00,03,BT1500 6/22/04 9:04 AM Page 6 Fig. 18 Fig. 19 WORK EXTENSIONS EXTENSIONES STOP BLOCK BLOQUE DE TOPE WING SCREW CLAMP BRACKET SCREW TORNILLO DE TORNILLO GRANDE DE LA ALETAS PENUEÑO BRIDA DE APRIETE...
- Page 7 All manuals and user guides at all-guides.com 395136-00,03,BT1500 6/22/04 9:04 AM Page 7 Important Safety Instructions Safety Instructions For All Tools WARNING: When using electric tools, basic safety • KEEP GUARDS IN PLACE and in working order. precautions should always be followed to reduce risk of fire, •...
-
Page 8: Additional Safety Rules For Miter Saws
All manuals and user guides at all-guides.com 395136-00,03,BT1500 6/22/04 9:05 AM Page 8 • USE PROPER EXTENSION CORDS. Make sure your • DON’T OVERREACH. Keep proper footing and balance extension cord is in good condition. When using an at all times. - Page 9 All manuals and user guides at all-guides.com 395136-00,03,BT1500 6/22/04 9:05 AM Page 9 • DON’T-Attempt to cut small pieces (hand within 6" of • DO-Be sure all blade and clamp washers are clean and blade) without clamping. recessed sides of collars are against blade. Tighten arbor screw securely.
- Page 10 In addition to this instruction manual, the ALWAYS ADJUST FENCE PROPERLY BEFORE USE. CLAMP SMALL PIECES carton should contain one No. BT1500 miter saw with blade and a BEFORE CUTTING. SEE MANUAL. plastic bag containing the following: ON GUARD: DANGER –...
-
Page 11: Specifications
All manuals and user guides at all-guides.com 395136-00,03,BT1500 6/22/04 9:05 AM Page 11 Familiarization clamped to your work support or moved to other job sites and reclamped. Place the saw on a smooth, flat surface such as a workbench or strong table. - Page 12 All manuals and user guides at all-guides.com 395136-00,03,BT1500 6/22/04 9:05 AM Page 12 clamp washer. Make sure recessed sides of washers are against wing screw into the threaded opening in the stop block. When using the stop block, loosen the wing screw and adjust the block to the blade.
-
Page 13: Fence Adjustment
All manuals and user guides at all-guides.com 395136-00,03,BT1500 6/22/04 9:05 AM Page 13 BEVEL POINTERS the two screws. Pay no attention to the reading of the miter pointer at this point. If the bevel pointers (11) do not indicate zero, loosen the screw that holds it in place and move the pointer as necessary. -
Page 14: Operation
All manuals and user guides at all-guides.com 395136-00,03,BT1500 6/22/04 9:05 AM Page 14 Although the louvers dramatically reduce flying debris, they are The electric brake may be erratic in operation until the brushes are openings in the guard and safety glasses should be worn at all times properly seated (worn in). - Page 15 All manuals and user guides at all-guides.com 395136-00,03,BT1500 6/22/04 9:05 AM Page 15 THIS SAW. Do not use any abrasive blades. material being cut, blade type, blade sharpness and rate of cut all contribute to the quality of the cut.
- Page 16 All manuals and user guides at all-guides.com 395136-00,03,BT1500 6/22/04 9:05 AM Page 16 means such as sawhorses or similar devices to keep the ends from - EXAMPLES - dropping. NO. SIDES ANGLE MITER OR BEVEL CUTTING PICTURE FRAMES, SHADOW BOXES AND OTHER 45°...
-
Page 17: Special Cuts
All manuals and user guides at all-guides.com 395136-00,03,BT1500 6/22/04 9:05 AM Page 17 INSTRUCTIONS FOR CUTTING CROWN MOLDING LAYING FLAT PRETESTING WITH SCRAP MATERIAL IS EXTREMELY AND USING THE COMPOUND FEATURES IMPORTANT! 1. Molding laying with broad back surface down flat on saw table 2. -
Page 18: Maintenance
All manuals and user guides at all-guides.com 395136-00,03,BT1500 6/22/04 9:05 AM Page 18 wood and CLAMPED OR HELD FIRMLY TO THE FENCE TO KEEP 4.Brushes worn out. 4.Have brushes replaced by authorized service IT FROM ROLLING PARTICULARLY WHEN MAKING ANGLE center. -
Page 19: Service Information
All manuals and user guides at all-guides.com 395136-00,03,BT1500 6/22/04 9:05 AM Page 19 The second option is to take or send the product (prepaid) to a Black 4.Workpiece moving. 4.Clamp workpiece to &Decker owned or authorized Service Center for repair or fence or glue 120 grit replacement at our option. -
Page 20: Renseignements Importants
9:05 AM Page 20 SCIE À ONGLETS COMBINÉE DE 25 CM (10 PO) SCIE À ONGLETS COMBINÉE DE 25 CM (10 PO) NO. BT1500 Description des pièces (figures 1 et 2) RENSEIGNEMENTS IMPORTANTS : FIG. 1 (1) Poignée de manoeuvre •Utiliser seulement des lames bien aiguisées. - Page 21 All manuals and user guides at all-guides.com 395136-00,03,BT1500 6/22/04 9:05 AM Page 21 Pièces de rechange : lors de l’entretien, UTILISER DES PIÈCES lorsqu’on soulève de la poussière. Les lunettes ordinaires protègent uniquement DE RECHANGE IDENTIQUES; réparer ou remplacer également les les yeux contre les chocs et ne sont PAS des lunettes de protection.
- Page 22 All manuals and user guides at all-guides.com 395136-00,03,BT1500 6/22/04 9:05 AM Page 22 protège-lame. •RALLONGES; s’assurer que la rallonge électrique soit en bon état et qu’elle soit en mesure de porter le courant nécessaire à l’outil. Une rallonge de calibre •ON DOIT garder les mains éloignées du trajet de la lame.
- Page 23 All manuals and user guides at all-guides.com 395136-00,03,BT1500 6/22/04 9:05 AM Page 23 •ON NE DOIT PAS mettre les mains sous la scie lorsque celle-ci est en marche SUR LE PROTÈGE-LAME : DANGER ou branchée, car la lame y est à découvert.
- Page 24 Biseau de 47° à gauche et de 2° à droite toutes les pièces. En plus du manuel d’utilisation, la boîte devrait contenir une scie à onglets no BT1500 munie d’une lame ainsi Onglet de 0°, - Hauteur max. 88.9mm (3,5 po) qu’un sac en plastique contenant :...
- Page 25 All manuals and user guides at all-guides.com 395136-00,03,BT1500 6/22/04 9:05 AM Page 25 Installation d’une lame neuve Assemblage et réglage de la scie (DÉBRANCHER LA SCIE À ONGLETS) Débrancher la scie avant de procéder à l’assemblage. NE PAS UTILISER LA SCIE À ONGLETS POUR COUPER DES Fixation de la poignée-pince à...
- Page 26 All manuals and user guides at all-guides.com 395136-00,03,BT1500 6/22/04 9:05 AM Page 26 Réglages d’une équerre sur le plateau et appuyer l’autre extrémité contre la DÉBRANCHER LA SCIE À ONGLETS AVANT DE PROCÉDER lame, en s’assurant que cette dernière soit perpendiculaire au AUX RÉGLAGLES...
- Page 27 All manuals and user guides at all-guides.com 395136-00,03,BT1500 6/22/04 9:05 AM Page 27 les deux boutons. Une fois la coupe en biseau terminée, on doit Balais replacer le guide vers la droite. Débrancher la fiche de la prise murale REMARQUE : la rainure du guide gauche (7) peut être obstruée par On doit inspecter régulièrement les balais du moteur.
-
Page 28: Coupes Transversales
All manuals and user guides at all-guides.com 395136-00,03,BT1500 6/22/04 9:05 AM Page 28 Méthode de coupe obtenu, bien serrer le bouton. REMARQUE : malgré le fait que la scie soit conçue pour couper On peut régler l’angle de biseau entre 2° à droite et 47° à gauche, et plusieurs types de matériaux non ferreux, le présent manuel décrit... -
Page 29: Coupe De Cadres, De Coffrages Ou D'autres Ouvrages Quadrilatéraux
All manuals and user guides at all-guides.com 395136-00,03,BT1500 6/22/04 9:05 AM Page 29 et à gauche, et en mettant la surface plus large contre le guide. effectuée au crayon à mine en regardant à travers les fentes prévues à cet effet. - Page 30 All manuals and user guides at all-guides.com 395136-00,03,BT1500 6/22/04 9:05 AM Page 30 COUPE DE MOULURES EN COURONNE 2. Réglage de 31,62° à gauche Pour que les moulures en couronne s’emboîtent bien, elles doivent 3. Conserver l’extrémité droite coupée être taillées en coupe combinée extrêmement précise; autrement dit, CÔTÉ...
-
Page 31: Guide De Dépannage
All manuals and user guides at all-guides.com 395136-00,03,BT1500 6/22/04 9:05 AM Page 31 Ouvrages courbés 1.La scie n’est pas branchée. 1.Brancher la scie. Toujours placer les ouvrages courbés conformément à la figure 16; 2.Le fusible a sauté ou le 2.Remplacer le fusible ou la figure 17 montre la position à... - Page 32 All manuals and user guides at all-guides.com 395136-00,03,BT1500 6/22/04 9:05 AM Page 32 PROBLÈME : la scie ne coupe pas les angles d’onglet avec GARANTIE COMPLÈTE DE DEUX ANS POUR L’USAGE précision DOMESTIQUE QUE SE PASSE-T-IL? QUOI FAIRE… Black & Decker (U.S.) Inc. garantit ce produit pour deux ans pour 1.L’échelle n’est pas réglée...
-
Page 33: Lea Todas Las Instrucciones
6/22/04 9:05 AM Page 33 INFORMACION CLAVE QUE DEBE SABER: BT1500 SIERRA DE ANGULO COMPUESTO DE 254 MM (10") • Corte únicamente con discos afilados. Los discos sin filo MANUAL DE INSTRUCCIONES cortan pobremente y sobrecargan el motor. Descripción de partes (Figuras 1, 2) FIG. - Page 34 All manuals and user guides at all-guides.com 395136-00,03,BT1500 6/22/04 9:05 AM Page 34 una máscara contra polvo si la operación que efectuará lo produce. Advertencias de seguridad: Clavijas polarizadas Los anteojos de diario solamente tienen lentes resistentes al Se emplean clavijas polarizadas en los equipos (con una pata más impacto, NO son anteojos de seguridad.
- Page 35 All manuals and user guides at all-guides.com 395136-00,03,BT1500 6/22/04 9:05 AM Page 35 se haya detenido completamente. dientes que se encuentran en la parte baja del disco apunten hacia • NO OPERE HERRAMIENTAS ELÉCTRICAS CERCA DE la parte posterior de la sierra.
- Page 36 All manuals and user guides at all-guides.com 395136-00,03,BT1500 6/22/04 9:05 AM Page 36 • NO Intente cortar piezas pequeñas (con la mano a menos de 15 EN LA GUARDA cm del disco) sin prensarlas. DANGER PELIGRO – ALEJESE DE EL DISCO •...
-
Page 37: Especificaciones
Altura máxima 88.9mm (3,5) manual de instrucciones, la caja debe contener una sierra de inglete Ancho máximo104.8mm (4,125) No. BT1500 con un disco y una bolsa de plástico con el siguiente Bisel de 45 grados - contenido: Altura máxima 63.5mm (2,5) 1. - Page 38 All manuals and user guides at all-guides.com 395136-00,03,BT1500 6/22/04 9:05 AM Page 38 Con el brazo de la sierra en posición elevada, levante la guarda Instalación de la bolsa para polvo inferior (2) tanto como sea posible. Destornille (pero no quite) el Su sierra incluye una bolsa para polvo de tela con cremallera.
- Page 39 All manuals and user guides at all-guides.com 395136-00,03,BT1500 6/22/04 9:05 AM Page 39 DESCONECTADA. contacto con la pieza de fundición cuando el disco esté a 90 grados. Apriete la tuerca de seguridad. Parea ajustar el tope de bisel de 45 NOTA: Su sierra viene perfectamente ajustada de fábrica a la hora...
- Page 40 All manuals and user guides at all-guides.com 395136-00,03,BT1500 6/22/04 9:05 AM Page 40 con serrín. Si usted observa esto, utilice una varita o aire a presión Carbones para limpiar el canal. DESCONECTE LA CLAVIJA DE LA TOMA DE CORRIENTE ACTUACION DE LA GUARDA Y VISIBILIDAD Revise los carbones regularmente desconectando la herramienta, La guarda del disco de su sierra se ha diseñado para levantarse...
- Page 41 All manuals and user guides at all-guides.com 395136-00,03,BT1500 6/22/04 9:05 AM Page 41 MATERIALES FERROSOS (HIERRO Y ACERO) O CALIDAD DEL CORTE MAMPOSTERIA CON ESTA SIERRA. No emplee ningún disco La lisura de cualquier corte depende de diferentes variables. abrasivo.
- Page 42 All manuals and user guides at all-guides.com 395136-00,03,BT1500 6/22/04 9:05 AM Page 42 Puede sujetar a cualquier lado del disco y recuerde poner la pieza brazo de inglete a 45 grados para cortar las dos superficies para contra una superficie sólida y plana de la guía. Para mejores formar un ángulo de 90 grados.
-
Page 43: Cortes Especiales
All manuals and user guides at all-guides.com 395136-00,03,BT1500 6/22/04 9:05 AM Page 43 CORTE DE MOLDURAS DE REMATE 3. Conserve el lado derecho del corte Para poder ensamblarse bien, las molduras deben cortarse a inglete LADO IZQUIERDO, ESQUINA EXTERIOR con gran precisión. - Page 44 All manuals and user guides at all-guides.com 395136-00,03,BT1500 6/22/04 9:05 AM Page 44 CORTE DE TUBERIA DE PLÁSTICO: Guía para la solución de problemas frecuentes La tubería de plástico puede ser fácilmente cortada con su sierra. ASEGURESE DE SEGUIR LAS REGLAS DE SEGURiDAD Y LAS Deberá...
- Page 45 All manuals and user guides at all-guides.com 395136-00,03,BT1500 6/22/04 9:05 AM Page 45 ¿QUE ESTA MAL? QUE HACER... INFORMACION RESPECTO EL SERVICIO 1. La sierra no está correctamente 1. Apriete Los herrajes de Black & Decker ofrece una red de centros de servicio propios y asegurada a la mesa de trabajo montaje.
- Page 46 (81) 8375 2313 Col. Remes Col. Centro VILLAHERMOSA, TAB Constitución 516-A (993) 312 5111 Col. Centro PARA OTRAS LOCALIDADES LLAME AL: (55) 5326 7100 Cat.No. BT1500 Form No. 395136-00 REV. 3 (JUNE ‘04) Copyright 2004 Black & Decker Printed in China ©...
- Page 47 All manuals and user guides at all-guides.com 395136-00,03,BT1500 6/22/04 9:05 AM Page 47...
- Page 48 All manuals and user guides at all-guides.com 395136-00,03,BT1500 6/22/04 9:05 AM Page 48...
Need help?
Do you have a question about the BT1500 and is the answer not in the manual?
Questions and answers