Table of Contents
Advertisement
Quick Links
Advertisement
Table of Contents

Related Manuals for Faber e-MatriX 800-I


Summary of Contents for Faber e-MatriX 800-I
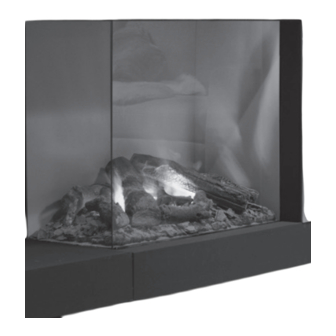
- Page 1 Manual e-MatriX 800-I/II/III ENG 40011677-1839 Manual e-MatriX 800-I/II/III ENG...
-
Page 2: Registration Plate
M a n u a l e - M a t r i X 8 0 0 Registration plate:... - Page 3 M a n u a l e - M a t r i X 8 0 0 1.2a 1.2b...
- Page 4 M a n u a l e - M a t r i X 8 0 0 2.0a 2.0c 2.0b 2.1a 2.1b...
- Page 5 M a n u a l e - M a t r i X 8 0 0 2.1c...
- Page 6 M a n u a l e - M a t r i X 8 0 0...
- Page 7 M a n u a l e - M a t r i X 8 0 0...
-
Page 8: Safety Instructions
M a n u a l e - M a t r i X 8 0 0 General Introduction Only have the fire installed by a qualified installer according to the water and electric safety regulations. Read this installation manual properly. Check • Before installation, check the fire for transport damage and report immediately to your supplier. • Check whether all of the parts below are included: Control box Remote Decoration material Suction cups (2x) Service door Spare transducers (2x) and sponge CE declaration Product: electric fire Opti-myst Model: e-MatriX 800x500-I/II/III and e-MatriX 800x650-I/II/III The product complies with the European Safety Standards EN60335-2-30 and the European Standard Electromagnetic Compatibility (EMC) EN55014, EN60555-2 and EN60555-3 these cover the essential requirements of EEC Directives 2006/95/EC and 2004/108/EC. !! This declaration is invalid if changes are made to the fire. Safety instructions •... -
Page 9: Electric Connection
M a n u a l e - M a t r i X 8 0 0 4.2 Placing the fire For a proper functioning of the fire, always ensure that the fire is levelled. Use the adjustable feet or the distance holder at the backside of the fire. See fig. 1.2a.. 4.2.1 Floor standing Place the fire at the right position and fix it on the wall see fig. 1.1. 4.2.2 Hanging on the wall The fire can be hanging on the wall with the optional wall bracket see fig. 1.2a, 1.2b and dimensional drawing in Chapter 13.6. 4.3 4.3 Installation and finishing (see fig. 1.0) 4.3.1 With cover strip “A” Build the false chimney breast or plateau against distance holder B. -
Page 10: Removing Glass
M a n u a l e - M a t r i X 8 0 0 Build-in structure • The e-MatriX needs a minimum ventilation of 50cm² above and 210cm² underneath the fire. • The construction may not rest on the fire. • The e-MatriX needs a minimum free space of 50mm above the fire. Removing glass 5.1 Front glass (e-MatriX front glass only) • Remove the cover strip see fig. 2.0a. • Rotate the glass clamp clockwise see fig. 2.0b. • Place suction cups and remove the front glass see fig. 2.0c. 5.2 Front glass (e-MatriX 2 or 3 sided glass) • Rotate the glass clamp clockwise see fig. 2.1a and 2.1b. • Place suction cups and remove the front glass see fig. 2.1c. - Page 11 M a n u a l e - M a t r i X 8 0 0 Using the fire 8.1 Manual control - behind access door (see fig. 4.1) A = main switch 1 = ON/OFF 2 = pairing 3 = only for maintenance (service engineer) 4 = reduce flame 5 = increase flame 6 = reduce fire crackling sound 7 = increase fire crackling sound 8.2 Remote control (see fig. 4.2) 1 = OFF 2 = press once for ON/press twice for glow effect only 3 = reduce flame 4 = increase flame 5 = reduce fire crackling sound 6 = increase fire crackling sound 8.2.1 Pairing the Bluetooth remote At the Control box see fig. 4.1: •...
-
Page 12: Performance Test
M a n u a l e - M a t r i X 8 0 0 Performance test • First time water fill, see Chapter 8.3. • Check all connections for water leakage. • Check if the fan, mounted at the top inside the fire, is running. • Check if the remote control is functioning at the desired distance (max. 8m) If needed, move the receiver to a different position in- or outside the construction (see fig. 4.3). The receiver is placed at the back inside the Engine and has a cable length of 1,4m. • Replace fuel bed see Chapter 6. • Replace front glass see Chapter 5.1 or 5.2. • Perform a final functional check. 10 Maintenance 10.1 Maintenance frequency • Cleaning water sump, air filter and replacing transducers. - Page 13 M a n u a l e - M a t r i X 8 0 0 10.1.2 Cleaning air filter • Gently slide the air filter upwards out of its plastic holder see fig. 8.0. • Gently rinse with water in the sink and dry with fabric towel before returning. • Replace the filter making sure that the coarse black filter is facing the back of the fire. • Place the fuel bed see Chapter 6. • Place the front glass see Chapter 5.1 or 5.2. 10.1.3 Replacing transducers !! Always press the mains switch of the Control box to the OFF position (see fig. 4.1) and disconnect the power supply. The transducers are fixed in the water sump with plastic clips. • Follow the first 5 steps in Chapter 10.1.1 to gain access to the transducers. • Press the clip back and lift the transducer upwards out of its holder. •...
-
Page 14: Technical Data
M a n u a l e - M a t r i X 8 0 0 Technical data Watts W Volts 230-240 Batteries remote (2x) 1,5 AA Water consumption l/h 0,15 Inlet water pressure Bar 0,5-8 Water connection Inch ½... - Page 15 M a n u a l e - M a t r i X 8 0 0 Dimensional Drawings 13.1 e-MatriX 800x500/650-I...
- Page 16 M a n u a l e - M a t r i X 8 0 0 13.2 e-MatriX 800x500/650-IIL...
- Page 17 M a n u a l e - M a t r i X 8 0 0 13.3 e-MatriX 800x500/650-IIR...
- Page 18 M a n u a l e - M a t r i X 8 0 0 13.4 e-MatriX 800x500/650-III...
-
Page 19: Control Box
M a n u a l e - M a t r i X 8 0 0 13.5 Control box... -
Page 20: Wall Bracket
M a n u a l e - M a t r i X 8 0 0 13.6 Wall bracket... -
Page 21: Service Door
M a n u a l e - M a t r i X 8 0 0 13.7 Service door... - Page 22 M a n u a l e - M a t r i X 8 0 0...
- Page 23 M a n u a l e - M a t r i X 8 0 0...
- Page 24 Saturnus 8 NL - 8448 CC Heerenveen Postbus 219 NL - 8440 AE Heerenveen T. +31(0)513 656500 F. +31(0)513 656501...
Need help?
Do you have a question about the e-MatriX 800-I and is the answer not in the manual?
Questions and answers