
Subscribe to Our Youtube Channel
Related Manuals for Kraus Urbix KPF-3125-FF-101BG


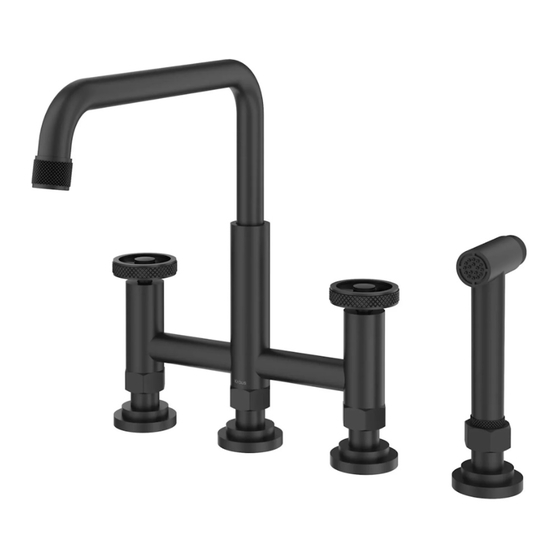
Summary of Contents for Kraus Urbix KPF-3125-FF-101BG
- Page 1 INSTALLATION MANUAL Urbix Industrial Bridge Kitchen Faucet KPF-3125 www.kraususa.com I Toll Free: 1.800.775.0703 I © 2023 Kraus USA Plumbing LLC I REV. April 3, 2023...
- Page 2 Congratulations on the purchase of your new Kraus plumbing fixture! Please keep the box and packaging materials until your product is completely installed. If you have any questions, require technical assistance or have any problems with your product: STOP DO NOT RETURN TO STORE Please contact our Customer Service Team 1-800-775-0703 / customerservice@kraususa.com...
-
Page 3: Prior To Installation
Prior to Installation: Make sure you have all necessary parts by checking the diagram and parts list. If any · part is missing or damaged, please contact Kraus Customer Service at 800-775-0703 for a replacement. · Read all instructions and safety warnings and ensure you have all tools, parts, and equipment necessary for a safe installation. - Page 4 Diagram and Parts List 1. Faucet Body 2. Side Sprayer 3. Sprayer Hose 4. Quick Connector 5. Plug (for NO side sprayer installation) 6. Rubber & Metal Washer 7. Mounting Nut & Screws...
- Page 5 Faucet Installation Procedure 9 3/4" (248.96mm) 2 1/8" (53mm) typ. 4" 4" 4" (102mm) (102mm) (102mm) 14 1/8" (359.98mm) 10 1/4" (258.92mm) * - Adjustable height range. Installer Tip: Shut off main water supply before installing new faucet.
- Page 6 NO Side Sprayer Option Step 1. Drill countertop Drill 3 holes into the countertop for the faucet body (1). Step 2. Install faucet assembly Install the faucet assembly through the holes in the countertop.
- Page 7 Step 3. Secure faucet assembly Secure the faucet body (1) with the rubber and metal washers (6) and the mounting nuts and screws (7). Do not overtighten. Make sure the plug (5) is installed tightly. Skip to Step 7. Side Sprayer Option Step 4.
- Page 8 Step 5. Install faucet assembly Install the faucet assembly through the holes in the countertop. Remove plug (5) and install quick connector (4). Connect the sprayer hose (3). Step 6. Secure faucet assembly Secure the faucet body (1) with the rubber and metal washers (6) and the mounting nuts and screws (7).
- Page 9 Step 7. Connect waterlines Connect waterlines to angle stops. Tighten with a wrench until snug. Turn on hot and cold angle stops and check for leaks. NOTE: Make sure filter washers are installed. Step 8. Flush waterway Remove the aerator from the spout.
- Page 10 Step 9. Adjusting spout height Unthread the holding nut (1) and pull the spout (2) up. Thread the holding nut (1). NOTE: The adjustment can be up to 1". Lock to the desired location. It is recommended to set and forget, so the grease does not get worn.
-
Page 11: Replacement Parts
Replacement Parts Part # Replacement Parts List Finish/Color 1. Aerator Housing SFS, MB, BG* KP44031 2. Aerator 1.8 GPM KP44029 3. Aerator Washer KP44028 4. Spout O-Ring KP44036 5. Spout Sleeve KP44037 6. Diverter Cap KP44038 KP44039 7. Diverter SFS,MB,BG,RD* 8. -
Page 12: Troubleshooting
Reassemble spout. For technical assistance or replacement parts, please contact Kraus Customer Service and one of our representatives will be happy to help: Toll-Free: 800-775-0703 or Customerservice@kraususa.com... - Page 13 Kraus warrants the structure and finish of the Faucet to be free from defects in material and workmanship under normal usage for as long as the original purchaser resides in the residence in which the Faucet was first installed.
- Page 14 12 Harbor Park Drive Port Washington, NY 11050 Toll-free 800-775-0703 Customerservice@kraususa.com If you are a plumbing contractor or trade professional, please contact a Kraus Pro Representative at: Kraus USA Plumbing, LLC 12 Harbor Park Drive Port Washington, NY 11050 516-801-8955 Proservice@kraususa.com...
- Page 15 IMPORTANT Register Your Kraus Product Activate Your Warranty Access Premium Customer Support Get Product Information REGISTER TODAY http://www.kraususa.com/registration www.kraususa.com...
Need help?
Do you have a question about the Urbix KPF-3125-FF-101BG and is the answer not in the manual?
Questions and answers