Table of Contents
Advertisement
Quick Links
Ambient Weather WS-1551-IP OBSERVER Solar Powered
Wireless IP Weather Station User Manual
Table of Contents
1.
Introduction ..................................................................................................................................... 2
2.
Warnings and Cautions ................................................................................................................... 2
3.
Quick Start Guide............................................................................................................................ 2
4.
Pre-Installation Checkout and Site Survey...................................................................................... 3
4.1
Pre-Installation Checkout ....................................................................................................... 3
4.2
Site Survey ............................................................................................................................. 3
5.
Getting Started ................................................................................................................................ 4
5.1
Parts List ................................................................................................................................. 4
5.2 Included tools ................................................................................................................................ 4
5.2
Recommend Tools .................................................................................................................. 4
5.3
Sensor Array Set Up ............................................................................................................... 6
5.3.1
Install Wind Vane ............................................................................................................... 6
5.3.2
Install Wind Cups ............................................................................................................... 7
5.3.3
Install the Rain Gauge Funnel ............................................................................................ 7
5.3.4
Install the Funnel Coil Filter .............................................................................................. 8
5.3.5
Install Batteries................................................................................................................... 8
5.3.6
Indoor Thermo-Hygrometer-Barometer Transmitter (Optional WH32B) .......................... 9
5.4
Accessories ........................................................................................................................... 11
5.4.1
5.4.2
PM2.5 Air Quality Sensor ................................................................................................ 15
5.4.3
Mounting the WH32B and WH31E Sensors ................................................................. 16
5.4.4 Best Practices for Wireless Communication ........................................................................ 17
5.4.5
Adding Additional Sensors............................................................................................... 18
6.
Programming the ObserverIP2.0 Receiver.................................................................................... 19
6.1
Hardware Requirements ....................................................................................................... 19
6.2
ObserverIP2.0 Physical Connections ................................................................................... 19
6.3
browser) when connected to your network via Wi-Fi Computer ...................................................... 20
6.3.1
PC Users ........................................................................................................................... 20
6.3.2
Mac Users ........................................................................................................................ 22
6.4.3 Linux Users .......................................................................................................................... 23
6.4
Local Network Settings ........................................................................................................ 23
6.4.1
Time Zone Setting ............................................................................................................ 24
6.4.2
Units of Measure .............................................................................................................. 25
6.5
Live Data .............................................................................................................................. 25
6.5.1
Reset and Change Rain Totals .......................................................................................... 26
6.6
Weather Services .................................................................................................................. 27
6.6.1
AmbientWeather.net ......................................................................................................... 27
6.7
Calibration ............................................................................................................................ 30
6.7.1
Relative Barometric Pressure Calibration Example ......................................................... 31
6.8
Sensor Array Mounting ........................................................................................................ 34
6.8.1
Aligning the Wind Direction ............................................................................................ 35
7.
Updating Firmware ....................................................................................................................... 35
7.1
PC Users ............................................................................................................................... 35
Version 1.0
©Copyright 2019, Ambient LLC. All Rights Reserved.
Page 1
Advertisement
Table of Contents

Related Manuals for Ambient Weather WS-1551-IP


Summary of Contents for Ambient Weather WS-1551-IP
-
Page 1: Table Of Contents
Ambient Weather WS-1551-IP OBSERVER Solar Powered Wireless IP Weather Station User Manual Table of Contents Introduction ............................. 2 Warnings and Cautions ........................2 Quick Start Guide..........................2 Pre-Installation Checkout and Site Survey..................3 Pre-Installation Checkout ....................... 3 Site Survey ..........................3 Getting Started .......................... -
Page 2: Introduction
California Prop 65 ........................45 1. Introduction Thank you for your purchase of the Ambient Weather WS-1551-IP Smart Wireless Weather Station with Remote Monitoring. The following user guide provides step by step instructions for installation, operation, and troubleshooting. To download the latest manual, firmware upgrades. -
Page 3: Pre-Installation Checkout And Site Survey
Required Step Description Section Assemble and power up the outdoor array 5.3-5.3.5 Power up the indoor thermometer-hygrometer-barometer 5.3.5 Power up the OBSERVERIP2.0 Calibrate the relative pressure to sea-level conditions (local airport) on the OBSERVERIP2.0 Register and upload to Weather Services 5.10 Mount the sensor array 5.11... -
Page 4: Getting Started
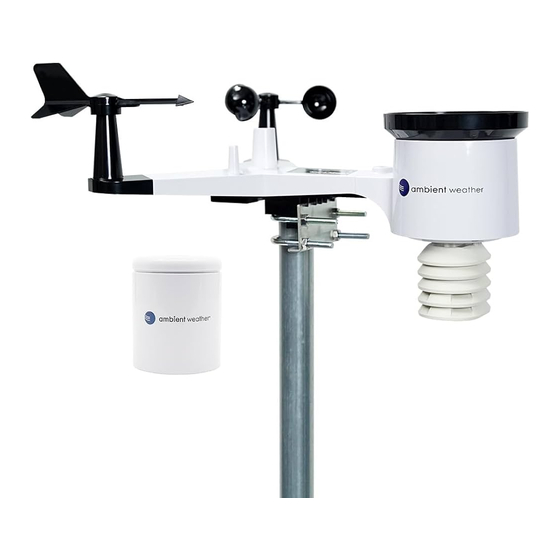
6. Visit Ambient Weather Mounting Solutions for assistance and ideas for mounting your weather station: http://www.ambientweather.com/amwemoso.html 5. Getting Started The WS-1551-IP weather station consists of a ObserverIP2.0 receiver, and an all-in-one sensor array. Parts List Item ObserverIP2.0 Module Sensor Array... - Page 5 • Compass or GPS (for wind direction calibration) Version 1.0 ©Copyright 2019, Ambient LLC. All Rights Reserved. Page 5...
-
Page 6: Sensor Array Set Up
Sensor Array Set Up Figure 1 Description Description Wind Vane (measures wind direction) Solar panel Wind Speed Sensor (measures wind speed) 8 U-Bolt UV sensor/ Light sensor Battery compartment Thermometer-hygrometer sensor Reset button (measures temperature and humidity) Rain collector LED transmitter Indicator Bubble level 5.3.1 Install Wind Vane Reference Figure 2. -
Page 7: Install Wind Cups
Figure 2 5.3.2 Install Wind Cups Reference Figure 3. (a) push the wind cups on to the shaft. (b) tighten the set screw with a precision screwdriver and make sure the wind cups spin freely. Note: You may need to back out the set screw first before sliding the cups onto the shaft. Figure 3 5.3.3 Install the Rain Gauge Funnel Reference Figure 4. -
Page 8: Install The Funnel Coil Filter
Figure 4 5.3.4 Install the Funnel Coil Filter To install the funnel coil filter, press the coil until the hook is inside the hole at the bottom of the funnel, and locked in place. The spring tension will keep the filter sit tight on the funnel. 5.3.5 Install Batteries Reference Figure 5. -
Page 9: Indoor Thermo-Hygrometer-Barometer Transmitter (Optional Wh32B)
Figure 5 Note: If the LED does not light up, or stays on permanently, make sure the battery polarity is correct, or the batteries are fresh. Do not install the batteries backwards. You can permanently damage the thermo-hygrometer. Note: We recommend lithium batteries for cold weather climates, but alkaline batteries are sufficient for most climates. - Page 10 Remove the battery door on the back of the sensor, as shown in Figure . Figure 7 1. Insert two AA batteries. 2. After inserting the batteries, the remote sensor will display temperature, humidity, and barometric pressure on the display, as shown in Figure . Figure 8 3.
-
Page 11: Accessories
Figure 8a Accessories Version 1.0 ©Copyright 2019, Ambient LLC. All Rights Reserved. Page 11... - Page 12 Description Part Image Number Ultrasonic Anemometer, Outdoor WS-5000- Thermometer / Hygrometer, Solar ARRAY Radiation and UV Rain Collector WS-5000- RAIN Indoor Air Quality Monitor AQIN Outdoor PM25 Particulate Monitor PM25 Indoor PM25 Particulate Monitor PM25IN Wireless Temperature and Humidity Sensor WH31E Leak Detector WH31LA...
-
Page 13: Indoor / Outdoor 8-Channel Thermo-Hygrometer Transmitter (Optional Wh31E)
Description Part Image Number Soil moisture sensor WH31SM Floating Pool Thermometer WH31PF* (*) The WH31E, WH31P and WH31PF share the same 8-channels. (*) The PM25IN and AQIN share the same channel. 5.4.1 Indoor / Outdoor 8-Channel Thermo-Hygrometer Transmitter (Optional WH31E) Note: Thee 8-channel sensors only appear on AmbientWeather.net. - Page 14 1. Remove the battery door on the back of the transmitter(s) by sliding down the battery door, as shown in Figure . Figure 10 2. BEFORE inserting the batteries, locate the dip switches on the inside cover of the lid of the transmitter.
-
Page 15: Pm2.5 Air Quality Sensor
Figure 11 5. Insert two AA batteries. 6. Verify the correct channel number (CH) and temperature units of measure (°F vs. °C) are on the display, as shown in Figure . Figure 12 (1) temperature (2) temperature units (°F vs. °C) (3) channel number (4) relative humidity 7. -
Page 16: Mounting The Wh32B And Wh31E Sensors
5.4.3 Mounting the WH32B and WH31E Sensors Note: If you mount the sensor outside, it is recommended you mount the remote sensor on an outside north facing wall, in a shaded area, at a height at or above the receiver. Direct sunlight and radiant heat sources will result in inaccurate temperature readings. -
Page 17: Best Practices For Wireless Communication
Figure 7 5.4.4 Best Practices for Wireless Communication Wireless communication is susceptible to interference, distance, walls, and metal barriers. We recommend the following best practices for trouble free wireless communication. 1. Electro-Magnetic Interference (EMI). Keep the console several feet away from computer monitors and TVs. -
Page 18: Adding Additional Sensors
The following is a table of reception loss vs. the transmission medium. Each “wall” or obstruction decreases the transmission range by the factor shown below. Medium RF Signal Strength Reduction Glass (untreated) 5-15% Plastics 10-15% Wood 10-40% Brick 10-40% Concrete 40-80% Metal 90-100%... -
Page 19: Programming The Observerip2.0 Receiver
On the Sensors ID screen, you can register or re-register an additional sensor by clicking the Re- register button. 6. Programming the ObserverIP2.0 Receiver Hardware Requirements 1. Broadband router 2. An “always-on” connection to the Internet. A high-speed DSL or cable internet connection that maintains constant connection to the internet. -
Page 20: Finding The Observerip2.0 From Your Device (Computer, Smart Phone, Or Tablet With A Browser) When Connected To Your Network Via Wi-Fi Computer
Ref. Description Server On when connected to AmbientWeather.net internet hosting service Link Connect to the internet (or router) Flashes when there is internet activity Power AC Power connected Figure 8 Ref. Description LAN connection (connect to router) Reset button (use IP Module reset tool or open-ended paper clip) AC Power connection Figure 9 Finding the OBSERVERIP2.0 from your device (computer,... - Page 21 Connect to the network and then open a browser Note: you may be told network has no internet. Navigate to the following IP address 192.168.4.1 you will be presented with the following screen. (Note: default password is blank) Once logged in you will want to navigate to the local network screen to connect to WIFI. Version 1.0 ©Copyright 2019, Ambient LLC.
-
Page 22: Mac Users
6.3.2 Mac Users To find the OBSERVERIP2.0 receiver, connect to power and look for the following WIFI network. Connect to the network and then open a browser Note: you may be told network has no internet. Navigate to the following IP address 192.168.4.1 you will be presented with the following screen. (Note: default password is blank) Version 1.0 ©Copyright 2019, Ambient LLC. -
Page 23: Linux Users
6.4.3 Linux Users Connect to the network and then open a browser Note: you may be told network has no internet. Navigate to the following IP address 192.168.4.1 you will be presented with the following screen. (Note: default password is blank) Local Network Settings From your web browser, access the OBSERVERIP2.0 from the IP address in the previous section. -
Page 24: Time Zone Setting
1. IP Address. The default setting is receiving automatically (DCHP), which is recommended. The network will assign an IP address. To statically assign an IP address, select Static from the pull-down menu. This will prevent the IP address from changing each time you power up the OBSERVERIP2.0 receiver. -
Page 25: Units Of Measure
Figure 19 6.4.2 Units of Measure Under unit settings you may choose which unit of measure you would like to utilize Figure 10 Live Data Select the Live Data tab to view your live data from the weather station. Version 1.0 ©Copyright 2019, Ambient LLC. -
Page 26: Reset And Change Rain Totals
6.5.1 Reset and Change Rain Totals During the installation of your weather station, you may report false rain due to vibration of the tipping mechanism. To reset the rain to 0.00, select the Reset button as shown in Error! Reference source not found., or enter the Daily, Weekly, Yearly, Monthly and Yearly rain totals in the appropriate fields, and select Save. -
Page 27: Weather Services
Figure 11 Weather Services Select the Weather Services tab to program the Ambient Weather Network settings Reference Figure Figure 12 6.6.1 AmbientWeather.net Reference Figure 12. Enter and update schedule and select Apply. Make a note of the MAC address. It will be required when you sign up at AmbientWeather.net. - Page 28 Figure 23 Next, enter the MAC address found on your IP Module Weather Network Panel (Figure 12), as shown in Figure . Note that this is an example only and your MAC address will be different. Figure 24 Register an account on AmbientWeather.net (email address and password). Once registered, select the dashboard to view your data, as shown in Figure .
- Page 29 AmbientWeather.net is a responsive design and mobile friendly, so there is no need for a mobile app. Simply open your mobile devices web browser, browse to AmbientWeather.net, and bookmark your dashboard. If you save the bookmark to your desktop, it will automatically save the Ambient Weather icon, as shown in Figure .
-
Page 30: Calibration
AmbientWeather.net. Enable the skill and get started: say "Alexa, ask Ambient Weather for a weather report.". This will provide you with your outdoor weather report, but you can ask for your indoor weather report as well by saying, "Alexa, ask Ambient Weather about the indoor conditions."... -
Page 31: Relative Barometric Pressure Calibration Example
OBSERVERIP2.0 web GUI Calibration Screen. Your results will vary. Steps: 1. The local “official” relative pressure found on the Ambient Weather Network (QR code two pages below) in your area is 30.12 inHg. 2. From the Live Data panel, your absolute pressure (measured, and not corrected to sea-level) reads 28.90 inHg. - Page 32 Parameter Type of Default Typical Calibration Source Calibration Temperature Offset Current Value Red Spirit or Mercury Thermometer (1) Humidity Offset Current Value Sling Psychrometer (2) Offset Current Value Calibrated laboratory grade Barometer barometer REL Barometer Offset Current Value Local airport / AWN (3) Wind Direction Offset Current Value GPS, Compass (4)
- Page 33 (3) The ObserverIP2.0 receiver displays two different pressures: absolute (measured) and relative (corrected to sea-level). To compare pressure conditions from one location to another, meteorologists correct pressure to sea-level conditions. Because the air pressure decreases as you rise in altitude, the sea-level corrected pressure (the pressure your location would be at if located at sea-level) is generally higher than your measured pressure.
-
Page 34: Sensor Array Mounting
Without a calibrated source, wind speed can be difficult to measure. We recommend using a calibrated wind meter (available from Ambient Weather) and a constant speed, high speed fan. (8) The rain collector is calibrated at the factory based on the funnel diameter. The bucket tips every 0.01”... -
Page 35: Aligning The Wind Direction
Figure 29 Use the bubble level next to the rain sensor to make sure the sensor array is completely level. If the sensor array is not level, the rain gauge, UV, and solar radiation sensors will not measure properly. Note: If you cannot read the bubble level due to mounting constraints, place straddle a line or ruler level across the top of the rain gauge for easier viewing. - Page 36 Open internet connections on your PC and look for the following WIFI network. Connect to the network and then open a browser Note: you may be told network has no internet. Navigate to the following IP address 192.168.4.1 you will be presented with the following screen. (Note: default password is blank) Once logged in you will want to navigate to Device Setting page Version 1.0...
-
Page 37: Mac Users
You may choose to automatically upgrade firmware by clicking the checkbox and click save. You may also check for a new version manually. Mac Users To find the OBSERVERIP2.0 receiver, Open internet connections on your Mac and look for the following WIFI network. -
Page 38: Linux Users
Once logged in you will want to navigate to Device Setting page You may choose to automatically upgrade firmware by clicking the checkbox and click save. You may also check for a new version manually. Linux Users Open internet connections on your PC and look for the above WIFI network. Connect to the network and then open a browser Note: you may be told network has no internet. -
Page 39: Access Point Deactivation
Navigate to the following IP address 192.168.4.1 you will be presented with the following screen. (Note: default password is blank) Once logged in you will want to navigate to Device Setting page You may choose to automatically upgrade firmware by clicking the checkbox and click save. You may also check for a new version manually. -
Page 40: Glossary Of Terms
9. Glossary of Terms Term Definition Absolute Barometric Absolute pressure is the measured atmospheric pressure and is a Pressure function of altitude, and to a lesser extent, changes in weather conditions. Absolute pressure is not corrected to sea-level conditions. Refer to Relative Barometric Pressure. -
Page 41: Specifications
Term Definition places) to which a value is being reliably measured. Solar Radiation A solar radiation sensor measures solar energy from the sun. Solar radiation is radiant energy emitted by the sun from a nuclear fusion reaction that creates electromagnetic energy. The spectrum of solar radiation is close to that of a black body with a temperature of about 5800 K. -
Page 42: Maintenance
11. Maintenance 1. Clean the rain gauge once every 3 months. Rotate the funnel counter-clockwise and lift to expose the rain gauge mechanism, and clean with a damp cloth. Remove any dirt, debris and insects. If bug infestation is an issue, spray the array lightly with insecticide. Figure 13 2. -
Page 43: Accessories
The following software and hardware accessories are available for this weather station at www.AmbientWeather.com Accessory Description Ambient Weather Mounting Ambient Weather provides the most comprehensive mounting solutions Solutions for weather stations, including tripods, pole extensions, pole mounting kits, guy wires, ground stakes and more. Version 1.0 ©Copyright 2019, Ambient LLC. -
Page 44: Liability Disclaimer
14. Liability Disclaimer Please help in the preservation of the environment and return used batteries to an authorized depot. The electrical and electronic wastes contain hazardous substances. Disposal of electronic waste in wild country and/or in unauthorized grounds strongly damages the environment. Reading the “User manual”... -
Page 45: Warranty Information
17 California Prop 65 WARNING: Use of the Ambient Weather Products can expose you to chemicals, including lead and lead compounds, which are known to the State of California to cause cancer and bisphenol A (BPA), and phthalates DINP and/or DEHP, which are known to the State of California to cause birth defects or other reproductive harm. - Page 46 "You could think of Proposition 65 more as a 'right to know' law than a pure product safety law." While using Ambient Weather Products as intended, we believe any potential exposure would be negligible or well within the "no significant risk" range. However, to ensure compliance with California law and our customers' right to know, we have elected to place the Proposition 65 warning signs on Ambient Weather Products.
Need help?
Do you have a question about the WS-1551-IP and is the answer not in the manual?
Questions and answers