Table of Contents
Advertisement
Quick Links
Installation and Operation Manual
This manual is available for free download on the distributor's web site. It is a copyrighted document. Re-sale is strictly
prohibited. The distributor may update this manual from time to time and cannot be responsible for problems, injuries,
or damages arising out of the use of information contained in any manual obtained from unauthorized sources.
CONTACT LOCAL BUILDING OR FIRE OFFICIALS ABOUT RESTRICTIONS AND INSTALLATION INSPECTION REQUIREMENTS IN LOCAL AREA.
READ THIS ENTIRE MANUAL BEFORE INSTALLATION AND USE OF THIS WOOD STOVE. FAILURE TO FOLLOW THESE
INSTRUCTIONS COULD RESULT IN PROPERTY DAMAGE, BODILY INJURY OR EVEN DEATH.
READ AND KEEP THIS MANUAL FOR REFERENCE
Printed in Canada
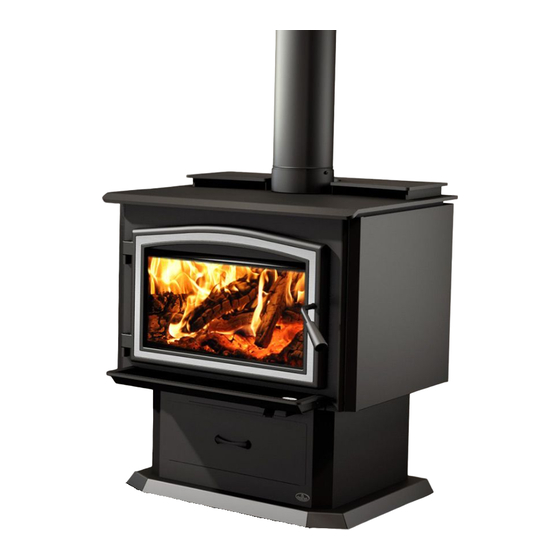
OSBURN 3500
(OB03505 model)
Distributed by
My Fireplace Australia PTY Ltd
www.myfireplaceaustralia.com.au
20 Auto Way
Pakenham, Victoria 3810 AUSTRALIA
Phone: 03 59 415 008
Fax: 03 59 415 975
Email: info@myfireplaceaustralia.com.au
46295A
2021-12-03
Advertisement
Table of Contents

Related Manuals for Osburn 3500


Summary of Contents for Osburn 3500
- Page 1 Installation and Operation Manual OSBURN 3500 (OB03505 model) Distributed by My Fireplace Australia PTY Ltd www.myfireplaceaustralia.com.au 20 Auto Way Pakenham, Victoria 3810 AUSTRALIA Phone: 03 59 415 008 Fax: 03 59 415 975 Email: info@myfireplaceaustralia.com.au This manual is available for free download on the distributor’s web site. It is a copyrighted document. Re-sale is strictly prohibited.
- Page 3 It is also highly recommended to register the warranty online at http://osburn-australia.com/warranty-registration.aspx Registering the warranty will help to quickly find the information needed on the unit. Installation and Operation Manual - Osburn 3500 Page 3...
-
Page 4: Table Of Contents
2.2.1 Combustion Chamber Dimensions ................10 2.3 Zone Heating and How to Make it Work for You ..............11 2.4 Osburn’s Commitment to You and the Environment .............11 2.4.1 What is This Wood fire Made Of? ................11 3. Fuel ............................12 3.1 MATERIALS THAT SHOULD NOT BE BURNED ..............12... - Page 5 7.4 Reducing Wall and Ceiling Clearances Safely...............32 8. The Venting System ......................34 8.1 General ..........................34 8.2 Suitable Chimneys ......................34 8.2.1 Factory built insulated flue kits .................. 34 8.2.2 Masonry Flue System ....................35 Installation and Operation Manual - Osburn 3500 Page 5...
- Page 6 Appendix 4: Optional Fire Screen Installation ................42 Appendix 5: Air Tubes and Baffle Installation ................43 Appendix 6: Decorative Panels Removal ................. 45 Appendix 7: Exploded Diagram and Parts List ................ 46 Page 6 Installation and Operation Manual - Osburn 3500...
-
Page 7: Part A - Operation And Maintenance
- railroad ties. • Do not elevate the fire by using a grate in this wood fire. • This appliance should be maintained and operated at all times in accordance with these instructions. Installation and Operation Manual - Osburn 3500 Page 7... -
Page 8: General Information
* Burn time and heating capacity may vary subject to location in home, flue system draft, flue system diameter, locality, heat loss factors, climate, fuels and other variables. ** Sideways: through the door you see the sides of the logs. Page 8 Installation and Operation Manual - Osburn 3500... -
Page 9: Dimensions
297mm 473mm 18 5/8" 473mm 26 1/2" 22 1/2" 674mm 573mm 26 1/2" 22 1/2" 674mm 573mm 26 1/2" 22 1/2" 674mm 573mm Figure 2: Front view Figure 3: Side view Installation and Operation Manual - Osburn 3500 Page 9... -
Page 10: Combustion Chamber Dimensions
9 7/8" 249mm 19" 483mm Figure 4: Door opening 5/16" 3/16" 22 7/8" 12 7/8" 581mm 327mm 20 1/8" 510mm Figure 5: Front view - Combustion chamber Figure 6: Side view Page 10 Installation and Operation Manual - Osburn 3500... -
Page 11: Zone Heating And How To Make It Work For You
The Benefits of Low Emissions and High Efficiency The low smoke emissions produced by the special features inside the Osburn 3500 firebox mean that your household will release up to 90 percent less smoke into the outside environment than if you used an older conventional wood fire. -
Page 12: Fuel
Old, leaky cast iron wood fires wouldn’t hold a fire overnight unless they were fed large pieces of hardwood. That is no longer true. You can successfully heat your home by using less wood and give the forest a break at the same time. Page 12 Installation and Operation Manual - Osburn 3500... -
Page 13: Log Length
. I t i s s o m e t i m e s a d v i s a b l e t o r e s p l i t t h e w o o d b e f o r e s t a c k i n g t o d r y. Installation and Operation Manual - Osburn 3500 Page 13... -
Page 14: How To Dry Firewood
Yo u c o u l d b u y a w o o d m o i s t u r e m e t e r t o t e s t y o u r f i r e w o o d . Page 14 Installation and Operation Manual - Osburn 3500... -
Page 15: Compressed Wood Logs
WOOD ABOVE THE FIREBRICK LINING ON THE FIREBOX). THIS WILL ALSO PREVENT OVERFIRING OF YOUR WOOD FIRE. • SHOULD THERE BE A SOOT OR CREOSOTE FIRE IN YOUR FLUE SYSTEM, CLOSE THE AIR CONTROL COMPLETELY. IMMEDIATELY CALL THE FIRE DEPARTMENT. Installation and Operation Manual - Osburn 3500 Page 15... -
Page 16: The Use Of A Fire Screen
Therefore, the blower speed control can be left at the desired setting. The thermodisc part number is AC02056 for a quick connect model. See «Appendix 2: Blower Figure 9: Blower rheostat and Optional Thermodisc Installation». Page 16 Installation and Operation Manual - Osburn 3500... -
Page 17: Your First Fires
AND LATCH THE DOOR AFTER THE FIRE IGNITES. After the kindling fire has mostly burned, you can add standard firewood pieces until you have a fire of the right size for the conditions. Installation and Operation Manual - Osburn 3500 Page 17... -
Page 18: The Top Down Fire
For example, the area temperature can be cooler when you are active, such as when doing housework or cooking, and it can be warmer when you are inactive, such as when reading or watching television. Page 18 Installation and Operation Manual - Osburn 3500... -
Page 19: Ash Removal
Remove ash first, and then rake charcoal towards the front of the firebox before loading so that it will ignite the new load. Installation and Operation Manual - Osburn 3500 Page 19... -
Page 20: Firing Each New Load Hot
If you fill the firebox full in fall weather, you will either overheat the space or turn the wood fire down so much that the fire will be smoky and inefficient. Here are some suggestions for building fires to match different heat demand. Page 20 Installation and Operation Manual - Osburn 3500... -
Page 21: Small Fires To Take The Chill Off The House
0.056 m 5 to 6 hours 0.056 m to 0.071 m 6 to 8 hours 0.071 m to 0.085 m 8 to 9 hours > 0.085 m 9 to 10 hours Installation and Operation Manual - Osburn 3500 Page 21... -
Page 22: North-South Fires Versus East-West Fires
If you do get brown stains on the glass you can remove them with special cleaners for wood fire glass doors. Do not use abrasives to clean your wood fire’s door glass. Page 22 Installation and Operation Manual - Osburn 3500... -
Page 23: Glass Door
1400º F. If the glass breaks, it must be replaced with one having the same specification. Tempered glass or ordinary glass will not withstand the high temperatures of this unit. Installation and Operation Manual - Osburn 3500 Page 23... -
Page 24: Replacing The Glass Gasket And/Or The Glass
Do not abuse the glass door by striking or slamming shut. DO NOT USE THE WOOD FIRE IF THE GLASS IS BROKEN. To change glass, perform same operation described above. Page 24 Installation and Operation Manual - Osburn 3500... -
Page 25: Door
Turn the handle counter clock wise one turn to increase pressure. Re-install the lock pin (spring pin) with a small hammer. Figure 11: Removing the split pin Figure 12: Installing the split pin Installation and Operation Manual - Osburn 3500 Page 25... -
Page 26: Door Alignment
Using a flat screwdriver, turn the adjustable hinge rods in the direction shown to adjust the doors. Tighten all door hinge pressure screws when they are at the desired positions. Configurations 1-2-3-4-5-6, show in which direction these act on the adjustment of the door. Page 26 Installation and Operation Manual - Osburn 3500... -
Page 27: Replacing The Door Gasket
Contact your local municipal or provincial fire authority for information on how to handle a flue system fire. Have a clearly understood plan to handle a flue system fire. Installation and Operation Manual - Osburn 3500 Page 27... -
Page 28: Cleaning The Flue System
If so, have the damaged ones replaced. Check the firebrick for damage at least annually and replace any broken or damaged ones with new ones. Inspection and cleaning of the flue system is facilitated by the removable baffle. Page 28 Installation and Operation Manual - Osburn 3500... -
Page 29: Part B - Installation
• DO NOT CONNECT TO OR USE IN CONJUNCTION WITH ANY AIR DISTRIBUTION DUCTWORK UNLESS SPECIFICALLY APPROVED FOR SUCH INSTALLATION. • DO NOT CONNECT THIS UNIT TO A FLUE OR FLUE SYSTEM SERVING ANOTHER APPLIANCE. Installation and Operation Manual - Osburn 3500 Page 29... -
Page 30: Regulations Covering Wood Fire Installation
Regulations Covering Wood fire Installation • IT IS RECOMMENDED THAT THE INSTALLATION OF YOUR OSBURN WOOD FIRE BE CARRIED OUT BY A QUALIFIED SPECIALIST INSTALLER. IF ANY ELECTRICAL WORK IS REQUIRED, IT MUST BE CARRIED OUT BY A LICENSED ELECTRICIAN. -
Page 31: Clearances To Heat-Sensitive Materials
• Bottom of appliance to ceiling height must be at least 2,400 mm in all cases. • The clearance between the flue and a wall are valid only for vertical walls and for vertical flue. Installation and Operation Manual - Osburn 3500 Page 31... -
Page 32: Floor Protector
2 The floor protector shall extend not less than 200 mm from each side of any ash removal or fuel loading openings unless the floor protector forms an abutment with a wall or heat shield at a lesser distance. Page 32 Installation and Operation Manual - Osburn 3500... - Page 33 1. Masonry may be used as a heat shield material. 2. Where heat shields are used to reduce appliance clearance dimensions, additional flue shielding may also be required. Refer to AS/NZS 2918:2001. Installation and Operation Manual - Osburn 3500 Page 33...
-
Page 34: The Venting System
AS/ NZS 2918, as stainless steel can be damaged by excessive stress in the lock forming process or by faulty machinery. Page 34 Installation and Operation Manual - Osburn 3500... -
Page 35: Masonry Flue System
8 m (25 feet) in height. When passing through a combustible wall, the use of an insulated listed thimble is required. Minimum Flue Height Flue heights and lengths from AS/NZS 2918:2001 Installation and Operation Manual - Osburn 3500 Page 35... -
Page 36: The Relationship Between The Chimney And The House
Inside flue systems are preferred because even when no fire burns they will go into cold downdraught if the wood fire is is burning, there is normally upward flow in the system. installed low in the house. Page 36 Installation and Operation Manual - Osburn 3500... -
Page 37: Why The Chimney Should Penetrate The Highest Heated Space
They are also more stable and easier to maintain than assemblies with elbows. Horizontal runs of flue should be avoided where possible because they reduce flue system draft. Figure 17: Best Figure 18: Acceptable Figure 19: Avoid Installation and Operation Manual - Osburn 3500 Page 37... - Page 38 A straight flue offers the least restriction to gas flow and results in a stronger draft. Straight assemblies also need less maintenance because there are no corners to collect creosote. The flue must be in good condition. Page 38 Installation and Operation Manual - Osburn 3500...
-
Page 39: Appendix 1: Door Overlay Installation
Position the overlay (A) on the door frame and secure it in place from behind using the nuts (B). To ease the installation, do not tighten the nuts until they are all installed. Note: It is not necessary to remove the glass to install the overlay. Installation and Operation Manual - Osburn 3500 Page 39... -
Page 40: Appendix 2: Blower And Optional Thermodisc Installation
Ensure that the blower’s power cord is not in contact with any surface of the stove to prevent electrical shock or fire damage. Do not run the power cord beneath the stove. Page 40 Installation and Operation Manual - Osburn 3500... -
Page 41: Appendix 3: Optional Fresh Air Intake Kit Installation
(HVAC type, must meet ULC S110 or UL 181 class 0 or class 1) (B), sold separately. Refer to air intake kit installation instructions for more details. Installation and Operation Manual - Osburn 3500 Page 41... -
Page 42: Appendix 4: Optional Fire Screen Installation
Lift the fire screen upwards and push the bottom part towards the stove then let the fire screen rest on the bottom of the door opening. Warning: Never leave the stove unattended while in use with the fire screen. Page 42 Installation and Operation Manual - Osburn 3500... -
Page 43: Appendix 5: Air Tubes And Baffle Installation
Repeat steps 1 and 2 for the second tube in the back then install the baffle before installing the two front tubes. To remove the tubes use the above steps in reverse order. Installation and Operation Manual - Osburn 3500 Page 43... - Page 44 Note that secondary air tubes (B), (C) and (D) can be replaced without removing the baffle board (A). Page 44 Installation and Operation Manual - Osburn 3500...
-
Page 45: Appendix 6: Decorative Panels Removal
APPENDIx 6: DECORATIVE PANELS REMOVAL To remove the decorative panel (A), remove the screws (B) and push forward on the panel to unhook it from the bracket (C). Exploded Diagram and Parts List Installation and Operation Manual - Osburn 3500 Page 45... -
Page 46: Appendix 7: Exploded Diagram And Parts List
APPENDIx 7: ExPLODED DIAGRAM AND PARTS LIST... - Page 47 STAINLESS WASHER ID 17/64" X OD 1/2" 30025 1/4-20 X 1/2" PAN-HEAD QUADREX BLACK SCREW SE70902 OSBURN DOOR GLASS 19 5/8''W X 11 5/8''H X 12 11/16''H AC06400 3/4" X 6' FLAT BLACK SELF-ADHESIVE GLASS GASKET PL70814 RIGHT GLASS FRAME...
- Page 48 Item Description PL36758 REFRACTORY BRICK 3 1/4" X 4 1/2" X 1 1/4" 29011 4'' X 9" X 1 1/4" REFRACTORY BRICK HD PL70864 SECONDARY AIR TUBE PL70991 SECONDARY AIR TUBE 21565 C-CAST 3.5 SERIE BAFFLE 22" X 14" X 1 1/4" 21564 C-CAST 3.5 SERIE INSULATION TOP AC02056...
- Page 50 Manufactured by This document is available for free download on the Stove Builder International inc. manufacturer’s website. It is a copyrighted document. 250, rue de Copenhague, Resale is strictly prohibited. The manufacturer may update St-Augustin-de-Desmaures (Québec) this document from time to time and cannot be responsible Canada for problems, injuries, or damages arising out of the use G3A 2H3...
Need help?
Do you have a question about the 3500 and is the answer not in the manual?
Questions and answers