
Related Manuals for weBoost Home Room U530001


Summary of Contents for weBoost Home Room U530001
- Page 1 A WILSON ELECTRONICS BRAND Home Room Cell Signal Booster Installation Guide support.weboost.com 866.294.1660 NEED HELP?
- Page 2 ______ Index Package Contents Preparation STEP 1: Find The dBm Reading On Your Phone STEP 2: Measure Signal Strength For Inside Antenna STEP 3: Measure Signal Strength For Outside Antenna STEP 4: Temporarily Mount The Outside Antenna STEP 5: Connect The System STEP 6: Compare Results STEP 7:...
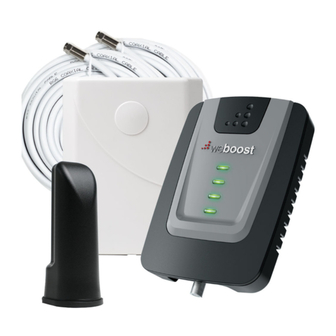
- Page 3 ______ Package Contents Inside Outside Window Home 30' Cables Antenna Antenna Entry Cable Room Qty. 2 Roof/Pole Wall Mount Cable Mount Bracket Connector Bracket HOME ROOM CELL PHONE SIGNAL BOOSTER...
- Page 4 ______ Step 1: Preparation You Will Need (tools not included) Make sure the following materials are prepared and ready for your installation. 1 to 2 hours 2 people (a person to help with antenna calibration) Ladder Phillips-head screwdriver 10mm open-end wrench or adjustable wrench Drill (if routing cable through wall) Mounting Option : 1-2”...
-
Page 5: Step 2: Find The Dbm Reading On Your Phone
Apple Inc. Android is a trademark of Google Inc. All Other Phones & Alternate Methods • https://www.weboost.com/test-mode-instructions/ All Phones: • Keep track of the network (3G or 4G) phone is connected to. - Page 6 ______ Step 3: Measure Signal Strength For Inside Antenna Placement Turn off your cell phone’s WiFi to ensure you are checking the cellular connection. The dBm reading will be refreshed every 30-60 seconds. Want faster results? Once you have a reading, turn on airplane mode.
- Page 7 ______ Step 4: Measure Signal Strength For Outside Antenna Placement This is the most critical step of the installation process because it will determine the overall performance of the booster system. Using the same method as Step 3, find the place with the strongest signal (number closest to zero) on the outside of your home.
-
Page 8: Step 5: Temporarily Mount The Outside Antenna
______ Step 5: Temporarily Mount The Outside Antenna Use one of the two options to mount the outside antenna on the side of the house with the strongest signal. Note: Using an app like 'Open Signal' will help you point the outside antenna in the direction of the nearest cell phone tower. - Page 9 ______ Step 6: Placing Inside Antenna And Connect The System Place inside antenna in weak signal area at least 18 inches away from booster. Connect the supplied Coax Cable to end of booster labeled Outside. If you choose to bring the cable in Outside through a window, you can use the flat Antenna...
-
Page 10: Step 7: Compare Results
______ Step 7: Compare Results Using the field test mode described in step 3, measure the new signal strength and write it down here ___________. Compare this number with the original reading you took in the same part of the house. If the number is higher (closer to zero) than the original reading without booster, your booster is working. -
Page 11: Step 8: Permanently Mount The Outside Antenna
______ Step 8: Permanently Mount The Outside Antenna Option : Outside Roof/Pole Mount (Best Option) Mount, or use an existing pipe in an optimal signal location. Watch out for power lines. Outside Antenna (pole mount) A flat Window Entry Inside Antenna Cable is provided that allows you to run Home Room... - Page 12 ______ (STEP 8 cont.) Option : Outside Wall Mount (Better Option) Outside Antenna (wall mount) Inside Antenna Home Room Power Supply Note: A flat Window Entry Cable is provided that allows you to run the cable through a window. Tap anchors in Drill holes using Fasten bracket to back 3/16 inch bit...
-
Page 13: Step 9: Route & Secure The Cable
To protect your system , you will want to purchase/install a lightening surge protector (#859992). To purchase, call 866-294-1660 or visit weboost.com After installing your system, check the lights after 24 hours to ensure no changes. -
Page 14: Troubleshooting
______ Troubleshooting Band 4 Band 2 Band 5 Power Indicator Light Each light corresponds to a frequency band. IMPORTANT: To get an accurate reading of the lights, unplug and re-plug the power supply from the Booster. No Lights Booster does not have power. Un-plug and securely re-plug in power supply. Note: Lights may be dim. - Page 15 • Move the Outside Antenna to a different location. Un-plug and re-plug power supply. • Change the method of mounting the Outside Antenna. Un-plug and re-plug power supply. support.weboost.com 866.294.1660 NEED HELP? HOME ROOM CELL PHONE SIGNAL BOOSTER...
-
Page 16: Antenna Kit Options
______ Antenna Kit Options BAND 5 BAND 25/2 BAND 4 Outside antenna maximum permissible 4.90 3.71 4.92 antenna gain (dBi) 50Ω Inside antenna maximum permissible 3.73 6.60 3.49 antenna gain (dBi) 50Ω FIXED INSIDE ANTENNA KIT OPTIONS Kit # Coax Type Ln(ft) Antenna Type Ω... - Page 17 ______ (ANTENNA KIT OPTIONS cont.) FIXED OUTSIDE ANTENNA KIT OPTIONS Kit # Coax Type Ln(ft) Antenna Type Ω 301111-0675 RG-6 Yagi Directional 301111-5850 RG-58 Yagi Directional 301111-11140 RG-11 Yagi Directional 301111-400170 Wilson-400 Yagi Directional 304421-1120 RG-11 4G Omni 304421-0610 RG-6 4G Omni 304422-40020 Wilson-400...
-
Page 18: Specifications
______ Specifications Home Room ™ Product Number U530001 Connectors SMA-Female on the Inside Antenna / F-Female on the Outside Antenna Antenna Impedance 75 Ohms / 50 Ohms Frequency 824-894 MHz, 1850-1995 MHz, 1710-1755/2110-2155 MHz 800 MHz 1900 MHz 1700/2100 MHz Band 4 Passband Gain (nominal) Band 5 Band 2... - Page 19 2 YEAR WARRANTY weBoost Signal Boosters are warranted for two (2) years against defects in workmanship and/or materials. Warranty cases may be resolved by returning the product directly to the reseller with a dated proof of purchase. Signal Boosters may also be returned directly to the manufacturer at the consumer’s expense, with a dated proof of purchase and a Returned Material...
- Page 20 3301 East Deseret Drive, St. George, UT T. 866.294.1660 www.weboost.com | support.weboost.com Copyright © 2017 weBoost. All rights reserved. weBoost products covered by U.S. patent(s) and pending application(s) For patents go to: weboost.com/us/patents NOT AFFILIATED WITH WILSON ANTENNA...
- Page 21 UNA MARCA DE WILSON ELECTRONICS Home Room Amplificador de señal celular Manual de usuario ¿NECESITA support.weboost.com 866.294.1660 AYUDA?
- Page 22 ______ Índice Contenido del paquete Preparación PASO 1: Lectura de dBm en el teléfono PASO 2: Medición de la intensidad de la señal de la antena interior PASO 3: Medición de la intensidad de la señal de la antena interior PASO 4: Instalación temporal de la antena exterior PASO 5: Conexión del sistema PASO 6:...
-
Page 23: Contenido Del Paquete
______ Contenido del paquete Antena Antena Cable para Home Cables de interior exterior instalación Room 9,1 m (30 ft) en ventana (cant.: 2) Soporte para Soporte para Conector del instalación en instalación cable techo o poste en pared HOME ROOM AMPLIFICADOR DE SEÑAL CELULAR... - Page 24 ______ Paso 1: Preparación Elementos necesarios (herramientas no incluidas). Asegúrese de contar con los siguientes elementos durante la instalación. Entre una y dos horas. Dos personas (una persona que ayude a calibrar la antena) Escalera Destornillador Phillips Llave de boca de 10 mm o llave inglesa Taladro (si pasará...
- Page 25 Apple Inc. Android es una marca comercial de Google Inc. Otros teléfonos y métodos alternativos • https://www.weboost.com/test-mode-instructions/ Todos los teléfonos: • Siempre esté atento a la conexión de red del teléfono (3G o 4G).
- Page 26 ______ Paso 3: Medición de la intensidad de la señal para la instalación de la antena interior Desactive la conexión wifi del teléfono para asegurarse de medir la conexión celular. La lectura de dBm se actualizará cada 30-60 segundos. ¿Necesita obtener resultados con mayor velocidad? Después de obtener una lectura, active el modo avión.
- Page 27 ______ Paso 4: Medición de la intensidad de la señal para la instalación de la antena exterior Este es el paso más importante del proceso de instalación porque determinará el rendimiento general del sistema de amplificación. Usando el mismo método del Paso 3, busque el área con mejor señal (el valor más cercano a cero) fuera de la vivienda.
- Page 28 ______ Paso 5: Instalación temporal de la antena exterior Utilice una de las opciones para instalar la antena exterior en el área de la vivienda con mayor señal. Nota: Si utiliza una aplicación como “Open Signal”, le resultará más fácil apuntar la antena exterior hacia la torre de telefonía celular más cercana.
- Page 29 ______ Paso 6: Instalación de la antena interior y conexión del sistema Coloque la antena interior en el área con poca señal a más de 0,45 m (18 in) del amplificador. Conecte el cable coaxial suministrado a la entrada “Outside” (Exterior) del amplificador. Si necesita pasar el cable por una Antena *instalación en ventana y conectar las...
- Page 30 ______ Paso 7: Comparación de resultados Utilice el modo de prueba en campo descrito en el Paso 3 y mida la nueva intensidad de la señal. Anótela aquí: ___________. Compare este valor con la lectura original que capturó en la misma zona de la vivienda. Si el valor es más alto (más cercano a cero) que la lectura original sin amplificación, significa que el dispositivo funciona correctamente.
- Page 31 ______ Paso 8: Instalación permanente de la antena exterior Opción : Instalación en techo o poste exterior (opción recomendada) Instale la antena, o utilice un poste ya instalado, en una zona con señal óptima. Tenga cuidado con las líneas de alto voltaje. Antena exterior (instalación en poste) Se proporciona un...
- Page 32 ______ Paso 8 (cont.) Opción : Instalación en pared exterior (opción alternativa) Antena exterior (soporte para pared) Antena interior Home Room Fuente de alimentación Nota: Se proporciona un cable plano para instalación en ventana que le permite pasar el cable por una ventana. Inserte los tacos.
- Page 33 Para proteger el sistema, compre e instale un protector de descargas atmosféricas (n.º 859992). Para adquirir el producto, llame al teléfono 866-294-1660 o visite weboost.com. Controle las luces 24 horas después de instalar el sistema para ver si hubo algún cambio. Si instala la antena exterior fuera del edificio, utilice cinta aislante para impermeabilizar las conexiones a 25 mm (1") de donde empiezan y terminan las conexiones.
-
Page 34: Solución De Problemas
______ Solución de problemas Banda 4 Banda 2 Banda 5 Luz indicadora de poder Cada luz corresponde a una banda de frecuencia. IMPORTANTE: Para obtener una lectura precisa de las luces, desenchufe y vuelve a enchufar la fuente de alimentación en el amplificador. Luces apagadas El amplificador no tiene energía. - Page 35 Traslade la antena exterior a otro lugar. Desenchufe y vuelva a enchufar la fuente de alimentación. • Cambie el método de instalación de la antena exterior. Desenchufe y vuelva a enchufar la fuente de alimentación. ¿NECESITA support.weboost.com 866.294.1660 AYUDA? HOME ROOM AMPLIFICADOR DE SEÑAL CELULAR...
- Page 36 ______ Opciones del kit de antena BAND 5 BAND 25/2 BAND 4 Outside antenna maximum permissible 4.90 3.71 4.92 antenna gain (dBi) 50Ω Inside antenna maximum permissible 3.73 3.49 6.60 antenna gain (dBi) 50Ω FIXED INSIDE ANTENNA KIT OPTIONS Kit # Coax Type Ln(ft) Antenna Type...
- Page 37 ______ Opciones del kit de antena (cont.) FIXED OUTSIDE ANTENNA KIT OPTIONS Kit # Coax Type Ln(ft) Antenna Type Ω 301111-0675 RG-6 Yagi Directional 301111-5850 RG-58 Yagi Directional 301111-11140 RG-11 Yagi Directional 301111-400170 Wilson-400 Yagi Directional 304421-1120 RG-11 4G Omni 304421-0610 RG-6 4G Omni...
-
Page 38: Especificaciones
______ Especificaciones Home Room ™ Número de producto U530001 Conectores SMA hembra en la antena interior; F hembra en la antena exterior Impedancia de la antena 75 ohmios/50 ohmios Frecuencia 824-894 MHz, 1850-1995 MHz, 1710-1755/2110-2155 MHz 800 MHz 1900 MHz 1700/2100 MHz Banda 4 Ganancia de banda de paso (nominal) Banda 5... - Page 39 GARANTÍA DE DOS AÑOS La garantía de dos (2) años de los amplificadores de señal weBoost cubren defectos de fabricación o de materiales. Los productos en garantía deben devolverse directamente al revendedor con el documento de compra donde aparezca la fecha. También se pueden devolver al fabricante con costos a cargo del consumidor. Se debe incluir el documento de compra donde aparezca la fecha y un número de...
- Page 40 3301 East Deseret Drive, St. George, UT Tel.: 866.294.1660 www.weboost.com | support.weboost.com Copyright © 2017 weBoost. Todos los derechos reservados. Los productos de weBoost están cubiertos por patentes de EE. UU. y solicitudes pendientes. Para conocer las patentes, visite weboost.com/us/patents. NO AFILIADO A WILSON ANTENNA GDE000200_Rev01_03.10.20...
Need help?
Do you have a question about the Home Room U530001 and is the answer not in the manual?
Questions and answers