Sinoboom GTJZ1932ME Maintenance Manual
Hide thumbs
Also See for GTJZ1932ME:
- Parts manual (204 pages) ,
- Maintenance manual (114 pages) ,
- Operation manual (108 pages)
Table of Contents
Troubleshooting

Related Manuals for Sinoboom GTJZ1932ME


Summary of Contents for Sinoboom GTJZ1932ME
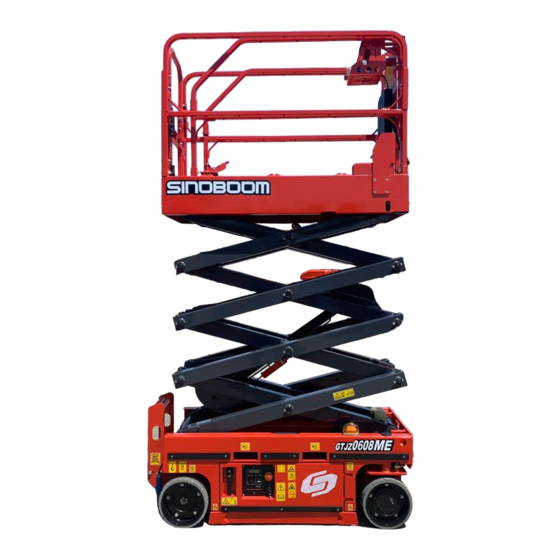
- Page 1 Maintenance Part No.PL501056110002 Rev: A Manual May 2022 产品说明书 PRODU C T MAN U AL GTJZ0608ME/0608ME/1932ME for Sinoboom Poland 0608E (2132E) G T JZ 0808E (2732E) G T JZ 0808E (2732E) G T JZ G T JZ 0808E (2732E)
- Page 3 Operating, servicing and maintaining this vehicle or equipment can expose you to chemicals including engine exhaust, carbon monoxide, phthalates, and lead, which are known to the State of California to cause cancer and birth defects or other reproductive harm. To minimize exposure, avoid breathing exhaust, do not idle the engine except as necessary, service your vehicle or equipment in a well-ventilated area and wear gloves or wash your...
- Page 4 : No.128, East Jinzhou Avenue, Ningxiang High-tech Industrial Park, Changsha, Hunan, China Zip Code : 410600 Copyright © Hunan Sinoboom Intelligent Equipment Co., Ltd. All Rights Reserved The final interpretation right of this manual belongs to Hunan Sinoboom Intelligent Equipment Co., Ltd.
- Page 5 APPLICATION Use the following table to identify the specific serial number for models included in this manual. Check the model of your machine before consulting the manual, and then use the correct manual according to the serial number of the model. See the nameplate on your machine to identify the model and serial number.(See Decals/Nameplates Inspection of the Operation Manual for details.) Trade identification MODELS...
- Page 6 This Page Intentionally Left Blank...
- Page 7 This manual covers the basic parts information of one or more products. Therefore, please use this manual according to your needs. If you find problems in the manual or have suggestions for improve- ment, feel free to share your feedback with Sinoboom, and we will address these issues as soon as possible.
- Page 8 This Page Intentionally Left Blank...
-
Page 9: Table Of Contents
......4-1 Electrocution Hazards....1-2 Qualified Sinoboom equipment Tipping Hazards and Rated Load ..1-2 mechanic . - Page 10 Tank .......5-16 Sinoboom Control System ..6-17 C-2 Inspect Platform Weighing DTC-K500 Control System .
- Page 11 Electrical Schematic Diagram ..6-42 Appendix 1: Prepare the Work Record Before Delivery ..A-1 Appendix 2: Repair & Inspection Report ......A-3 GTJZ0608ME Maintenance Manual © May 2022...
- Page 12 © May 2022 GTJZ0608ME Maintenance Manual...
-
Page 13: Introduction
The owner or administrator of the machine shall also provide the manufacturer’s maintenance information to the person responsible for maintaining the machine. If you have any questions, contact Hunan Sinoboom In- telligent Equipment Co., Ltd.. GTJZ0608ME Maintenance Manual © May 2022... - Page 14 This Page Intentionally Left Blank © May 2022 GTJZ0608ME Maintenance Manual...
-
Page 15: Safety
Failure to notify the manufacturer within SAFETY DEFINITIONS 48 hours of the incident involving the machine of Hunan Sinoboom Intelligent Equipment Co., Ltd. may void the product's warranty. This safety alert symbol appears with most safety statements. It means atten-... -
Page 16: Electrocution Hazards
SAFETY ELECTROCUTION TIPPING HAZARDS AND HAZARDS RATED LOAD NOTE: This machine is not insulated and does not have Maximum rated load bearing capacity of the platform: an electric shock protection function. Table 1-2 All operators and managers shall comply with national or local regulations regarding the minimum safe dis- tance of live conductors above the ground. - Page 17 SAFETY TIPPING HAZARDS TIPPING HAZARDS • Do not modify or change moving • Personnel, equipment and materi- aerial platforms without the manu- als on the platform must not ex- facturer’s prior written ceed the maximum load capacity. permission. • Only raise or extend the platform •...
-
Page 18: Work Environment Hazards
0.8 km/h (0.5 mph) when the plat- cations, or by any other means, as specified by form rises. Sinoboom, it must be approved or guided by the • If the machine can be used out- manufacturer. -
Page 19: Unsafe Operation Hazards
SAFETY BEAUFORT METERS/ MILE/ DESCRIPTION GROUND CONDITION NUMBER SECOND HOUR Twigs broken from trees. Cars veer on Fresh gale 17.2~20.7 39~46 road. Strong gale Light structure damage. 20.8~24.4 47~54 NOTICE Maximum climbing ability is suitable for machines with platform retracted. Maximum Slope: GTJZ0608ME: 25% (14°)... -
Page 20: Fall Hazards
SAFETY UNSAFE OPERATION HAZARDS UNSAFE OPERATION HAZARDS • Do not tie the platform onto near- • Do not push any object outside by objects. the platform. The maximum lateral • Do not put the load outside the force allowed is: platform. -
Page 21: Collision Hazards
SAFETY FALL HAZARDS COLLISION HAZARDS • Each person on the platform must • Pay attention to the field of sight wear harnesses or use safety and the presence of blind spots equipment consistent with gov- when moving or operating the ernment regulations. -
Page 22: Crush Hazards
SAFETY EXPLOSION AND FIRE HAZARDS COLLISION HAZARDS • Never operate a machine danger- ously or for fun. EXPLOSION AND FIRE HAZARD CRUSH HAZARDS • Do not use the machine or charge the battery in hazardous or poten- tially flammable or explosive atmospheres. -
Page 23: Bodily Injury Hazards
SAFETY BATTERY HAZARDS UNSAFE OPERATION HAZARDS • Do not use the machine if it is FIRE AND EXPLOSION HAZARD damaged or not in proper operat- ing condition. • Batteries contain sulfuric acid and • Thoroughly inspect and test for all generate explosive mixtures of functions of the machine before hydrogen and oxygen gases. -
Page 24: Welding And Polishing Requirements1-10
SAFETY BATTERY HAZARD LITHIUM BATTERY HAZARD • Only connect the charger to a • Only use the dedicated charger to grounded 3–wire AC outlet. Be charge the battery. sure the charger is in proper • Do not allow lens, needles or operating condition before other sharp objects to contact charging. -
Page 25: After Using The Machine
SAFETY WELDING HAZARDS • Comply with the welder manufac- turer’s recommendations for pro- cedures concerning proper use of the welder. • Welding leads or cables may only be connected after turning off the power unit. • Carry out welding operations only after the welding cable has been correctly connected. - Page 26 SAFETY This Page Intentionally Left Blank © May 2022 1-12 GTJZ0608ME Maintenance Manual...
-
Page 27: Specifications
SPECIFICATIONS MACHINE SPECIFICATIONS Table 2-1 GTJZ0608ME Specifications 0608ME (METRIC) 1932ME (IMPERIAL) MEASURE DIMENSION Max. platform height 5.8m 19ft Max. working height 7.8m 25ft 7in. Max. horizontal extension 0.9m Rails down 1.8m 5ft 11in Fold-down platform Rails up 1.8m 5ft 11in Overall length- Quick fold-... - Page 28 SPECIFICATIONS 0608ME (METRIC) 1932ME (IMPERIAL) MEASURE Uptime (in a no-load state) 15~20 s Downtime (in a no-load state) 25~30 s Gradeability 3° (Front to back)/1.5° (Left to right) Max. allowable inclination Turning radius (inside) 0 ft Turning radius (outside) 1.49m 4ft 10.7in.
-
Page 29: Power System Specifications
SPECIFICATIONS 0608ME (METRIC) 1932ME (IMPERIAL) MEASURE Weight (in a no-load state) (indoor/outdoor) 1575kg 3473 lb NOTE: a) The working height adds 2m (6ft 7in) of human height to platform height. b) In different areas, hydraulic oil, engine oil, coolant, fuel and lubrication should be added in accordance with the environmental temperature. -
Page 30: Hydraulic Hose And Fitting
SPECIFICATIONS HYDRAULIC HOSE AND FITTING SPECIFICATIONS HYDRAULIC HOSE TORQUE Hydraulic hoses must be torqued to the following specifications. Table 2-3 Hydraulic Hose Torque L (LIGHT-DUTY) S (HEAVY-DUTY) METRIC THREAD 19 ± 1 Nm (14 ± 1 ft-lb) M12 × 1.5 26 ±... - Page 31 SPECIFICATIONS INSTALLED INTO INSTALLED INTO STEEL ALUMINUM THREAD SIZE ED, O-RING + CIRCLIP ED, O-RING + CIRCLIP O-RING 90 ± 6 Nm (66 ± 4 ft-lb) 130 ± 8 Nm (96 ± 6 ft-lb) 60 ± 4 Nm(44 ± 3 ft-lb ) M22×1.5 120 ±...
- Page 32 SPECIFICATIONS INSTALLED INTO INSTALLED INTO STEEL ALUMINUM THREAD SIZE ED, O-RING + CIRCLIP ED, O-RING + CIRCLIP O-RING S (HEAVY-DUTY) G1/4A 40 ± 3 Nm (30 ± 2 ft-lb) 43 ± 3 Nm (32 ± 2 ft-lb) G3/8A 55 ± 3 Nm (41 ± 2 ft-lb) 85 ±...
-
Page 33: Hydraulic Hose And Fitting Torque
SPECIFICATIONS 3. Properly seat the O-ring. HYDRAULIC HOSE AND FITTING TORQUE PROCEDURE 4. Position the tube and nut squarely on the fitting. Then tighten the nut as required. The hydraulic hose and fitting must be torqued to the 5. Tighten the nut or fitting to the torque specified in following requirements when they are installed. - Page 34 SPECIFICATIONS NOMINAL DIAMETER PITCH (MM) CLASS 8.8 CLASS 10.9 CLASS 12.9 (MM) 750 Nm (553 ft-lb) 1050 Nm (774 ft-lb) 1250 Nm (923 ft-lb) 800 Nm (590 ft-lb) 1100 Nm (811 ft-lb) 1300 Nm (959 ft-lb) 1150 Nm (848 ft-lb) 1500 Nm (1106 ft-lb) 1800 Nm (1327 ft-lb) 1500 Nm (1106 ft-lb)
-
Page 35: System Descriptions
SYSTEM DESCRIPTIONS POWER SAFETY MEASURES GTJZ0608ME machines are powered by four 6V A series of angle sensors and limit switches provides batteries in series or a 24V lithium battery to drive a 24V signals to the controllers. DC motor which boosts the gear pump to provide power The level sensor measures the angle of machine on X- to the system. - Page 36 SYSTEM DESCRIPTIONS This Page Intentionally Left Blank © May 2022 GTJZ0608ME Maintenance Manual...
-
Page 37: Service And Guidelines
MECHANIC INSPECTION AND MAINTENANCE Qualified Sinoboom equipment mechanic is a person recognized by Sinoboom as one who, by possession of a recognized degree, certificate, training, has GENERAL successfully demonstrated the ability and proficiency to service, repair and maintain the subject Sinoboom product model. -
Page 38: Preventive Maintenance
Procedures in appropriate sections of this manual to perform the inspection and maintenance procedures. For the purpose of receiving the safety-related bulletins, it is important that Hunan Sinoboom Intelligent Equipment Co., Ltd. has updated ownership information for each machine. When performing each annual machine inspection, notify Hunan Sinoboom Intelligent Equipment Co., Ltd. -
Page 39: Storage
User or operator Operation Manual Inspection change. Maintenance Manual, Pre- Pre-delivery Prior to each sale, delivery Preparation Form, Owner, dealer or Qualified Sinoboom Inspection lease or rental delivery. and Maintenance Inspection user mechanic Report In service for 3 months or 150 hours, Maintenance Manual and whichever comes first;... -
Page 40: Cleanliness
SERVICE AND GUIDELINES • The qualified personnel should sign on the CLEANLINESS handover document to evidence the integrity of the machine. All inspection/test results should 1. The most important single item in preserving the be documented (including the inspector name, service life of a machine is to keep dirt and foreign title, organization and date). -
Page 41: Pressure-Fit Parts
SERVICE AND GUIDELINES accordance with recommended shop practices. PRESSURE-FIT PARTS (See Fastener Torque Specifications, page 2-7) When assembling pressure-fit part, use a molybdenum disulfide base compound or equivalent to lubricate the HYDRAULIC LINES AND mating surface. ELECTRICAL WIRING BEARINGS Clearly mark or tag hydraulic lines and electrical wiring, as well as their receptacles, when disconnecting or removing them from the unit. -
Page 42: Pins And Composite Bearing
SERVICE AND GUIDELINES • Avoiding oxidization of the mechanical joints 2. The composite bearing should be replaced if the between the male pins and female pins. following occurs: • Avoiding electrical failure due to low conductivity • Frayed or separated fibers on the liner surface. between the pins in humid environment. -
Page 43: Maintenance
MAINTENANCE This section provides detailed procedures for regular • While maintaining the machine, replace any parts maintenance inspections. For further information about on the machine using the same parts or the maintenance, please see Maintenance Manual. equivalent parts of the original machine. •... -
Page 44: Following Amaintenance Schedule
MAINTENANCE 5. A competent operator must conduct daily mainte- following maintenance procedures and performing nance on this machine as stated in operation man- functional inspections. ual and maintenance manual. 2. Use the following table to note the results. After each section is complete, mark the appropriate box. Before delivering the machine, complete the following record using these instructions: 3. - Page 45 MAINTENANCE Table 5-3 REPAIR & INSPECTION REPORT Model Serial No. Checklist A Procedures REPAIRED/ YES/Machine is NO/Machine Has Problem Machine Has Items in Good Damage or Description Been Repaired Condition Malfunction A-1 Inspect All Manuals A-2 Inspect All Decals A-3 Inspect Damaged, Loose or Lost Parts A-4 Inspect Hydraulic Oil Level...
-
Page 46: Checklist Aprocedures
MAINTENANCE REPAIR & INSPECTION REPORT B-12 Inspect Pothole Guards Checklist C Procedures REPAIRED/ YES/Machine is NO/Machine Has Problem Machine Has Items in Good Damage or Description Been Repaired Condition Malfunction C-1 Replace Hydraulic Oil Tank Air Filter C-2 Inspect Platform Weighing System C-3 Inspect Lift Limit Switch C-4 Inspect Staged Lowering... -
Page 47: Inspect All Decals
MAINTENANCE • Inspect the pages of the manuals and confirm that • Platform door they are legible and intact. • Pothole guard device • Pin shafts and fasteners for scissor arm NOTICE • Platform control joystick If needing to replace the manuals, contact Hunan Si- •... -
Page 48: Inspect Hydraulic Oil Leakage
MAINTENANCE Table 5-4 1. Select a solid, level and flat surface as a testing site. CUSTOMER HYDRAULIC OIL 2. Ensure the testing site is clear of obstructions. REQUIREMENTS MARK 3. Ensure the battery is properly connected. Normal-temperature region Mobil DTE 25 Ultra 4. - Page 49 MAINTENANCE Figure 5-3 Platform controller (SINOBOOM) Figure 5-4 Platform controller (DTC) 8. Emergency stop 8. Emergency stop 1. Steer right 1. Steer right button button 9. Display screen 9. Display screen (to display battery (to display battery 2. Steer left 2.
-
Page 50: Inspect The Battery Level
MAINTENANCE A-7 Inspect the Battery Level The battery power level can be checked through the platform screen. Table 5-5 PLATFORM POWER DISPLAY POWER RATIO DESCRIPTION The battery has been fully charged. 90-100% The battery is at 70% of its capacity. The battery is at 50% of its capacity. -
Page 51: Inspect Rim, Tire And Fasteners5-9
MAINTENANCE 2. Inspect the flexile joints, and confirm that the joints are tight and the sensor lines are not damaged. ELECTRICAL SHOCK HAZARD B-2 Inspect Rim, Tire and Fasteners Be sure to disconnect the battery from the machine and the charger Good maintenance of rims and tires is important for the from the AC outlet before inspecting safe operation of the machine. -
Page 52: Inspect Battery
MAINTENANCE Torque Value Name Slotted nut (non-steering wheel mounting) 420Nm(310 ft-lb) Bolt (drive deceleration motor installed) 51 Nm(38 ft-lb) Bolt (mounting place of hub and axle seat) 130Nm(96 ft-lb) 4. Replace the cotter pin and bend it to the locking 1. -
Page 53: Inspect Hydraulic Oil
MAINTENANCE satisfying the Result 1, proceed with the next NOTICE step. Shut off the drive motor/hydraulic motor before Note: if the Result 1 cannot be met even after many inspection. attempts, the battery may have malfunctions. 9. Check the battery electrolyte level, add distilled 1. -
Page 54: Inspect Brake Manual Release
10. After the towing is completed, re-energize the ma- chine, the brake can operate properly. 11. Remove the chokes as needed. SINOBOOM system 1. Chock the wheels from rolling. 2. Ensure the path of travel is clear of obstructions. © May 2022... -
Page 55: Inspect Emergency Lowering
MAINTENANCE 3. Pull out the emergency stop button on the platform controller to ON position. 4. Pull out the emergency stop button on the ground controller to the ON position, and meanwhile press the Enter key, the adjustment screen will show on the display.. -
Page 56: Full Lifting And Full Lowering
MAINTENANCE 3. —SINOBOOM system:Move upwards the lift func- B-9 Full Lifting and Full Lowering Time tion enable switch on the platform controller, the in- Test dicator light should be on. —DTC system:Press the lift function enable Appropriate lifting or lowering speed is important for the button, the button should be lit. -
Page 57: Inspect The Tilt Protection
5in) is less than 50s, immediately tag and re- move the machine from service. High speed testing: 9. —SINOBOOM system:Move downwards the drive high/low speed select switch on the platform con- troller, the high drive speed mode should be active. -
Page 58: Test The Pothole Guard
MAINTENANCE 8. Fully lower the platform. Switch the machine from lift CHECKLIST C function to drive function. Drive the machine off and PROCEDURES remove the wooden blocks. 9. Place two wooden blocks under the two wheels on the front or back side of the machine, and then drive C-1 Replace Air filter of Hydraulic Tank the machine onto the blocks. -
Page 59: Inspect Platform Weighing
MAINTENANCE 2. Use ground controller to lift and lower the platform C-2 Inspect Platform Weighing System without loading twice; the platform must operate in (optional) its normal state. 3. Lower the platform until the scissor arm is in the The platform weighing system is optional. Make sure fully retracted state. -
Page 60: Checklist Dprocedures
MAINTENANCE CHECKLIST D Figure 5-10 PROCEDURES D-3 Inspect and Replace Hydraulic Oil D-1 Inspect Scissor Arm Installation Bearing Inspecting and replacing the hydraulic oil is important for the proper operation and service life of the machine. The machine may be unable to operate properly if the Effectively maintaining the scissor arm installation hydraulic oil and the filter screen become dirty, and the bearing is important for proper operation of the... - Page 61 MAINTENANCE Figure 5-11 4. After the hydraulic oil is completely drained, remove the fastening screws of the hydraulic oil tank and remove the hydraulic oil tank from the power unit. Figure 5-12 5. Wash the oil tank inside with neutral solvents and allow the hydraulic oil tank to dry.
- Page 62 MAINTENANCE This Page Intentionally Left Blank © May 2022 5-20 GTJZ0608ME Maintenance Manual...
-
Page 63: Platform Components
REPAIR NOTICE Perform this procedure when the scissor arm has been fully retracted. Repair procedures must be performed by qualified, trained and competent personnel in a properly 1. Disconnect the external power supply. Turn the equipped workshop. emergency stop button on the platform controller and ground controller to the OFF position. -
Page 64: Removing The Extension Platform
REPAIR 4. Remove the bolts of the fixed clevis pin. Removing the Extension Platform 1. Remove the platform. Refer to Removing the Plat- form, page 6-1. 2. Loosen the bolts of all rails. Remove rails and put them aside. 3. Loosen the bolts and pin on the roller bracket of the extended platform. -
Page 65: Chassis Components
REPAIR to the Part Manual. If the replacement tires are not as Hunan Sinoboom Intelligent Equipment Co., Ltd. recommends, the following requirements of tires should be met: 1. Ply rating/rated load and dimension equal or greater than the original. 2. Tire tread contact width equal or greater than the original. -
Page 66: Removing The Geared Travel Motor
REPAIR Figure 6-5 1. Place the machine on a firm and level surface. 2. Place a jack of ample capacity under the chassis on the side to be removed, raise the jack to make the wheel off the ground. Figure 6-6 3. -
Page 67: Removing Steer Cylinder
REPAIR Make sure to use a lifting device with enough capacity Figure 6-8 to lift the chassis. Place the lifting lug to a proper location on the frame. 1. Support the steer cylinder with a suitable supporting device. 2. Disconnect and plug the hoses and fittings on the steer cylinder, and tag the machine. -
Page 68: Hydraulic System
REPAIR HYDRAULIC SYSTEM Hydraulic Power Unit Figure 6-9 Table 6-1 1. Plastic oil tank 2. DC motor 3. Filter screen 4. Gear pump 5. Return filter within the tank 6. Direct-acting relief valve 7. 2-position 4-way cartridge 8. Direct-acting relief valve 9. - Page 69 REPAIR Figure 6-10 Lift control valve (PN.202040003293) Table 6-2 Lift control valve (PN.202040003293) Name Function Torque To keep the fluid flowing in 27Nm (20ft-lb) Check valve one direction To lower the platform 27Nm (20ft-lb) Solenoid valve Throttle screw 2Nm (1.5ft-lb) Throttle screw 2Nm (1.5ft-lb) GTJZ0608ME Maintenance Manual...
- Page 70 REPAIR Figure 6-11 Lift control valve (PN.202040003295) Table 6-3 Lift control valve (PN.202040003295) Name Function Torque To keep the fluid flowing in 27.1Nm (20ft-lb) Check valve one direction Damper 4Nm (3ft-lb) To lower the platform 22.7Nm (17ft-lb) Solenoid valve Damper 4Nm (3ft-lb) ©...
- Page 71 REPAIR Figure 6-12 Lift control valve (PN.202040003315) Table 6-4 Lift control valve (PN.202040003315) Name Function Torque To keep the fluid flowing in 27Nm (20ft-lb) Check valve one direction To lower the platform 27Nm (20ft-lb) Solenoid valve Throttle screw 2Nm (1.5ft-lb) Throttle screw 2Nm (1.5ft-lb) GTJZ0608ME Maintenance Manual...
- Page 72 REPAIR Figure 6-13 Lift control valve (PN.202040003323) Table 6-5 Lift control valve (PN.202040003323) Name Function Torque To keep the fluid flowing in 27.1Nm (20ft-lb) Check valve one direction Damper 4Nm (3ft-lb) To lower the platform 22.7Nm (17ft-lb) Solenoid valve Damper 4Nm (3ft-lb) Remove the lift control valve N N O O T T I I C C E E...
-
Page 73: Regulating The Platform Lifting
REPAIR NOTICE Do not allow the machine to operate if there is air CRUSH HAZARDS entrainment in the pump, or else, the pump could be damaged. Make sure to keep your hands and other parts of your body away from the scissor arm when Adjusting the Emergency Lowering lowering the platform. -
Page 74: Hydraulic Symbols
34.4087 REPAIR 32.0000 16.0000 6. Adjust the mounting nut so that the distance be- Symbol Description 28.5682 28.5682 tween the end of the handle and the mounting nut is 46.7096 28.5682 46.7096 no more than 3 mm (0.12 in.). 28.5682 7. -
Page 75: Hydraulic Schematic Diagram
REPAIR Hydraulic Schematic Diagram Hydraulic schematic diagram lift cylinder Overload sensor Overload sensor Steering cylinder 2 10bar GTJZ0608ME Maintenance Manual 6-13 © May 2022... -
Page 76: Electrical System
REPAIR ELECTRICAL SYSTEM UNSAFE OPERATION HAZARD Use and Maintenance of Battery • Strictly follow the manufacturer’s The battery falls into 3 types: lead acid, lead acid recommendations on how to maintenance-free and lithium batteries. The lithium properly use and maintain the battery and lead acid maintenance-free battery are free battery. - Page 77 REPAIR See the Charging the Battery section of Operation The battery will bleed air in the equalization process Manual. (forming bubbles). Equalizing 5. Remove the vent cap every hour to measure the gravity of all battery cells, if the gravity doesn’t Equalization is the deliberate process of overcharging increase, stop the charging in equalization mode.
-
Page 78: Charger Troubleshooting
REPAIR or battery out of charge for a long time (not timely NOTICE charged for 3 days or longer when the battery level less than 10%). • Do not store more than 6 months in hot or cold environment. • It will not be covered by the warranty if the battery Charger Troubleshooting attenuates or fails due to customer’s overuse (-... -
Page 79: Sinoboom Control System
Pull out the emergency stop button to “ON” position and turn the key switch to Ground control position. Press This section is applicable to Sinoboom system with the the Enter key on the main interface of the ground software version of JZ.C.00.W 1.01. - Page 80 REPAIR ECU main interface System Unlock Parameter IO functional test Info query settings vehicle debugging Battery pack Curtis Driver PCU Information Trouble code GPS Information Switching value Language information query Information Service See the inquiry Service input check setting next page Battery cell Bus timing System Version...
- Page 81 REPAIR ECU main interface(continued) Unlock System IO functional test Parameter debugging Info query vehicle settings Access with a password see the previous page Manufacturer parameters Access with a password Warning parameters System Parameters Warning setting Level gauge Up limit switch X-axis warning Overload limit Level gauge...
- Page 82 USB flash disk: ECU_MAIN.bin. In the Warning parameters menu of Parameter debugging, the parameters of level gauge X-axis Note: please contact Sinoboom after-sales warning, level gauge Y-axis warning, raised/stowed personnel to get the program. shift point, allowable overload lowering height, walk 3.
- Page 83 REPAIR ON (depend on Outdoor mode models) Weighing device ON (depend on Angle sensor models) Down overload restraint Walk limit on pit Foot switch 80/90 overweight alarm 3. Return to the main interface through the Esc key, 4. Calibrate joystick lower end: push the joystick to the and power off the machine as needed.
- Page 84 REPAIR 2. Select and enter Full-load calibration interface, Figure 6-23 and press the Enter key to start automatic calibration. 6. Return to the main interface through the Esc key, lower the platform to the stowed position, and Full-load calibration power off the machine as needed. Calibrate weight Figure 6-26 NOTICE...
-
Page 85: Dtc-K500 Control System
PCU, ECU, sensors, etc. are precisely adjusted and protected before delivery. Therefore, personnel who have not been professionally trained and authorized by Sinoboom cannot disassemble their housings, otherwise moisture and dust will enter the internal mechanism and normal operation will not be guaranteed. - Page 86 REPAIR 1. Set Speed 2. Set Option 5. Fault History 3. Calibration 4. Machine Mode 6. Link Host PC 标定 连接 PC 速度设置 选配设置 机器模式 历史错误 Execute No Load Max Fast Speed Machine Type OL Descent Height Access ECU Calibration? 高速行驶速度最大值...
- Page 87 Sinoboom to the original settings set by the control height. system manufacturer. Therefore, it is prohibited to update the program without the authorization of 2.
- Page 88 REPAIR 2. After entering the ECU menu selection mode, select Figure 6-36 and enter “OL Descent Height” interface. 3. The platform will rise and descend for three OL Descent Height times automatically: rise to the highest position and descend to the stowed position (the first, second and third ascending and descending movements are for height calibration, static calibration and dynamic calibration respectively).
-
Page 89: Trouble Diagnosis
2. Press the Enter key to view fault history (10 faults trouble types. can be viewed. For the causes and solutions of fault codes, please refer to ). Table 6-8 Trouble Description and Inspection (SINOBOOM System) Cod- Problem Action Limit... - Page 90 Discharge Temperature Fault 2 and Driving factory to check battery. Alarm only GPS Lock Ⅰ Contact SINOBOOM after-sales staff. Pressure Sensor 1 Fault: Check the wiring to the sensor and then the sensor itself. Also check to Disable All Pressure Sensor 1 Fault...
- Page 91 ECU and Driving controller to quit the mode. GPS Lock Ⅱ pre-warning Alarm only Contact SINOBOOM after-sales staff. Disable Lifting GPS Lock Ⅱ Contact SINOBOOM after-sales staff. GPS Lock Ⅲ pre-warning Alarm only Contact SINOBOOM after-sales staff.
- Page 92 REPAIR Cod- Problem Action Limit Solution Forward Coil Fault: Check the connections to the Disable Lifting Coil’s terminals and make sure they are tight. If Forward Coil Fault and Driving so, check the coil itself to see if it is open or shorted.
- Page 93 REPAIR Cod- Problem Action Limit Solution the Motor controller. If that doesn’t resolve the issue, replace the Motor Controller. Motor Controller Motor Fault: Check connections Disable Lifting to the motors. Cycle power to the lift and if that Motor Controller Over Heat Fault and Driving does not resolve the issue, replace the Motor Controller.
- Page 94 REPAIR Cod- Problem Action Limit Solution Machine Tilted Beyond Safe Limits Fault: If the Disable Lifting machine is tilted, find a way to make it level. If the Machine Tilted and Driving machine is level, check the wiring to the tilt sensor and then the sensor itself.
- Page 95 REPAIR Code Problem Action Limit Solution Sharp Difference in Temperature: Inform BMS Sharp Difference in Disable Lifting and Driving Temperature factory to check battery. Discharge Current Discharge Current High Fault 2: Inform BMS Disable Lifting and Driving High Fault 2 factory to check battery.
- Page 96 REPAIR Code Problem Action Limit Solution Lift Up Coil Fault: Check the connections to the Lift Up Coil Fault Disable Lifting and Driving Coil’s terminals and make sure they are tight. If so, check the coil itself to see if it is open or shorted. Lift Down Coil Fault: Check the connections to the Disable Lifting and Driving Coil’s terminals and make sure they are tight.
- Page 97 REPAIR Code Problem Action Limit Solution connections and tight or clean. Check the voltage to the ECU and PCU. High Neutral Current: The MC is sensing current in the motors when there should not be. This could High Neutral Current occur anytime the MC thinks the brakes are on Disable Lifting and Driving Fault (Zapi Only)
- Page 98 REPAIR Code Problem Action Limit Solution Over 80% Load Warning: Platform is getting close Over 80% Load Warning Only to its limit of weight. Consider not adding more Warning load. Right Drive Motor Short Fault: Check the Motor Right Drive Motor Disable All Motion connections and make sure they are tight.
-
Page 99: Fundamental Troubleshooting
REPAIR Code Problem Action Limit Solution Foot pedal no action: when operate the joystick to Foot pedal no action drive and lift, there is no action on foot pedal, so Disable PCU Control please check the switch of foot pedal. Anti-collision switch warning: When lifting up and Anti-collision switch Disable Lifting and Driving... - Page 100 REPAIR Problem Cause Solution • Inspect whether the on-off input plug is inserted properly and firmly. The ground controller • Inspect whether the wiring of the plug switch is does not lower when The lowering valve has malfunctioning. the machine has no trouble load and is level •...
- Page 101 REPAIR Problem Cause Solution • The hydraulic valve is malfunctioning. • The level switch air bubble is not in the middle position. Tilting warning The level switch is abnormal • The level switch is not connected properly or firmly. • The ground controller is malfunctioning.
-
Page 102: Electrical Symbols
REPAIR Electrical Symbols Table 6-11 Symbol Description Symbol Description Warning lamp Solenoid coil 8.5682 兰 棕 棕 兰 Charger Level switch 黑 28.5682 黑 28.5682 46.7096 28.5682 46.7096 28.5682 兰 棕 Two lines connected Two lines non-connected 黑 兰 棕 28.5682 棕... - Page 103 46.7096 46.7096 46.8000 34.4087 34.4087 REPAIR 32.0000 28.5682 Symbol Description Symbol Description 28.5682 16.0000 Storage battery Lithium battery 46.8000 Fuse GTJZ0608ME Maintenance Manual 6-41 © May 2022...
- Page 104 REPAIR Electrical Schematic Diagram © May 2022 6-42 GTJZ0608ME Maintenance Manual...
- Page 105 APPENDIX 1: PREPARE THE WORK RECORD BEFORE DELIVERY PREPARE THE WORK RECORD BEFORE DELIVERY Model Serial No. REPAIRED/Machine YES/Machine is in NO/Machine Has Damage Inspection Item Has Been Repaired Good Condition or Malfunction Pre-operational Inspection Maintenance Procedure Functional Inspection Machine Buyer/ Renter Inspector Signature Inspector Title Inspector Company...
- Page 106 REPAIR This Page Intentionally Left Blank © May 2022 GTJZ0608ME Maintenance Manual...
- Page 107 APPENDIX 2: REPAIR & INSPECTION REPORT REPAIR & INSPECTION REPORT Model Serial No. Checklist A Procedures REPAIRED/ YES/Machine is NO/Machine Has Problem Machine Has Items in Good Damage or Description Been Repaired Condition Malfunction A-1 Inspect All Manuals A-2 Inspect All Decals A-3 Inspect Damaged, Loose or Lost Parts A-4 Inspect Hydraulic Oil...
- Page 108 REPAIR REPAIR & INSPECTION REPORT B-9 Test Lift/Lower Speed B-10 Test Drive Speed B-11 Inspect Tilt Protection B-12 Inspect Pothole Guards Checklist C Procedures REPAIRED/ YES/Machine is NO/Machine Has Problem Machine Has Items in Good Damage or Description Been Repaired Condition Malfunction C-1 Replace Hydraulic Oil...
- Page 109 REPAIR REPAIR & INSPECTION REPORT Inspector Company NOTES: 1. The Repair & Inspection Report shall include the inspection table of each regular inspection. 2. Duplicate the Repair & Inspection Report template for each inspection. Store the completed tables for 10 years or until the machine is no longer in use or as required by machine owner/company/custodian.
- Page 110 Solution s Alw ays For B et t er A ccess Solution s Always for Better Access Solutions AS/N ZS Hunan Sinoboom Intelligent Equipment Co., Ltd. 长沙市宁乡高新技术产业园区金洲大道东 128 号 No.128, East Jinzhou Avenue, Ningxiang High-tech Industrial Park, Changsha, Hunan, China 市宁乡高新技术产业园区金洲大道东...
Need help?
Do you have a question about the GTJZ1932ME and is the answer not in the manual?
Questions and answers