Table of Contents
Advertisement
Quick Links
Advertisement
Table of Contents

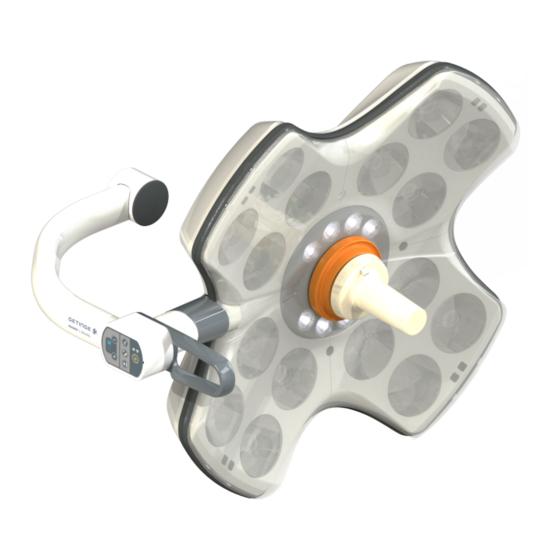
Related Manuals for Getinge Volista


Summary of Contents for Getinge Volista
- Page 1 Maintenance Manual Volista NM 01780 EN 03 2023-08-02...
- Page 2 © Copyright 2021 Maquet SAS Subject to technical changes. The illustrations and technical specifications provided in this manual may, on account of future product devel- opments, differ slightly from the actual product supplied. V03 02.08.2023 Maquet Volista NM 01780 EN 03...
-
Page 3: Table Of Contents
Electrical inspections ..........................6.2.1 Electrical evaluation ....................... 42 6.2.2 Performing battery tests......................44 6.2.2.1 From the wall-mounted control keypad (on VCSII only)........44 6.2.2.2 From the wall-mounted control keypad (on VCS only)........45 Maquet Volista 3 / 56 NM 01780 EN 03... - Page 4 Contents 6.2.2.3 From the touchscreen control panel..............46 6.2.3 Electrical safety tests ......................47 Functional tests ............................ Recording the inspection ........................Maquet Volista 4 / 56 NM 01780 EN 03...
-
Page 5: Introduction
Perform regular inspections at the subcontractor’s premises and verify for your own or- ganisation the compliance of the maintenance performed. • Getinge may not be held liable for any damage or injury resulting from failure to follow these recommendations. Liability Modifications to the product The product must not be modified in any way without the prior written consent of Getinge. -
Page 6: Symbols Used In This Manual
Indicates a potential risk that may cause injuries, health hazards or serious material damage leading to injuries. CAUTION! Indicates a potential risk that may cause material damage. Tab. 1: Hazard levels of safety instructions Maquet Volista 6 / 56 NM 01780 EN 03... -
Page 7: Indications
Addition of the estimated maintenance time • Integration of VCSII lighting • Updating of safety alerts • Integration of the Valia spring arms • Inspection of safety labels in the maintenance protocol Maquet Volista 7 / 56 NM 01780 EN 03... -
Page 8: Safety Instructions
Anyone not trained in installation, maintenance or decommissioning opera- tions is exposed to the risk of injury or electric shock. Installation, maintenance and decommissioning of the device or components of the device must be performed by a Getinge technician or a Getinge-trained service technician. AR NI NG... - Page 9 Risk of malfunction of the device The use of wireless accessories other than those supplied or specified by the manufacturer can affect the operation and performance of the device. Use only the wireless accessories specified by Getinge. AU TION Risk of equipment damage If adjustments are made incorrectly or not at all, the lighthead or installed equipment may drift.
-
Page 10: Technical Specifications
The technical characteristics can be consulted in: • Installation Instructions (https://swp-linkone.getingegroup.local/): • Mechanical systems (Mechanism, Tightening torques), Electrical systems for installation. • Instructions for Use (https://eifu.getinge.com/fr/): • Optical, Electrical, Mechanical, Video systems of the product in operation. Maquet Volista 10 / 56 NM 01780 EN 03... -
Page 11: Vps Power Supply Connection Diagrams
Technical specifications VPS power supply connection diagrams VPS power supply connection diagrams 24 V AC-DC / 24 battery backup with Getinge backup option 100-240 V AC 24 V AC - DC / 24 V DC 100 - 240 V AC... - Page 12 568407516 POWER SUPPLY 1 PS LINK NOT CONNECTED OR POWER SUPPLY 2 568407525 NOT CONNECTED 688700009 or power supply 2 with daisy-chain board 699600055 699600055 569003050 Fig. 2: Maquet Backup connection diagram Maquet Volista 12 / 56 NM 01780 EN 03...
-
Page 13: Eps Power Supply Connection Diagrams
Technical specifications EPS power supply connection diagrams EPS power supply connection diagrams Connecting the dual EPS power supply without backup Fig. 3: Connecting the dual EPS power supply without backup Maquet Volista 13 / 56 NM 01780 EN 03... - Page 14 Technical specifications EPS power supply connection diagrams Connecting the dual EPS power supply with Maquet backup Fig. 4: Connecting the dual EPS power supply with Maquet backup Maquet Volista 14 / 56 NM 01780 EN 03...
- Page 15 Technical specifications EPS power supply connection diagrams Connecting the dual EPS power supply with customer backup Fig. 5: Connecting the dual EPS power supply with customer backup Maquet Volista 15 / 56 NM 01780 EN 03...
- Page 16 Technical specifications EPS power supply connection diagrams Fig. 6: Connecting the ceiling-mounted EPS Maquet Volista 16 / 56 NM 01780 EN 03...
-
Page 17: Wps Power Supply Connection Diagrams
Technical specifications WPS power supply connection diagrams WPS power supply connection diagrams Not supplied by Getinge to RS232 (optional) to backup 24VDC (optional) 24VDC Option n°1 CAT 6a-T 568B (15m maximum) CAT 6a-T 568B (80m maximum) Option n°1 CAT 6a-T 568B... - Page 18 Technical specifications WPS power supply connection diagrams Not supplied by Getinge Faston eyelet not provided Junction Box Security earth connection (6 AWG 10 mm²) Fig. 8: Electrical diagram for US power supply without termination box Maquet Volista 18 / 56 NM 01780 EN 03...
- Page 19 Technical specifications WPS power supply connection diagrams Not supplied by Getinge Faston eyelet not provided Termination Box Junction Box Fig. 9: Electrical connection diagram for US power supply with termination box Maquet Volista 19 / 56 NM 01780 EN 03...
- Page 20 : Earth Earth Voltage output 24V DC : CANH :To lighthead. Marked cable CANH : To lighthead. Marked cable + : To lighthead. Marked cable - Fig. 10: 24V AC-DC / 24V DC version without remote control Maquet Volista 20 / 56 NM 01780 EN 03...
-
Page 21: Maintenance Procedures
To ensure safety and performance, please follow the recommendations below. For SB, SA and SAT suspensions Items Frequency All brakes Every year Suspension mounting screws Every 6 years (tighten the screws to the recommended tightening torque) Maquet Volista 21 / 56 NM 01780 EN 03... -
Page 22: Replacing The Batteries
Risk of burns If unsuitable batteries are used, they may explode due to the emission of gases or liquids. Always use batteries supplied by Getinge during installation and when repla- cing defective batteries. AR NI NG Risk of electric shock or injury The use of screws or spare parts other than those supplied by the manufac- turer may damage the device. -
Page 23: On The Vps Power Supply
Reconnect the cables to the terminals in compliance with the position shown in the illustra- tion. • Close the fuse holders • Close the battery pack cover and screw in the mounting screws Maquet Volista 23 / 56 NM 01780 EN 03... -
Page 24: On The Eps Power Supply
– The red terminal is on the “+” side of the battery and connects to the red wire. – The black terminal is on the “-” side of the battery and connects to the black wire. • Reconnect the connectors of the fuse board. Maquet Volista 24 / 56 NM 01780 EN 03... -
Page 25: On The Wps Power Supply
– The red terminal is on the “+” side of the battery and connects to the red wire. – The black terminal is on the “-” side of the battery and connects to the black wire. • Reconnect the connectors of the fuse board. Maquet Volista 25 / 56 NM 01780 EN 03... -
Page 26: Operations To Be Performed On The Touchscreen
• Press Cancel to reinitialise the maintenance and remove the orange key. • Quit the menu by pressing the Getinge logo again. Maquet Volista 26 / 56 NM 01780 EN 03... -
Page 27: Adjustments
Lubricating the spring arm under the slip ring 1. Remove the mounting screw. 2. Raise the screw cover. 3. Spray lubricating grease at the location of the screw cover. Fig. 16: Spring-arm lubrication Maquet Volista 27 / 56 NM 01780 EN 03... -
Page 28: Adjusting The Acrobat 2000 And Ondaspace Spring Arms
Fig. 17: Adjusting the balance Adjusting the top stop on the DF spring arm • Tighten to lower the stop. • Loosen to raise the stop. 5 mm Fig. 18: Stop adjustments Maquet Volista 28 / 56 NM 01780 EN 03... -
Page 29: Adjusting The Oasys Spring Arms
O T I C E Be careful not to damage the plastic tabs when remov- ing the covers. • Move the tabs away and leave them on their base. Fig. 21: Removing the spring-arm half-covers Maquet Volista 29 / 56 NM 01780 EN 03... - Page 30 • Insert the tool into the side-hole nut. • Rotate the nut counter-clockwise to retract the end of the spring arm, and clockwise to extend it. Fig. 23: Alignment Maquet Volista 30 / 56 NM 01780 EN 03...
- Page 31 Carefully refit and clip the half-covers to the spring arm. • Re-install the mounting screws. – Two screws for SF version – Four screws for DF version Fig. 25: Re-installation of the half-covers Maquet Volista 31 / 56 NM 01780 EN 03...
- Page 32 Position the spring arm in the lowered position. • Insert tabs in the side covers, according to the spring arm position. • Check that the tabs slide correctly in the side covers. Maquet Volista 32 / 56 NM 01780 EN 03...
-
Page 33: Adjusting The Valia Spring Arms
Position horizontally and push back the tab halfway to access the adjustment screw. • Insert a 5-mm Allen key. • Tighten to decrease the tension. • Loosen to increase the tension. Fig. 30: Adjusting the tension Maquet Volista 33 / 56 NM 01780 EN 03... - Page 34 Refitting the front flanges DF version • Remove the screw covers. • Unscrew the two M4x10 screws and re- move the two washers. • Unhook the two flanges. Fig. 33: Removing the front flanges Maquet Volista 34 / 56 NM 01780 EN 03...
- Page 35 • Clip on the two flanges. • Fit the two washers with the two M4x10 screws; tighten until they make contact. • Fit the screw covers. Fig. 36: Fitting the front flanges Maquet Volista 35 / 56 NM 01780 EN 03...
- Page 36 , then proceed in the same way to install the second tab. • Move the arm up and down to check that the tabs slide without coming out of their grooves. Maquet Volista 36 / 56 NM 01780 EN 03...
-
Page 37: Adjusting The Brakes
VCSII lighthead DF version • Adjust the lighthead brake, located on the intermediate fork: – Tighten screw to increase braking. – Loosen screw to reduce braking. Fig. 40: Adjusting the DF lighthead brake Maquet Volista 37 / 56 NM 01780 EN 03... - Page 38 Check that the snap ring is correctly positioned and adjust the brake if necessary: – Tighten screw to increase braking. – Loosen screw to reduce braking. • Re-install the grey cover. Maquet Volista 38 / 56 NM 01780 EN 03...
-
Page 39: Inspections
Check that the cover and the retention and upper seals are secure. • Check the resistance of the silicone sleeve and, for the modified SAT tube, the screw cover labels for shaft 2 and 3. Maquet Volista 39 / 56 NM 01780 EN 03... - Page 40 Check the correct installation of the cov- ers, the tightening of the screws for the round covers. Fig. 46: Acrobat or Ondaspace spring arm • Check the condition, position and sliding of the tabs. Maquet Volista 40 / 56 NM 01780 EN 03...
- Page 41 Check the position and sliding of the tabs. Fig. 48: Valia spring arm Fig. 49: Lighthead • Check that the silicone covers, seals and cover are secure. • Check that there are no cracks or scratches on the underside. Maquet Volista 41 / 56 NM 01780 EN 03...
-
Page 42: Electrical Inspections
Check the general condition of the power supply. • Check the tightening of the connections. • Check the ground connections. lightheads power supplies Fig. 51: Connection box Fig. 52: Identification of the 3-track connector Maquet Volista 42 / 56 NM 01780 EN 03... - Page 43 Verify the output voltage of the batteries (12 V per battery, difference of voltage between bat- teries <0.1 V). • Check the general condition of the backup, the batteries, the absence of swelling, leaks, oxid- ation. Maquet Volista 43 / 56 NM 01780 EN 03...
-
Page 44: Performing Battery Tests
If the test fails, the battery level indicator flashes red. 3. If the test fails, contact the Getinge technical service department. 4. Press Switchover test again and hold until the button turns off. Ø The light remains on at Level 3 and the system is ready for use. -
Page 45: From The Wall-Mounted Control Keypad (On Vcs Only)
If the test fails, the battery level indicator flashes red. 3. If the test fails, contact the Getinge technical service department. 4. Press Battery backup test again and hold until the button turns off. Ø The light remains on at Level 3 and the system is ready for use. -
Page 46: From The Touchscreen Control Panel
4. If the test fails, press Maintenance information to access the maintenance information page, and then call the Getinge technical service department. Running a battery lifetime test (only with a Getinge backup) 1. Turn off the light. 2. Press Battery Tests in the menu bar. -
Page 47: Electrical Safety Tests
The earth resistance should be less than or equal to 300 mΩ. Fig. 58: Electrical safety test The measurement should be made between the flange and the edge of the connector located in the centre of the lighthead Maquet Volista 47 / 56 NM 01780 EN 03... -
Page 48: Functional Tests
The camera is working properly (video and zoom) • Switch over to battery mode and back to mains Recording the inspection See also 2 SW Service Protocol PM OR Lights VOLISTA-F-EN [} 49] Maquet Volista 48 / 56 NM 01780 EN 03... - Page 49 SW service protocol Preventive maintenance Surgical Lighting VOLISTA 1. Customer Address Contact name Telephone number Order number Installation date Location (department, room number, etc.) 2. Product Configuration Configuration Description Part No. Serial No. Lighthead 1 Part Lighthead 1 Description Serial No.
- Page 50 Batteries Every 3 years 4. Other components replaced or to be replaced To be Part No. Description Replaced replaced 5. Calibrated tooling Validity date Description Registration No. (DD/MMM/YYYY) Document name: SW Service Protocol PM OR Lights VOLISTA Rev: F www.getinge.com...
- Page 51 AC2000: Check that the safety ring is present with holding screws. ONDASPACE SF: Check that the safety ring is present with holding screws. Check the correct installation of the covers, the tightening of the screws, round covers. Document name: SW Service Protocol PM OR Lights VOLISTA Rev: F www.getinge.com...
- Page 52 Check the tightening of the connections. Check the ground connections. Verify the output voltage of the batteries. (Record the value) Check the general condition of the backup, batteries, absence of swelling, leaks, oxidation. Document name: SW Service Protocol PM OR Lights VOLISTA Rev: F www.getinge.com...
- Page 53 Check that all touchscreen functions are working correctly The camera is working properly (video and zoom) Switch to battery mode and back to AC mains mode 12. Cleaning Document name: SW Service Protocol PM OR Lights VOLISTA Rev: F www.getinge.com...
- Page 54 The configuration must not be used until the faults have been corrected. The configuration is unsafe. Decommissioning recommended. Comments 14. Performed by Name / Title Date Signature YYYY 15. Facility (Required) Name / Title Date Signature YYYY Document name: SW Service Protocol PM OR Lights VOLISTA Rev: F www.getinge.com...
- Page 55 Notes...
- Page 56 *VOLISTA, Volista VisioNIR, STANDOP, AIM, LMD, FSP, SATELITE, MAQUET, GETINGE and GETINGE GROUP are trademarks or registered trademarks of Getinge AB, its divisions or its subsidiaries. ** ONDASPACE, ACROBAT and VALIA are trademarks or registered trademarks of ONDAL HOLDING GmbH, its divisions or its subsidiaries.
Need help?
Do you have a question about the Volista and is the answer not in the manual?
Questions and answers