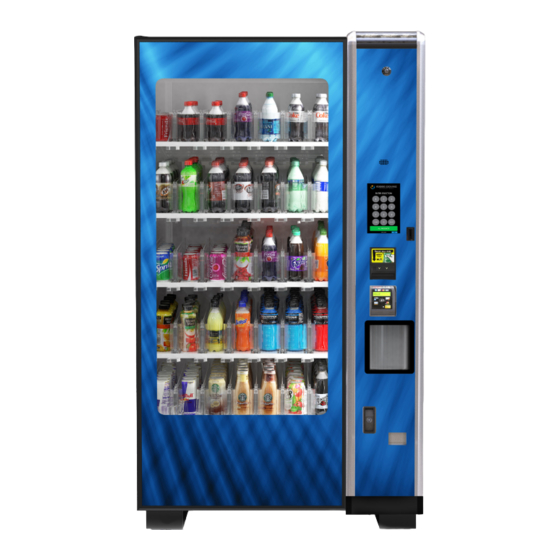
Summary of Contents for Vendors Exchange BEVMAX
- Page 1 INSTALLATION GUIDE BEVMAX - MEDIA - HANG www.veii.com 8700 BROOKPARK ROAD 1.800.321.2311 CLEVELAND, OHIO 44129 VE1021164 - BEVMAX - MEDIA PANEL INSTALLATION MANUAL...
-
Page 2: Table Of Contents
STEP 2. INSTALL PAYMENT SYSTEMS ..............STEP 3. SECURE OEM DELIVERY PORT..............ATTACH HARNESS STEP 1. INSTALL VENTURE HARNESSING............& STEP 2. INSTALL OTHER HARNESSING ............... DIAGRAMS STEP 1. CONTROLLER PORTS................. STEP 2. VENTURE PORTS..................VE1021164 - BEVMAX - MEDIA PANEL INSTALLATION MANUAL www.veii.com... - Page 3 1/4 - 20 NYLON INSERT LOCKNUT VE1017454 5/16 ID 7/16 OD X 11/16 LG, BUSHING 10 VE1020754 1/4 - 20 X 2.50 CARR BOLT VE7358 1/4 - 20 , KEP LOCK NUT VE1021164 - BEVMAX - MEDIA PANEL INSTALLATION MANUAL www.veii.com...
- Page 4 POWER HARNESS FOR VENTURE BOARD VE7320 MDB Y CABLE VE5817 DEX HARNESS FOR UCB VE1020990 DOOR SWITCH HARNESS FOR BEVMAX VE1016368 UCB TEMPERATURE SENSOR EXTENSION VE1015669 TEMPERATURE CABLE WITH PROBE , 4FT VE1021164 - BEVMAX - MEDIA PANEL INSTALLATION MANUAL www.veii.com...
-
Page 5: Remove Door
2.C) Remove the (4) nuts securing the OEM Remove the upper housing to reveal the screws that are used to secure the delivery port to the door. Set aside for OEM delivery port to the door. future use. VE1021164 - BEVMAX - MEDIA PANEL INSTALLATION MANUAL www.veii.com... -
Page 6: Step 3. Remove Old Harnessing
Step 5: Mount New controller & New Door hinge 5. A) Install the new BevMax control 5.B) Mount the new top hinge (VE1017933) to the curve BevMax panel with Washer board (VE1015694) utilizing the (VE1017455), bushing (VE1017454), and 1/4-20 nut (VE6023M). -
Page 7: Install New Door
Step 2: Install Payment Systems 2.A) Secure the payment Systems that you removed earlier into their respective locations. This needs to be done prior to installing the OEM delivery port, as they sit behind it. VE1021164 - BEVMAX - MEDIA PANEL INSTALLATION MANUAL www.veii.com... -
Page 8: Step 3. Secure Oem Delivery Port
7/16” nut driver. Ensure the switch contact bracket (VE1019646) contact bracket (VE1019552) switch is shifted all the way back. which corresponds to the door switch in instead. step 3.F VE1021164 - BEVMAX - MEDIA PANEL INSTALLATION MANUAL www.veii.com... -
Page 9: Attach Harness
(VE1015669) and extension (VE1015669) around the EVAP coil to temperature cable with probe (VE1016368) into the side cabinet. inside the cabinet . (VE1015669). Connect extension to the control board as shown. VE1021164 - BEVMAX - MEDIA PANEL INSTALLATION MANUAL www.veii.com... - Page 10 Once install is complete you will need to specify the machine in use using the program UCB menu. *Proceed to the next two pages for UCB & Venture Harnessing Diagrams* VE1021164 - BEVMAX - MEDIA PANEL INSTALLATION MANUAL www.veii.com...
-
Page 11: Step 1. Controller Ports
& Y ENCODER PROGRAM BUTTON MOTOR MOTOR CONNECTIONS DISPLAY ESCROW BUTTON ESCROW MOTOR RELAY OUTPUTS BEVMAX KEYPAD TEMPERATURE NOT USED OEM DOOR SERIAL FOR SWITCH VENTURE SD CARD SLOT POWER SUPPLY VENTURE POWER VE1021164 - BEVMAX - MEDIA PANEL INSTALLATION MANUAL www.veii.com... -
Page 12: Step 2. Venture Ports
VENTURE PORT DIAGRAM USB 1 USB 2 POWER MOTION SENSOR DATA SPEAKER VE1021164 - BEVMAX - MEDIA PANEL INSTALLATION MANUAL www.veii.com... - Page 13 VE’s recommendations, and/or (iv) Products not serviced by VE authorized service personnel or which contain replacement parts not furnished by VE or its authorized service personnel. For additional information please review the Terms and Conditions of Sale. VE1021164 - BEVMAX - MEDIA PANEL INSTALLATION MANUAL www.veii.com...


Need help?
Do you have a question about the BEVMAX and is the answer not in the manual?
Questions and answers