Table of Contents
Advertisement
Quick Links
Advertisement
Table of Contents

Related Manuals for Vendors Exchange REVISION


Summary of Contents for Vendors Exchange REVISION
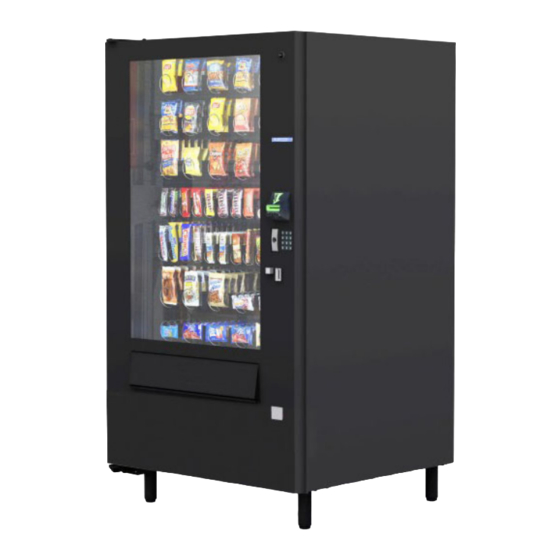
- Page 1 INSTALLATION GUIDE REVISION™ Door For National 157/167 - 158/168 REVISION Door 157/167 - BLACK REVISION Door 158/168 - PLATINUM 8700 BROOKPARK ROAD www.veii.com 1.800.321.2311 CLEVELAND, OHIO 44129 VE1015231 REV. C ©2021, VENDORS EXCHANGE® INTERNATIONAL, USA...
-
Page 2: Table Of Contents
INSTALL REVISION DOOR ......................14 ATTACH AND ROUTE TRAY HARNESSES ..................18 INSTALL VEND BUCKET ......................20 INSTALL DROP SENSOR ......................22 ADJUST THE DOOR ........................24 UCB™ CONNECTIONS – NATIONAL .................... 25 PRODUCT WARRANTY ....................... 28 REVISION™ Door for National 157/167 - 158/168... -
Page 3: Precautionary Statements
THIS STATEMENT IS USED TO ADDRESS PRACTICES NOT RELATED TO PHYSICAL INJURIES OR SITUATIONS THAT WILL NOT CAUSE HARM. PLEASE READ THESE INSTRUCTIONS THOROUGHLY BEFORE INSTALLING THE CURVE DOOR. IF YOU NEED ANY ASSISTANCE, CALL 1-800-321-2311 REVISION™ Door for National 157/167 - 158/168 To TOC Overview... -
Page 4: Tools Required
PART NUMBER DESCRIPTION VE1529A DOOR SWITCH VE4350N LOCK BAR VE6816R1 KEY PAD VE1015284 COIN CHUTE VE3852C COIN RETURN BUTTON ASSEMBLY SERVICE PARTS − MOTORS PART NUMBER DESCRIPTION NAT1577038 VEND MOTOR REVISION™ Door for National 157/167 - 158/168 Overview To TOC... -
Page 5: Service Parts Kit − Door
SCREW, SELF-TAP, #8-18 X 1/2 IN. VE5888A 110 V POWER HARNESS VE8387THK VE8387 AND VE8387A HARNESS VE8387 TRAY HARNESS VE8387A ADAPTER TRAY HARNESS VE1015729 POWER ADAPTER HARNESS VE105231 INSTALLATION MANUAL REVISION™ Door for National 157/167 - 158/168 To TOC Overview... -
Page 6: Service Parts − Spirals
GLASS, 42.81” X 21.56” X 0.19” TEMPERED, 4 WIDE MODEL SERVICE PARTS − UCB™ PART NUMBER DESCRIPTION VE5801 UNIVERSAL CONTROL BOARD VE5816 MDB HARNESS VE5802C DISPLAY HARNESS VED5866DF HARNESS BOARD FORCED VE6451R1 DISPLAY BOARD VE6820 DEX HARNESS Overview To TOC REVISION™ Door for National 157/167 - 158/168... -
Page 7: Service Parts − Labels
4 WAY TIE MOUNT VE4601K 6” BAR LOCK CABLE VE4679 1/8” CABLE CLAMP VE7207K LOCK NUT, KEPS, #8-32 VE9314 PLASTIC DIVERTER, BENT VE9300RTNAT REFLECTIVE TAPE 1-1/2 IN. WIDE X 6 IN. LONG REVISION™ Door for National 157/167 - 158/168 To TOC Overview... -
Page 8: Door Overviews - Oem
Inside Location of Bottom Inside Location of Card Door Hinge and Door Stop Validator Inside Location of Vend Bucket and Inside Locations of Coin Chute and Coin Harnesses Inside Location of Coin Mechanism To TOC REVISION™ Door for National 157/167 - 158/168... -
Page 9: Door Overviews - Revision
(A), Coin Funnel (B) and Cash Box (C) Inside Position where Coin Inside Position for Power Supply Board Inside Position of the Vend Buck- Mechanism and Electrical Panel. et (A) and the Bottom Hinge (B). REVISION™ Door for National 157/167 - 158/168 To TOC... -
Page 10: Remove Oem Door And Parts
Vend Bucket. Use 11/32” nut driver or socket mechanism. If they are MDB, set them aside for for two side screws. future installation. (Continued next page) Overview To TOC REVISION™ Door for National 157/167 - 158/168... - Page 11 REVISION door. Lift up and remove the door. CAUTION USE AN ADDITIONAL PERSON WHEN REMOVING THE DOOR TO PREVENT INJURY TO THE INSTALLER AND DAMAGE TO THE EQUIPMENT (Continued next page) REVISION™ Door for National 157/167 - 158/168 To TOC Overview...
- Page 12 Loosen nuts in (6) places from swing panel, then remove the swing panel from the cabinet. Screws (3) Screws (3) Loosen 1/4” screws and remove the bracket from right side of the cabinet. (Continued next page) Overview To TOC REVISION™ Door for National 157/167 - 158/168...
- Page 13 Save standoffs and hardware from both boards and set aside machine), remove the (4) screws that hold (2) OEM lock bar for future installation of power supply board. latches in place. REVISION™ Door for National 157/167 - 158/168 To TOC Overview...
-
Page 14: Install Revision Door
Align Washers Then, align (2) Flat Washers (VE1015506) over the hole on the bottom of the bracket. Then, insert the Bottom Hinge (VE3855) into the bottom bracket hole. (Continued next page) Overview To TOC REVISION™ Door for National 157/167 - 158/168... - Page 15 Open/Close Door Open and close door to verify fit. Remove gum and mint support bar from OEM door and hang on hinge side of the REVISION door. (Continued next page) REVISION™ Door for National 157/167 - 158/168 To TOC Overview...
- Page 16 Next, connect the power cable from the Cabinet Harness If note above is true, from inside cabinet, remove cover from (VE1015729) to power supply board as shown. main power supply (Continued next page) Overview To TOC REVISION™ Door for National 157/167 - 158/168...
- Page 17 Next, from inside the cabinet, re-install the cover to the main power supply (left, right images). Ensure that all wires are not pinched and are contained behind the main power supply cover. REVISION™ Door for National 157/167 - 158/168 To TOC Overview...
-
Page 18: Attach And Route Tray Harnesses
Then, connect (2) tray harnesses from main door harness to connect 24 V power supply to power supply board. existing door harnesses. Ensure that connector pins tabs are in the same direction on both plugs. Overview To TOC REVISION™ Door for National 157/167 - 158/168... - Page 19 Finally, replace the screws set aside from before on the top and bottom of the panel THIS SECTION IS COMPLETE, MOVE TO INSTALL VEND BUCKET ON THE NEXT SECTION REVISION™ Door for National 157/167 - 158/168 To TOC Overview...
-
Page 20: Install Vend Bucket
Door View 168 only First, if using a National 168 Vend Bucket, loosen the filler mount attached to the hinge side of the REVISION door, the 168 bucket has a wider profile and does not require a filler mount. NOTICE... - Page 21 (see image) are oriented in the same direction as shown. Use cable tie to secure harness- es together. THIS SECTION IS COMPLETE, THE MOVE ON TO INSTALLING DROP SENSOR REVISION™ Door for National 157/167 - 158/168 To TOC Overview...
-
Page 22: Install Drop Sensor
Next, using a 1/4” nut driver, loosen Top Plate (VE4310P) by Then, connect 4-Pin harness into 4-prong plug on sensor removing nuts from top of sensor bracket and lifting off plate. board (Continued next page) Overview To TOC REVISION™ Door for National 157/167 - 158/168... - Page 23 LED illuminates. Next, place magnet in iden- tified location, then move the bucket flap until it touches the magnet and release the bucket flap. THIS SECTION IS COMPLETE, MOVE ON TO ADJUSTING THE DOOR REVISION™ Door for National 157/167 - 158/168 To TOC Overview...
-
Page 24: Adjust The Door
Lift and support the door in the center of the cabinet. Tighten the inner door bolt on the top and bottom hinges. Carefully open the REVISION Door and tighten the outer door bolt on the top and bottom of the door. Tighten the hex screws and door stop arm. -
Page 25: Ucb™ Connections - National
INSTALLATION GUIDE UCB™ CONNECTIONS – NATIONAL UCB CONNECTIONS Motors Motor Motion Sensor Gum and Mint Motors VE Supplied LED Display/Keypad VE Supplied Drop Sensor 24V DC Power 9 10 REVISION™ Door for National 157/167 - 158/168 To TOC Overview... - Page 26 INSTALLATION GUIDE NOTES Overview To TOC REVISION™ Door for National 157/167 - 158/168...
- Page 27 INSTALLATION GUIDE NOTES REVISION™ Door for National 157/167 - 158/168 To TOC Overview...
-
Page 28: Product Warranty
Products not serviced by VE authorized service personnel or which contain replacement parts not furnished by VE or its authorized service personnel. For additional information please review the Terms and Conditions of Sale. To TOC Overview REVISION™ Door for National 157/167 - 158/168...
Need help?
Do you have a question about the REVISION and is the answer not in the manual?
Questions and answers