Table of Contents
Advertisement
Advertisement
Table of Contents

Related Manuals for Getinge Lucea 50


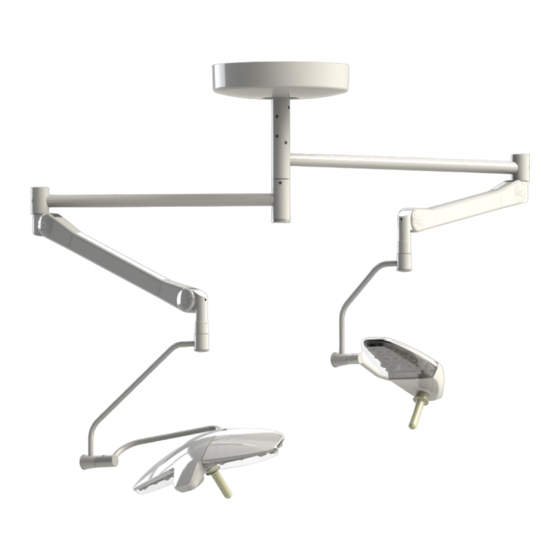
Summary of Contents for Getinge Lucea 50
- Page 1 Maintenance Manual Lucea 50-100 01740 EN 01 2021-08-02...
- Page 2 Copyright All rights reserved. This document may not be copied, adapted or translated without prior written permission, except as permitted under copyright law. © Copyright 2021 Maquet SAS Subject to technical changes. The illustrations and technical specifications provided in this manual may, on account of future product devel- opments, differ slightly from the actual product supplied.
-
Page 3: Table Of Contents
Contents Contents Introduction ......................Preface ..............................Other documents relating to this product....................Information about this document ......................1.3.1 Symbols used in this manual ....................1.3.1.1 Cross-references....................1.3.1.2 Actions and results ....................1.3.1.3 Menus and buttons....................1.3.2 Definitions ..........................1.3.2.1 Hazard levels....................... 1.3.2.2 Indications ...................... - Page 4 Contents Electrical inspection ..........................4.5.1 Functional tests........................26 4.5.1.1 Battery capacity and charge times ..............27 4.5.2 Visual inspections ........................30 Hydraulic inspections..........................Optical inspections ..........................4.7.1 Visual inspections ........................31 Electrical safety tests ..........................Recording the inspection ..................35 Lucea 50_100 4 / 44 01740 EN 01...
-
Page 5: Introduction
Your hospital has chosen Getinge's innovative medical technology. We thank you for the confid- ence you have shown in us. Getinge is one of the world’s leading suppliers of medical equipment for operating rooms, hybrid rooms, induction rooms, intensive care units and patient transport. Getinge always puts the needs of healthcare staff and patients first during the development of its products. -
Page 6: Definitions
Introduction Changes to the document compared to the previous version 1.3.2 Definitions 1.3.2.1 Hazard levels The text in safety instructions describes types of risk and how to avoid them. Safety instructions are classified into the following three levels: Symbol Hazard level Meaning DANGER! Indicates a direct and immediate risk that may be... -
Page 7: Safety-Related Information
Anyone not trained in installation, maintenance or decommissioning opera- tions is exposed to the risk of injury or electric shock. Installation, maintenance and decommissioning of the device or components of the device must be performed by a Getinge technician or a Getinge-trained service technician. AR NI NG... -
Page 8: Product Integrity
Safety-related information Safety instructions 2.1.2 Product integrity AR NI NG Risk of electric shock or injury The use of screws or spare parts other than those supplied by the manufac- turer may damage the device. Use only screws and spare parts supplied by the manufacturer. AR NI NG Risk of infection Lightweight parts from the device may fall onto the surgical site. -
Page 9: Technical Specifications
̶ Radiant energy 3.9 mW/m²/lx ± 0.4 UV illumination ≤ 0.7 W/m² ̶ FSP system ̶ Tab. 3: Table of LUCEA 50-100 optical data Specifications LUCEA 50 LUCEA 100 Tolerance With one mask 42 % ±10 With two masks 58 % 49 % ±10... -
Page 10: Electrical Characteristics
Technical specifications Electrical characteristics Electrical characteristics Specifications Values Supply voltage 100-240 V AC/50-60 Hz Power consumption, LUCEA 50 configuration 60 VA Power consumption, LUCEA 100 configuration 120 VA Power consumption, DUO L50/100 180 VA Power consumption, DUO L50 120 VA Power consumption, DUO L100 240 VA Power consumption, L50 Mobile configuration, without batteries 60 VA Power consumption, L100 Mobile configuration, without batteries... -
Page 11: Mechanical Specifications
Technical specifications Mechanical specifications Mechanical specifications 3.3.1 Light Specifications Values Weight, LUCEA 50 mobile without batteries 11 kg Weight, LUCEA 100 mobile without batteries 24 kg Weight, LUCEA 50 mobile with batteries 22 kg Weight, LUCEA 100 mobile with batteries 63 kg Length of mains supply cable 2/3 m Vertical reach of spring arm, LCA 50 Mobile and LCA 50 Mobile B +60°... -
Page 12: Electrical Connections: Installation Diagram
Technical specifications Diagrams 3.5.1 Electrical connections: Installation diagram Ceiling-mounted or wall-mounted power supply without backup Power supply output Option A: power supply ceiling-mounted unit Option B: power supply wall-mounted unit Fig. 1: Power supply without backup Ceiling-mounted or wall-mounted power supply with customer backup switchover Power supply output Customer backup input Equipment... - Page 13 Technical specifications Diagrams Power supply with Getinge backup CAT 5 Equipment room Remote backup unit (optional) RB: Remote backup unit Fig. 3: Power supply with Getinge backup Link between backup switchover and remote backup unit: CAT 5 (maximum length 80 m) Lucea 50_100...
-
Page 14: Maintenance And Inspection Procedures
Maintenance and inspection procedures Tools required for maintenance Maintenance and inspection procedures AU TION Risk of equipment damage If adjustments are made incorrectly or not at all, the lighthead or installed equipment may drift. Make all adjustments (balance, stop and brakes) during installation and then after all maintenance operations. -
Page 15: Replacing The Batteries
Risk of burns If unsuitable batteries are used, they may explode due to the emission of gases or liquids. Always use batteries supplied by Getinge during installation and when repla- cing defective batteries. AR NI NG Risk of electric shock or injury The use of screws or spare parts other than those supplied by the manufac- turer may damage the device. - Page 16 Maintenance and inspection procedures Periodic replacements • Remove power from the backup unit. • Open the front panel by removing the four screws. Fig. 4: Opening the battery pack • Disconnect the batteries. • Remove the batteries from the backup unit. Fig. 5: Removing the batteries •...
-
Page 17: Adjustments
Maintenance and inspection procedures Adjustments Adjustments 4.3.1 Adjusting the brake on the lighthead (Lucea 50 example) • Pull out the silicone cap. Fig. 7: Removing the cap • Place the silicone cap to one side to keep it out of the way. Fig. 8: Placing the cap out of the way •... -
Page 18: Adjusting The Brake On The Fork (Lucea 100 Example)
Maintenance and inspection procedures Adjustments • Insert the flat-bladed screwdriver. • Tighten the screw to restrain the fork more firmly or loosen it to allow more move- ment. Fig. 10: Insert the brake screw 4.3.2 Adjusting the brake on the fork (Lucea 100 example) •... -
Page 19: Adjusting The Spring Arm For The Ceiling And Wall-Mounted Light, Sf Version
Maintenance and inspection procedures Adjustments 4.3.4 Adjusting the spring arm for the ceiling and wall-mounted light, SF version • Take the cap off the spring arm • Adjust the adjustment nut – If the spring arm rises by itself, loosen the locknut –... -
Page 20: Mechanical Inspections
Maintenance and inspection procedures Mechanical inspections Adjusting the top stop • Tighten to lower the stop. • Loosen to raise the stop. 5 mm Fig. 15: Top stop adjustment Mechanical inspections 4.4.1 Visual inspections • Check the entire surgical light (spring arm, complete suspension with ceiling cover) for signs of damage Fig. 16:... - Page 21 Maintenance and inspection procedures Mechanical inspections • Check that the cover is firmly in place. Fig. 18: Fitting of cover • As a preventive measure, every six years, replace the screws securing the suspen- sion tube to the anchor plate, as well as the screws for the suspension end caps.
- Page 22 Maintenance and inspection procedures Mechanical inspections • Check for any loose covers and caps. Fig. 21: Checking the caps Stability and drift of the system 1. Operate the device, making several move- ments in order to swivel the extension arms, the spring arms and the lightheads. Ø...
- Page 23 Maintenance and inspection procedures Mechanical inspections • Check that the circlip is correctly in place. Fig. 24: Checking the circlip • Make sure the snap ring is in place. Fig. 25: Checking the snap ring • Lower the retaining ring onto the snap ring.
- Page 24 Maintenance and inspection procedures Mechanical inspections Integrity of the lightheads, brake screw cap and mounting screws 1. Check the lightheads for chipped paint, im- pact marks, any other damage, loose cov- ers, etc. 2. Check that the cap protecting the brake screw is properly seated.
-
Page 25: Checks
Maintenance and inspection procedures Electrical inspection 4.4.2 Checks Lubricating the suspension under the slip ring 1. Remove the mounting screw. 2. Raise the screw cover. 3. Spray lubricating grease at the location of the screw cover. Fig. 30: Lubricating the suspension Lubricating the spring arm under the slip ring 1. -
Page 26: Functional Tests
Maintenance and inspection procedures Electrical inspection 4.5.1 Functional tests Turning the lighthead on and off 1. Press the On/Off button to turn on the lighthead. Ø All of the LEDS turn on, at the last illu- mination level used when the light was turned off. -
Page 27: Battery Capacity And Charge Times
Maintenance and inspection procedures Electrical inspection 4.5.1.1 Battery capacity and charge times Battery control keypad Fig. 35: Example of a double remote control unit Meaning of operating LEDs for a customer backup Symbol Status Meaning Mains symbol displayed in Operation on mains power green Mains symbol displayed in yel- Switchover to external backup... - Page 28 Maintenance and inspection procedures Electrical inspection Five LEDs lit green External backup at good level Six LEDs lit green External backup at excellent level OTICE The level LEDs turn on (or off) depending on the voltage of the batteries. Backup switchover test •...
- Page 29 Maintenance and inspection procedures Electrical inspection • If the external backup is no longer work- ing, the six LEDs of the bar graph flash red , indicating that the external backup cannot supply power for three hours. • Press the battery life test button for 2 seconds.
-
Page 30: Visual Inspections
Maintenance and inspection procedures Hydraulic inspections Check Mains LED Battery LED LEDs 3 to 8 Meaning After 1 hour Yellow One of LEDs Operation on bat- (LCA50) or 4 3 to 8 is lit (bat- teries hours (LCA100) tery charge level) Connect the Green Scrolling LEDs Batteries char- power outlet... -
Page 31: Optical Inspections
Maintenance and inspection procedures Optical inspections Optical inspections 4.7.1 Visual inspections OTICE Protective goggles [Minimum UV Class 2 (EN 170) – Optical Class 1 – Orange shade] are recommended during installation and maintenance operations on surgical lights. Adjusting the illumination Operation of the LEDs 1. -
Page 32: Electrical Safety Tests
Maintenance and inspection procedures Electrical safety tests Electrical safety tests Ceiling-mounted version Fig. 42: Safety tests, ceiling-mounted version Safety test: • For a single fork lighthead, perform a safety test between point and point • For a single fork lighthead, perform a safety test between point and point The earth resistance should be less than or equal to 300 mΩ. - Page 33 Maintenance and inspection procedures Electrical safety tests Wall-mounted version Fig. 43: Safety tests, wall-mounted version Safety test: • Test the continuity between point and point The earth resistance should be less than or equal to 300 mΩ. Continuity test: • Test the continuity between point and point ...
- Page 34 Maintenance and inspection procedures Electrical safety tests Mobile version Fig. 44: Safety tests, mobile version Safety test: • Test the continuity between point and point The earth resistance should be less than or equal to 300 mΩ. Continuity test: • Test the continuity between point and point ...
-
Page 35: Recording The Inspection
Recording the inspection Recording the inspection See also 2 SW Service Protocol PM OR Lights LUCEA 50 100-A [} 36] Lucea 50_100 35 / 44 01740 EN 01... - Page 36 Recording the inspection SW Service Protocol PM OR Lights LUCEA 50 100-A SW Service Protocol PM OR Lights LUCEA 50 100-A Lucea 50_100 36 / 44 01740 EN 01...
- Page 37 Lead batteries discharge cycles or every 3 years Please refer to the technical manual for detailed instructions and the annexes. Document name: SW Service Protocol PM OR Lights LUCEA 50 100 www.getinge.com Lucea 50_100 37 / 44 01740 EN 01...
- Page 38 Check the hold of the spring arm covers and metal strips (Only double fork version) Check the vertical stop of the spring arms (Only double fork version) Document name: SW Service Protocol PM OR Lights LUCEA 50 100 www.getinge.com Lucea 50_100...
- Page 39 (Inflated, oxidized terminal, …) Check batteries’ voltage Check the tightening, the stability and the brake efficiency of castors (Only mobile version) Document name: SW Service Protocol PM OR Lights LUCEA 50 100 www.getinge.com Lucea 50_100 39 / 44 01740 EN 01...
- Page 40 Wireless remote control operates correctly Camera operates correctly Switch over to battery mode and back to mains Batteries charge indicator brights when light is off Document name: SW Service Protocol PM OR Lights LUCEA 50 100 www.getinge.com Lucea 50_100 40 / 44...
- Page 41 Device no longer safe. Taking out of service is recommended. Comments 13. Processed by Name / Title Date Signature YYYY Document name: SW Service Protocol PM OR Lights LUCEA 50 100 www.getinge.com Lucea 50_100 41 / 44 01740 EN 01...
- Page 42 Recording the inspection SW Service Protocol PM OR Lights LUCEA 50 100-A Lucea 50_100 42 / 44 01740 EN 01...
- Page 43 Recording the inspection SW Service Protocol PM OR Lights LUCEA 50 100-A SAFETY PARTS TO REPLACED EVERY 6 YEARS SAFETY SCREWS : Maquet recommends a preventive safety screw replacement every 6 years. TUBES ADAPTERS BUSHINGS TUB 60 ADPT 120 TO 60 BUSHING OF THE MAIN ARM OF SUSP.
- Page 44 *LUCEA LED, FSP, SATELITE, MAQUET, GETINGE and GETINGE GROUP are trade- marks or registered trademarks of Getinge AB, its divisions or its subsidiaries. **ACROBAT and ONDASPACE are trademarks or registered trademarks of Ondal Holding GmbH, its divisions or its subsidiaries. ...
Need help?
Do you have a question about the Lucea 50 and is the answer not in the manual?
Questions and answers