Salda RIS 700 V EKO 3.0 Mounting And Installation Instruction
Source: salda.lt/en, vetter-lufttechnik.de
Table of Contents
Advertisement
Quick Links
Advertisement
Table of Contents

Related Manuals for Salda RIS 700 V EKO 3.0


Summary of Contents for Salda RIS 700 V EKO 3.0
- Page 1 RIS 700 V EKO 3.0 MOUNTING AND INSTALLATION INSTRUCTION...
-
Page 2: Table Of Contents
8.1.7. WATER HEATER CIRCULATION PUMP AND VALVE ACTUATOR 8.1.8. RECOMMENDED SCHEME FOR CONNECTION OF INTERNAL AND EXTERNAL COMPONENTS 9. POSSIBLE FAULTS AND TROUBLESHOOTING 10. ECODESIGN DATA TABLE 11. DECLARATION OF CONFIMITY 12. WARRANTY 12.1. LIMITED WARRANTY COUPON | EN RIS 700 V EKO 3.0 v2020.1... -
Page 3: Symbols And Marking
Figure. 2.3. Technical label place and air duct indication (right ver- Figure. 2.4. Technical label place and air duct indication (left version) sion) NOTE. Ducts are not the part of the unit. RIS 700 V EKO 3.0 v2020.1 EN |... -
Page 4: Safety Instructions And Precautions
• manually check fans to make sure they are not stuck or blocked; • if rotary heat exchanger is installed in the device, make sure that it is not stuck or blocked; • check the earthling; • | EN RIS 700 V EKO 3.0 v2020.1... -
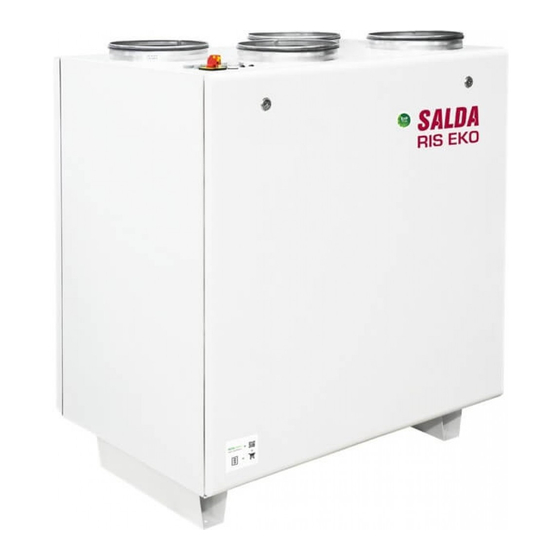
Page 5: Information About The Product
4. INFORMATION ABOUT THE PRODUCT 4.1. DESCRIPTION Not suitable for operation in pools, saunas and other similar premises. 4.2. DIMENSIONS AND WEIGHT RIS 700 V EKO 3.0 v2020.1 EN |... -
Page 6: Technical Data
FMK 600x225x170/8 ePM10-65 FMK 600x225x170/8 ePM10-65 [mm] FMK 600x225x170/8 ePM10-65 FMK 600x225x170/8 ePM10-65 Device protection class IP-34 IP-34 According to EN 13141-7. Not suitable for installation in living rooms: additional noise insulation required. | EN RIS 700 V EKO 3.0 v2020.1... -
Page 7: Operating Conditions
STANDART PACKAGE OF COMPONENTS RIS EKO 3.0 700VE 700VW Key 291103 Syphon D250 202.085 4.6. DESCRIPTION OF COMPONENTS 1 - Plate heat exchanger; 2 - Supply fan; 3 - Exhaust fan; 4 - By-pass damper RIS 700 V EKO 3.0 v2020.1 EN |... -
Page 8: Installation
• Before commencing the installation of the unit, please check if all ordered equipment have been delivered. Any variation from the ordered equip- ment list must be reported to the product supplier. | EN RIS 700 V EKO 3.0 v2020.1... -
Page 9: Piping And Instrumentation Diagram
5.4. PIPING AND INSTRUMENTATION DIAGRAM Figure. 5.1. * KE1 - only in electrical version; * KV1 - used in water version; ** Possible to control. RIS 700 V EKO 3.0 v2020.1 EN |... -
Page 10: Mounting
• Before connecting to the air duct system, the connection openings of ventilation unit should be closed. • • • • • • • out maintenance, servicing and/or repairs signs may occur. Figure 5.5.1. | EN RIS 700 V EKO 3.0 v2020.1... -
Page 11: Unit Placing And Mounting Positioning Requirements
• The installation should be performed having positioned the units in horizontal direction only. • Install the supporting legs. • The units are assembled from separate sections. • • 5.7.1. DRAINAGE 5.8. CONNECTION OF THE AIR DUCT • • RIS 700 V EKO 3.0 v2020.1 EN |... -
Page 12: Connection Of The Unit To Electric Network
• all electrical equipment protection components are properly connected (if they are additionally used), • • earthling and protection systems are properly installed, • condition of all seals and sealing surfaces is proper. | EN RIS 700 V EKO 3.0 v2020.1... -
Page 13: Maintenance
All the contactors in the product or in its accessories must be checked. Check the condensate discharge Condensate trap and discharge Clean assembly ter runs from the bath properly. 6.3. COVER OPENING RIS 700 V EKO 3.0 v2020.1 EN |... -
Page 14: Filters Maintenance
6.4. FILTERS MAINTENANCE direction. tion manual or on our website www.salda.lt 6.5. FANS MAINTENANCE • • The fan should be inspected and cleaned at least once per year. • • Proceed to maintenance and repair after any fan rotation is stopped. -
Page 15: Heater Maintenance
CONTROL BOARD MAINTENANCE • • Open the cover of the product. • • Remove the control box cover. • • Remove control board. • and connector to corresponding connection terminal and connector. RIS 700 V EKO 3.0 v2020.1 EN |... -
Page 16: Control
BMS over Modbus TCP/IP FLEX BMS over BACnet TCP/IP 7.2. DEVICE FUNCTIONS WEB application and SALDA AIR mobile application. Refer to the instruction manual of the existing control device for unit control instructions. | EN RIS 700 V EKO 3.0 v2020.1... -
Page 17: Accessories
Remote control panel Stouch ACC000272 ACC000272 ACC004460 ACC004460 Router TP-Link TL-WR802N ACC000273 ACC000273 Sensor C02 duct S-KCO2 ACC000277 ACC000277 Sensor CO2 room S-RCO2-F2 ACC000278 ACC000278 External sensors Pressure transmitter S-1141 ACC004375 ACC004375 RIS 700 V EKO 3.0 v2020.1 EN |... -
Page 18: Connection Of Accessories
FIT000205 MUTE 250X600 FIT000293 FIT000293 Silencers MUTE 250X900 FIT000294 FIT000294 Filter sets Filter set RIS 700 V EKO 3.0 (ePM10-65-2pcs.) ACC004877 ACC004877 8.1. CONNECTION OF ACCESSORIES 8.1.1. FIRE PROTECTION SIGNAL INPUT (FIRE PROTECTION INPUT (NC)) 8.1.2. EXTERNAL CO /PRESSURE SENSORS | EN RIS 700 V EKO 3.0 v2020.1... -
Page 19: Co2 Concentration According To Pettenkofer Limit
If the duct CO2 transmitter is used, it must be installed in the extract air duct. To install duct transmitters, hole drilling tools are required . 8.1.4. CO2 CONCENTRATION ACCORDING TO PETTENKOFER LIMIT 8.1.5. CONNECTION OF SUPPLY AND EXTRACT AIR DAMPERS ators. RIS 700 V EKO 3.0 v2020.1 EN |... -
Page 20: Connection Of Remote Control Panel Or Modbus
M2 – Spring-return damper actuator. M3 – Open/Close damper actuator. Upon activation of outputs X16:17, X16:20, the dampers open, Upon is deactivated, the supply air damper closes. 8.1.6. CONNECTION OF REMOTE CONTROL PANEL OR MODBUS 8.1.7. WATER HEATER CIRCULATION PUMP AND VALVE ACTUATOR 3.0 units). Wiring diagram | EN RIS 700 V EKO 3.0 v2020.1... - Page 21 RIS 700 V EKO 3.0 v2020.1 EN |...
-
Page 22: Recommended Scheme For Connection Of Internal And External Components
8.1.8. RECOMMENDED SCHEME FOR CONNECTION OF INTERNAL AND EXTERNAL COMPONENTS Figure 8.1.8.1. | EN RIS 700 V EKO 3.0 v2020.1... - Page 23 Figure 8.1.8.2. RIS 700 V EKO 3.0 v2020.1 EN |...
-
Page 24: Possible Faults And Troubleshooting
(if installed) Manual safety device is activated MUST be contacted to identify and eliminate the failure . Filter replacement needed on the remote control panel broken, or its pressure is set improperly. | EN RIS 700 V EKO 3.0 v2020.1... -
Page 25: Ecodesign Data Table
[ dB(A) ] /s ] 0,146 [ Pa ] [ W/(m /h) ] 0,25 Declared maximum internal leakage rates Declared maximum external leakage rates Timer ErP Compliance 2018 Internet address for disassembly instructions RIS 700 V EKO 3.0 v2020.1 EN |... -
Page 26: Declaration Of Confimity
LST EN 61000-6-3:2008 - Electromagnetic compatibility (EMC) -- Part 6-3: Generic standards - Emission standard for residential, commercial and light-industrial environments. Quality: ISO 9001:2015. Date 2020-10-23 Giedrius Taujenis Director product development | EN RIS 700 V EKO 3.0 v2020.1... -
Page 27: Warranty
In order to avoid any misunderstandings, please read the instructions for installation and operation of the product as well as other technical docu- The manufacturer reserves the right to refuse provision of free warranty servicing in cases when the warranty conditions listed below are disre- garded. RIS 700 V EKO 3.0 v2020.1 EN |... - Page 28 Look at the product label. ** - At least. NOTE. The customer shall be required to complete the Product Maintenance Table. MANUALS IN OTHER LANGUAGES https://select.salda.lt/file/ https://select.salda.lt/file/ https://select.salda.lt/file/ https://select.salda.lt/file/ https://select.salda.lt/file/ https://select.salda.lt/file/ https://select.salda.lt/file/ MAN000321 Ragainės g. 100 +370 41 540 415 Šiauliai LT-78109, LITHUANIA...
Need help?
Do you have a question about the RIS 700 V EKO 3.0 and is the answer not in the manual?
Questions and answers