Table of Contents
Advertisement
Quick Links
Before using this product and document, please read the following document carefully.
Also, please keep this document to the place where you can see any time.
-
Safety Precautions and Regulatory Notices for GT Series
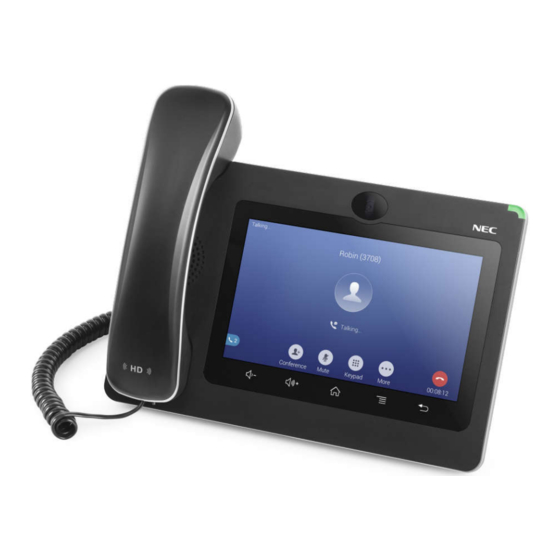
Standard SIP Video Terminal
IP Phone GT890
User Guide
GVT-076621-001
Issue 1.1
February, 2019
Advertisement
Table of Contents

Related Manuals for NEC GT890


Summary of Contents for NEC GT890
- Page 1 Standard SIP Video Terminal IP Phone GT890 User Guide Before using this product and document, please read the following document carefully. Also, please keep this document to the place where you can see any time. Safety Precautions and Regulatory Notices for GT Series GVT-076621-001 Issue 1.1...
- Page 2 Caution: Changes or modifications to this product not expressly approved by NEC, or operation of this product in any way other than as detailed by this guide, could void your manufacturer warranty. Caution: User ID and password are important information. Be careful when handling them. Default password is given for initial maintenance and operational settings.
- Page 3 FCC Caution: FCC Statement This equipment has been tested and found to comply with the limits for a Class B digital device, pursuant to part 15 of the FCC Rules. These limits are designed to provide reasonable protection against harmful interference in a residential installation.
- Page 4 ETSI EN 300 328 V2.1.1 (2016-11); EN 301 893 V2.1.1 (2017-05) ETSI EN 301 489-1 V2.1.1 (2017-02); ETSI EN 301 489-17 V3.1.1 (2017-02) EN 60950-1:2006+A11:2009+A1:2010+A12:2011+A2:2013 EN 62311: 2008; EN62479: 2010 Manufacturer: NEC Corporation 7-1, Shiba 5-chome, Minato-ku, Tokyo 108-8001, Japan EUT Feature Tx/Rx Frequency 2402~2480 MHz...
- Page 5 20 cm between the radiator and your body. CE Authentication Hereby, NEC Corporation declares that the radio equipment ITX-3370 is in compliance with Directive 2014/53/EU. The full text of the EU declaration of conformity is available at the following internet address:...
- Page 6 THE TERMS AND CONDITIONS OF SOFTWARE The software embedded in GT890 contains certain third party open source software components which are provided under the terms and conditions designated at https://mind.bcom.nec.co.jp/customernet/soft-license/GT890_OSS.html...
-
Page 7: Table Of Contents
Table of Contents Document Purpose ..................... 10 Product Overview ......................11 Model Line Up of ITX-3370 Series ....................11 Feature Highlights .......................... 11 Supporting Communication Servers ....................11 ITX-3370 Technical Specifications....................12 Getting Started ......................14 Equipment Packaging ........................14 Description of the ITX-3370 ...................... - Page 8 Account Status ........................38 Configure SIP Account ......................39 Dial a Number Directly ........................40 Redial ............................. 41 Dial a Number via Contact ......................41 Dial a Number via Call History ......................41 Answer a Call ..........................43 Single Incoming Call ........................ 43 Multiple Calls/Call Waiting ......................
- Page 9 Add Contacts to Blacklist ......................70 Add Group ..........................70 Add contacts to Group ......................71 Contacts Storage Status ......................71 Harassment Interception .................... 73 Blocked Contacts..........................73 Block History ..........................73 Delete Block History ........................ 74 Edit Blacklist ..........................74 Intercept anonymous calls ......................
- Page 10 Turn On/Off Bluetooth ......................97 Change Bluetooth Device Name ....................98 Pair with a Bluetooth Device ....................98 Unpair a Bluetooth Device ....................... 99 Bluetooth Settings Shortcut ...................... 99 EHS Headset..........................100 USB Headset..........................101 USB ............................. 103 SD Card ............................104 Compatibility Headset List ......................
-
Page 11: Document Purpose
Document Purpose This document describes how to configure the ITX-3370 via phone's LCD menu and Web GUI menu to fully manipulate phone's features. To learn advanced functions of ITX-3370, please refer to "IP Phone GT890 Administration Guide". This guide covers following topics: ... -
Page 12: Product Overview
Product Overview Model Line Up of GT890 Series Table 1: GT890 Model Line Up Model Name Description ITX-3370-1(BK)TEL Standard SIP Video Terminal (Black) for North America ITX-3370-1W(BK)TEL Standard SIP Video Terminal (Black) for Global Feature Highlights The following tables contain the major features of the ITX-3370. -
Page 13: Itx-3370 Technical Specifications
ITX-3370 Technical Specifications The following table resumes all the technical specifications including the protocols / standards supported, voice codecs, telephony features, languages and upgrade/provisioning settings for the phone ITX-3370. Table 4: ITX-3370 Technical Specifications SIP RFC3261, TCP/IP/UDP, RTP/RTCP, HTTP/HTTPS, ARP, ICMP, DNS (A Protocols/Standards record, SRV, NAPTR), DHCP, PPPoE, SSH, TFTP, NTP, STUN, LLDP-MED, ®... - Page 14 User and administrator level passwords, MD5 and MD5-sess based authentication, Security 256-bit AES encrypted configuration file, TLS, SRTP, HTTPS, 802.1X media access control. English, German, Italian, French, Spanish, Portuguese, Russian, Croatian, Multi- System simplified and traditional Chinese, Korean, Japanese, Arabic, Dutch, Norwegian, language Danish, Swedish, Greek, Turkish, Romanian, Polish, Catalan, Hebrew, Ukrainian.
-
Page 15: Getting Started
Getting Started This chapter provides basic installation instructions including the list of the packaging contents and also information for obtaining the best performance with the ITX-3370. Equipment Packaging Table 5: Equipment Packaging ITX-3370 1x Main Case. 1x Handset. ... -
Page 16: Description Of The Itx-3370
Description of the ITX-3370 Front View Figure 2: ITX-3370 Front View Table 6: ITX-3370 Front View Item Name Description Mega pixel front camera. The angle can be adjusted, and the Front Camera camera can be blocked by scrolling up/down the wheel on the back of the camera. -
Page 17: Back View
Back View Figure 3: ITX-3370 Back View Table 7: ITX-3370 Back View Item Name Description Camera Adjusting Wheel Scroll up/down to adjust the camera angle. Phone Stand (built-in) Adjust the phone stand angle to place the phone on the desk. Handset Port RJ9 handset connector port. -
Page 18: Side View
Side View Figure 4: ITX-3370 Side View Table 8: ITX-3370 Side View Item Name Description HDMI Port Connect display device to the HDMI port via HDMI cable. SD Card Port Connect SD storage device to the SD Card Slot. 3.5mm Headset Port Connect 3.5mm headset. -
Page 19: Connecting And Setting Up The Itx-3370
Connecting and Setting Up the ITX-3370 The ITX-3370 can be installed using the built-in stand or attached on the wall using the slots for wall mounting. Figure 5: Built in Stand and Mounting Slots on ITX-3370 Figure 6: ITX-3370 Back / Side View Using the Phone Stand The ITX-3370 has a built-in phone stand. - Page 20 2. Pull out the tab from the handset cradle (see figure below); 3. Rotate the tab and plug it back into the slot with the extension up to hold the handset while the phone is mounted on the wall. Figure 7: Tab on the Handset Cradle 4.
-
Page 21: Getting To Know Itx-3370
Getting to Know ITX-3370 Use the Touchscreen When the phone boots up in HOME screen, the LCD will display as below. A registered account is shown in the following figure and users might need register their own account to have the account status displayed. The Status Bar shows time, network connectivity, signal strength, notification information etc... - Page 22 To fully manipulate the ITX-3370 capacitive touch screen, use your fingers to operate the following on the ITX-3370 icons, buttons, menu items, onscreen keyboard etc. Figure 11: ITX-3370 Finger Gestures on the Touch Screen Slightly touch the screen with fingertip to initiate menu, options or applications. For example, to select items on the screen (e.g., setting options, apps etc.);...
-
Page 23: Use The Desktop
Zoom In/Zoom Out Place two fingers on the screen, then pinch them together (zoom out) or spread them apart (zoom in). Double Tap Quickly touch the screen twice with fingertip to switch between default display and zoomed-in display. This is usually used when viewing photos or web pages. -
Page 24: Add Widget To Desktop
Add Widget to Desktop The ITX-3370 provides widgets like account bar, clock etc. Users could conveniently add those widgets to the desktop as preferred. To add a widget: 1. Tap the Menu key or long press on an empty space on the idle screen and select "Widgets". 2. - Page 25 Figure 14: Open Clock Widget Certain widgets such as Clock can be resized on the desktop. To resize a widget, touch and press the widget for about 2 seconds. Then lift your finger from the screen. This will bring up the white frame as shown in .
-
Page 26: Set Wallpapers
Figure 16: Move Clock Widget Note: Deleting an application icon will open a pop up window asking the permission to uninstall the application from the screen. Tap OK to uninstall or tap Cancel. Set Wallpapers On the ITX-3370 screen, tap and hold on an empty spot presto show the menu key and select "Wallpaper"... -
Page 27: Manage Running Applications
Figure 17: ITX-3370 Choose Wallpaper Manage Running Applications On the ITX-3370 desktop, press an empty spot for about 2 seconds then select “Management” or select "Management" after pressing Menu button Figure 18: ITX-3370 Recent Applications Users could use the thread manager to do the following: Slide the running thread to the left or right to stop the application. -
Page 28: Idle Screen
Idle Screen Switch Idle Screens The ITX-3370 supports multiple idle screens by sliding the screen horizontally. On the ITX-3370 screen, swipe left or right using your finger to switch between different idle screens. Figure 19: ITX-3370 Switch Idle Screens Set Up Idle Screen ... - Page 29 Figure 20: Set up Home Idle Screen Add/Delete idle screen As shown in , this section shows the available desktop screens. [Figure 20: Set up Home Idle Screen] Users could add or delete idle screen. Add idle screen. Tap on to add a new idle screen.
-
Page 30: Use The Status Bar
screen are removed first. Otherwise, the icon won't show for the idle screen. Figure 22: Delete an Idle Screen Use the Status Bar The status bar on the top of the ITX-3370 screen provides visual notifications for the system settings and status, as well as quick access for important system settings. - Page 31 Figure 24: Status Bar - More Options The running process and notifications will show up in the list. For example, the following figures indicate that there is a notification for Wi-Fi has no Internet access. Figure 25: ITX-3370 Top Status Bar – Notification Tap on the notification message to view the details.
- Page 32 Figure 26: ITX-3370 Top status Bar - Get more information For example, you can see the available Wi-Fi Networks. Wi-Fi point 1 Wi-Fi point 2 Wi-Fi point 3 Wi-Fi point 4 Figure 27: ITX-3370 Top status Bar – Wi-Fi...
-
Page 33: Notifications In Status Bar
Notifications in Status Bar The following table describes the icons used on the status bar for notification purpose. Table 9: ITX-3307 Status Bar Notification Icons Network connected via Ethernet cable. Trying to connect to the network via Ethernet cable. Network disconnected via Ethernet cable. Handset is off hook. - Page 34 Downloading files via Bluetooth. Alarm is set up and enabled. DND is enabled. Silent mode is enabled. When it's on, the incoming call/message won't produce ring tone/notification tone from phone's speaker. SD Card is inserted. SD Card space is less than 10%. USB flash drive is inserted.
-
Page 35: System Settings In Status Bar
System Settings in Status Bar Slide down the top status bar and select System Settings. Users will see the following settings: Turn on/off DND. When DND is Turn on/off the voice of Turn on/off Bluetooth. Turn on/off LCD display. on, all the calls to the registered the phone. -
Page 36: Keypad Shortcut Functions
Table 10: ITX-3370 Keys Volume Down Tap to turn down the call volume and media volume. Volume Up Tap to turn up the call volume and media volume. Tap to go back to Home screen; or touch and press for about 2 Home seconds to take a screenshot. -
Page 37: Use The On-Screen Keyboard
Use the On-Screen Keyboard The ITX-3370 onscreen keyboard can be activated by tapping on an input field. English Keyboard This is the default keyboard on ITX-3370. Figure 30: ITX-3370 Onscreen Keyboard - English Keyboard To switch input between lowercase and uppercase, tap on (lowercase) or (uppercase). -
Page 38: Use The Message Waiting Indicator
Tap on to access more symbols. Figure 33: English Keyboard - More Symbols Note: To configure keyboard and input options, go to LCD menuSettingsBasic Language & KeyboardKeyboard and Input Methods. Users could touch and press the key on the keyboard for about 2 seconds to input the alternative ... -
Page 39: Make Phone Calls
Make Phone Calls Register SIP Accounts The ITX-3370 supports up to 16 independent SIP accounts. Each account can have separate SIP servers, usernames and NAT configurations. Account Status On the idle screen, the account widget shows the account name, and registration status. The following figure shows the account is successfully registered (account icon is green). -
Page 40: Configure Sip Account
Note: For Web GUI login and configuration information, please refer to “IP phone GT890 Administration Guide”. If the account is successfully registered, use one of the following ways to bring up the dial screen to start making calls. -
Page 41: Dial A Number Directly
Figure 36: Disable Video Call Feature on Dial Screen Dial a Number Directly Use the methods mentioned above to open dial screen [Figure 35: ITX-3370 Dial Screen] Select the account to dial out on the left panel of the dial screen. The selected account will be displayed in green. -
Page 42: Redial
Redial Users can dial out the last dialed number if there is dialed call log, using the same SIP account making the call last time. 1. Enter the dial screen. 2. A list of dialed calls will be displayed on the left side of the dial pad. Tap on the number you would like to call, the number will be added to the dialing field, press Audio call or Video call to redial. - Page 43 Figure 38: ITX-3370 Call History...
-
Page 44: Answer A Call
Answer a Call Single Incoming Call When the phone is in idle and there is an incoming audio call, the phone will show the call screen as below. Tap on "Answer" softkey to answer the call via speaker or pick up the handset the answer the call. - Page 45 Figure 40: Single Incoming Call – Video If the phone set the “Preview” feature for the incoming call from Web GUIPhone SettingsCall SettingsEnable Function for Incoming Call, the phone will display one more key “Preview” when there is an incoming video call. End users will preview the remote end without answering the video call. After previewing, end user can tap on Answer key to answer the video call, or “Reject”...
- Page 46 Figure 42: Single Incoming Call – Preview-2 Note: During the previewing, The Ring Back Tone of caller side is stop.
-
Page 47: Multiple Calls/Call Waiting
Multiple Calls/Call Waiting 1. When there is another incoming call during active call, users will hear a call waiting tone, with the LCD displaying the caller name and ID for the incoming call. In the prompt window, it shows new incoming call from "Jack"... -
Page 48: Call Progress Status
Call Progress Status During an active call if Home Button is pressed, the phone will go back to the home screen and the call-in- progress status will be shown on the ITX-3370 status bar, once clicking the bar it will go back to call screen. Figure 44: Touch to Return to Call Screen Call Hold During the active call, press "More""Hold"... -
Page 49: Call Recording
Call Recording 1. During the call, users could record the conversation to the phone by tapping on "More""Record" on the call screen. 2. If need to stop the recording, tap on "More""Stop recording" or hang up the call. 3. The recording files can be retrieved from the ITX-3370 Web GUIApplicationsRecording. Figure 46: ITX-3370 Call Recording Mute During an active call, press the Mute softkey on the bottom of the screen to mute the call. -
Page 50: Turn On Video During Audio Call
Figure 47: ITX-3370 Call Mute Turn on Video during Audio Call Users could establish audio call first and then turn on video or accept video request during the call if the other party supports video calls. Turn on video during audio call ... -
Page 51: Switch Audio Channel During Call
If the ITX-3370 receives video request during the audio call, a message "Do you want to accept video?" will be prompted. Select "Yes" to establish video during the call. If the Disable Video Call Feature is enabled on ITX-3370, the “Video On” option on ITX-3370 will be hidden during the audio call. Switch Audio Channel during Call The ITX-3370 allows users to switch among handset, speaker or headset (RJ9 headset, 3.5mm ... -
Page 52: Call Transfer
Call Transfer A call can be transferred to another party during the call. The ITX-3370 supports blind transfer and attended transfer. Blind Transfer 1. During the active call, tap on "More" softkey. 2. Select "Transfer" to bring up the transfer screen. 3. -
Page 53: Attended Transfer
Attended Transfer ITX-3370 supports attended transfer: 1. During the active call, tap on "More" softkey. Select "Transfer" to bring up transfer screen. 2. Select transfer mode as "Attended" by tapping on the mode selection area (see figure below). Figure 52: Attended Transfer 3. - Page 54 Figure 53: Attended Transfer - Transferring 5. After transfer target answers the call, the following screen will be shown up. If the user simply hangs up or taps on “End” soft key, the call is transferred, and ITX-3370 will hang up the call. If the user taps on "Split"...
- Page 55 9. During the active call, tap on "More" softkey. 10. Select "Transfer" to bring up transfer screen. The other call on hold will be displayed such as 11. Select transfer mode as “Attended” in the transfer mode bar and tap on the call on hold such as to transfer the call.
-
Page 56: 7-Way Conference
7-Way Conference The ITX-3370 supports up to 7-way audio conferencing. Initiate Conference There are three ways to initiate a conference call. Initiating conference from dial screen 1. Bring up the dial screen using one of the methods described previously [Figure 35: ITX-3370 Dial Screen] 2. - Page 57 4. Using the same method add the other members then press “Audio Call” for an Audio conference or “Video Call” for a video Conference. Initiating conference during a phone call When the phone is on call screen, tap on "Conference" softkey; 2.
-
Page 58: Remove Party From Conference
Figure 59: ITX-3370 Conference - Add Existing Call to Conference 3. Repeat the above steps to add more parties into the conference. The following figure shows a 3-way conference established. Figure 60: 3-Way Conference Call Established Remove Party from Conference To remove a party from the conference: 1. -
Page 59: End Conference
Figure 61: ITX-3370 Conference - Remove Party from Conference End Conference To end the conference, tap to disconnect all the parties from the conference. ITX-3370 will hang up the call. If the remote party hangs up the call itself, it will be disconnected from the conference but other parties on ITX-3370 will stay in the existed conference.* Hold and Resume Conference During the conference, users could tap on More softkey then tap Hold to hold the conference at any time. -
Page 60: Missed Call
Missed Call When there is a missed call, the LCD will show missed call dialog on the idle screen. Figure 62: Missed Call Screen Users can tap on the missed call entry to access the missed call log. To close the missed call screen and return to the idle screen, tap the space except the dialog. -
Page 61: Voicemail/Message Waiting Indication
Figure 63: Enable/Disable DND Note: When the phone is in an active call, turning on/off DND won't affect the current active call. It will take effect starting from the next incoming call. Voicemail/Message Waiting Indication When there is a new voicemail, the Message Waiting Indication (MWI) LED icon will blink in red on the upper right corner and will show up in the status bar. -
Page 62: Call Forward
Figure 64: Retrieve Voicemail For each account, the Voicemail User ID can be set up under Web GUIAccountGeneral Settings: "Voicemail Access Number". This is the number that will be dialed out to access voicemail message when tapping on the account in Voice Mail screen. Call Forward Call forward feature can be set up the LCD or Web GUI. - Page 63 From Web GUI Log in to the Web GUI and go to Web GUIAccountCall Settings. By default, Call Forward Type is set to "None". The Call Forward feature options are: Unconditional Forward: All the incoming calls will be forwarded to the number set up in "All To" field.
- Page 64 Figure 68: Call Forward - Busy/No Answer/DND...
-
Page 65: Contact
Contact The phone supports local Contacts. To access contacts, on the phone’s idle screen, tap on icon on the right panel. The following figure shows Contacts. Figure 69: ITX-3370 Contacts Local Contacts The local contacts can save up to 1000 entries. Users can manage contacts by adding, deleting and modifying single contacts, downloading contacts from HTTP/TFTP server, importing contacts from external storage and exporting contacts to external storage. - Page 66 Figure 70: ITX-3370 Contacts - Add New Contact Note: When typing a number using dial pad, “Add to contacts” button will appear as displayed on following picture, to add a new entry to your contacts list if the input number does not match any entry in your contacts.
-
Page 67: Import/Export Contacts
Import/Export Contacts If you have a phonebook file saved in local storage or external storage device that has been plugged into the phone, the phonebook file can be directly imported to the Contacts. There are two different formats supported for the phonebook file:"vcard", and "xml". You can manually create contacts first and export the phonebook file in vcard or xml format to take a look on the phonebook file. -
Page 68: Download Contacts
Figure 73: ITX-3370 Contacts - Export Contacts Download Contacts The phone supports downloading XML phonebook from a remote HTTP/TFTP/HTTPS server to local Contacts. When downloading the phonebook, the ITX-3370 sends request to the HTTP/TFTP/HTTPS server looking for file phonebook.xml. To download phonebook: 1. -
Page 69: Search Contacts
Search Contacts 1. Open Contacts. 2. Tap on the search field 3. Enter a contact's name or a number to search. The search result will be automatically updated and displayed when entering the key words. Figure 75: ITX-3370 Contacts - Search Contacts Use Contacts Once the contacts are added, users could navigate in the contacts list to make a call and manage the... -
Page 70: Add Contacts To Favorites
Figure 76: ITX-3370 Contacts - Select Contacts Add Contacts to Favorites 1. Select the contact/contacts to be added as described in [Select Contacts] 2. Then tap on to add the contacts selected to Favorites There are two other methods to add contacts to favorites. ... -
Page 71: Edit Contacts
Edit Contacts 1. Tap on a contact from the contacts list 2. Tap on to edit the contact. Send Contacts to Desktop Shortcut 1. Long press on the contact 2. Tap on Send to desktop from the menu. Share Contacts via Bluetooth Users can share a single contact or a batch of contacts. -
Page 72: Add Contacts To Group
Figure 78: ITX-3370 Contacts - Add New Group Add contacts to Group To add contacts to a group, tap on the group then tap on , check the contacts to be added to the group and press Note: Users could also select a group for the contact when adding or editing the contact. ... - Page 73 Figure 79: ITX-3370 Contacts - Storage Status...
-
Page 74: Harassment Interception
Harassment Interception The phone has blacklist support for users to manage incoming calls. To access blacklist, tap the “Settings” icon then under “Features”, access “Harassment interception”. Blocked Contacts The blocked Contacts are the contacts that were added to the blacklist, the phone will block any calls coming from these contacts. -
Page 75: Delete Block History
Figure 81: Block History Delete Block History 1. In the block history, tap on the recycle bin icon 2. To confirm, tap “OK” Edit Blacklist Tap on Blacklist under the Harassment interception Menu to show the blacklisted contacts Add number to blacklist ... -
Page 76: Intercept Anonymous Calls
The following figure shows manually adding number to blacklist. Once Manually enter the number option is selected, a window will be prompted for users to enter the phone number in the first field and name/note in the second field (optional). Tap on OK to finish the adding operation. Figure 83: Manually Add Number to Blacklist ... - Page 77 Figure 84: Intercept Anonymous Calls...
-
Page 78: Call History
Call History The phone supports local Call history. Tap on idle screen to access Call history. The following figure shows the call history on the ITX-3370. Figure 85: ITX-3370 Call History Local Call History There are four different categories in the local call history. Users could tap on the icon on the top menu to access the corresponding call logs: ... -
Page 79: Dial Out From Call History
Dial Out from Call History Tap on of the call history entry to call this number directly. The phone will use the same account as the call log when dialing out. Call History Options Touch and press the call history entry for about 2 seconds until more option window pops up Users can edit this number before calling, add this number to contacts, add this number to etc…... -
Page 80: Call History Details
Call History Details For each call history entry, users can tap on the entry to access the details. Figure 87: ITX-3370 Call History - Details The following operations are supported: Dial out this number directly. Bring up dial screen with the call history number. You can edit the number before ... -
Page 81: File Manager
File Manager File Manager is a tool that allows users to delete, move, copy/paste, send and rename files. It helps users to access and manage files in local storage as well as external storage devices (e.g, SD card/USB flash drive). Tap on the phone's menu or desktop to launch File Manager application. -
Page 82: Move Files
Figure 89: Paste File Move Files The steps to move a file are similar to the steps to copy/paste a file. The difference is once the file is moved, the file will not be kept in the source folder. Follow the steps below to move a file to the phone. 1. -
Page 83: Send Files
1. Tap in the top right corner of the screen and select the files to move 2. Tap to move the files. 3. Select the directory to which you want to past the files then Send Files The users can send a file via Bluetooth. Please make sure Bluetooth is turned on and connected to the Bluetooth devices. -
Page 84: Rename A File
2. Scroll down and select “Delete” 1. Open file manager and navigate to the directory of the file/files to be deleted, then tap 2. Select the files to delete. 3. Tap to delete the files. 4. Tap on OK to confirm Figure 92: Delete File(s) via File Manager Rename a File 1. -
Page 85: File Categories
Figure 93: Rename File File Categories The file manager will categorize the files stored on local/external storage based on the type of files. The available categories are All: gives access to all internal storage files as well as external storage devices ... -
Page 86: Camera
Camera The phone has a built-in Camera to support taking pictures and recording videos. You can also use the camera during SIP video calls as well as video calls via 3rd party applications. To access Camera to take pictures and videos, tap on Camera icon on idle screen. -
Page 87: Angle Adjustment
Angle Adjustment On the back of the camera, you can scroll the wheel up/down to adjust the camera angle. If you scroll the camera all the way up until the icon shows up on the status bar of the screen. Gallery The phone has built-in Gallery for users to view pictures and play videos from internal storage. - Page 88 Figure 96: Edit picture Note: Videos cannot be edited from the gallery Gallery page To access the Gallery, open the camera click on the circular key on the right top corner of the camera sceen. Figure 97: Access to the Gallery -1...
- Page 89 Tap on Figure 98: ITX-3370 Gallery -2 Tap on Figure 99: ITX-3370 Gallery -3...
- Page 90 Figure 100: ITX-3370 Gallery -4 On this page from the upper left corner, users can sort the pictures and videos by Album, Location or Time. View pictures Access one group of pictures and videos and select "Grid View" or "Filmstrip View" from upper left corner of the screen to set view mode of the pictures.
-
Page 91: Screensaver
Take picture/video the upper right of the Gallery page to start taking pictures or videos using the built-in camera. Select multiple pictures Tap and hold on one of the pictures for about 2 seconds until the picture is highlighted in blue. Tap on other pictures to select multiple pictures. - Page 92 Figure 103: Use Network Images Click on Use network images and set the path of the remote screensaver folder. Figure 104: Network Image Path...
-
Page 93: Browser
Browser The browser can be used similar to a PC-based web browser. You can open web pages, bookmarks, view history, search …etc. Tap on the idle screen to launch the Browser application. Figure 105: ITX-3370 Web Browser Touch the screen and scroll up/down/left/right to view the web page. ... - Page 94 To open a new window, tap on icon on the right side of the tab. Figure 107: Open New Window in Browser To open Bookmarks, History and Saved Pages, tap on the upper right of the Browser. Figure 108: ITX-3370 Web Browser-Bookmarks...
-
Page 95: Connect To Network And Devices
Connect to Network and Devices The phone supports a variety of network connections (Ethernet, Wi-Fi) and device connections, including EHS headset (Plantronics), USB, SD card and Bluetooth device. You can connect the phone and transfer files from/to the ITX-3370 using a USB connection, SD card or Bluetooth. Ethernet Ethernet connection is turned on as DHCP by default. - Page 96 password information to connect to the selected Wi-Fi network. 4. The phone will start connecting to the Wi-Fi. The status bar will show Wi-Fi signal strength. 5. Once it is added and the password is saved, the phone will automatically connect to it when the SSID is within the range.
-
Page 97: Wi-Fi Settings Shortcut
the phone system will pop up a new window to allow user to check the Wi-Fi parameters and change the setting by checking the “Advanced options” at the bottom. 10. You can also add Wi-Fi Networks manually if the network is hidden or not showing on the list of scanned SSIDs. -
Page 98: Bluetooth
Wi-Fi point 4 Figure 113: Wi-Fi Shortcut - Wi-Fi List For more information about how to use Wi-Fi, please refer to “IP Phone GT890 Administration Guide”. Bluetooth Bluetooth is a proprietary, open wireless technology standard for exchanging data over short distances from fixed and mobile devices, creating personal area networks with high levels of security. -
Page 99: Change Bluetooth Device Name
Change Bluetooth Device Name The phone uses "ITX-3370XXXXXX" as Bluetooth device name by default where “XXXXXX” are the last 6 digits of the phone’s Bluetooth MAC address. The device name will be visible to other devices when connecting them. Follow the steps below to change the name: 1. -
Page 100: Unpair A Bluetooth Device
Device 1 Device 2 Figure 114: ITX-3370 Bluetooth - Paired Device Unpair a Bluetooth Device 1. In the Bluetooth settings, tap the icon corresponding to the Bluetooth device. 2. Select Unpair. Bluetooth Settings Shortcut You can enter the Bluetooth settings by sliding the Status Bar, then long Press on the Bluetooth icon. Figure 115: Bluetooth Settings Shortcut -Or- Press the letter under Bluetooth icon this will show the list of the paired devices. -
Page 101: Ehs Headset
Device 1 Figure 116: Bluetooth Setting shortcut 2 For more information about Bluetooth feature on the phone, please refer to “IP Phone GT890 Administration Guide”. EHS Headset The phone supports normal RJ9 headset and EHS headset. To use Plantronics EHS headset: 1. -
Page 102: Usb Headset
USB Headset The phone supports USB Headsets, once a headset plugged, it will be detected automatically, and the following icon will be shown on the top right of the status bar, this means a USB headset is connected. Figure 118: USB Headset Connected In the calling page, user can press on the USB headset button (shown in figure below) to enable USB headset. - Page 103 Figure 120: Switch between Speaker and USB mode Note: USB port is disable on the default setting. For enable the USB Port, check off the Disable SD card feature under Web GUISystem SettingsPreferencesPeripherals interface ManagementDisable USB Port.
-
Page 104: Usb
The phone supports USB connection with USB storage devices. To connect and access a USB storage device: 1. Insert an USB storage device into USB port at the back. 2. It will take a few seconds for the ITX-3370 to prepare the connection. Then the USB storage icon will show on the status bar. -
Page 105: Sd Card
SD Card 1. Insert your SD card into SD Card slot at the back of the phone. Please make sure the SD Card is inserted with right direction on the phone as indicated on the SD card slot. 2. It will take a few seconds for the phone to prepare the connection. Then the SD Card icon will show on the status bar. -
Page 106: Compatibility Headset List
Compatibility Headset List 1. RJ9 Headset Table 12: RJ9 Headset Vendor Model Cord/Cable Model Number GN2000 Jabra GN1200 CC Jabra GN2100 Jabra GN1200 CC 2. EHS Headset Table 13: EHS Headset Vendor Model EHS Adapter APV-63 Plantronics Savi W710 APD-80 (with 85638-01 cable) - Page 107 * NEC and NEC logo are trademarks or registered trademarks of NEC Corporation that may be registered in Japan and other jurisdictions. * Android is a trademark of Google LLC. © 2002-2017 OpenVPN Inc. OpenVPN is a registered trademark of OpenVPN Inc.
- Page 108 Standard SIP Video Terminal IP Phone GT890 User Guide GVT-076621-001 February, 2019 Issue 1.1 NEC Corporation...
Need help?
Do you have a question about the GT890 and is the answer not in the manual?
Questions and answers