
Subscribe to Our Youtube Channel
Related Manuals for Bosch HBN 13N5 1B Series


Summary of Contents for Bosch HBN 13N5 1B Series
- Page 1 HBN 13N5.1B Operating Instructions Internet: http://www.bosch-hausgeraete.de Bosch Info-Team: de Tel. 01 80/5 30 40 50 (E 0,12/Min. DTAG)
- Page 2 Making cooking as much fun as eating Please read this instruction manual. This will ensure that you make use of all the technical benefits the cooker has to offer. It will provide you with important safety information. You will then be familiarised with the individual components of your new cooker.
-
Page 3: Table Of Contents
Table of contents Important information ..... . Before installation ......Safety information . - Page 4 Table of contents Timer ........Setting procedure ......Basic settings –...
- Page 5 Table of contents Energy saving tips ......Acrylamide in food ......What can you do? .
-
Page 6: Important Information
Important information Read this instruction manual carefully. Only then will you be able to operate your cooker safely and correctly. Please keep the instruction and installation manual in a safe place. Please pass on the instruction manual to the new owner if you sell the appliance. Before installation Transport damage Check the appliance after unpacking it. -
Page 7: Reasons For Damage
Repairs Incorrectly done repairs are dangerous. There is a risk of electrocution. Repairs may only be carried out by after-sales service technicians who have been fully trained by BSH. If there is a fault, switch off the oven fuse at the fuse box. -
Page 8: Your New Cooker
Very dirty oven seal If the oven seal is very dirty, the oven door will no longer close properly when the oven is in use. The fronts of adjacent units could be damaged. Keep the oven seal clean. Using the oven door as a seat Do not stand or sit on the oven door. Your new cooker Here you will learn more about your new oven. -
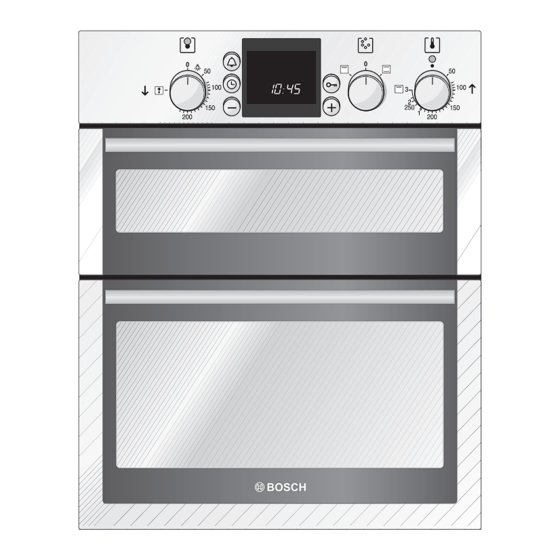
Page 9: Function Selector Mini Oven
Function selector Mini oven Use the function selector to select the type of heating for the oven. Settings Conventional heat Radiant grill – large area The oven light switches on when you select a function. Temperature selector Mini oven Use the temperature selector to set the temperature or grill setting. -
Page 10: Control Buttons And Display Panel
Control buttons and display panel Timer button Use this button to set the timer Clock button Use this button to set the time of day, the cooking time * and the completion time + Minus button – Use this button to reduce the values set. -
Page 11: Types Of Heating Main Oven
Types of heating Main oven Different types of oven heating are available. You can therefore select the best method for cooking any dish. 3D-hot air A fan in the rear panel distributes the heat from the ring heating element evenly inside the oven. Using 3D-hot air, it is possible to bake cakes and pizza on two shelves. -
Page 12: Types Of Heating Mini Oven
Types of heating Different types of oven heating are available. You can Mini oven therefore select the best method for cooking any dish. Top and bottom heating This ensures the even distribution of heat onto the cake or roast from the top and bottom of the oven. This type of heating is best for cake mixtures in tins or for bakes. -
Page 13: Oven And Shelving Accessories
Oven and shelving accessories Mini oven Your oven features 2 shelf positions. The shelf positions are counted from bottom to top. The numbers are marked in the oven. Main oven The shelf can be inserted at 3 different heights in the oven. - Page 14 Optional accessory Optional accessories may be purchased from the after-sales service or from specialist shops. Enamel baking tray HEZ 331000 for cakes and biscuits. Push the baking tray with the sloping edge facing towards the oven door. Grill pan HEZ 325000 Can be used for grilling instead of the wire rack or as a spray guard to protect the oven against dirt.
- Page 15 Glass pan HEZ 336000 A deep baking tray made from glass. Can also be used as a serving dish. Pizza tray HEZ 317000 Ideal for pizza, frozen foods and large round cakes, for example. You can use the pizza tray instead of the universal pan.
-
Page 16: Cooling Fan
Cooling fan The oven is fitted with a cooling fan. It switches itself on and off as necessary. The warm air escapes above the door. Before using for the first time This section will tell you everything you need to do before using the cooker for the first time. -
Page 17: Setting The Oven
Setting the oven You have various options for setting the oven. Switching off the oven When your meal is ready, switch off the oven manually yourself. The main oven switches off You can leave the kitchen for a long period. automatically The main oven swiches on You can put your meal in the oven in the morning,... -
Page 18: Setting Procedure Main Oven
Switching off Switch off the function selector when the meal is ready. Changing the setting You may change the temperature or grill setting at any time. Setting procedure Main oven Set the temperature control knob to the desired temperature. The selected temperature will be controlled automatically. -
Page 19: If The Oven Is To Switch Off Automatically - Main Oven
If the oven is to switch off Make setting as described in step 1. automatically Set the cooking time (duration) for your meal. – Main oven Example: Cooking time of 45 minutes Press the clock button. The cooking time symbol * will flash. Set the cooking time using the + or –... -
Page 20: If The Oven Is To Switch On And Off Automatically - Main Oven
If the oven is to switch on and off Please remember that easily spoiled foods must not automatically be allowed to remain in the oven for too long. – Main oven Perform the settings as described in items 1 to 3. The oven starts. -
Page 21: Time
Time When the oven is first connected, or following a power cut, the symbol and three zeros flash in the display. Set the time. The function selector must be switched off. Setting procedure Example: 13:00 Press the clock button. 12.00 appears in the display and the symbol flashes. -
Page 22: Timer
Timer You can use the timer as a kitchen timer. It operates independently of the oven. The timer has a special signal. This means that you can tell whether the set timer period has elapsed or the cooking time is complete. You can also set the timer if the childproof lock is active. -
Page 23: Basic Settings Main Oven
The timer and cooking time The symbols light up. The timer period counts down count down simultaneously visibly in the display. To call up remaining cooking time , end time time : Press the clock button until the symbol in question flashes. -
Page 24: Changing The Basic Settings
Changing the basic settings – Main oven There must be no program set. Example: Hiding the time Press the clock button and the + button at the same time until a appears in the display. This is the basic setting for the time in the foreground. -
Page 25: Childproof Lock
Childproof lock for the main oven The oven has a childproof lock to prevent children switching it on accidentally. Press the E key button until the E symbol Locking the oven appears in the display. This will take approximately 4 seconds. Press the E key button until the Esymbol goes Unlocking out. -
Page 26: Oven
Appliances with stainless Always remove any flecks of limescale, grease, steel fronts cornflour and egg white immediately. Corrosion can form under such flecks. Use stainless steel care products. Follow the manufacturer’s instructions. Try out the product on a small area first, before using on the whole surface. Appliances with aluminium Use a mild window-cleaning detergent. - Page 27 Cleaning the catalytic The rear wall and top of the oven are coated with surfaces of the oven self-cleaning enamel. The surfaces clean themselves while the oven is in operation. Large splashes may only disappear after the oven has been used several times. Never use oven cleaner on self-cleaning surfaces.
-
Page 28: Cleaning The Glass Panels Main And Mini Oven
Cleaning the glass panels The glass panel on the oven door can be removed to Main and Mini oven assist in cleaning. Removal Remove the oven door and lay it down on a cloth with the handle underneath. Unscrew the cover at the top of the oven door. To do this, undo the right and left-hand screws (Fig. - Page 29 Removal Press in the retaining clip with your thumb on one side and disengage the inner door glass e.g. with the spatula, then repeat on the other side. (Fig. C). Installation Installation after cleaning: Insert inner door glass into the holder. First engage the right side and then the other side.
-
Page 30: Cleaning The Rails
Cleaning the rails Removing You can remove the rails for cleaning. At the front, press the rails up and detach the front clip. At the back, pull the rails forward and take it off. Clean the rails using washing-up liquid and pan scrapers or brushes. -
Page 31: Seal
Seal Clean the seal on the oven with washing-up liquid. Never use caustic or abrasive detergents. Accessories Immediately after use, soak the accessories in washing-up liquid. Food residues can then be easily removed with a brush or sponge. Troubleshooting Should a malfunction occur, it is often only due to a minor fault. -
Page 32: Replacing The Oven Light
Replacing the oven light Mini oven If the oven light fails, it must be replaced. 40 watt heat-resistant spare bulbs can be obtained from the after-sales service or specialist shops. Only use these bulbs. Method Switch off the oven fuse in the fuse box. Place a tea towel in the cold oven to prevent damage. -
Page 33: After-Sales Service
After-sales service Our after-sales service is there for you if your oven needs repairing.You will find the address and telephone number of your nearest after-sales service centre in the phone book. The after-sales service centres listed will also be happy to advise you of a service point in your local area. -
Page 34: Packaging And Old Appliances
Packaging and old appliances Your new appliance was protected by suitable packaging while it was on its way to you. All materials used for this purpose are environmentally friendly and can be recycled. Please make a contribution to protecting the environment by disposing of the packaging appropriately. -
Page 35: Tables And Tips
Tables and tips This table contains a selection of dishes and the optimum settings at which to cook them. You can find out which type of heating and temperature is best for your dish, which accessories to use, and at which oven level the dish should be inserted. - Page 36 Baking 3D-hot air – Main oven 1 level Food Dish Shelf Temp. °C Time, position minutes Victoria sandwich 20 cm tin 25-35 Light fruit cake 20 cm tin 65-75 Fruit crumble Glass dish 35-45 Jam tarts* 12 hole bun tin 20-30 Yeast cookery* Universal pan...
- Page 37 Baking 3D-hot air – Main oven 2 levels Food Dish Shelf Temp. °C Cooking position time, min Victoria sandwich 20 cm tins 30-40 Scones* Baking trays 20-30 Biscuits Baking trays 20-30 Small Cakes* Baking trays 30-40 Meringues Baking trays 100-150 * Preheat oven...
-
Page 38: Baking Tips
Baking tips You wish to cook to your own Refer to the instructions in the tables for similar types of food. recipe. How to check that a sponge Approximately 10 minutes before the end of the baking time given cake is cooked properly. in the recipe, pierce the tallest point of the cake with a cocktail stick. -
Page 39: Meat, Poultry, Fish
Meat, poultry, fish Ovenware You may use any heat-resistant dishes. The universal pan is also suitable for larger roasts. Always place the dishes in the centre of the wire rack. Hot glass dishes should be placed on a dry kitchen towel after being removed from the oven. - Page 40 Advice on radiant grilling Used for smaller dishes having little height/thickness. Mini oven If possible, use pieces of meat which are of the same thickness. They should be at least 2 to 3 cm thick. Such pieces will be browned evenly and stay juicy and soft in the middle.
- Page 41 Roasting – 3D-hot air Main oven Food Shelf Temperature Cooking time mins position °C per 1 lb Beef rare 180-200 15+20 Beef medium 180-190 20+20 Beef well done 180-190 25+25 Beef filet 180-190 20+20 Lamb medium 180-190 20+25 Pork 190-210 30+20 Chicken, 1 kilo 180-190...
-
Page 42: Tips For Roasting And Grilling
Tips for roasting and grilling The table does not contain Select the next lowest weight from the instructions and extend the information for the weight time. of the roast. How can you tell when the roast Use a meat thermometer (available from specialist shops) or carry is ready? out a „spoon test“. -
Page 43: Preserving Main Oven
Preserving Main oven Preparation The jars and rubber sealing rings must be clean and intact. Use jars of the same size if possible. The instructions in the table refer to round 1-litre jars. Caution Do not use larger or taller jars. The lid could crack. - Page 44 Fruit, Cucumbers and tomato purée Vegetables (however not cucumbers) Insert jars. Insert jars. Select 3D-hot air function and set to Select 3D-hot air function and set to approx. 160 °C. approx. 160 °C. The rear jar and the right jar in the The rear jar and the right jar in the second row bubble first.
-
Page 45: Energy Saving Tips
Energy saving tips Only preheat the oven if it specifies in the recipe or in the table in the instruction manual that you should do Use non-stick, black painted or enamelled tins. They absorb the heat especially well. If you have several cakes to bake it is best to bake them one after the other. -
Page 46: What Can You Do
What sort of foods are Acrylamide forms mostly in grain and potato afected? products that are prepared at high temperatures, e.g.: crisps, chips, toast, rolls, bread, baked goods made from shortcrust pastry (speciality biscuits and cakes). What can you do? You can avoid high levels of acrylamide when baking, frying and grilling. -
Page 47: Test Dishes - Main Oven
Test dishes refering to EN 60350 Baking for the main oven Food Dish and notes Shelf Cooking Temperature Time in position method °C minutes Shortbread* Baking tray 3D-hot air 140-160 20-30 2 baking trays 3D-hot air 140-160 20-35 Small Cakes Baking tray 3D-hot air 150-160... - Page 48 9000 165 089 Robert Bosch Hausgeräte GmbH Printed in Germany 1106 Es.
Need help?
Do you have a question about the HBN 13N5 1B Series and is the answer not in the manual?
Questions and answers