Table of Contents
Advertisement
Advertisement
Table of Contents

Related Manuals for Knox KEYSECURE 5


Summary of Contents for Knox KEYSECURE 5
- Page 1 KEYSECURE 5 & 6 ® ADMIN & USER GUIDE...
- Page 2 ADMIN & USER GUIDE Copyright® 2020 by the Knox Company. All rights reserved. The Knox® Company, the Knox logo and all other Knox Company product or service names are registered trademarks or trademarks of the Knox Company. 1601 W. Deer Valley Road, Phoenix, AZ 85027 Phone: 800-552-5669 •...
-
Page 3: Table Of Contents
Resetting the KeySecure Device ......................11 Syncing the KeySecure Device ....................... 11 KEYSECURE® 6 USER INSTRUCTIONS ....................... 12 Remove and Return the Electronic Knox eKey ..................12 KEYSECURE® 5 USER INSTRUCTIONS ....................... 13 Remove and Return Mechanical Knox Master key ................... 13 KEYSECURE®... -
Page 4: Keysecure® 5 & 6 Overview
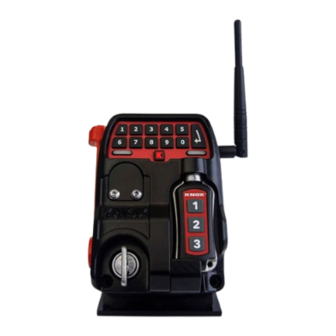
The KeySecure 5 secures one or more mechanical master keys to support a traditional Knox Rapid Access System. The KeySecure 6 is part of the Knox eLock system and will secure an eKey with an option to also secure a mechanical master key... -
Page 5: Installation
Upon shipment, KeySecures are assigned to the jurisdiction. Before use, the device must be configured in KnoxConnect. The Knox Device Sync app is then used to pass the configurations to each device via USB. Users may be given permissions to use some or all devices. Users access keys retained in the KeySecure through entry of a valid PIN or SecurePIN temporary access code. - Page 6 See battery and mounting installations instructions below: • A coin-cell battery within the unit maintains the date and time for the audit trail 1601 W. DEER VALLEY RD. PHOENIX, AZ 85027 800-552-5669 TECHSUPPORT@KNOXBOX.COM KNOXBOX.COM PAGE 6 ©Knox Company. All rights reserved. OPE-ESYSLR-0325-F...
-
Page 7: Battery And Mounting Installation
4. Rotate bottom out, then lift unit up and off back cover. NOTE: Unit should slide easily off the back cover. Do not force. Contact Knox Customer Technical Support for assistance at 1-800-552-5669 x 3. 5. To install the battery (battery included with shipment): a. - Page 8 LED lights will indicate security status of the key(s). 16. Power must be ON and the Disable eKey Retention Right setting must be unchecked in the KnoxConnect device configuration for the eKey charging port to lock and secure the Knox eKey in the KeySecure 6.
-
Page 9: Programming Instructions
Admin computer via USB cable SecurePIN • Knox SecurePIN is a feature of the KnoxConnect Management System that enables dispatchers to create temporary access codes that are communicated to a user to release keys from Knox KeySecures. •... -
Page 10: Programming And Updating The Keysecure
Blackout: Turns off all device lights • NOTE: If keys will be used while the unit is in Blackout Mode, Knox recommends removing prior to adjusting settings as keypad feedback and indicator lights will not be available. Adjust Light Settings Using Device Keypad: 1. -
Page 11: Resetting The Keysecure Device
KnoxConnect Local: Download Device Sync App or KnoxConfig App from KnoxConnect and follow prompts to update the KeySecure NOTE: Refer to the Knox Networking Guide for detailed communications setup instructions. Resetting the KeySecure Device • To reset the KeySecure, press and hold the arrow (return) key for 10 seconds. Release after LEDs and keypad backlight turn off. -
Page 12: Keysecure® 6 User Instructions
KEYSECURE® 6 USER INSTRUCTIONS The Knox eKey can be charged and programmed via the KeySecure 6. When the Knox eKey is retained, the KeySecure will not display any LED lights. The Knox eKey, however, will slowly flash green while charging. -
Page 13: Keysecure® 5 User Instructions
ADMIN & USER GUIDE KEYSECURE® 5 USER INSTRUCTIONS Remove and Return Mechanical Knox Master Key 1. Enter a valid PIN, SecurePIN or two valid PINs if Dual PIN is enabled on the keypad. PIN entry should be followed by pressing the arrow (Return) key to complete the PIN entry: •... -
Page 14: Keysecure® Led Light Status
KEYSECURE® LED LIGHT STATUS The KeySecure 5 and 6 LEDs provide information about the current status of the unit. The left LED serves the mechanical key (if available). The right LED serves the electronic key. Both LEDs and keypad backlight indicate current PIN status.
Need help?
Do you have a question about the KEYSECURE 5 and is the answer not in the manual?
Questions and answers