Dancing Wings Hobby Fokker Dr.I - Triplane Toy Manual
Also See for Fokker Dr.I:
- Instruction manual (2 pages)
Advertisement
Table of Contents
Contents
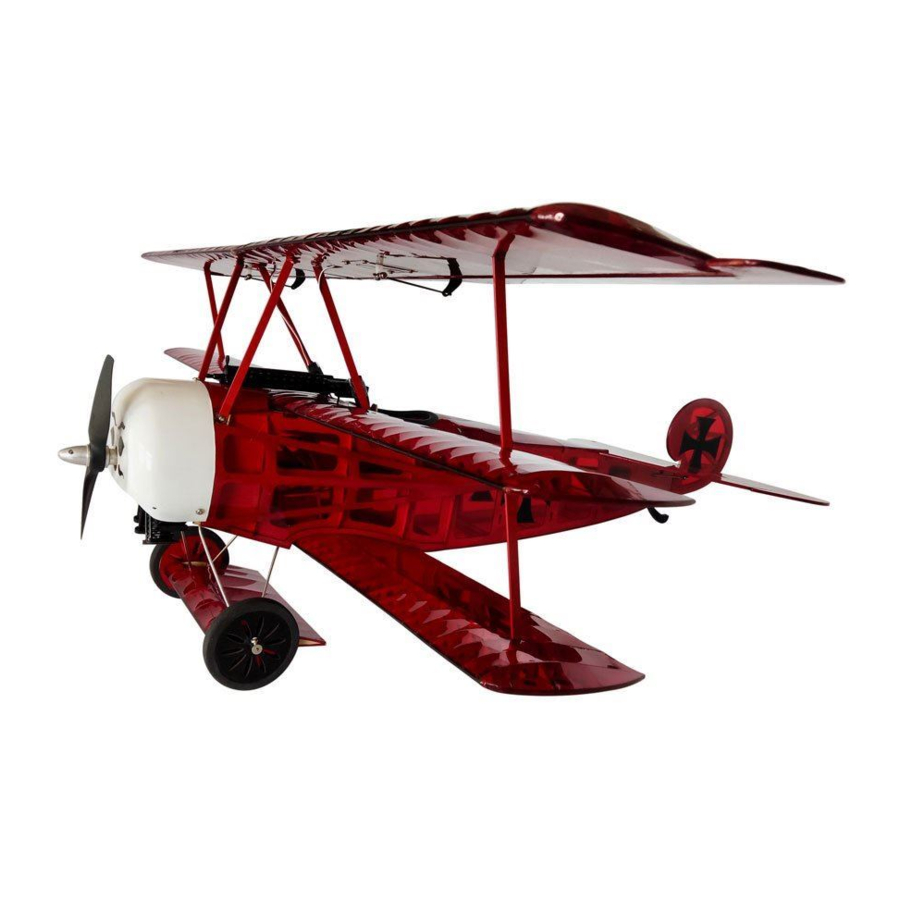
Dancing Wings Hobby Fokker Dr.I - Triplane Toy Manual
Specification
Wingspan: 770mm
Length: 630mm
Net weight: ≈650g
Suggested Equipment
Motor: 2212 800-1000KV
ESC: 20A
Servo: 2.5g *2 & 5g *2
Propeller: 7-8 inch
Battery: 2-3S 1300-1800mAh
Radio≥3CH
Parts of the Unit

- Fuselage
- Vertical tail
- Landing gear aileron
- Wing
- Screw set, quick connector, wheel lock
- Emulational machine gun
- Sled
- Horizontal tail
- Emulational engine
- Rudder angle
- Paper hinge
- Carbon rod
- Spacer
- Wheel bracket
- Motor board
- Landing gear steel wire
- Cowling
- Wing bracket
- Sticker
- Wheel
Assembly
- Install landing gear bracket P1, embed the bracket into the prefrmed groove, lock it with self-tapping screw and M spacer.

- Install landing gear aileron and wheels.

- Plug the middle wings into each other with carbon rod, glue the joint.

- Plug the middle wing's bolt into the fuselage, then lock the wing with self-tapping screw.

- Plug the upper wings into each other with carbon rod, glue the joint.

- Install wing bracket in the back of the upper wing, lock it with self-tapping screw.

- Use self-tapping screw to lock the other end of bracket on the fuselage.

- Install wing's support rods as shown.

- Plug lower wings into each other with carbon rod, glue the joint.

- Use self-tapping screw to lock the lower wing on the fuselage.

- Support rods connect the lower wing, adjust the space among the three wings and fasten them.

- Install motor board, and install the emulational engine on the motor board. Install emulational machine gun on the middle wing. (Don't stick the motor board on the fuselage at this moment, please stick the motor board on the fuselage after finishing the motor installation.)

- Install the cowling, fasten the edge with 3pcs self-tapping screws.

- Install horizontal tail, connect with fuselage groove, and fix it with glue. Connect the vertical tail to the tail of fuselag with paper hinge, and make the vertical tail swing freely.


- Take down rudder angle from J board, install into elevator and rudder, glue it, and connect rudder angle with Z-shape steel wire.
- Power system installation as shown.
Motor installation

Install the motor on the motor board, fasten with screw, then glue the motor board on the fuselage.

Fasten propeller to the motor with prop adapter.
Install elevator, rudder servo, and link the steel wire pulling rod in the fuselage.

Install servo on the upper wing's servo place as shown. Install rudder angle on the aileron. Connect rudder arm and rudder angle with steel wire pulling rod.

- Adjust the C.G

- Stick the sticker S after finishing installation.

- Static show
Fasten the landing gear bracket on the wooden box with self-tapping screws according to the actual distance during static show.


ADDITIONAL SAFETY PRECAUTIONS AND WARNINGS
Age Recommendation: This is not a toy, not for children under 14 years old.
- Always keep a safe distance in all directions around your model to avoid collisions or injury. The model is controleld by a radio subject to interference from many sources outside your control. Interference can cause momentary loss of control.
- Always operate your model in open spaces away from full-size vehicles, traffic and people.
- Always carefully follow the directions and warnings for his and any optional support equipment (chargers, rechargeable battery packs, etc.)
- Always keep all chemicals, small parts and anything electrical out of the reach of children.
- Always avoid water exposure to all equipment not specificatlly designed and protected for this purpose. Moisture causes dadmage to electronics.
- Never place any portion of the model in your mouth as it could cause serious injury or even death.
- Never operate your model with low transmitter batteries.

Documents / ResourcesDownload manual
Here you can download full pdf version of manual, it may contain additional safety instructions, warranty information, FCC rules, etc.
Download Dancing Wings Hobby Fokker Dr.I - Triplane Toy Manual
Advertisement


Need help?
Do you have a question about the Fokker Dr.I and is the answer not in the manual?
Questions and answers