Advertisement
Quick Links
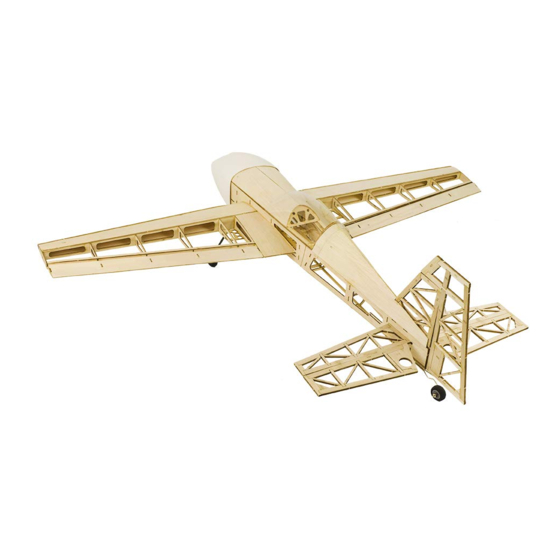
S25 Extra330
散件 KIT
机身组装
Assemble the Fuselage
1
对齐
Align
C2
C1
翻转
2
Turn over
对齐
Align
C1-1L / C1-1R
3
F5
F4
F3
F16
F2
F1x2
翻转
Turn over
4
F10
F9
F8
F7
F15
F11
F14x2
F10
F13
F12
F9
5
V.2019
Instruction Manual
6
工具 Tools Needed
7
8
C1,C2粘贴在一起,按预留孔对齐
Paste together the C1 and C2,and
Z5
Z7
align with reserved holes
Z6
C1-1L粘贴时按预留孔对齐
Align with the reserved holes
when paste the C1-1L
9
F17x2
10
F18
把侧板粘贴到步骤
拼装的骨架
3
上,如下图。
Paste the side panel onto the
skeleton of step
as shown
3
below
仓身盖为可开合设计,请勿
用胶水粘死到机身上。
The cover is detachable.
Do not stick to the body
with glue.
U
3X4mm桐木 Paulownia
3X3mm轻木
Balsawood
此处按实际长度截取
Cut here by actual length
M2
粘贴蒙版M2时,用水稍加湿润,
M2
方便弯曲,然后进行粘贴。
When pasting the covering
mask M2, it is slightly
moistened with water, which is
easy to bend and then pasted.
安装圆木杆
install the round
wooden rods.
Z4
Z8
Z3
Z2
Z1
Z8
M1
M1
粘贴蒙版M1时,用水稍加湿润,
方便弯曲,然后进行粘贴。
When pasting the covering mask M1, it
is slightly moistened with water, which is
easy to bend and then pasted.
磁铁 magnet
仓身内舵机位置
servo position
inside the cabin
机身与舱身盖两部
分磁铁为相吸状态
The two parts of the
fuselage and the body
磁铁
cover are in a state of
magnet
attraction.
11
12
Fx2
R
机翼,尾翼组装
Assemble the Wing and Tail
尾翼组装
Assemble the Tail
13
13.2
R12
R23
R1
13.1
R7
R2
R5
R14
R8
R3
R6
R9
R10
R4
机翼组装
Assemble the Wing
W7
15
W6
按实际形状裁剪PVC座舱罩,然
后粘贴到舱盖上。
Cut the PVC canopy cover according to
the actual shape and then paste it onto
the hatch cover.
3X3mm轻木
16
Balsawood
17
顶面 Top
M4
L
14.1
14
14.2
R15
R11
R19
R13
R16
R20
E1
R17
E12
R21
R22
E13
E11
R24
R18
E7
E19
E10
E22
E3
E2
E18
E6
E14
E15
E9
E21
E5
E17
E20
E8
E23
W5
E16
E4
W4
W3
W2 W1-1 W1
L1
此处按实际长度截取
Cut here by actual length
L2
Advertisement

Related Manuals for Dancing Wings Hobby S25 Extra330


Summary of Contents for Dancing Wings Hobby S25 Extra330
-
Page 1: Instruction Manual
机翼,尾翼组装 14.1 S25 Extra330 3X4mm桐木 Paulownia Assemble the Wing and Tail V.2019 14.2 Instruction Manual 尾翼组装 散件 KIT 工具 Tools Needed Assemble the Tail 3X3mm轻木 Balsawood 13.2 此处按实际长度截取 Cut here by actual length 13.1 机身组装 粘贴蒙版M2时,用水稍加湿润, 方便弯曲,然后进行粘贴。 Assemble the Fuselage... - Page 2 起落架组装 Landing Gear Installation 自攻螺丝 Self-tapping screws W2-1 W3-1 自攻螺丝 副翼拼装好后,如图打磨成斜角 Self-tapping screws 各部件组装 After the ailerons are assembled,polished as shown in the figure. Components Assembly 后尾轮组装 Rear Wheel Installation 尾翼组装 12.1 Tail Assembly 自攻螺丝 Self-tapping screws 13.1 水平尾翼和垂直尾翼在机身尾部 底面 Bottom 调整好后,用胶水粘合固定。...
Need help?
Do you have a question about the S25 Extra330 and is the answer not in the manual?
Questions and answers
When complete, how **** I suppose to make the two seperate ailerons work together when putting together the servos and controls horns. The instructions do not say how I **** suppose to connect them. If both only go on 1 servo how are they suppose to be connected?
To connect the ailerons on the Dancing Wings Hobby S25 Extra330 to work together with one servo, follow these steps:
1. Assemble the ailerons and shape them as shown in the manual.
2. Install the aileron servo in the designated position on the wing.
3. Use a control horn and linkage to connect the servo to both ailerons.
4. Ensure the linkage is adjusted so that both ailerons move in opposite directions when the servo operates.
5. Secure the connections and test the movement before finalizing the installation.
This setup enables the ailerons to work together using a single servo.
This answer is automatically generated
@Mr. Anderson, the rear elevators are supposed to to go in opposite directions when I want to go up and down. Can you maybe show some pictures on how the servo should hook up to the elevators? Thankyou
How do I connect both Ailerons for the elevator in the back to one servo? It doesn’t say how they are supposed to go together. Or how to do any of the electrical work on the plane. Would be so much easier if I would be able to get a step by step on all the electrical work. And how and where the servos connect to the all ailerons.
To connect both ailerons to one servo on the Dancing Wings Hobby S25 Extra330, follow these steps:
1. Install the Aileron Servo:
- Position the servo in the designated slot within the wing.
- Secure it using screws to prevent movement.
2. Connect Aileron Linkages:
- Attach control horns to both ailerons.
- Use a Y-shaped pushrod or a linkage system to connect both ailerons to the single servo arm.
- Ensure the pushrods are adjusted so both ailerons move symmetrically.
3. Electrical Connections:
- Route the servo wire through the fuselage towards the receiver.
- Plug the aileron servo connector into the appropriate channel (typically Channel 1) on the receiver.
- If using an extension cable, ensure secure connections to avoid signal loss.
4. Power and Calibration:
- Connect the ESC (Electronic Speed Controller) to the receiver’s throttle channel.
- Attach the battery (3S 1500-2200mAh) to power the system.
- Turn on the transmitter and power the receiver.
- Check for proper aileron movement and make necessary adjustments in the transmitter settings.
Ensure all connections are secure and test the system before flight.
This answer is automatically generated
So I **** still stuck on this. Can you give me a picture of the linkage system and detailed instructions on where and how it links up the to elevator ailerons. Also if you could give me pictures and detailed instructions on the whole electrical work on all the servos control horns pushrods and the placement of all of it. It would make this project fly by. You guys could also help the people building this plane by adding detailed instructions on setting up servos and stuff like that. Because what I’ve seen is lots of people get stuck on that stuff with this plane.