Table of Contents
Advertisement
Advertisement
Table of Contents

Subscribe to Our Youtube Channel
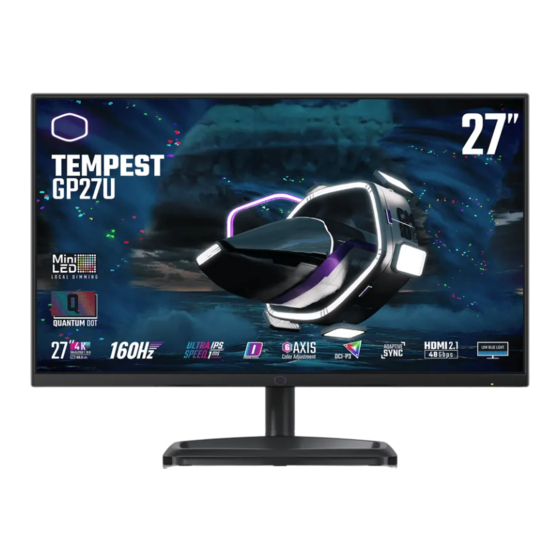
Summary of Contents for Cooler Master Tempest GP27U
- Page 1 Tempest GP27U (GP27-FUS) Cooler Master 27" Gaming Monitor User Manual...
-
Page 2: Table Of Contents
Table of Contents Requirements and Safety Notice ....................1 Important Safety Instructions ......................3 Package Contents ........................4 Installing the Monitor Stand and Base ..................5 Adjusting the Monitor ........................7 Wall Mount Installation Instructions ....................8 External Control Buttons.......................9 Main Menu ..........................10 [Input Select] ..............................10 [Picture Setting] ............................ -
Page 3: Requirements And Safety Notice
● If assistance is needed, contact the distributor or a professional radio/TV technician. CE Compliance Statement Cooler Master Technology Inc. hereby declares that the monitor conforms to the following key standards and other related provisions: EMC Directive 2014/30/EU, Low Voltage Directive 2014/35/EU, RoHS Directive 2011/65/EU and Directive 2009/125/EC establishing a framework for the setting of eco-design requirements for energy-related products. -
Page 5: Important Safety Instructions
Important Safety Instructions Please read the following instructions carefully. 1. To clean the LCD monitor screen: Turn off the LCD monitor and unplug the power cord. Spray a non-solvent cleaning solution onto a rag and clean the screen gently. 2. Do not place the LCD monitor near a window. Exposing the monitor to rain, moisture or sunlight can severely damage it. -
Page 6: Package Contents
Package Contents Monitor Stand Base Power cord (Optional) HDMI cable (Optional) DP cable (Optional) Cable clip Base screw Type C cable (Optional) (Used for fixing cables on the (Used for installing the base back of the stand) and stand) USB Type A to B cable (Optional) Adapter (PC and Monitor data transmission) -
Page 7: Installing The Monitor Stand And Base
Installing the Monitor Stand and Base... - Page 8 USB1 USB2 USB-UP Type C...
-
Page 9: Adjusting The Monitor
Adjusting the Monitor ● For the best results, it is recommended to look directly at the front of the monitor and make any adjusts as necessary. ● Ensure that the monitor is mounted upright on the stand base. ● When adjusting the monitor viewing angles, avoid touching the screen and hold the stand in order to prevent it from falling over. -
Page 10: Wall Mount Installation Instructions
Wall Mount Installation Instructions VESA: 100 x 100 mm Screws M4 x 10 mm... -
Page 11: External Control Buttons
External Control Buttons Menu/Navi/OK button Short press to turn on the monitor and Long press to turn off. When the OSD menu is activated, pull up/down/left/right the button to adjust the settings you need. When finished, you can pull the Button Back to return to the previous level or use the Button Exit to close the OSD menu. -
Page 12: Main Menu
Main Menu [Input Select] Sync Off HDR Off OD Off 2560 1440 × Input Select Type-C Picture Setting Color Adjust HDMI 2 Gaming Setup HDMI 1 Advanced System Move BACK ENTER ● Enter the Input Select menu to switch the input signal. ■... -
Page 13: [Color Adjust]
[Color Adjust] Sync Off HDR Off OD Off 2560 1440 × Input Select Color Temperature Native Picture Setting Gamma Color Adjust 6-axis Color Gaming Setup Color Domain Auto Advanced Color Space Auto System Blue Light Filter MOVE BACK ENTER ● Enter the Color Adjust menu to adjust the color mode. ■... -
Page 14: [Advanced]
[Advanced] Sync Off HDR Off OD Off 2560 1440 × Input Select Off Picture Setting Local Dimming Off Color Adjust HDMI Range Auto Gaming Setup USB Off Advanced RGB Light System MOVE BACK ENTER ● Enter the Advanced Setting menu to select the advanced mode. ■... -
Page 15: Specifications
Specifications Size 27” Pixel pitch 0.1552 (H) × 0.1552 (V) mm Brightness 600 nits (Typ.) LCD panel Contrast 1000:1 (Typ.) Viewing angle 178°(Horizontal) 178°(Vertical) Response time . 1 ms Display colors 1.07 billion colors Maximum display frequency (Resolution H * V/Fv) 3840×2160@160Hz (HDMI &... -
Page 16: Supported Timing
Supported Timing [PC Timing] Port Frame Pixel H. Frequency Mode Resolution Rate Clock HDMI1 HDMI2 Type-C (kHz) DP1 Input (Hz) (MHz) Input Input Input 640×480@59Hz 31.463 59.9286 25.17 31.5 25.2 640×480@60Hz 31.4625 59.9286 25.17 640×480@72Hz 37.861 72.8088 31.5 640×480@75Hz 37.5 31.5 640×480@119Hz 269.73... - Page 17 Port Frame Pixel H. Frequency Mode Resolution Rate Clock HDMI1 HDMI2 Type-C (kHz) DP1 Input (Hz) (MHz) Input Input Input 1152×864@59Hz 134.864 59.9394 593.4 1152×864@60Hz 134.864 59.9394 593.4 1152×864@75Hz 67.5 1152×864@119Hz 269.73 119.88 1186.81 1152×864@120Hz 269.73 119.88 1186.81 1152×864@144Hz 318.384 1273.54 1152×864@160Hz 349.6...
- Page 18 Port Frame Pixel H. Frequency Mode Resolution Rate Clock HDMI1 HDMI2 Type-C (kHz) DP1 Input (Hz) (MHz) Input Input Input 1600×900@144Hz 318.384 1273.54 1600×900@160Hz 349.6 1398.4 1600×1200@59Hz 134.864 59.9394 593.4 1600×1200@60Hz 134.864 59.9394 593.4 WXGA+ 1600×1200@119Hz 269.73 119.88 1186.81 182.997 119.998 497.75 1600×1200@120Hz...
-
Page 19: [Video Timing]
Port Frame Pixel H. Frequency Mode Resolution Rate Clock HDMI1 HDMI2 Type-C (kHz) DP1 Input (Hz) (MHz) Input Input Input 3200×1800@119Hz 134.864 119.879 296.7 3200×1800@120Hz 3200×1800@144Hz 318.384 1273.54 3200×1800@160Hz 349.6 1398.4 3840×2160@50Hz 111.1 444.4 3840×2160@59Hz 134.864 59.9394 593.4 3840×2160@60Hz 3840×2160@119Hz 134.864 119.879 296.7... -
Page 20: Product Outline Dimensions
Product Outline Dimensions -5°~20° 110mm 90° 90° ° °...


Need help?
Do you have a question about the Tempest GP27U and is the answer not in the manual?
Questions and answers