Table of Contents
Advertisement
Advertisement
Table of Contents

Related Manuals for Cooler Master GP2711


Summary of Contents for Cooler Master GP2711
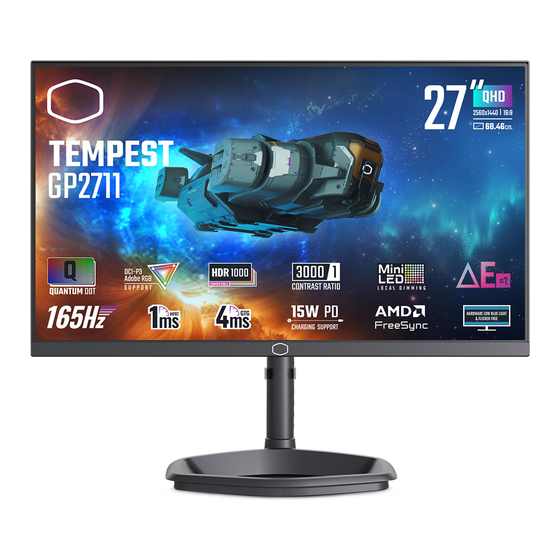
- Page 1 GP2711 Cooler Master 27" Gaming Monitor User Manual...
-
Page 2: Table Of Contents
Table of Contents Requirements and Safety Notice .................1 Important Safety Instructions ................3 Correct Posture to Use the Product ..............3 Low Blue Light ......................4 Flicker Free ......................4 Package Contents ....................5 Installing the Monitor Arm/Base ................6 Adjusting the Monitor ...................8 Wall Mount Installation Instructions ..............9 External Control Buttons ..................10 Main Menu ......................11 [Input] ........................11... -
Page 3: Requirements And Safety Notice
If assistance is needed, contact the distributor or a professional radio/TV technician. CE Compliance Statement Cooler Master Technology Inc. hereby declares that the monitor conforms to the following key standards and other related provisions: EMC Directive 2014/30/EU, Low Voltage Directive 2014/35/EU, RoHS Directive 2011/65/EU and Directive 2009/125/EC establishing a framework for the setting of eco-design requirements for energy-related products. - Page 4 限 限 用 用 物 物 質 質 含 含 有 有 情 情 況 況 標 標 示 示 聲 聲 明 明 書 書 : : : 注意!使用過度恐傷害視力 使用30分鐘請休息10分鐘;2歲以下幼兒不看螢幕,2歲以上每天看螢幕不要超過1小時。...
-
Page 5: Important Safety Instructions
Important Safety Instructions Please read the following instructions carefully. 1. To clean the LCD monitor screen: Turn off the LCD monitor and unplug the power cord. Spray a non-solvent cleaning solution onto a rag and clean the screen gently. 2. Do not place the LCD monitor near a window. Exposing the monitor to rain, moisture or sunlight can severely damage it. -
Page 6: Low Blue Light
Failure to do so may cause your eyesight to deteriorate. • Looking at the screen too close for an extended period of time can deteriorate your eyesight. • Rest your eyes for more than 5 minutes or look at distant objects for every 1 hour of product use. -
Page 7: Package Contents
Package Contents Monitor Support stand Support base Cable clip Power adapter HDMI cable DP cable USB-A to USB-B cable Power cord (Optional) -
Page 8: Installing The Monitor Arm/Base
Installing the Monitor Arm/Base... - Page 9 DC IN USB-A USB-A TYPE B HDMI 1 HDMI 2 TYPE C AUDIO NOTE: Please do not use a USB extension cord for the USB-A port.
-
Page 10: Adjusting The Monitor
Adjusting the Monitor z For the best results, it is recommended to look directly at the front of the monitor and make any adjustments as necessary. z Ensure that the monitor is mounted upright on the stand base. z When adjusting the monitor viewing angles, avoid touching the screen and hold the stand in order to prevent it from falling over. -
Page 11: Wall Mount Installation Instructions
Wall Mount Installation Instructions 100mm VESA: 100 x 100 mm Screws: M4 x 10 mm... -
Page 12: External Control Buttons
External Control Buttons Power button „ Short press the power button to turn the monitor on or off. Joystick „ Push the joystick up to activate the quick settings menu’s Input settings. „ Push the joystick down to activate the quick settings menu’s KVM function settings. „... -
Page 13: Main Menu
Main Menu [Input] 1920 x 1080 Sync Off HDR Off Input Type-C Picture Setting HDMI1 Color Adjustment HDMI2 Gaming Setup Advanced Settings System MOVE BACK ENTER z Enter the Input menu to switch the input signal. „ Type-C: Sets the input signal source to the Type-C port. „... -
Page 14: [Color Adjustment]
d. Movie: Provides the optimal setting for movie viewing. e. RTS: Provides the optimal setting for RTS (Real-Time Strategy) games. f. FPS: Provides the optimal setting for FPS (First Person Shooter) games to increase the visibility in dark scenes. g. MOBA: Provides the optimal setting for MOBA (Multiplayer Online Battle Arena) games. -
Page 15: [Gaming Setup]
[Gaming Setup] 1920 x 1080 Sync Off HDR Off Input FreeSync Over Drive Picture Setting Ultra Low Latency Color Adjustment Gaming Plus Gaming Setup MPRT Advanced Settings System MOVE BACK ENTER z Enter the Gaming Setup menu to adjust gaming settings. „... -
Page 16: [Advanced Settings]
[Advanced Settings] 1920 x 1080 Sync Off HDR Off Input Local Dimming Picture Setting Max Brightness Color Adjustment HDMI Range Full Gaming Setup Auto Advanced Settings Power-Off USB Charge System MOVE BACK ENTER z Enter the Advanced Settings menu to configure the display’s advanced settings. „... -
Page 17: [System]
[System] 1920 x 1080 Sync Off HDR Off Input Language English OSD Setup Picture Setting Audio Color Adjustment Information Gaming Setup Power Indicator Level 3 Advanced Settings Quick Boot System Sleep MOVE BACK ENTER z Enter the System menu to configure system settings: „... -
Page 18: Updating The Monitor Firmware
1. While the monitor is turned on, disconnect the power cable and all input sources from the monitor. 2. Copy the GP2711.bin firmware file onto a USB flash drive’s root directory. 3. With the power cable still unplugged from the monitor, insert the USB flash drive into the USB-A port located next to the DC IN port. -
Page 19: Specifications
Specifications Size 27" Pixel pitch 0.2331 (H) x 0.2331 (V) mm Brightness 600nits (Typ.) LCD panel Contrast ratio (Typ.) 3000:1 (Typ.) Viewing angle (R/L/U/D) 89/89/89/89 degrees Response time (ms) 6.5ms (G to G) Display colors 8bit, 16.7 million colors Max. display frequency 2560 x 1440@165 Hz (DP) (Resolution H*V/Fv) 2560 x 1440@144 Hz (HDMI) -
Page 20: Supported Timing
Supported Timing [PC Timing] Nominal Port Horizontal Vertical Pixel Mode Resolution Frequency Frequency DP / Clock HDMI (KHz) (Hz) type C (MHz) 640 x 480@60Hz 31.469 59.940 25.175 640 x 480@72Hz 37.861 72.809 31.500 640 x 480@75Hz 37.500 75.000 31.500 VESA 720 x 400@70Hz 31.469... -
Page 21: [Video Timing]
[Video Timing] Video Pixel Aspect Field Rate Horizontal Vertical Formats Clock Ratio (Hz) (KHz) (Hz) code (MHz) 59.94 31.469 59.94 25.175 640 x 480p 31.500 60.00 25.200 59.94 31.469 59.94 27.000 720 x 480p 31.500 60.00 27.027 59.94 31.469 59.94 27.000 720 x 480p 16:9... -
Page 22: Product Outline Dimensions
Product Outline Dimensions 273.66 71.3 614.2 609.2 69.4 614.2 69.41 364.92 364.9 534.31 368.71 290.97...
Need help?
Do you have a question about the GP2711 and is the answer not in the manual?
Questions and answers